New Product -- Eden's Garden

Stampin’ Up! has a new suite of products coming out called Eden’s Garden and it will be available for customer’s to order starting November 2, 2021.

Look for my YouTube Live on Wednesday, Oct. 27 at 4pmET to see the entire suite of products. Subscribe so you don’t miss any of my videos.


You know I always go for the Designer Series Paper. This one, Ever Eden is a Specialty Designer Series Paper with gold accents. The colors are Evening Evergreen and Soft Succulent, two of my favorite colors. This is available only while supplies last.


I used a piece of Soft Succulent Cotton Paper behind the sentiment label. It’s very thin and delicate and makes a pretty border for the sentiment.


Tips & Instructions

  • Evening Evergreen Card Base - 5 1/2 x 8 1/2, score at 4 1/4

  • Gold Foil Sheet - 5 1/4 x 4, adhere to card base.

    TIP: Cut center of foil sheet to save for another project. I used the Rectangle Stitched Dies to do this.


  • Ever Eden Designer Series Paper Layer - 5 1/8 x 3 7/8, adhere to card.

  • Cut piece of the Ever Eden Cotton Paper using the Stitched So Sweetly Die.

  • Stamp sentiment on Basic White scrap and stamp using Versamark Ink. Heat emboss with Gold Embossing powder and cut with the Stitched So Sweetly Die.

  • Adhere sentiment label to cotton paper, then adhere to card.

  • Tie a bow using the Gold Shimmer Ribbon and adhere using a Glue Dot.

  • Add some Gilded Gems.


On the inside stamp the sentiment using Evening Evergreen Ink and the floral images using Soft Succulent Ink. This sentiment is so beautiful for a very close friend or relative.


Supply List

Note: The Eden’s Garden products will be available for purchase starting November 2, 2021.

Sketch Saturday - Sailing Home

I used the Sailing Home Stamp Set for this week’s sketch challenge to make a birthday card that would be great for a guy.


This is the sketch I followed from the Atlantic Hearts Sketch Challenge. This sketch was a challenge for me but I’m happy with how my card turned out.


I decided to look through my older stamp sets to create this card. The Sailing Home Stamp Set seemed like a good one to use.


Tips & Instructions

  • Night Of Navy Card Base - 4 1/4 x 11, score at 5 1/2 (top folding)

  • Basic White Layer - 5 1/4 x 4

  • Blue Ombre Specialty Paper - 2 3/4 x 1 3/4

  • Yellow Ombre Specialty Paper - 1 3/4 x 1 3/4

  • Basic White Cardstock - 1 7/8 x 1 7/8, emboss using the Painted Texture 3D Embossing Folder.

  • Stamp lighthouse with Night Of Navy Ink and anchor with Crushed Curry Ink and cut with coordinating Smooth Sailing Dies.

  • Lay out all the pieces to determine placement and stamp sentiment with Night Of Navy Ink. The sentiment I used is from the Art Gallery Stamp Set. I chose that because it fit nicely in that spot and I wanted this to be a birthday card.

  • Adhere all the pieces, use Dimensionals on the anchor.

  • Add some Night Of Navy Holiday Rhinestones.


Here’s a closeup so you can see the the Ombre Specialty Paper. It is a glimmer paper with lots of shine to it. I chose these colors for water and sun.


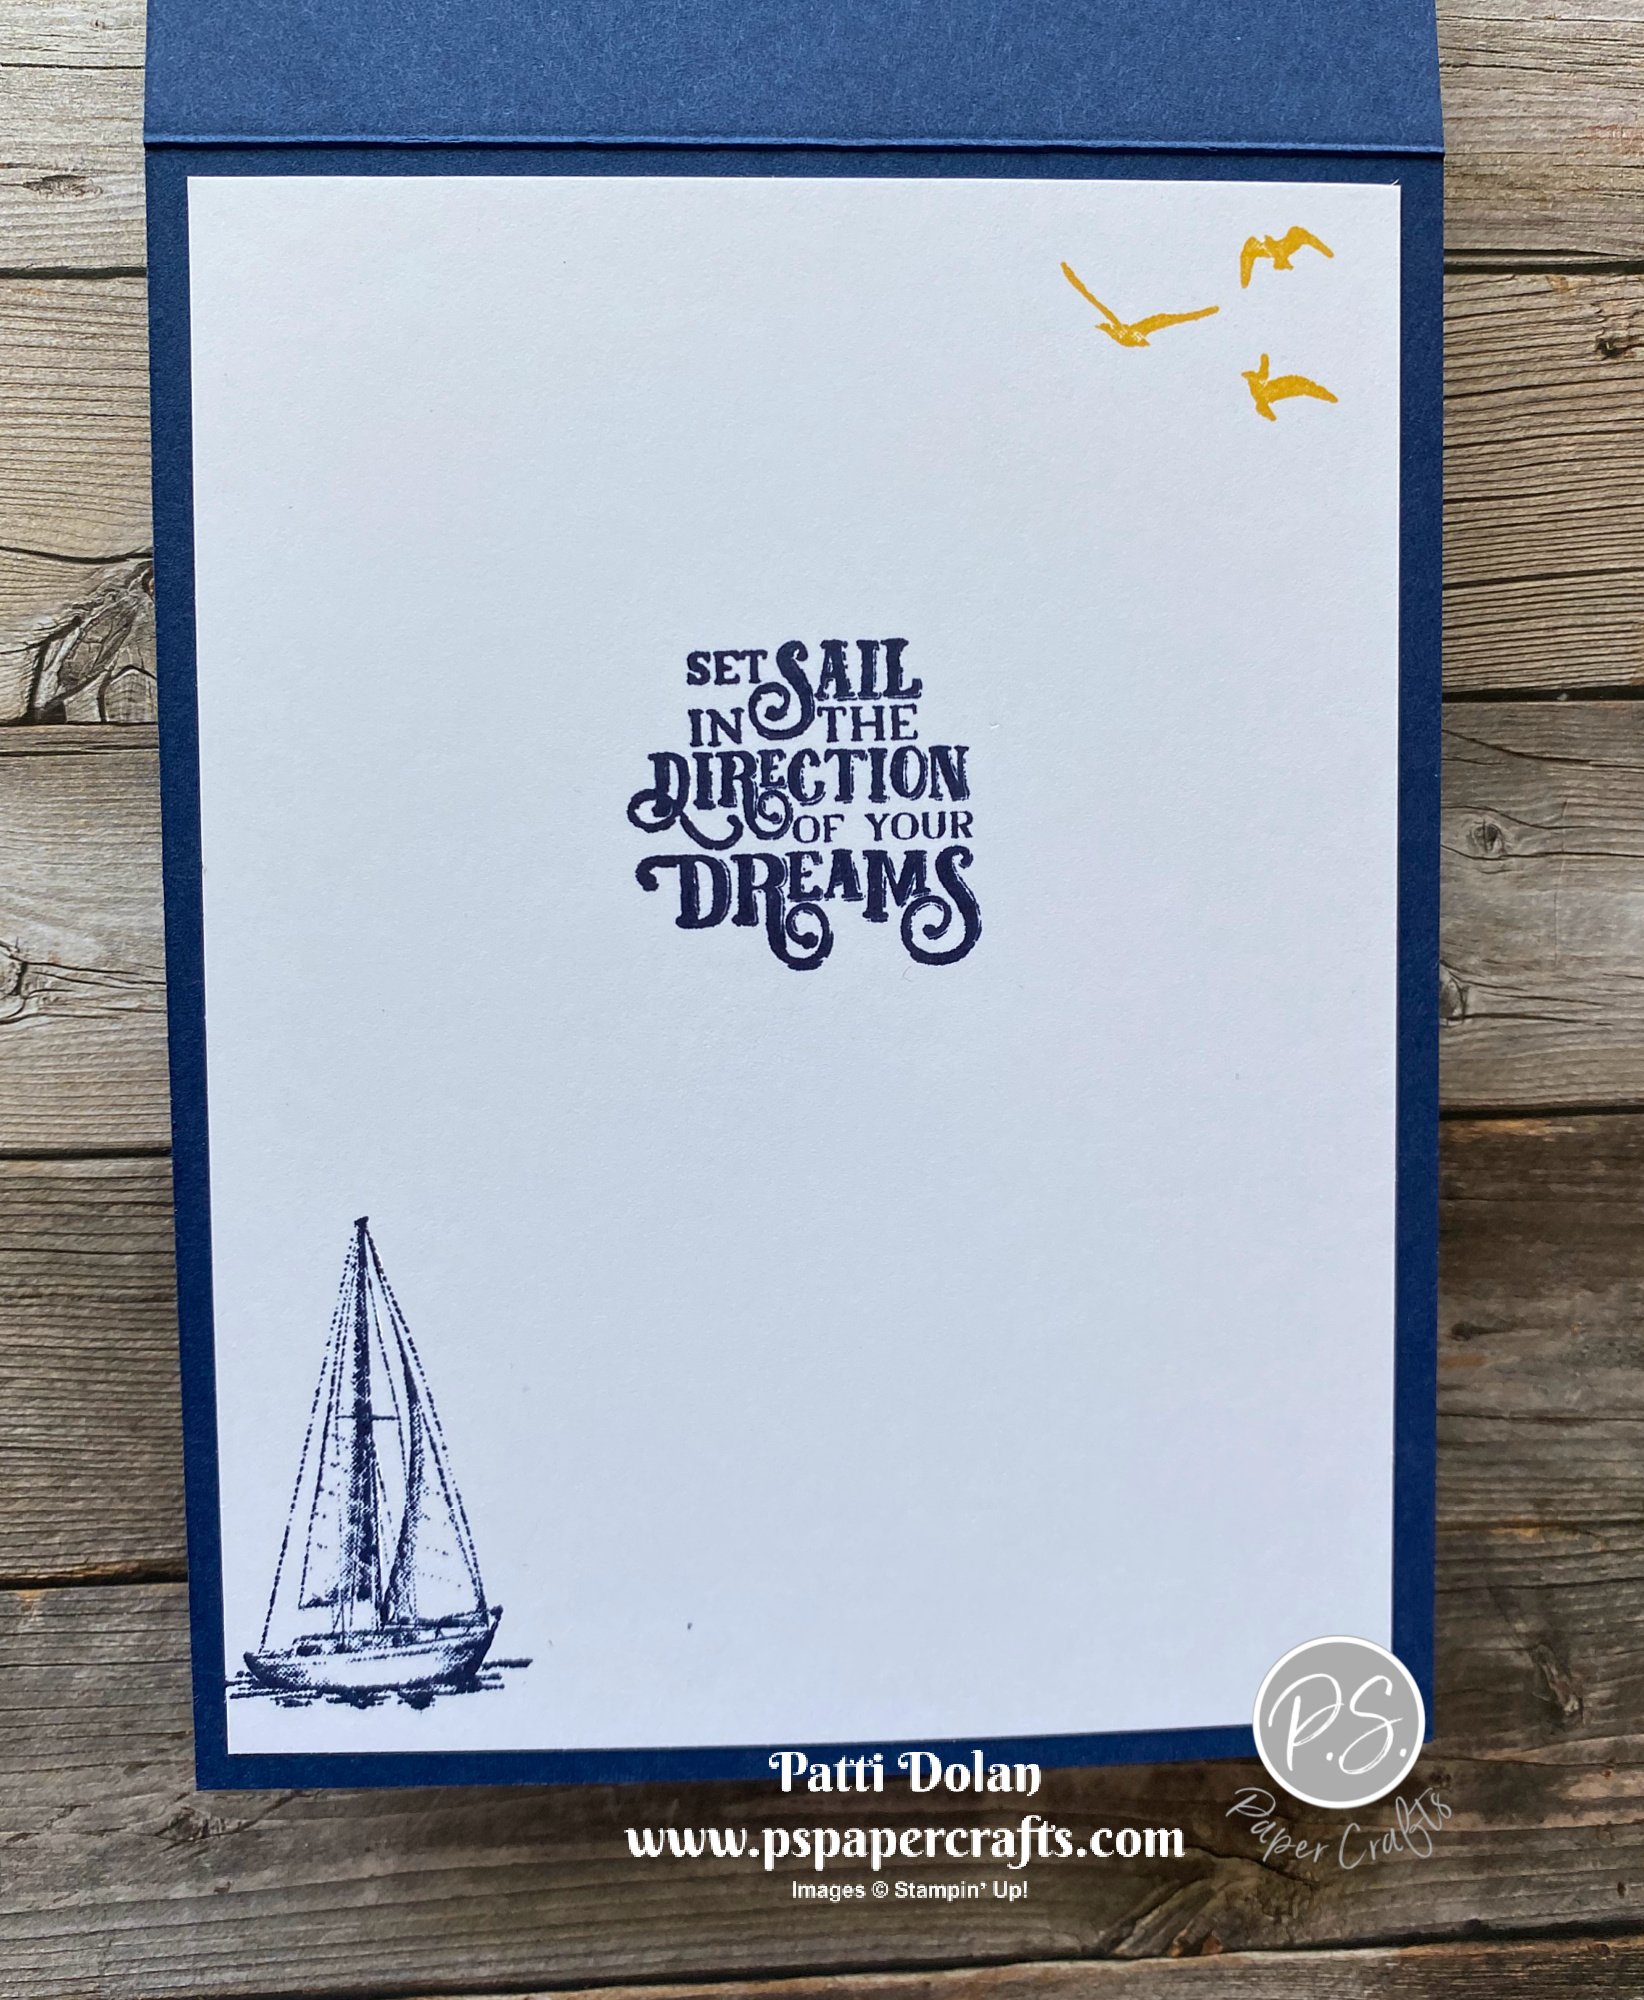
On the inside stamp the sentiment and sailboat with Night Of Navy Ink. I used the Sailing Home Stamp set for the inside sentiment. Stamp birds with Crushed Curry Ink.


Supply List

Winter Cardinals - Beauty Of The Earth

Isn’t this card pretty? I love cardinals in the winter on a snowy tree. That blue background is perfect for a winter sky.


In the video I’ll show you how I added some texture by embossing the tree with the Timber 3D Embossing Folder and the snowy hill with the Hammered Metal 3D Embossing Folder.


The Beauty Of the Earth Designer Series Paper has such great patterns for autumn and winter scenes.


I used the Beautiful Tree Dies to cut the tree and the birds. I know they are not cardinals but cutting them from Real Red Cardstock kind of makes them look like them.


Tips & Instructions

  • Thick Basic White Card Base - 5 1/2 x 8 1/2, score at 4 1/4

  • Beauty Of The Earth Designer Series Paper - 5 1/4 x 4

  • Stamp sentiment with Versamark Ink and heat emboss with White Embossing Powder. Adhere layer to card base.

  • Basic White Cardstock - cut tree using the Beautiful Trees Dies and emboss using the Timber 3D Embossing Folder.

  • Basic White Cardstock - 4” strip, cut hill and emboss using the Hammered Metal 3D Embossing Folder.

  • Adhere tree to card using Liquid Glue and then add the hill over the tree.

  • Cut 2 birds from Real Red Cardstock and adhere to tree using Mini Dimensionals.

  • Add some Subtle Shimmer Sequins.


On the inside stamp sentiment with Misty Moonlight Ink and star with Daffodil Delight Ink.


Supply List

Timeless Tropical Birthday Card

I used the In The Wild Designer Series Paper and the Timeless Tropical Stamp Set to create this fun birthday card. This would be great for a guy!


I have to admit that this paper is not really my style but I always purchase all the Designer Series Paper packs because I find patterns that I end up loving and use them differently than they were meant for. The pattern that I chose seemed tropical to me so why not pair it with the Timeless Tropical Stamp Set.


This Macrame 3D Embossing Folder creates such a beautiful impression. It can be used for a backgrounds for a variety of cards.


Tips & Instructions

  • Crushed Curry Card Base - 5 1/2 x 8 1/2, score at 4 1/4

  • Basic White Layer - 5 1/4 x 4, emboss with the Macrame 3D Embossing Folder

  • Cajun Craze Strip - 5 1/4 x 2

  • In The Wild Designer Series Paper Strip - 5 1/4 x 1 3/4, adhere to Cajun Craze Strip then adhere to embossed layer. Adhere layer to card base.

  • Stamp sentiment with Cajun Craze Ink on Basic White Cardstock and cut using the Stitched So Sweetly Dies.

  • Color pineapple stamp with Crushed Curry and Garden Green Stampin’ Write Markers and stamp on scrap of Basic White Cardstock. Cut using the In The Tropics Dies.

  • Cut small flowers from Crushed Curry Cardstock with flower die.

  • Adhere pineapple and one flower to the sentiment label and adhere to card using Dimensionals.

  • Add a Champagne Rhinestone to center of flower.


On the inside adhere a 5 1/4 x 3/4 strip of the Designer Series Paper to side of layer. Stamp sentiment with Cajun Craze Ink.


Supply List

October Simple Suite Stampers Tutorial - Cutest Halloween

Every month I collaborate with 11 other Demonstrators to create a Tutorial Bundle using a suite of products from Stampin’ Up! This month we’re featuring the Cute Halloween Suite.

You can get this Tutorial Bundle from me for free when you place an order from my Online Store during the month of October.


This is the card I made for the tutorial. Isn’t it cute? I love that Black Glitter Paper, it really stands out.


Watch the video to see how to make two cards from the tutorial and to find out more about how to get this tutorial with a purchase from my Online Store.


I used the Cutest Halloween Bundle for both cards. You can purchase them separately or purchase together to save 10%.


The Cute Halloween Designer Series Paper is adorable. You can punch out the pumpkins, ghosts and cats from the paper with the punch.


This is the card that Jo Blackman designed. I realized after the video that I forgot to add the ribbon. I tied a piece of the Metallic Mesh Ribbon around and tied a bow.


On the inside stamp a sentiment and a pumpkin, spider or whatever you want.


Supply List

Simple Blackberry Beauty Sympathy Card

I love to let the Designer Series Paper make the card. So simple but very elegant!


I used the Blackberry Beauty Specialty Designer Series Paper which is gorgeous! Right now it’s not available with all the crazy shipping issues but should be back in the warehouse in November. For those of you who took my October Card Class to Go, you’ll have some extra to make this card.


The Inspired Thoughts Stamp Set has great sentiments for different occasions. It’s a go to set for me, especially for Sympathy Cards. This is on the 24-Hour Stamp Sale List happening on October 20, 2021.


Tips & Instructions

  • Blackberry Bliss Card Base - 5 1/2 x 8 1/2, score at 4 1/4

  • Gold Foil Sheet - 5 1/4 x 4

  • Blackberry Beauty Specialty Designer Series Paper - 5 x 3 3/4

  • Stamp sentiment with Versamark Ink and heat emboss with Gold Embossing Powder.

  • Adhere layers to card base.

  • Add some Gilded Gems.


On the inside stamp sentiment with Versamark Ink and heat emboss with Gold Embossing Powder. Adhere 3 gold strips at the bottom. I cut the strips at 4 x 1/4.


Supply List

24-Hour Stamp Sale - October 20, 2021!!!

Stampin' Up! is having a 24-hour Stamp Sale on October 20, 2021!!!!!


Sale runs for 24 hours on 20 October—from 12:00 AM to 11:50 PM (MT) online, and 7:00 AM to 6:50 PM (MT) by phone.

The store will have a category titled “Stamp Sale” that displays every stamp set on sale to ensure a quick and easy shopping experience.

Look over the list today and get ready to shop tomorrow!!!


Don't forget my October Ordering Special.


When you order $50 in product (before shipping & tax), I will send you a sample of some of the Designer Series Papers from the Sale-a-bration Brochure.

You'll get 6x6 samples of:

  • Penguin Playmates

  • Peaceful Prints

  • Be Dazzling Specialty Paper

Use Host Code: DZJH4DQS

Sketch Saturday - In Bloom

The flowers on this card remind me of “Flower Power”! Are you old enough to remember that? Of course the colors were lighter and brighter; I wanted this to be more of a Fall look.

 
Sketch Saturday - In Bloom.png
 

I made this card for the weekly Atlantic Hearts Sketch Challenge. Here’s the sketch I followed.

 
Screen Shot 2021-10-15 at 9.29.50 PM.png
 

Tips & Instructions

  • Rich Razzleberry Card Base - 5 1/2 x 8 1/2, score at 4 1/4

  • Basic White Layer - 5 1/2 x 3 3/4, cut/emboss with the Stitched Greenery Die and adhere to card base.

  • Basic White Strip - 3 3/4 x 1 1/2, stamp sentiment with Crushed Curry Ink.

  • Rich Razzleberry Strip - 3 3/4 x 1 3/4, adhere behind sentiment strip.

  • Cut flowers and centers from Rich Razzleberry and Crushed Curry Cardstock. Cut leaves from Granny Apple Green and Mossy Meadow Cardstock.

  • Adhere leaves behind sentiment strip and then adhere strip to card.

  • Arrange flowers and adhere with Dimensionals.

 
Sketch Saturday - In Bloom card2.png
 

I love the Rich Razzleberry and Crushed Curry together for the fall.

 
Sketch Saturday - In Bloom card3.png
 

For the inside layer I cut the Basic White layer at 5 1/2 x 3 3/4 to match the card front. Stamp the sentiment (from the Sunny Sentiments Stamp Set) with Rich Razzleberry Ink. Stamp some small flowers with Crushed Curry Ink.

 
Sketch Saturday - In Bloom inside.png
 

Supply List

Nature's Harvest Fun Fold Card

I made this pretty Fun Fold card using the Nature’s Harvest Stamp Set. I love this flower; it reminds me of Fall in NY.

 
Nature's Harvest Fun Fold card2.jpeg
 

Watch the video to see how this Fun Fold Card works. It’s pretty cool but so easy to make.


See how it opens, fold up the top and down the bottom to see the inside.

 
Nature's Harvest Fun Fold card4.jpeg
 

Tips & Instructions

  • Bumblebee Card Base - 4 1/4 x 11, score at 5 1/2 and cut off at 2 3/4. Fold up the bottom and burnish with Bone Folder.

  • Pansy Petals Designer Series Paper - 4 x 2 1/2, adhere to bottom of card base.

  • Bumblebee Cardstock - 2 1/2 x 9 1/2, score at 4 3/4, fold and burnish with Bone Folder.

  • Basic White Cardstock - 2 pieces cut at 4 1/2 x 2 1/4.

  • On one of the white pieces stamp the flower image with Soft Suede Ink. Color the flowers with Stampin’ Blends. I used Calypso Coral, So Saffron and Old Olive.

  • Stamp sentiment with Calypso Coral (sentiment is from the Garden Birdhouses Stamp Set).

  • Adhere layer to front of Bumblebee layer.

  • Add some Wink Of Stella to the flower tops. Adhere a Bumblebee Trinket with a Glue Dot.

 
Nature's Harvest Fun Fold card3.jpeg
 
  • Stamp smaller flowers to the other white layer. Color with Stampin’ Blends and adhere to the inside of folded Bumblebee Layer. Adhere layer to card front (see video for demonstration).

 
Nature's Harvest Fun Fold inside.jpeg
 

I love how it turned out. Hello cards are great to send to anyone for no reason at all. Wouldn’t you love to receive a card like this in the mail?

 
Nature's Harvest Fun Fold card1.jpeg
 

Supply List

Whimsy & Wonder Merry Card

I just love this Whimsy & Wonder Specialty Designer Series Paper. The colors are so bright and fun!

 
Whimsy & Wonder Merry card2.jpeg
 

Here’s a closer look at the patterns. It has Iridescent accents that add such beautiful sparkle to your card.

 
Screen Shot 2021-10-11 at 8.03.35 PM.png
 

The pretty ornaments and the bold stripes on this paper create a whimsical card for the Christmas season.

 
Whimsy & Wonder Merry card3.jpeg
 

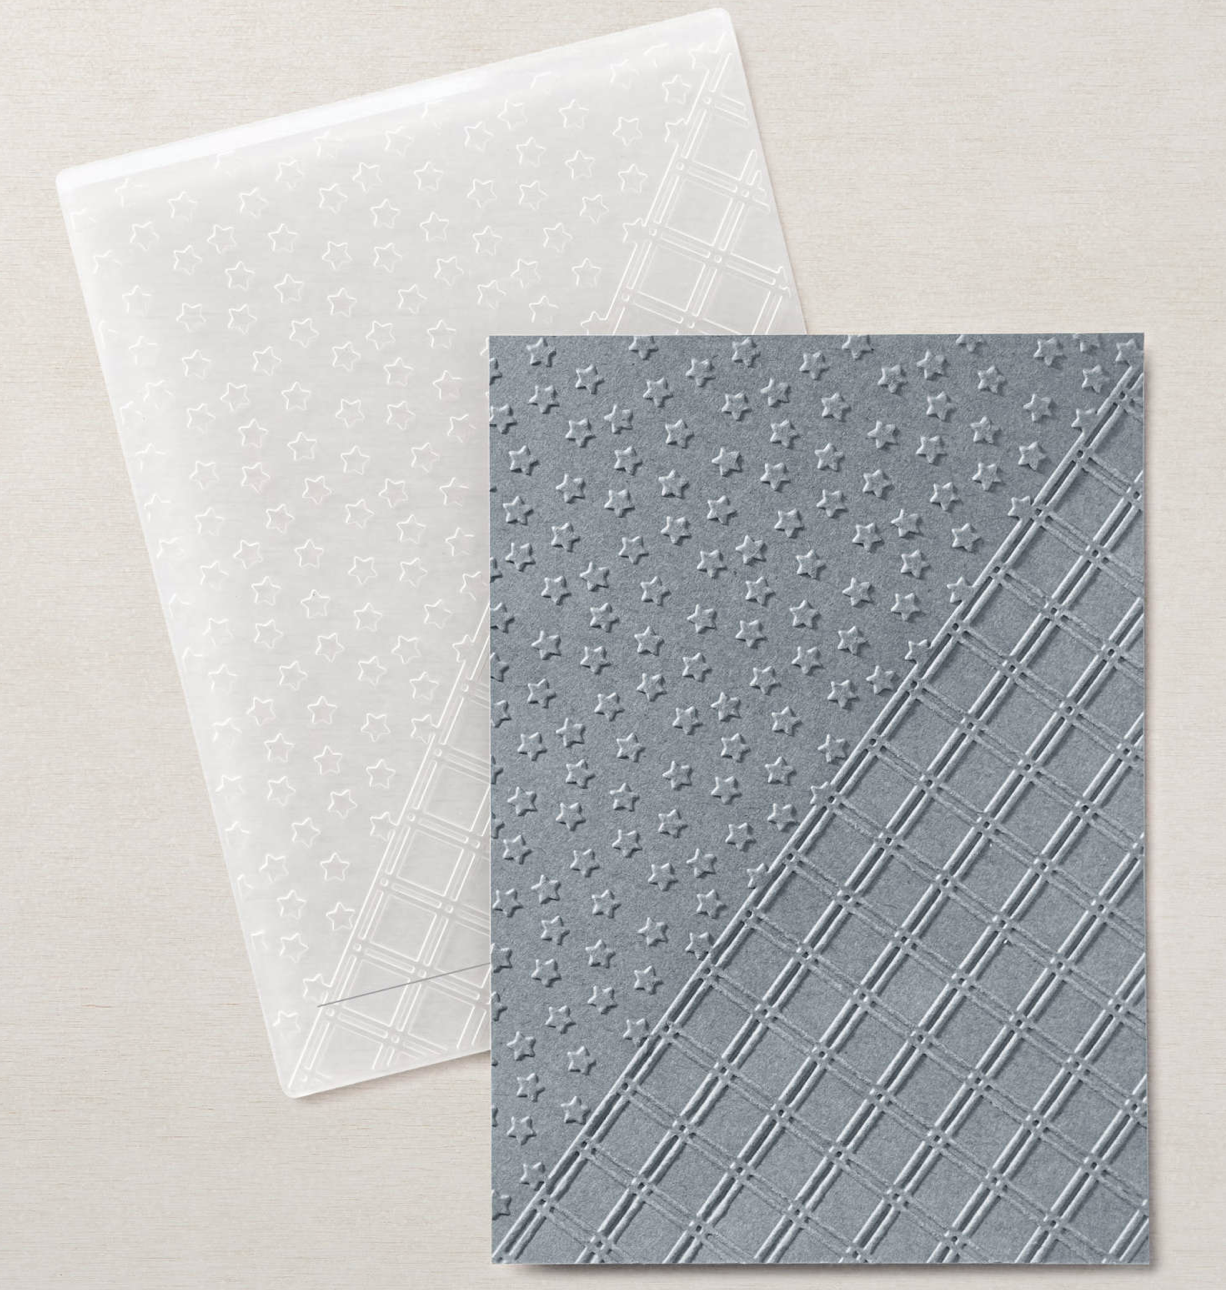
I embossed a strip of Misty Moonlight Cardstock with the bottom part of the Star-Crossed Embossing Folder. I like to use an embossed strip instead of ribbon to break up the top and bottom patterns.

 
Screen Shot 2021-10-13 at 10.15.52 PM.png
 

Tips & Instructions

  • Misty Moonlight Card Base - 5 1/2 x 8 1/2, score at 4 1/4

  • Basic White Layer - 5 1/4 x 4

  • Whimsy & Wonder Designer Series Paper (ornaments) - 3 7/8 x 3 3/4

  • Whimsy & Wonder Designer Series Paper (stripes) - 3 7/8 x 1 1/2

  • Adhere Designer Series Paper to the white layer and adhere to card base.

  • Misty Moonlight Strip - 4 1/4 x 5/8, emboss with the Star-Crossed Embossing Folder and adhere over seam on the card.

  • Stamp sentiment (from Christmas To Remember) with Misty Moonlight Ink on 1/2” strip of Basic White Cardstock. Adhere to card with Dimensionals.

  • For an added touch, adhere a bow to one of the ornaments with a Glue Dot. I used the Misty Moonlight/Silver Baker’s Twine.

 
Whimsy & Wonder Merry Card1.jpeg
 

Here’s a close-up of my favorite ornament; the one with that sweet Bambi deer!

 
Whimsy & Wonder Merry closeup.jpeg
 

On the inside stamp the sentiment with Misty Moonlight Ink. Adhere a 3/4” strip of the striped paper to bottom. Emboss a strip of Misty Moonlight Cardstock and cut down to just the 2 lines. Adhere above the striped paper.

 
Whimsy & Wonder Merry inside.jpeg
 

Supply List

Friendship Card using Queen Anne's Lace

I used the Queen Anne’s Lace Stamp Set to create this simple but pretty Hello Friend Card. This is one of my favorite stamp sets.


I made this card on a Live but if you missed it, you can watch the replay to see how to blend this strip on the card front. I’m always so excited to see how clean the edges are when I pull up the Post-It Tape.


The Queen Anne’s Lace Stamp Set has delicate images of the flower and some beautiful sentiments. You can stamp the image with or without the second step.


These blending brushes come in a pack of 3 for $12(US). They’re great for creating a soft backgrounds or using with masks or stencils. The velvety soft bristles blend ink perfectly.

 
Screen Shot 2021-10-12 at 9.55.34 PM.png
 

Tips & Instructions

  • Merry Merlot Card Base - 5 1/2 x 8 1/2, score at 4 1/4

  • Crumb Cake Layer - 5 1/4 x 4, adhere to card base.

  • Basic White Layer - 5 x 3 3/4, using Post-It Tape or Post-It Notes, cover the layer leaving about 1 1/2” of space for blending. Blend using the Blending Brushes. I used Daffodil Delight, then Crushed Curry, then Calypso Coral (see video for demonstration).

  • Lift the Post-In. Stamp the Queen Anne’s Lace image with Crumb Cake Ink. Stamp the flowers with Merry Merlot but stamp off first to get a light layer.

  • Stamp sentiment with Merry Merlot Ink.

  • Add some Wink Of Stella to the flower tips.

  • Add a Bumblebee Trinket with Glue Dot.

 
Queen Anne's Lace Ink Blending Card1.jpeg
 

On the inside stamp flower image with Crumb Cake Ink. You can also stamp a sentiment with Merry Merlot Ink if you want.

 
Queen Anne's Lace Ink Blending inside.jpeg
 

Supply List

Fun Whimsical Trees Christmas Card

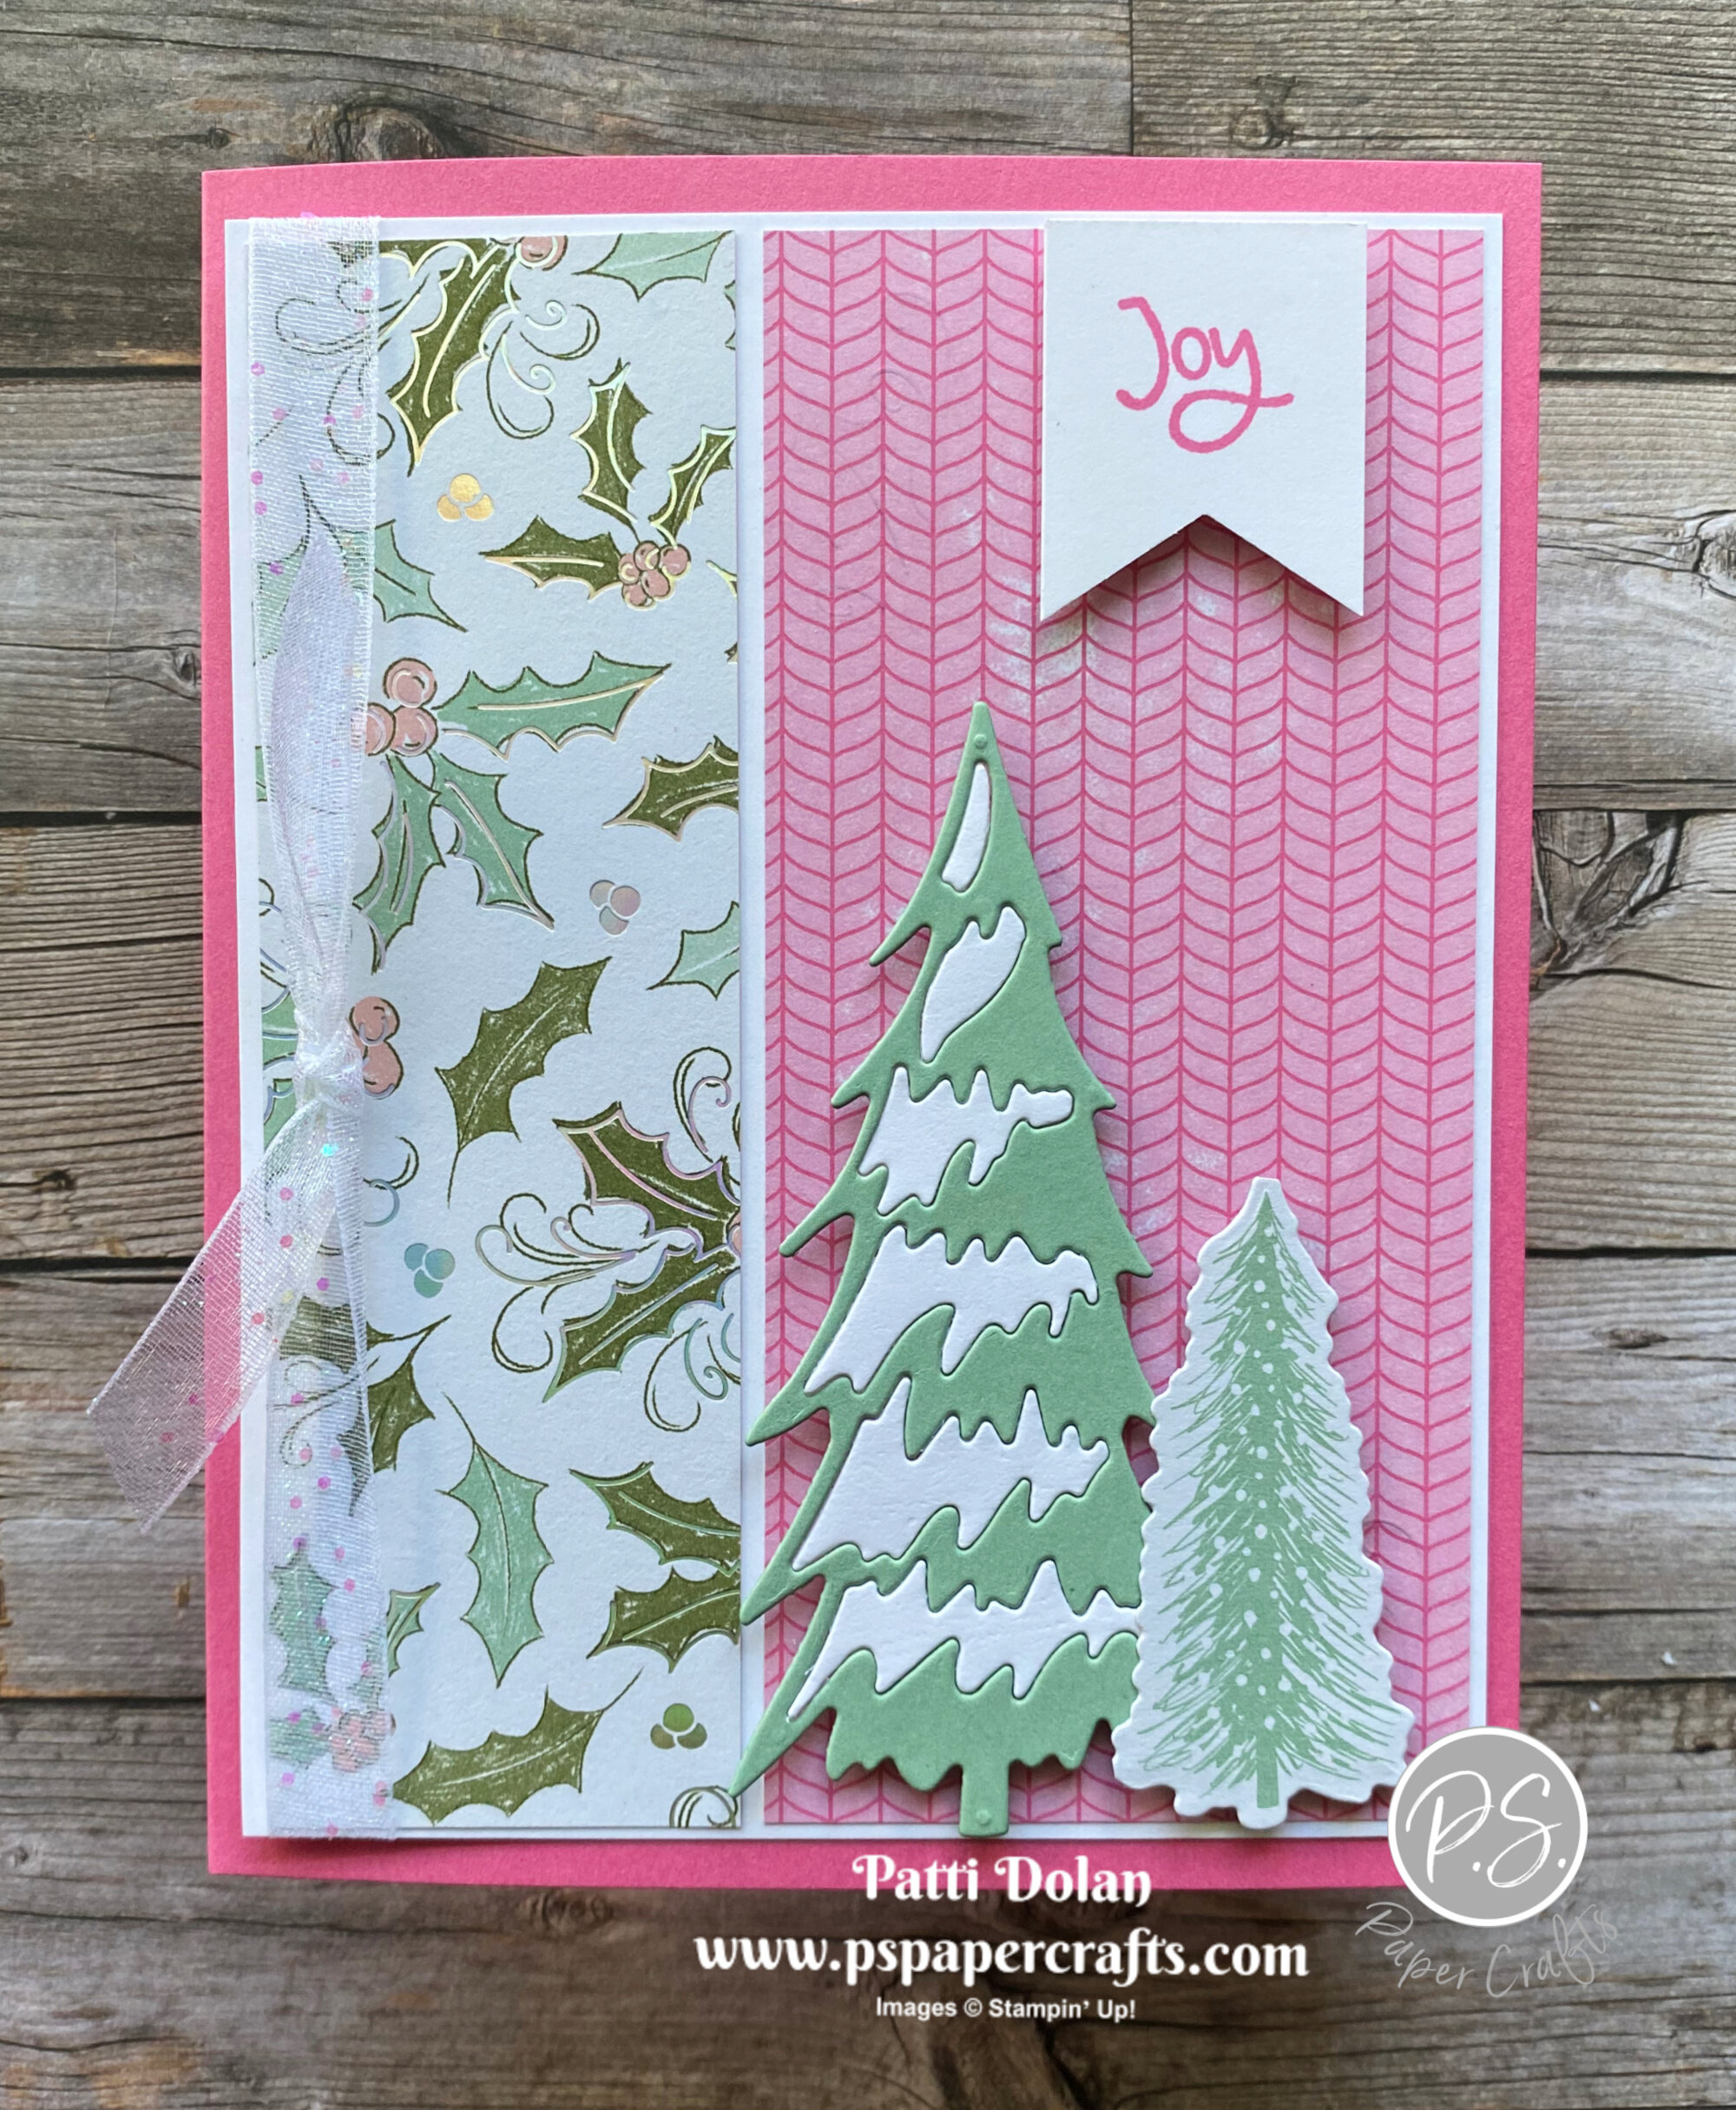
Do you like non-traditional colors for Christmas Cards? I think the colors on this card are refreshing and pretty!

 
Whimsical Trees Christmas Card2.jpeg
 

The Whimsical Trees Stamp Set and Christmas Trees Dies gives you lots of options to create fun trees. I cut the one with the snow twice, once with Mint Macaron and one with Basic White Cardstock. Poke the white out and insert in the green branches. Bundle the stamp set and dies together and save 10%.

 
Screen Shot 2021-10-11 at 8.03.17 PM.png
 

The colors on the Whimsy & Wonder Designer Series Paper are bright and pretty. They can be used for Christmas but many of the patterns would be great for Birthday Cards or other occasions.

 
Screen Shot 2021-10-11 at 8.03.35 PM.png
 

Tips & Instructions

  • Polished Pink Card Base - 5 1/2 x 8 1/2, score at 4 1/4

  • Basic White Layer - 5 1/8 x 4

  • Whimsy & Wonder Designer Series Paper (holly) - 5 x 1

  • Whimsy & Wonder Designer Series Paper (pink pattern) - 5 x 2 1/4

  • Adhere designer paper to the white layer. Wrap ribbon around layer and adhere to back. Tie a separate piece of ribbon in a knot around the ribbon. Adhere layer to card.

  • Mint Macaron Cardstock - cut Christmas tree, pop out the snow areas.

  • Basic White Cardstock - cut same Christmas tree, pop out the snow areas. Adhere the white snow into the green tree. I used scotch tape on the back to keep them in place.

  • Cut 2 trees from the designer paper using the coordinating dies, one for the card front and one for the inside.

  • Adhere trees to the card front using Dimensionals.

  • Basic White 1” strip, stamp sentiment with Polished Pink Ink. Flag the end and adhere to card using Dimensionals.

 
Whimsical Trees Christmas Card1.jpeg
 

On the inside stamp sentiment with Polished Pink Ink. Adhere tree that was cut from the designer paper.

 
Whimsical Trees Christmas Card inside.jpeg
 

Supply List

Sketch Saturday - Sunny Sentiments

Time for another sketch! I just love the sentiment that I used on yesterday’s card and decided to use it again today.

 
Sketch Saturday - Sunny Sentiments card1.jpeg
 

I pretty much followed the sketch from the Atlantic Hearts Sketch Challenge to a “T”! I punched the flower from a scrap of Harvest Meadow Designer Series Paper and then used the same pattern for one of the layers.

 
Screen Shot 2021-10-08 at 2.14.16 PM.png
 

The Sunny Sentiments Stamp Set has great sentiments. I love the Happy Hello and Sunny Thoughts sentiments!

 
Screen Shot 2021-10-08 at 3.21.13 PM.png
 

Tips & Instructions

  • Bumblebee Card Base - 5 1/2 x 8 1/2, score at 4 1/4

  • Basic White Layer - 5 1/4 x 4

  • Bumblebee Layer - 3 3/4 x 2 3/8, emboss using the Ornate Floral 3D Embossing Folder

  • Harvest Meadow Designer Series Paper Layer - 3 3/4 x 2 3/8

  • Adhere the embossed layer and the patterned layer to the Basic White layer leaving a border around and between. Adhere layer to card base.

  • Stamp sentiment with Early Espresso ink on Basic White Cardstock and cut using the Stitched So Sweetly Dies. Adhere to card.

  • Punch 2 daisies from the Harvest Meadow Designer Series Paper. Glue them together, offsetting to make a full flower. Punch Early Espresso Cardstock using a 1/2” punch and adhere to center of flower. Add some Wink Of Stella to the center to give it some shine. Adhere flower to card using a Dimensional.

  • Punch a scrap of Pear Pizzazz Cardstock using the Sprig Punch and adhere behind the flower.

  • Add 3 Bumblebee Square Gems to label.

 
Sketch Saturday - Sunny Sentiments card2.jpeg
 

On the inside layer adhere a 5 1/4 x 3/4 strip of the patterned paper.

 
Sketch Saturday - Sunny Sentiments inside.jpeg
 

Supply List

Baby Wipe Technique using Gorgeous Leaves

I love doing the Baby Wipe Technique to create beautiful Fall leaves. I seem to make these cards every Fall.

 
Baby Wipe Fall Leaves card2.jpeg
 

This is a very easy technique and I’ll walk you through all the steps in the video below.


I used the Gorgeous Leaves Stamp Set. These leaf images stamp beautifully on their own but with the variation in color using this technique they are so pretty.

 
Baby Wipe Fall Leaves stamp.jpeg
 

Just squeeze some drops of ink on a baby wipe and then ink up your stamp. I put the wipes in a stamp case just to keep my area clean.

 
Baby Wipe Fall Leaves ink.jpeg
 

Tips & Instructions

  • Crushed Curry Card Base - 5 1/2 x 8 1/2, score at 4 1/4

  • Very Vanilla Layer - 5 1/4 x 4

  • Place a couple of baby wipes in a stamp case or lay on plastic and squeeze some ink drops randomly on the wipe. I used Crushed Curry, Merry Merlot and Calypso Coral.

  • Starting with the largest leaf image, ink it up and stamp randomly on the Very Vanilla layer. Follow these steps with the second largest, then the smallest.

  • Fill in with the tiny leaves by stamping them with Crushed Curry Ink.

  • Wrap Bumblebee Gingham Ribbon around the stamped layer and adhere to card base.

  • Cut 2 labels, one from Very Vanilla Cardstock and one from Crushed Curry Cardstock using the Tasteful Labels Dies.

  • Stamp sentiment from the Sunny Sentiments Stamp Set with Crushed Curry Ink on the Very Vanilla Label. Cut the Crushed Curry Label in half, spread it and adhere the pieces behind the stamped label. Adhere over the ribbon with Dimensionals.

  • Tie bow with ribbon and adhere using a Glue Dot.

  • Add a Playing With Patterns Resin Dot to label.

 
Baby Wipe Fall Leaves card1.jpeg
 

Stamp two of the small leaves on the inside layer.

 
Baby Wipe Fall Leaves inside.jpeg
 

I decided to keep stamping and stamped some leaves on the envelope front and flap on the back.

 
Baby Wipe Fall Leaves envelopes.jpeg
 

Supply List

Pretty Pumpkins Sitting On A Wall!

This Clean And Simple (CAS) card came together so easily. I had those pumpkins leftover from another card I was making and decided not to use them. I had an idea of putting them on a brick wall and voila this card was designed.

 
Pretty Pumpkins Sitting On A Wall2.jpeg
 

The Pretty Pumpkins Stamp Set has some great images and I just love the coordinating dies. Save 10% when you purchase them in a bundle.

 
Screen Shot 2021-10-07 at 2.53.48 PM.png
 

Tips & Instructions

  • Cinnamon Cider Card Base - 5 1/2 x 8 1/2, score at 4 1/4

  • Basic White Layer - 5 1/4 x 4, using a Cinnamon Cider Stampin’ Write Marker “flick” some ink splatters on the layer mainly at the top part. Stamp sentiment with Pumpkin Pie Ink.

  • Bloom Where You’re Planted Designer Series Paper - 4 x 2 1/2, adhere to white layer and adhere layers to card.

  • Cinnamon Cider Strip - 4 1/4 x 3/4, emboss using the Tasteful Textiles Embossing Folder. Adhere over the seam.

  • Stamp pumpkin image with Cinnamon Cider Ink on scrap of Pumpkin Pie Cardstock and cut with coordinating die. Adhere using Dimensionals.

 
Pretty Pumpkins Sitting On A Wall.jpeg
 

On the inside adhere a 4 x 1/2 strip of the Bloom Where You’re Planted Designer Series Paper. Stamp the pumpkin image on Pumpkin Pie Cardstock with Cinnamon Cider Ink and cut with coordinating die. Fussy cut just the medium sized pumpkin and adhere on top of wall.

 
Pretty Pumpkins Sitting On A Wall inside.jpeg
 

Supply List

October Card Class To Go!

This month's Card Class To Go uses the Blackberry Beauty Specialty Designer Series Paper.  This paper is so rich and beautiful with gold accents that create an elegant look.

You'll get kits to make 8 beautiful cards, 4 designs, 2 of each. 

Here’s a sneak peak of the cards you’ll make.

 
October Card Class To Go Ad.jpeg
 

Email patti@pspapercrafts.com to sign up!!!
Deadline October 16, 2021

Here's what you get:

  • 8 card kits, including envelopes, layers and die cuts

  • Product goody bag (you'll use to make the cards)

  • PDF & videos with complete measurements & instructions

Class Fee Options:

  • October Card Class To Go - $38 ($32 for local pickup)

  • Add on Pretty Pumpkins Stamp Set - $60.00

  • Add on Pretty Pumpkins Bundle - $83.75

Other Info:

  • Email me and I will send you a PayPal Invoice.

  • Payment due by October 16.

  • I will pick up the shipping and tax for any Add-Ons.

  • You will require stamps, ink and adhesive to complete the cards.

  • If there is a backordered product, there may be a delay in shipping but I don't see a problem at this time.

  • Invite a friend and I will include a free gift with your kits.

Email patti@pspapercrafts.com to sign up!!!
Deadline October 16, 2021


October Ordering Special.jpeg
 

Don't forget my October Ordering Special.

When you order $50 in product (before shipping & tax), I will send you a sample of some of the Designer Series Papers from the Sale-a-bration Brochure.

You'll get 6x6 samples of:

  • Penguin Playmates

  • Peaceful Prints

  • Be Dazzling Specialty Paper

Use Host Code: DZJH4DQS

Scrappy Birthday Card - Blackberry Beauty

This was a fun card to make and it was great to use up some scraps in the process. I love how rich and beautiful these colors are, especially for the fall season.

 
Scrappy Birthday Card2.jpeg
 

Watch a replay of my YouTube Live to see how easy it is to make this design.


The scraps are from the Blackberry Beauty Specialty Designer Series Paper. There are gold accents on some of the sheets which add elegance to whatever projects you use them on.

 
Screen Shot 2021-10-06 at 4.32.33 PM.png
 

Tips & Instructions

  • Blackberry Bliss Card Base - 5 1/2 x 8 1/2, score at 4 1/4

  • Very Vanilla Cardstock - 5 1/4 x 4

  • Gold Foil Sheet - 5 1/4 x 4 (you will cut down to 5 1/8 x 3 7/8)

  • Blackberry Beauty Specialty Designer Series Paper - cut strips at angles (larger than 4” long).

  • Adhere the strips to the Gold Foil Sheet leaving a space between each strip.

  • Cut ends from behind to get a straight edge and cut down to 5 1/8 x 3 7/8. Adhere to card Very Vanilla layer and adhere layers to card.

  • Stamp sentiment on scrap of Very Vanilla Cardstock with Blackberry Bliss Ink. Fussy cut around the edge. If you want you can use a Blackberry Bliss Marker around the edges to make sure there is no white showing.

  • Cut Gold Foil Scrap to 1 1/2 x 1 1/8 and adhere behind the sentiment. Adhere to card using Dimensionals.

  • Add Gilded Gem to sentiment label.

 
Scrappy Birthday Card1.jpeg
 

On the inside stamp sentiment with Blackberry Bliss Ink. Adhere a 3/4 x 5 1/4 strip of Designer Series Paper along the bottom.

 
Scrappy Birthday inside.jpeg
 

Supply List

Enjoy The Moment Card

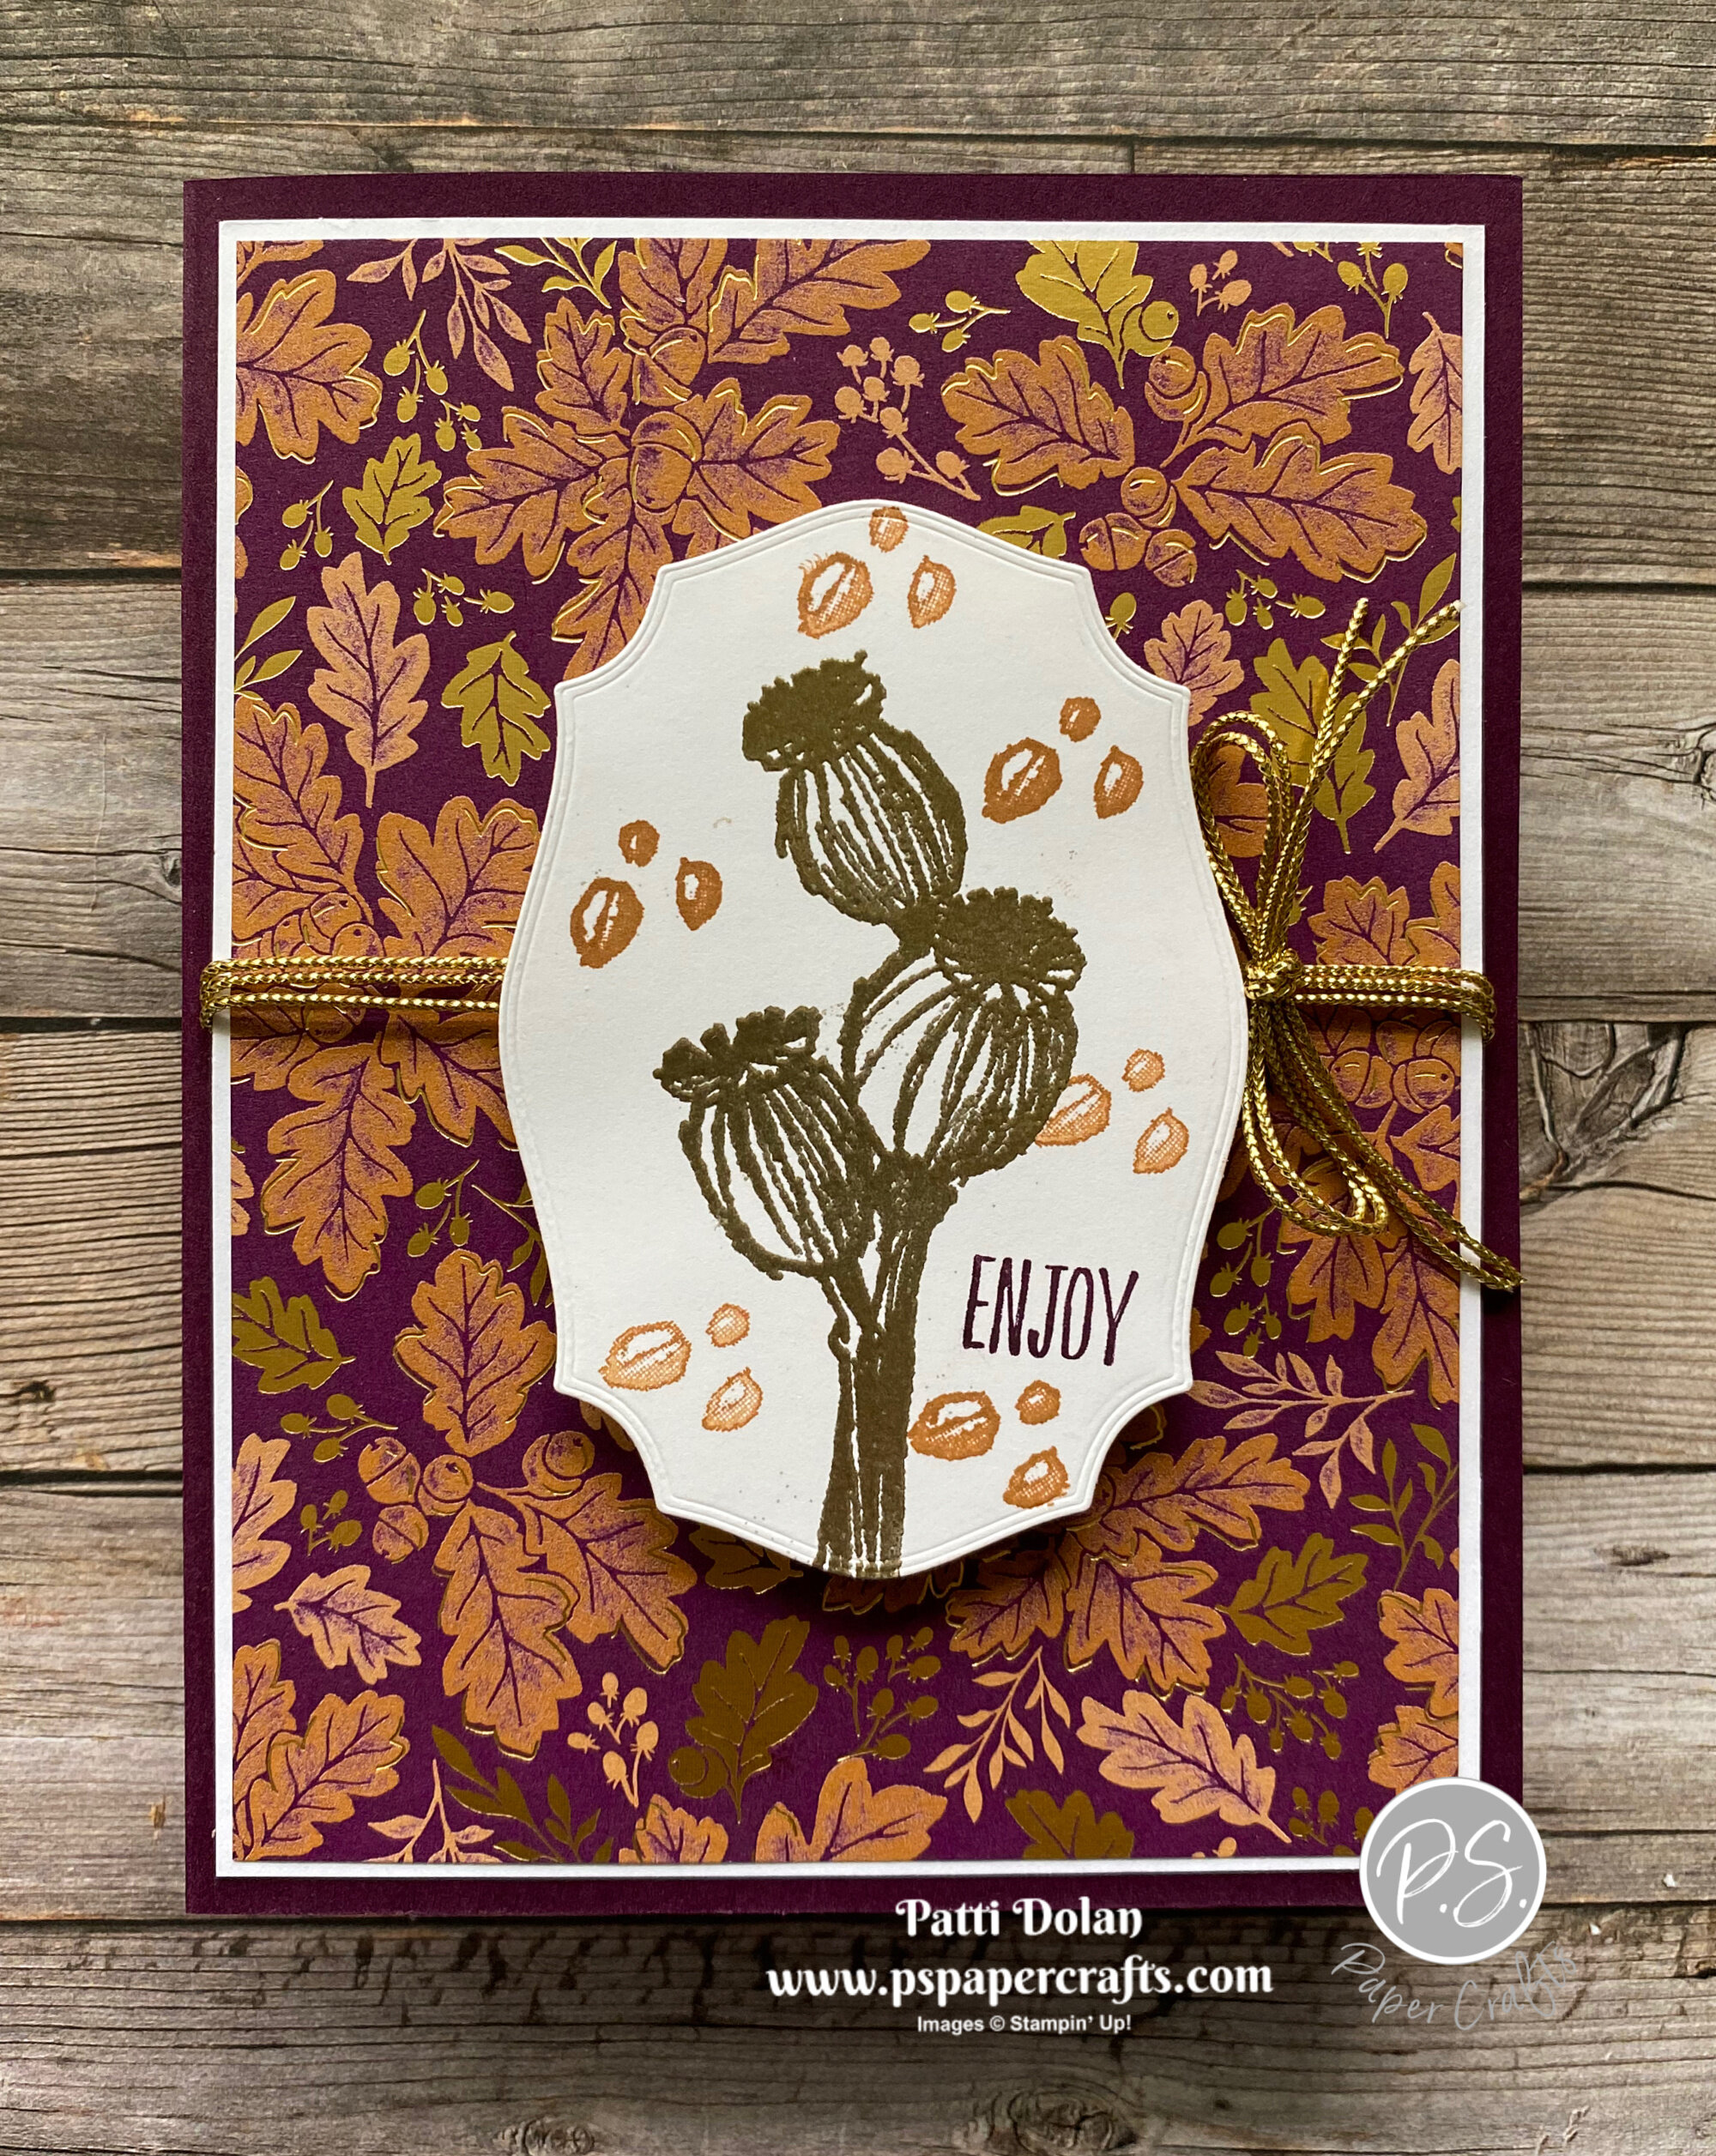
There’s something about this stamp set that I love. These images remind me of fall in NY. They stamp such beautiful images.

 
Enjoy The Moment stamp.jpeg
 

This was a simple card to make but the gold makes it look elegant and beautiful!

 
Enjoy The Moment Card2.jpeg
 

I finally broke out the Blackberry Beauty Specialty Designer Series Paper and it is gorgeous. The colors are so rich and there are gold foil accents on some of the papers.

 
Screen Shot 2021-10-04 at 8.34.14 PM.png
 

Tips & Instructions

  • Blackberry Bliss Card Base - 5 1/2 x 8 1/2, score at 4 1/4

  • Basic White Cardstock - 5 1/4 x 4

  • Blackberry Beauty Specialty Designer Series Paper - 5 1/8 x 3 7/8, adhere to Basic White Layer. Wrap piece of gold trim around 3 times and adhere to back of layer. Adhere to card base.

  • Cut Basic White Cardstock using the large Tasteful Labels Die. Stamp image with Versamark Ink and heat emboss with Gold Embossing Powder.

  • Stamp sentiment with Blackberry Bliss Ink. I only used the word “ENJOY” from the sentiment stamp. (Cover the words you don’t want Post-It Note, then ink it up, remove the Post-It Note and stamp just what you want.)

  • Stamp the seed images around using Cinnamon Cider Ink, stamping a second time without re-inking to get different shades.

  • Adhere label to card using Dimensionals.

  • Tie a bow using two strands of gold trim and adhere with a Glue Dot.

 
Enjoy The Moment Card1.jpeg
 

On the inside stamp sentiment with Versamark Ink and heat emboss with Gold Embossing Powder. Stamp images with Blackberry Bliss Ink and Cinnamon Cider Ink.

 
Enjoy The Moment inside.jpeg
 

Supply List

Sketch Saturday - Gorgeous Leaves

Today’s card for this week’s sketch challenge has lots of texture to it. I love the embossed layer and the Cork Specialty Paper.


The sketch I followed is from the weekly Atlantic Hearts Sketch Challenge. This one was a little more difficult for me but I love to just play until I figure out what to make.

 
Screen Shot 2021-10-02 at 4.39.40 PM.png
 

The leaves in this stamp set are so beautiful. They have little splatters around the edges. I cut them with the coordinating Intricate Leaves Dies.

 
Screen Shot 2021-10-02 at 4.53.04 PM.png
 

Tips & Instructions

  • Rich Razzleberry Card Base - 5 1/2 x 8 1/2, score at 4 1/4

  • Basic White Layer - 5 1/4 x 4, emboss using the Timeworn Type 3D Embossing Folder. Adhere to card base.

  • Cork Specialty Paper - 5 1/2 x 1 1/4, adhere to card.

  • Rich RazzleBerry Square - 3 1/4 x 3 1/4

  • Basic White Square - 3 x 3, adhere to Rich Razzleberry Square and adhere to card.

  • Cut Cork Specialty Paper using the 4th from largest Layering Circles Dies and adhere to square.

  • Stamp the leaves on Basic White Cardstock using Bumblebee, Cajun Craze and Rich Razzleberry Inks. Cut with coordinating dies and glue together. Adhere to circle using Dimensionals.

  • Stamp sentiment (from the Quiet Moments Stamp Set) on scrap of Basic White Cardstock with Rich Razzleberry Ink and cut with Tasteful Labels Dies.

 
Sketch Saturday - Gorgeous Leaves card2.jpeg
 

I love these fall colors. This is a great card to send to a guy; it’s rustic and has a masculine feel to it.

 
Sketch Saturday - Gorgeous Leaves closeup.jpeg
 

On the inside stamp sentiment with Rich Razzleberry Ink and the leaves with Bumblebee and Cajun Craze Inks.


Supply List

Pretty Pumpkins Hey Friend Card

I love this pumpkin image with the leaves on it from the Pretty Pumpkins Stamp Set. I embossed it in gold; so pretty!

 
Pretty Pumpkins Hey Friend Card2.jpeg
 

In my video I’ll show you how to make this card using Gold Embossing Powder and my Heat Tool. The scalloped vellum piece is a great layer to highlight the pumpkin but have the patterned paper show through.


You can purchase the Pretty Pumpkins Stamp Set with the Detailed Pumpkin Dies as a bundle and save 10%. There are some wonderful pumpkin dies in this set that can be used with the stamp set or on their own.

 
Screen Shot 2021-10-01 at 3.33.38 PM.png
 

Tips & Instructions

  • Early Espresso Card Base - 5 1/2 x 8 1/2, score at 4 1/4

  • Beauty Of The Earth Designer Series Paper - 5 1/4 x 4, wrap a piece of Early Espresso Faux Suede Trim around layer and adhere to the back. Adhere layer to card base.

  • Cut piece of Vellum Cardstock using the Scalloped Contours Dies.

  • Stamp pumpkin on Pale Papaya Cardstock using Versamark Ink and heat emboss with Gold Embossing Powder.

  • Stamp greenery on Old Olive Cardstock using Versamark Ink and heat emboss with Gold Embossing Powder.

  • Cut pumpkin and greenery with coordinating dies.

  • Stamp sentiment (from the In Symmetry Stamp Set) on 1/2” strip of Basic White Cardstock and punch one end with the Banners Pick A Punch. Adhere to pumpkin.

  • Adhere pumpkin and greenery to Vellum and then adhere layer to card.

  • Tie bow and adhere using a Glue Dot.

 
Pretty Pumpkins Hey Friend Card1.jpeg
 

On the inside stamp pumpkin with Pumpkin Pie Ink.

 
Pretty Pumpkins Hey Friend Card inside.jpeg
 

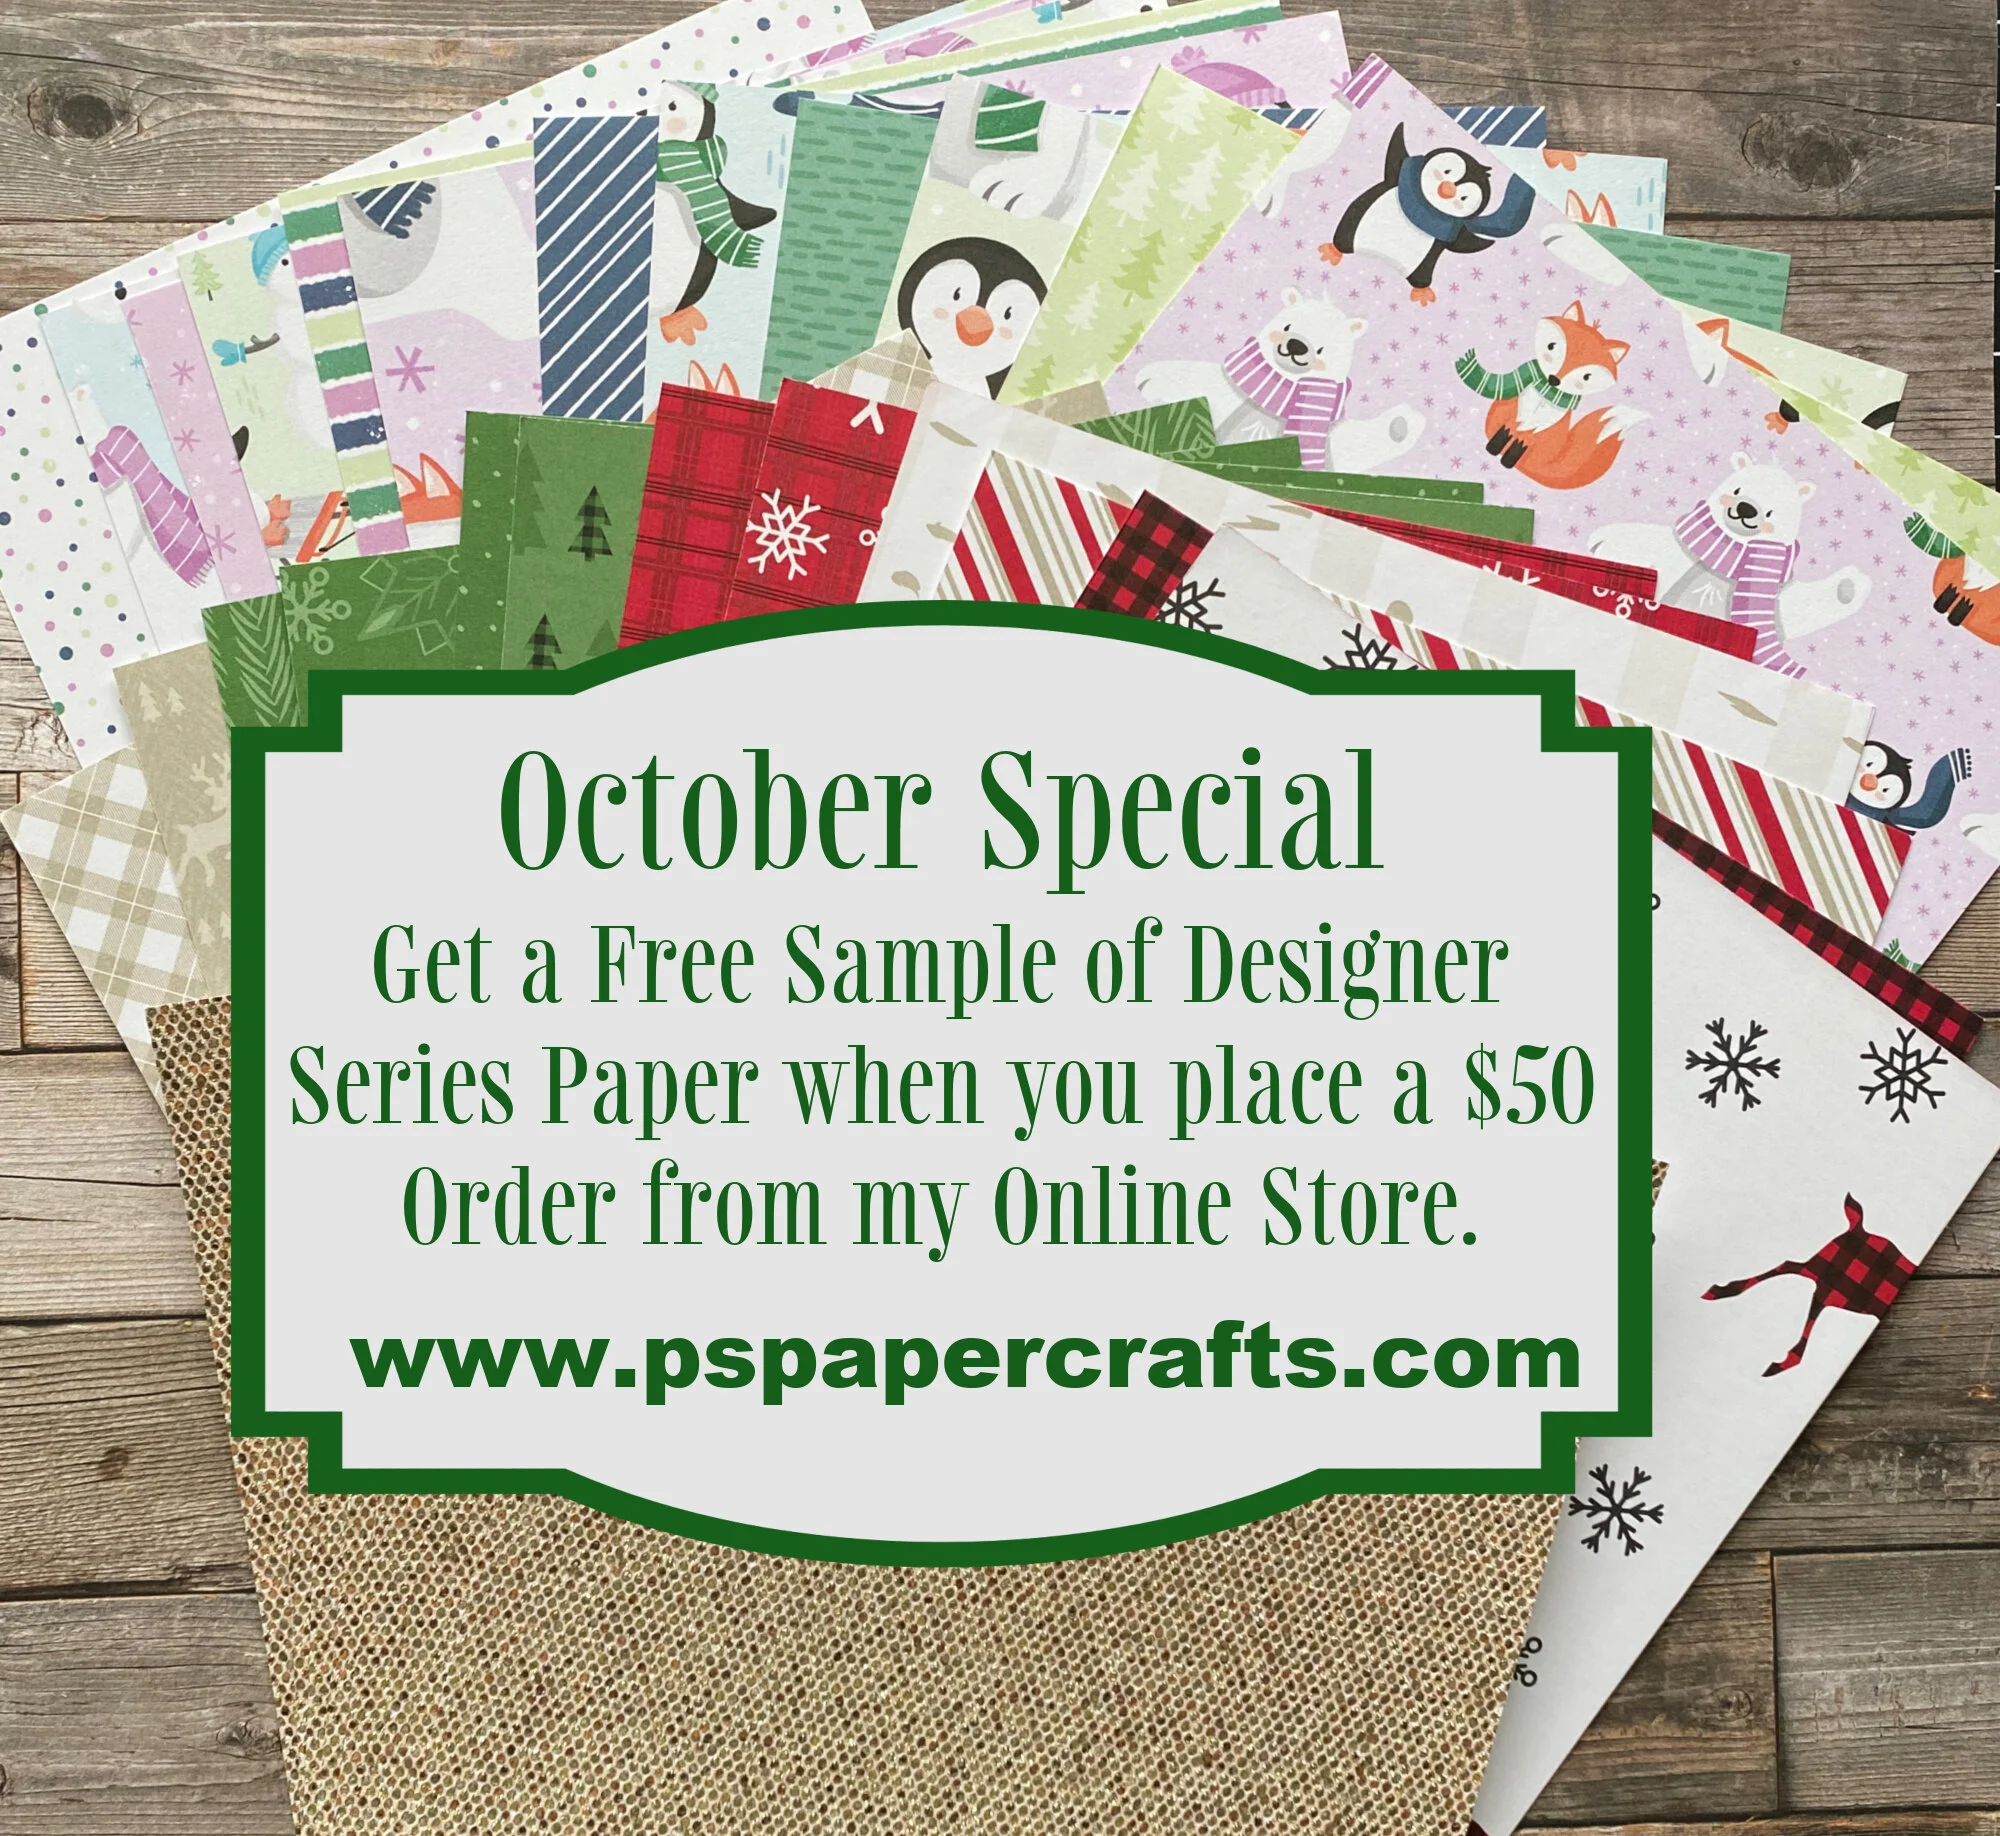
I have an October Ordering Special going on. When you place a $50 product order from my Online Store, I’ll send you a FREE sample pack of Designer Series Paper from the Sale-a-bration Brochure.

 
October Ordering Special.jpeg
 

Supply List