Blog — P.S. Paper Crafts

Join My Email List for Card Class Info, Promotions and Tips. Click here!

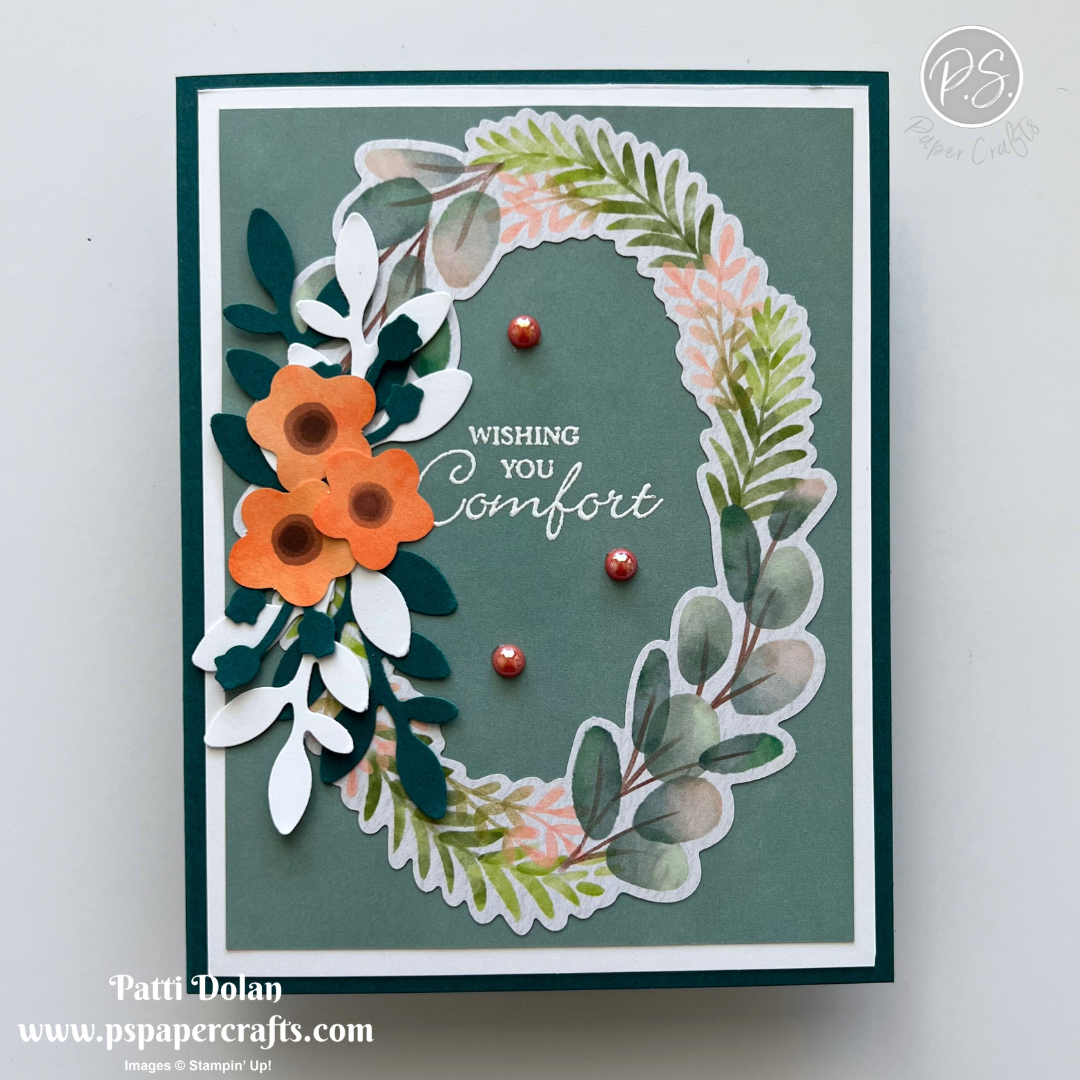
Sketch Saturday - Frames & Flowers

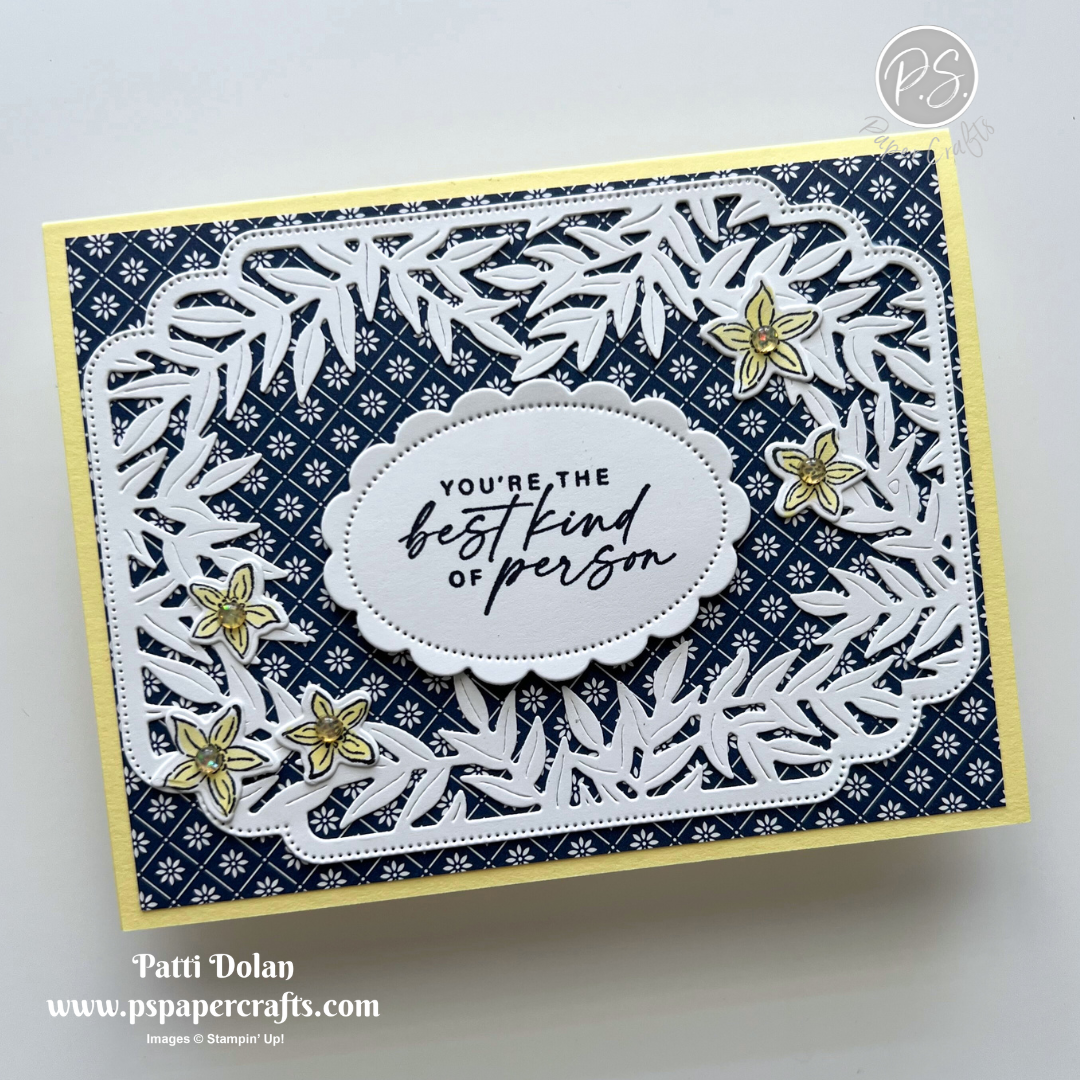
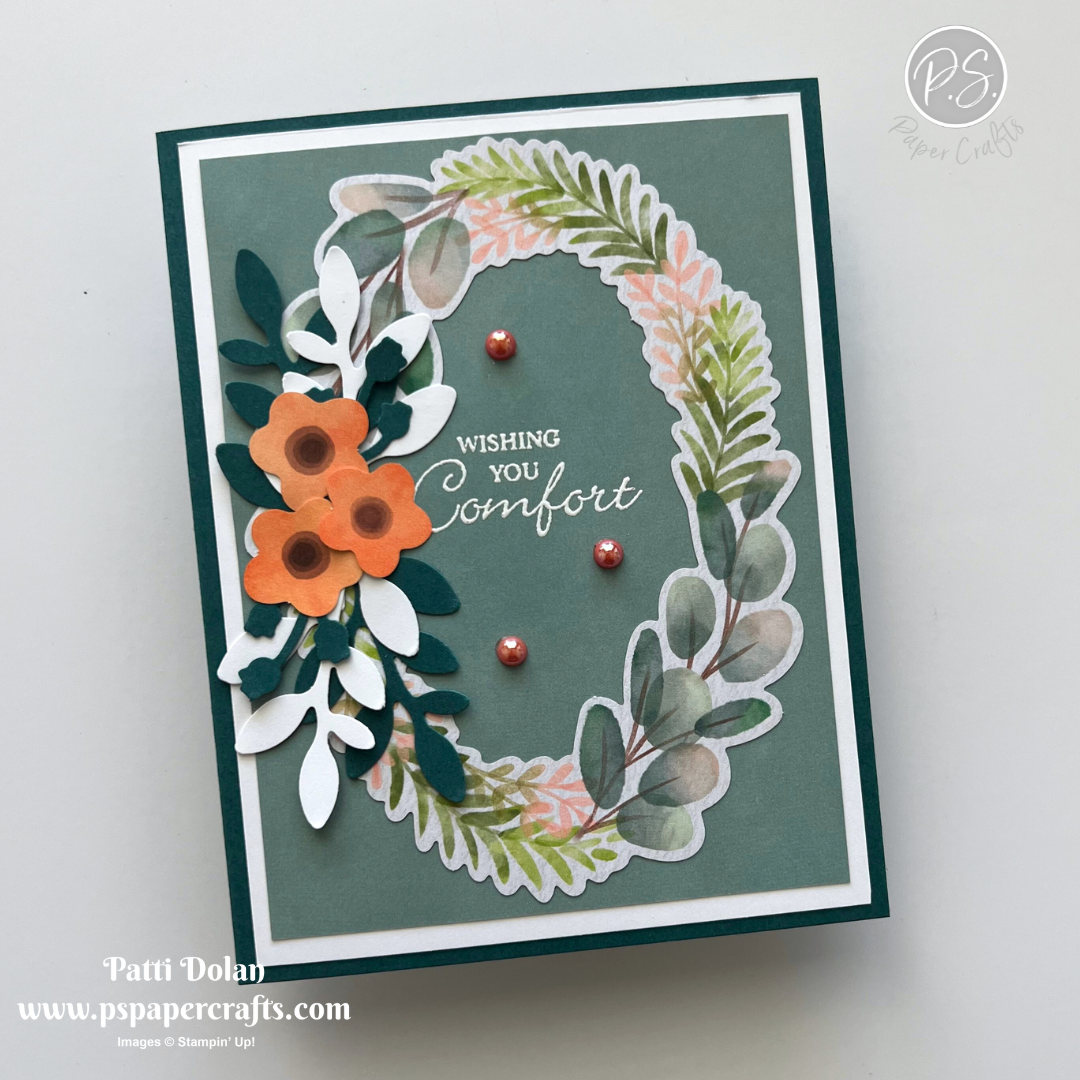
The Frames & Flowers Designer Series Paper has some great die cuts. The wreath and flowers are from it. I added some greenery using the Bough Punch to fill it out.


I made this card for the weekly Atlantic Hearts Sketch Challenge. Here’s the sketch I used.


Tips & Instructions

  • Pretty Peacock Card Base - 5 1/2 x 8 1/2, score at 4 1/4

  • Basic White Layer - 4 x 5 1/4, adhere to the card base.

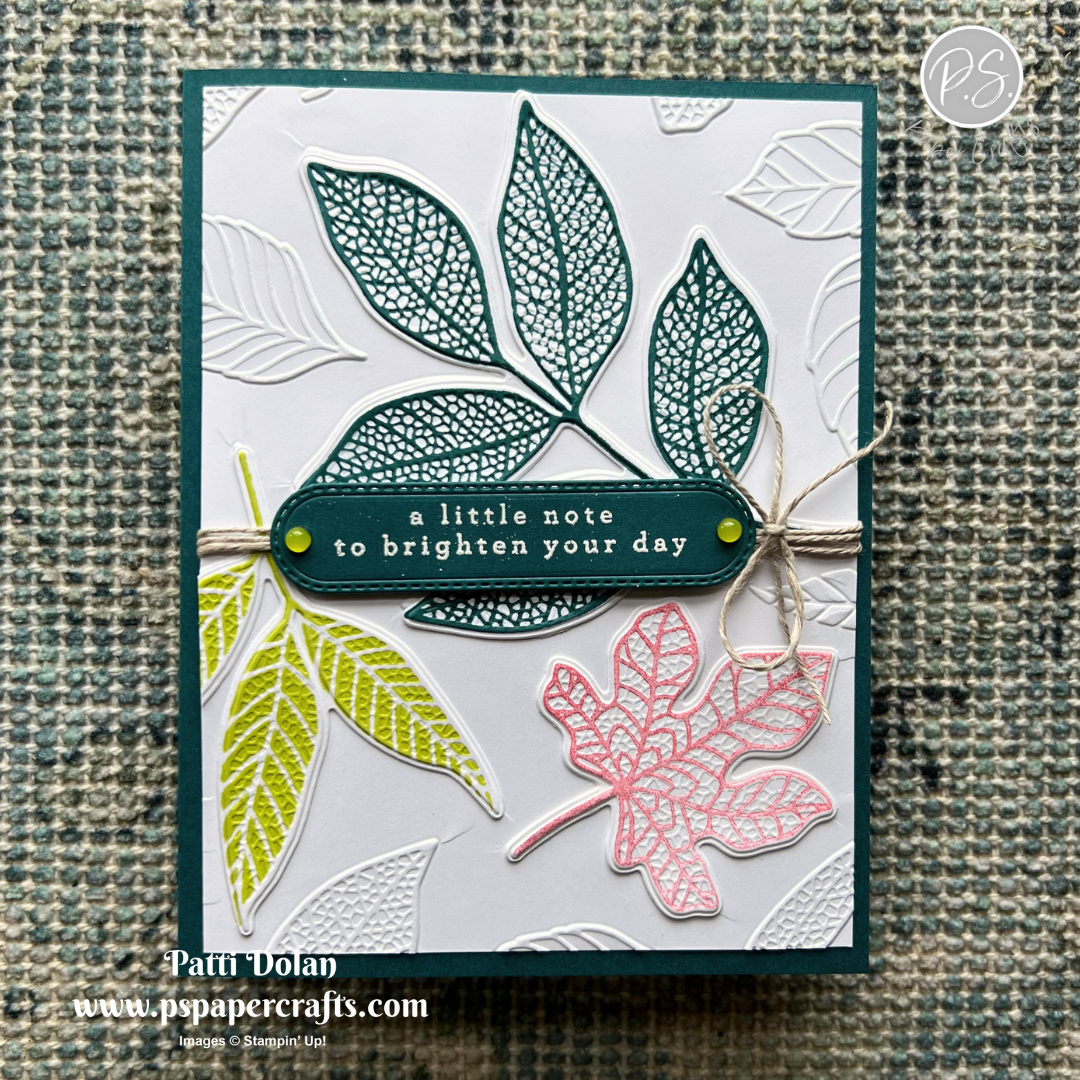
  • Frames & Flowers Designer Series Paper Layer - 3 3/4 x 5. Lay the wreath from the paper pack over the layer to determine where to stamp the sentiment. Stamp the sentiment in Versamark Ink and heat emboss with White Embossing Powder. The sentiment is from the Hope You Know Stamp Set.

  • Adhere the layer to the card.

  • Adhere the wreath from the paper pack to the card.

  • Punch some boughs from Pretty Peacock and Basic White using the Bough Punch. Adhere to the side of the wreath.

  • Add some of the flower die cuts from the paper pack.

  • Add some Adhesive-Backed Pearls.


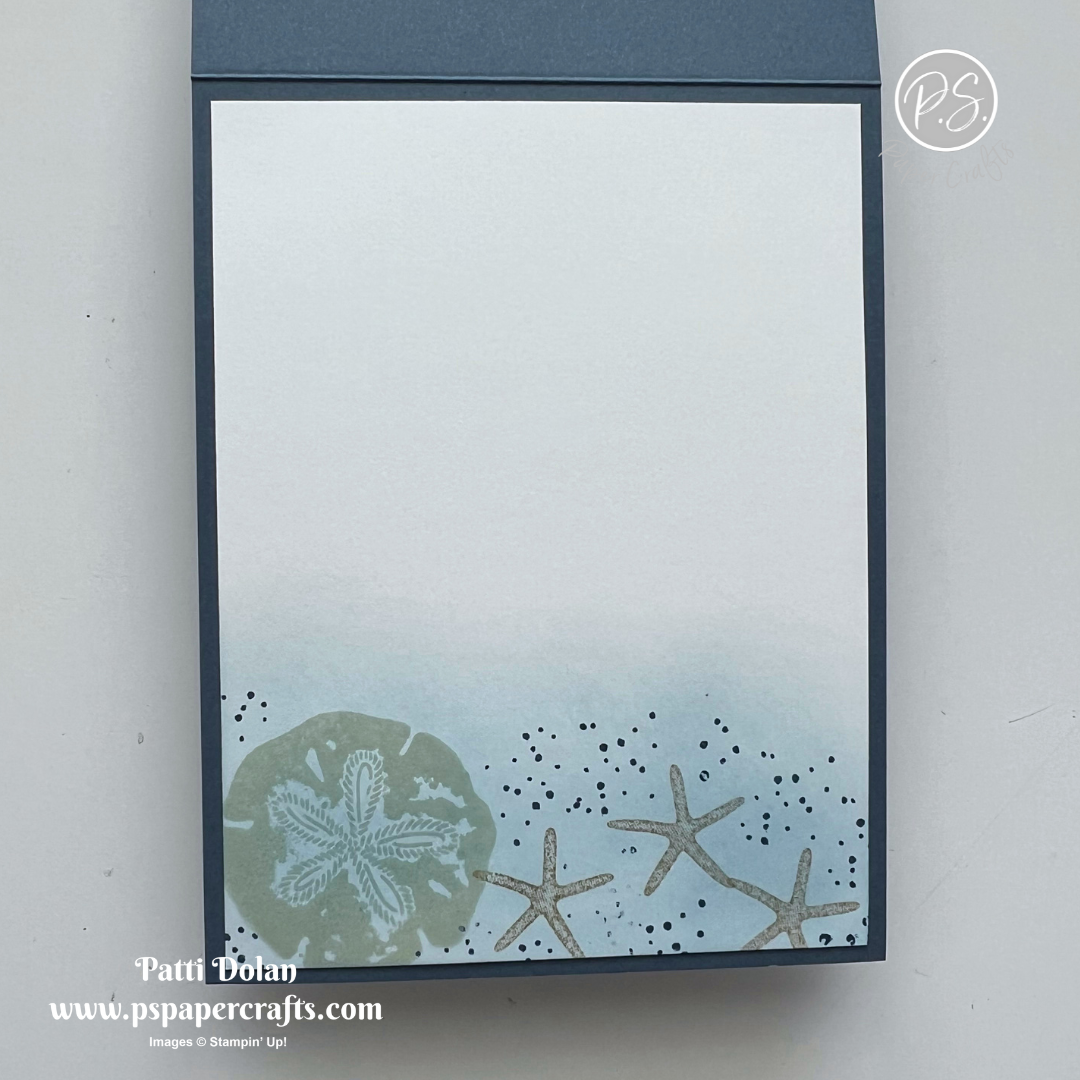
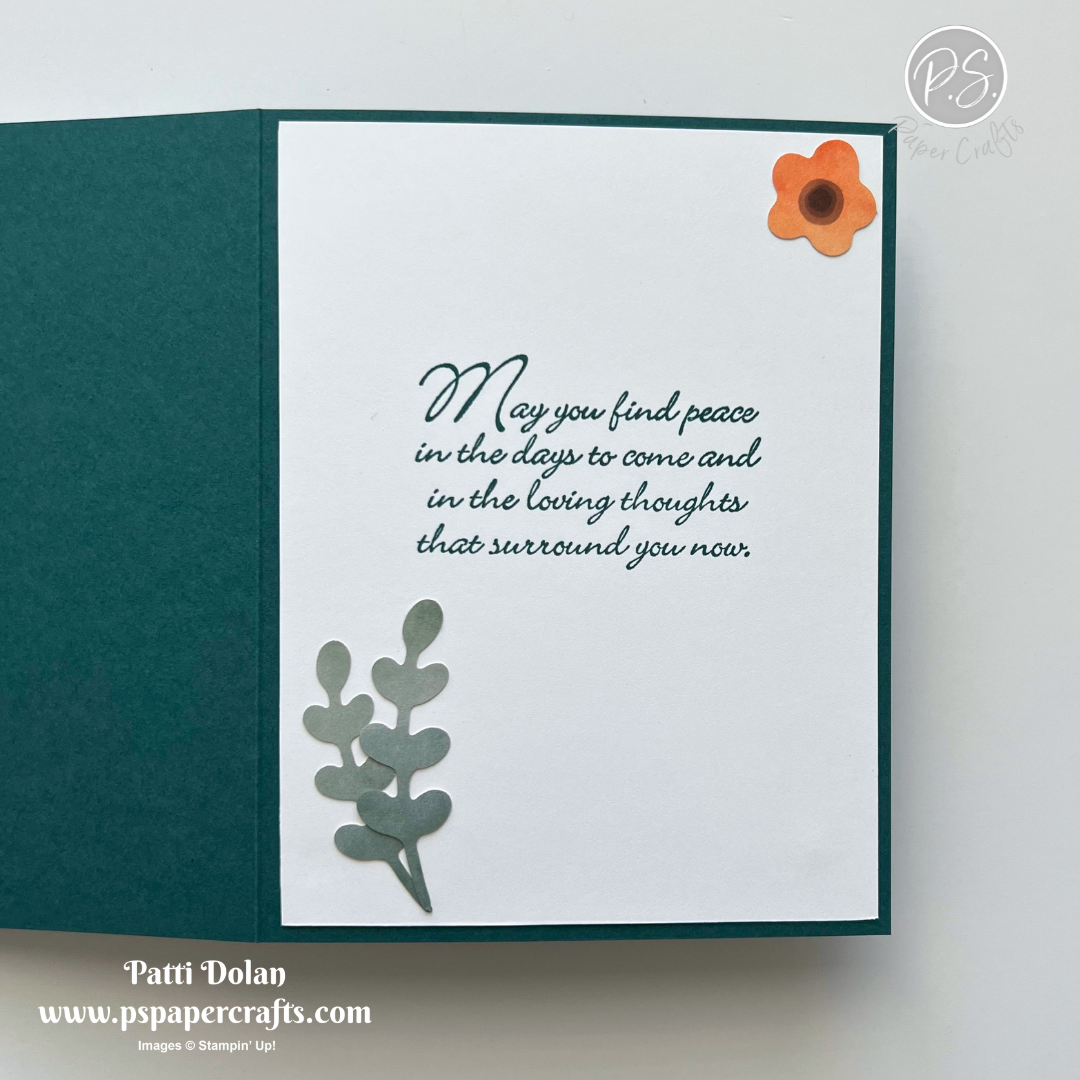
On the inside layer (4 x 5 1/4), stamp sentiment in Pretty Peacock ink. Adhere some of the die cuts. I used the greenery and a flower.


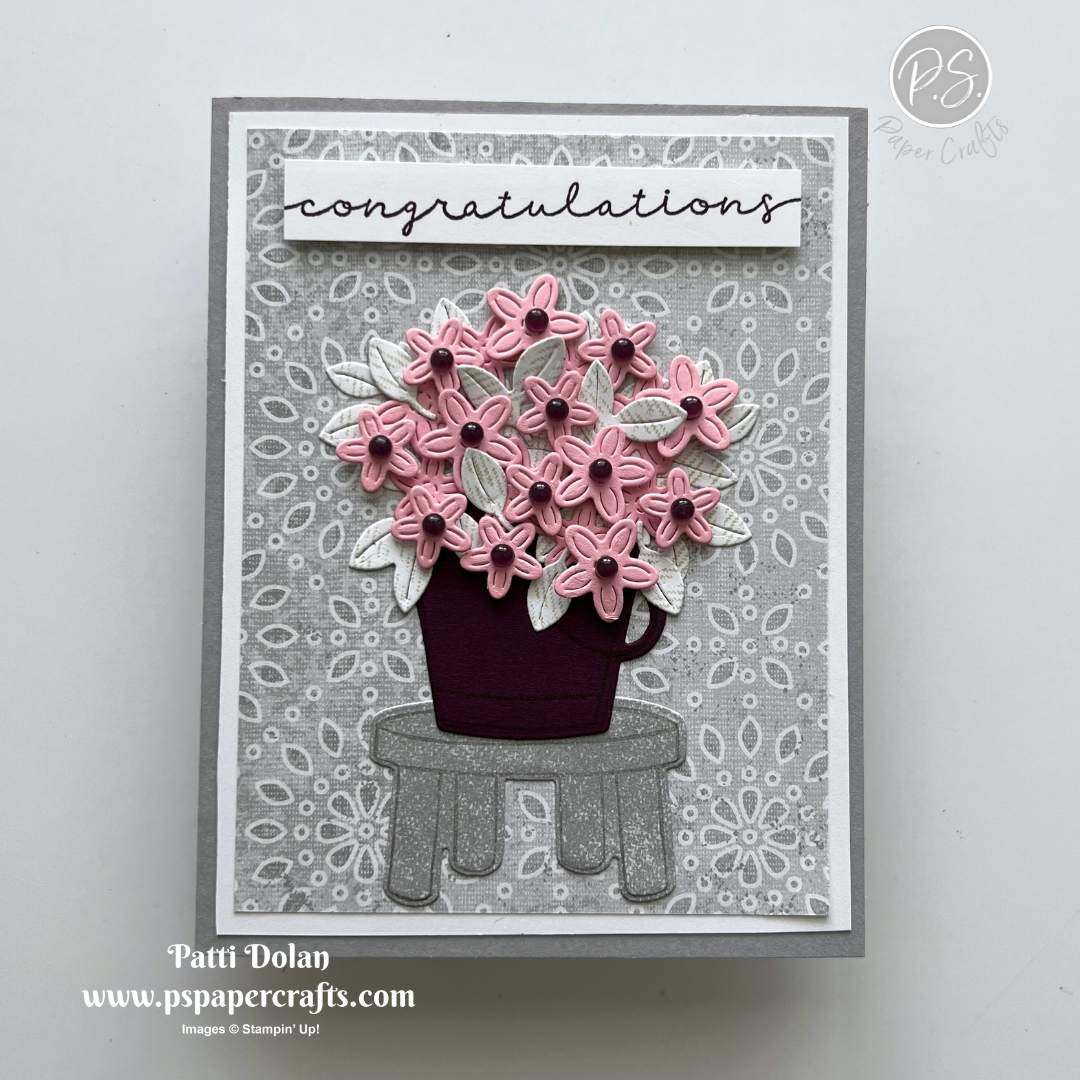
I love the pop of orange that the flowers give to the card.


Supply List

You can click on the item to purchase it from my Online Store.

Arrow Fold Cards

I made these Arrow Fold Cards on my YouTube Video today. They turned out so pretty!


Watch the video to see step by step instructions to make this design.

Click on the button below to get a printable pdf with measurements and instructions.


This card was made using some new Online Exclusive products that will be available for purchase starting July 3, 2024. I used the Season of Green & Gold Specialty Designer Series Paper and Greetings of the Season Bundle.


I made this Birthday Day Card using the Mediterranean Blooms Designer Series Paper. The sentiments and label are from the Round We Go Bundle


Supply List

You can click on the item to purchase it from my Online Store.

Please note - Season Of Green & Gold Suite of products are available starting July 3, 2024 so they are not listed in the Supply List)

Changing Leaves - Color Combo

Here’s a sneak peek of some new Online Exclusive products that will be available starting July 3, 2024. I used the Changing Leaves Bundle which has a stamp set and hybrid embossing folder.


I used this week’s Color Combo from my June Inspiration Calendar - Lemon Lime Twist, Flirty Flamingo and Pretty Peacock. You can get my calendar each month when you subscribe to my email list.


Tips & Instructions

  • Pretty Peacock Card Base - 5 1/2 x 8 1/2, score at 4 1/4

  • Basic White Layer - 4 x 5 1/4, emboss using the Changing Leaves Embossing Folder

  • Stamp the leaves on Basic White in Pretty Peacock, Lemon Lime Twist and Flirty Flamingo. I used 3 different pieces of cardstock and ran them through my Stampin’ Cut & Emboss Machine 3 separate times. Put the die into the folder, it will lock into place and then put the stamped images in lining them up to cut and emboss.

  • Adhere the die cut pieces to the white embossed layer lining them up so they sit directly on top of the coordinating leaves. They will hang over a little and you can trim off that part.

  • Wrap Linen Thread around 3 times and adhere to the back of the layer. Adhere layer to card base.

  • Die cut the label from a scrap of Pretty Peacock. Stamp the sentiment in Versamark ink and heat emboss with White Embossing Powder. Adhere to the card with Dimensionals.

  • Tie a bow with Linen Thread and adhere with a Glue Dot.

  • Add some Transparent Adhesive-Backed Dots.


On the inside layer (4 x 5 1/4), stamp the leaves in Pretty Peacock ink.


It’s hard to see the texture from the embossing folder on the leaves in the picture but in person, they are beautiful.


Supply List

You can click on the item to purchase it from my Online Store.

NOTE - The Changing Leaves Bundle will be available for ordering starting July 3, 2024.

Sketch Challenge - Pets & More

I love the Pets & More Stamp Set. It’s a reversible set which means you can ink up and stamp both sides of the stamp. I stamped the detailed images in Black Memento cleaned my stamps, flipped them over and inked the filler with a color. I stamped off each time toget a lighter shade.


I made this card for the weekly Splitcoaststampers SketchChallenge. Here’s the sketch I used. You can see all the projects posted for this week’s challenge by clicking on the sketch below.


Tips & Instructions

  • Basic Black Card Base - 5 1/2 x 8 1/2, score at 4 1/4

  • Peach Pie Layer - 4 x 5 1/4, adhere to the card base.

  • Basic White Layer - 3 3/4 x 5, use a Basic Black Stampin’ Write Marker (or Stampin’ Blends or Sharpie) to draw the lines on the card. I used a ruler and just started drawing like the sketch.

  • Die cut 3 circles from Basic White using the Stylish Shapes Dies. I used the 2nd from largest, 3rd from largest and 4th from largest.

  • Stamp the pet images on each circle in Black Memento Ink. Clean the stamps and flip them over. Ink up the back of the stamp and stamp off to get a lighter shade and then stamp on each image to fill them in. I used Pecan Pie on the dog, Peach Pie on the Cat and Lemon Lime Twist on the parrot.

  • Lay them out on the white layer to determine placement and stamp sentiment in Black Memento Ink. The sentiment is from the Hope You Know Stamp Set. Adhere the layer to the card.

  • Adhere the circles to the card with Dimensionals.

  • Add some Adhesive-Backed Sparkle Gems.


On the inside layer (4 x 5 1/4), stamp the pets across the bottom just the way you did on the circles.


Aren’t they so cute. This is a great card for a pet lover.


Supply List

You can click on the item to purchase it from my Online Store.

Sketch Saturday - Blueberry Bunches

I made this pretty Thank You Card for the weekly Atlantic Hearts Sketch Challenge using the Blueberry Bunches Stamp Set.


Here’s the sketch I used. I colored the Paper Butterfly Accents with Stampin’ Blends Markers.


Tips & Instructions

  • Blueberry Bushel Card Base - 5 1/2 x 8 1/2, score at 4 1/4

  • Basic White Layer - 4 x 5 1/4, emboss using the Cane Weave 3D Embossing Folder and adhere to the card base.

  • Granny Apple Green Strip - 1 1/4 x 5 1/4, adhere to card.

  • Basic White Layer - 3 x 4 1/4, stamp the blueberry bunches at the top and bottom corners of the layer in Black Memento ink. Color with Stampin’ Blends Markers. I colored the berries with Dark and Light Blueberry Bushel and the leaves with Light Granny Apple Green.

  • Stamp the sentiment in Blueberry Bushel ink.

  • Adhere layer to the card.

  • Color 2 Paper Butterfly Accents with Dark Lemon Lolly and Black Stampin’ Blends Markers and adhere to the card.


On the inside layer (4 x 5 1/4), stamp the blueberry bunch image in Black Memento ink and color with Blueberry Bushel and Granny Apply Green Stampin’ Blends Markers.


I love the embossed layer with the blueberries and those butterflies; a perfect garden scene.


Supply List

You can click on the item to purchase it from my Online Store.

Triple Floating Diamond Cards

These Triple Floating Diamond Cards are beautiful and they open and sit so nicely. This is a great design to sit on a shelf for the recipient to look at.


Watch the video to see step by step instructions to make this design.

Click on the button below to get a printable pdf with measurements and instructions.


Both cards were made using the Wildly Flowering Designer Series Paper which has beautiful floral prints. This one focuses on the Moody Mauve color.


This card was made in Misty Moonlight. The sentiment and label were made using the Unbounded Love Stamp Set and Dies.


Supply List

You can click on the item to purchase it from my Online Store.

Magnolia Mood - Color Combo

When I saw the color combo on this week’s Inspiration Calendar I knew I would make a floral card. I used the Magnolia Mood Stamp Set and Dies which are gorgeous.


The color combo is Granny Apple Green, Calypso Coral and Balmy Blue. You can get my Inspiration Calendar and play along when you subscribe to my email list.


Tips & Instructions

  • Balmy Blue Card Base - 5 1/2 x 8 1/2, score at 4 1/4

  • Basic White Layer - 3 7/8 x 5 1/8

  • Basic White Layer - 3 3/4 x 5, blend Balmy Blue Ink with a Blending Brush. Adhere to the Basic White Layer and then to to card base.

  • Stamp the large, medium and small floral images on Basic White in Black Memento ink. Color with Light Granny Apple Green and Light & Dark Calypso Coral Stampin’ Blends Markers. Die cut with coordinating dies.

  • Stamp sentiment on 3/4” strip of Basic White in Black Memento ink.

  • Adhere the large floral image with Dimensionals and the 2 smaller images with Liquid Glue or the adhesive of your choice.

  • Adhere the sentiment label with Dimensionals.


On the inside layer (4 x 5 1/4), stamp the sentiment in Black Memento ink. The sentiment is from the So Sincere Stamp Set. Stamp 3 of the small floral images across the bottom starting with the middle one. Color with Light Granny Apple Green and Light Calypso Coral Stampin’ Blends Markers.


I love the black lines in the images, they add a realistic feel to the flowers and leaves.


Supply List

You can click on the item to purchase it from my Online Store.

Sketch Challenge - Rhino Ready

Here’s my card for this week’s Sketch Challenge from Splitcoaststampers using the adorable Rhino Ready Stamp Set. Isn’t it cute?


This is the sketch I used. You can see all the projects posted for this week’s challenge by clicking on the sketch below.


Tips & Instructions

  • Shy Shamrock Card Base - 5 1/2 x 8 1/2, score at 4 1/4.

  • Shy Shamrock Layer - 4 x 5 1/4, cut the archway lining it up along the bottom so it cuts off completely. Emboss using the Fern 3D Embossing Folder.

  • Cut a second archway from Basic White and use the center piece to stamp on. Lay the white piece in the embossed piece and trim the bottom if needed so it lines up.

  • Stamp the rhino in Black Memento ink and color with Gray Granite Stampin’ Blends Markers. Color the toenails with a Dark Petunia Pop Stampin’ Blends Marker. Stamp the sentiment in Petunia Pop ink. Stamp some grass in Shy Shamrock ink.

  • Adhere the embossed layer to the card base and the white stamped layer to the card base.

  • Add some Petunia Pop Adhesive-Backed Pearls.


On the inside layer (4 x 5 1/4), stamp the sentiment in Petunia Pop ink. Stamp the rhino in Black Memento ink and color it with Stampin’ Blends Markers. I used Gray Granite for the rhino, Light Azure Afternoon for the bird and Dark Peach Pie for the beak.


I love how the Fern Embossed layer looks like the rhino is in the jungle.


Supply List

You can click on the item to purchase it from my Online Store.

Sketch Saturday - Graduation Card

I was able to work in a graduation card for this week’s Sketch Challenge. It’s so great that you can make a card with the colors of a school and add the year to personalize it.


Here’s the sketch I used from the weekly Atlantic Hearts Sketch Challenge.


Tips & Instructions

  • Shaded Spruce Card Base -5 1/2 x 8 1/2, score at 4 1/4

  • Basic White Layer - 4 1/8 x 5 3/8, adhere to the card base.

  • Regals 6 x 6 Designer Series Paper - 2 x 5, banner bottom end. Adhere to the card.

  • Regals 6 x 6 Designer Series Paper - 3 x 3 1/2, adhere to the card.

  • Shaded Spruce Strip - 1/2 x 4 1/8, adhere to the card.

  • Basic White - Die cut circle from the Spotlight On Nature Dies.

  • Die cut the year from Shade Spruce using the Alphabet A La Mode Dies. Adhere to the circle.

  • Create a graduation cap from Shaded Spruce. I found the directions at Julie B’s Blog. Click the button below the instructions to get to her blog. I added a small punched circle to the cap.

  • Adhere the cap to the circle and then adhere to the card.

On the inside layer (4 x 5 1/4), stamp diploma in Black Memento ink and the sentiment in Shaded Spruce Ink.


You can make this card in any color, just change up the papers. We have the 6 x 6 Designer Series Papers in all of the Stampin’ Up! colors.


Supply List

You can click on the item to purchase it from my Online Store.

Waterfall Fun Fold Cards

The Waterfall Card Design is so fun. You create this waterfall on the card front where you pull the tab and the different panels pop up. These are great for kids or for anyone who you think would like an interactive card.


Watch the video to see step by step instructions to make this design.

Click on the button below to get a printable pdf with measurements and instructions.


This card was made using the Unbounded Beauty Designer Series Paper. I cut some of the floral designs for the waterfall. I love how our products all coordinate, the Designer Series Paper, cardstock, ink and ribbon! It makes it so easy to pull a card together.


This adorable card was made using the Fluffiest Friends Stamp Set. These critters are so cute!


Supply List

You can click on the item to purchase it from my Online Store.

Round We Go Color Combo

Isn’t this a fun Birthday Card? I used the Round We Go Bundle. You can stamp and cut the pinwheels and create pretty rosettes to create a great card for a celebration.


I used the Color Combo from my June Inspiration Calendar - Poppy Parade, Blueberry Bushel and Daffodil Delight. You can get my calendar each month when you subscribe to my email list.


Tips & Instructions

  • Poppy Parade Card Base - 4 1/4 x 11, score at 5 1/2

  • Brights Designer Series Paper (Poppy Parade) - die cut 2 strips to create the rosette. Fold them back and forth on the score lines and glue to two pieces together to make the rosette. Die cut a small circle to glue to the back to hold the rosette together.

  • Use the scalloped circle die and die with the holes to create the label. Take a piece of Basic White and put the scalloped die on it and the circle with the holes centered on the cardstock. Die cut and then stamp the sentiment in Daffodil Delight ink. Adhere to the front of the rosette.

  • Stamp the larger pinwheel image in Blueberry Bushel ink, lift and rotate to line up the stamp over the white part and stamp to create the two-tone pinwheel. Die cut with coordinating die. Die cut the circle from Blueberry Bushel and adhere to the center.

  • Repeat the above step for the smaller pinwheel using Poppy Parade ink.

  • Basic White Layer - 3 1/2 x 5 1/2, stamp the stars in Daffodil Delight on the layer to create the background.

  • Cut 2 strips of the Designer Series Paper at 1/2 x 5 1/2. Adhere to the outer edges of the card front. Adhere the white stamped layer to the card front.

  • Adhere the pinwheels and rosette.

  • Add some Blueberry Bushel Tinsel Gems.


For the inside layer, cut the white layer at 3 1/2 x 5 1/2 and 2 more strips of the Designer Series Paper at 1/2 x 5 1/2. Trim them all down just a little bit so they fit with the card folding.

Stamp the sentiment in Blueberry Bushel ink and the stars in Daffodil Delight ink.

Adhere the Designer Series Paper strips on each edge and then the white layer.


This card would be great for any sort of celebration. Change up the colors for a graduation!


Supply List

You can click on the item to purchase it from my Online Store.

Sketch Challenge - Seaside Wishes

This is the first time I used the Seaside Wishes Hybrid Embossing Folder. It’s amazing that you can cut and emboss the sand dollar in one pass through your machine.


Here’s the sketch I used from Splitcoaststampers. It was a real challenge for me. What you you make?

You can see all the projects posted for this week’s challenge by clicking on the sketch below.


Tips & Instructions

  • Misty Moonlight Card Base - 4 1/4 x 11, score at 5 1/2 (top folding)

  • Pool Party Layer - 4 x 5 1/4, adhere to the card.

  • Basic Beige - die cut & emboss the sand dollars using the Seaside Wishes Hybrid Embossing Folder. I used the smallest sand dollar for this card and saved the other 2 for future projects.

  • Misty Moonlight Mat - 2 3/4 x 3 1/2

  • Basic White Layer - 2 1/2 x 3 1/4, lightly ink blend using a Blending Brush and Misty Moonlight ink.

  • Stamp 3 starfish on Basic White in Crumb Cake ink. Die cut with coordinating die.

  • Die cut 3 sea plants from Old Olive and trim off the bottoms.

  • Adhere the ink blended layer to the Misty Moonlight mat. Adhere to the card.

  • Stamp the bubbles across the Pool Party and ink blended layer as shown.

  • Stamp sentiment (from Something Fancy Stamp Set) on 1/4” x 2 strip of Basic White in Misty Moonlight ink. Adhere to a 3/8” x 2 1/4 strip of Basic Beige and adhere to the card.

  • Adhere the sand dollar using Dimensionals.

  • Adhere the sea plants and starfish.

  • Add some Pool Party Glossy Dots.


On the inside layer (4 x 5 1/4), ink blend Misty Moonlight ink at the bottom of the layer. Stamp the sand dollar in Basic Beige ink and starfish in Crumb Cake ink. Stamp some bubbles around in Misty Moonlight ink.


Look at how realistic that sand dollar looks!


Supply List

You can click on the item to purchase it from my Online Store.

Mediterranean Blooms Tutorial

I made this card for the June Simple Suite Stampers Tutorial Bundle. We’re featuring the Mediterranean Blooms Suite.


You can get this tutorial for free when you place a $35 product order from my Online Store or you can purchase it here by clicking on the Tutorials at the top of this page. It contains 12 projects designed by different Demonstrators with pictures, measurements and instructions.


The Mediterranean Blooms Designer Series Paper has fun citrus fruit patterns on one side and beautiful blue and white tilework patterns on the other.


I didn’t stamp on the inside layer but used a piece of the Designer Series Paper behind my white layer.


There’s a great large leafy die that you can use to create this pretty layer on the card front.


Supply List

You can click on the item to purchase it from my Online Store.

Sketch Saturday - Magnolia Mood

Today’s pretty Birthday Card was made for the weekly Atlantic Hearts Sketch Challenge.


Here’s the sketch I used. The Magnolia Mood Bundle is one of the bundles is on sale during June, 2024 and you can save an additional 10%.


Tips & Instructions

  • Thick Basic White Card Base - 5 1/2 x 8 1/2, score at 4 1/4

  • Regals Designer Series Paper (Old Olive) - 4 x 5 1/2

  • Cut circle from Basic White using the Deckled Circle Dies.

  • Stamp sentiment in Black Memento ink on the circle and adhere to the Designer Series Paper layer letting it hang over the edge a little. Cut off the part that’s hanging over the edge.

  • Stamp the large floral image on Basic White in Black Memento ink and color with Stampin’ Blends Markers. I used Light Flirty Flamingo, Light Old Olive and Light Wild Wheat. Cut with coordinating die and adhere to the card with Dimensionals.

  • Add some Iridescent Faceted Gems.


On the inside layer (4 x 5 1/4), stamp sentiment and small floral image in Black Memento ink. Color the flower with Light Flirty Flamingo and Old Olive Stampin’ Blends Markers.


This magnolia is so pretty, I love how the black lines from the stamp show through the colors.


Supply List

You can click on the item to purchase it from my Online Store.

Fun Tunnel Cards

On today’s video I’ll show you how to make these fun Tunnel Cards. When you open them, you’ll see a pop-up window with a pretty scene behind it.


Watch the video to see step by step instructions to make this design.

Click on the button below to get a printable pdf with measurements and instructions.


This card was made using the Full Of Life Designer Series Paper. I used the Beauty Of The Deep Stamp Set and Dies and the sentiment is from the Gone Fishing Stamp Set.


I made Thanks Card using the Thoughtful Journey Designer Series Paper along with the Thoughtful Wishes Stamp Set.


Supply List

You can click on the item to purchase it from my Online Store.

Country Flowers Color Combo

My neighbor asked me to make a card for her son’s engagement and I decided to make one using this week’s color combo and the Country Flowers Bundle.


The color combo is from my June Inspiration Calendar - Pretty in Pink, Blackberry Bliss and Smoky Slate. You can get my calendar each month when you subscribe to my email list.


Tips & Instructions

  • Smoky Slate Card Base - 5 1/2 x 8 1/2, score at 4 1/4.

  • Basic White Layer - 4 x 5 1/4, adhere to the card base.

  • Country Lace Designer Series Paper - 3 3/4 x 5, adhere to the card.

  • Stamp the stool on a piece of gray patterned paper from the Country Lace Designer Series Paper in Smoky Slate ink and die cut with the coordinating die.

  • Stamp the jug on a piece of Blackberry Bliss Cardstock in Blackberry Bliss ink and die cut with the coordinating die.

  • Die cut a bunch of flowers from Pretty in Pink Cardstock.

  • Die cut a bunch of leaves from the light gray pattern from the Country Lace Designer Series Paper. I cut 2 of the large groupings of leaves to use as the base.

  • Stamp the sentiment on a 1/2” strip of Basic White in Blackberry Bliss ink. The sentiment is from the Sweetly Scripted Stamp Set.

  • Adhere the stool and jug to the card.

  • Arrange the leaves and flowers and adhere to the card. I used Mini Dimensionals for some of the top flowers. Make sure there is room for the sentiment.

  • Adhere the sentiment to the card using Dimensionals.

  • Add some small Blackberry Bliss Transparent Adhesive-Backed Dots.


On the inside layer (4 x 5 1/4), stamp the sentiment in Blackberry Bliss ink and the leaves in Smoky Slate ink. I used the Lifetime of Love Stamp Set for the inside.


When I’m working on a color combo, I always search on the Stampin’ Up! website for the colors to see what products have those colors. I was happy to see the different patterns of Smoky Slate and used 3 patterns on this card.


Supply List

You can click on the item to purchase it from my Online Store.

Sketch Challenge - Garden Meadow

This week’s Sketch Challenge from Splitcoaststampers was a fun one. I knew I would use the die from the Garden Meadow set and once I picked the patterned paper I was all set.


Here’s the sketch I used. You can see all the projects posted for this week’s challenge by clicking on the sketch below.


Tips & Instructions

  • Crumb Cake Card Base - 5 1/2 x 8 1/2, score at 4 1/4

  • Blackberry Bliss Layer - 4 x 5 1/4, adhere to the card base.

  • Perennial Lavender Designer Series Paper (gingham design) - 3 3/4 x 5

  • Perennial Lavender Designer Series Paper (floral design) 3 3/4 x ~4
    Note - pick the design you want to use and lay the Garden Meadow Die over it to make sureit will cut the design you want to show. I wanted the flowers with the 2 butterflies.

  • Lay the floral piece of the Designer Series Paper over the gingham layer and die cut using the Garden Meadow Die.

  • Adhere the gingham piece to the card and the floral piece to fit into the gingham piece.

  • Crumb Cake Strip - 1/2 x 4 3/4, emboss using the Cane Weave 3D Embossing Folder. Cut into 2 pieces one a little shorter than the other. Cut the ends to make a point. Adhere to the card.

  • Stamp sentiment on 1/2” strip of Basic White in Blackberry Bliss ink. Cut both ends to make a point. Adhere to the card with Dimensionals.

  • Add some Transparent Adhesive-Backed Dots.


Inside Layers

  • Blackberry Bliss - 4 x 5 1/4

  • Basic White - 3 3/4 x 5

  • Stamp sentiment (from the Unbounded Love Stamp Set) in Blackberry Bliss ink.

  • Add a 3/4 x 3 3/4 strip of Designer Series Paper.


I wasn’t sure about how this card would come together but I’m happy with how it turned out.


Supply List

You can click on the item to purchase it from my Online Store.

Sketch Saturday - Patriotic Card

I made a Patriotic Card for this week’s Atlantic Hearts Sketch Challenge. This is a great card for the Fourth of July!


Here’s the sketch I used. It’s a great way to use scraps of paper.


Tips & Instructions

  • Night of Navy Card Base - 5 1/2 x 8 1/2, score at 4 1/4

  • Basic White Layer - 5 1/8 x 3 7/8

  • Cut strips of Night of Navy, Real Red and Basic white at various lengths and 3/4” wide.

  • Adhere the strips on the white layer letting the ends hang over the side. Once all are adhered, snip off the ends that are hanging over.

  • Adhere the layer to a piece of Basic White cut to 4 x 5 1/4. Adhere layer to the card base.

  • Die cut the USA letters from Real Red using the Mini Alphabet Dies and adhere to a piece of Basic White cut to 1 x 1 3/4.

  • Adhere the sentiment layer to a piece of Night of Navy cut to 1 1/4 x 2. Adhere to the card with Dimensionals.

  • Die cut 3 large stars from Night of Navy, Real Red and Basic White using the Kiddin’ Around Dies. Adhere to the card.


On the inside layer (4 x 5 1/4), stamp the sentiment in Night of Navy ink. The sentiment is from the Simply Said Mix & Match Stamp Set. Die cut one large star from Real Red and 2 small stars from Night of Navy and adhere to the layer.


I love that you can use the Mini Alphabet Dies to spell out what you want. They are not too big so they come in handy for all sorts of sentiments or names.


Supply List

You can click on the item to purchase it from my Online Store.