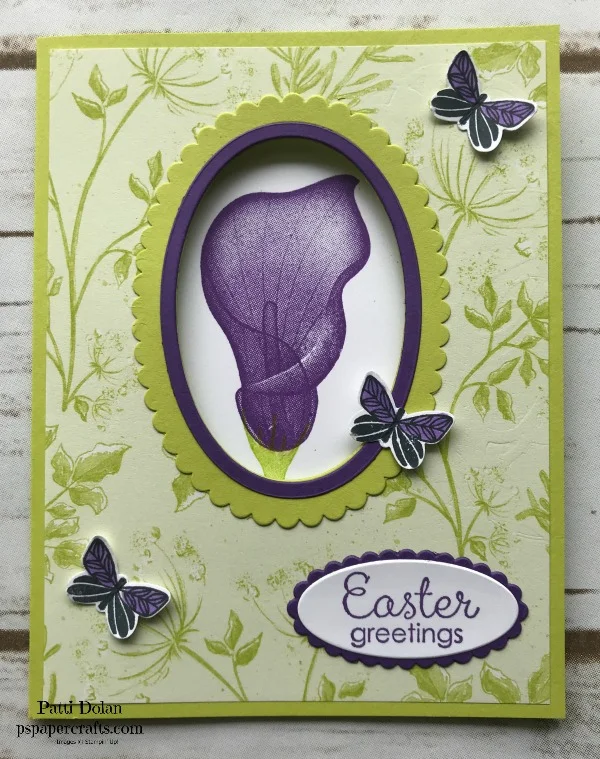
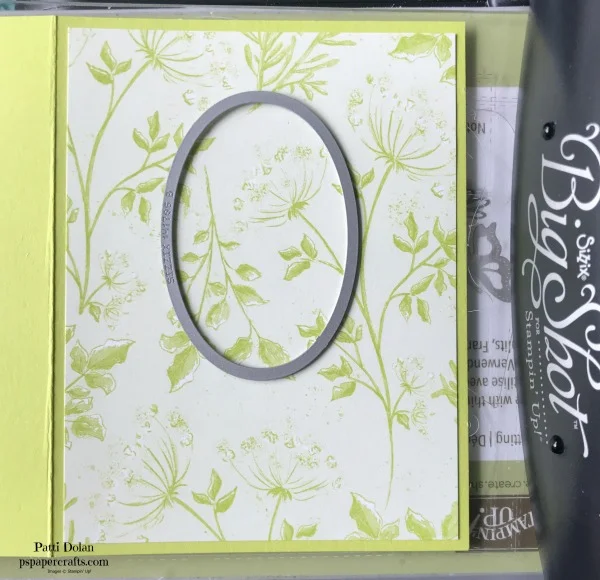
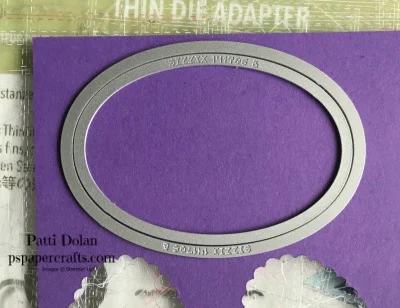
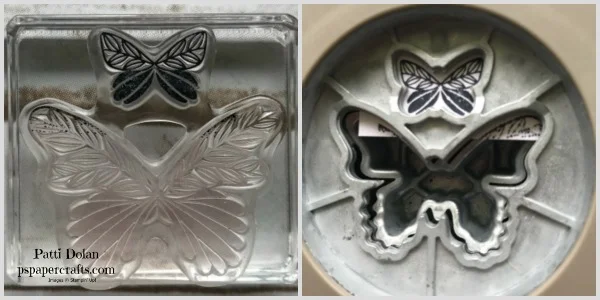
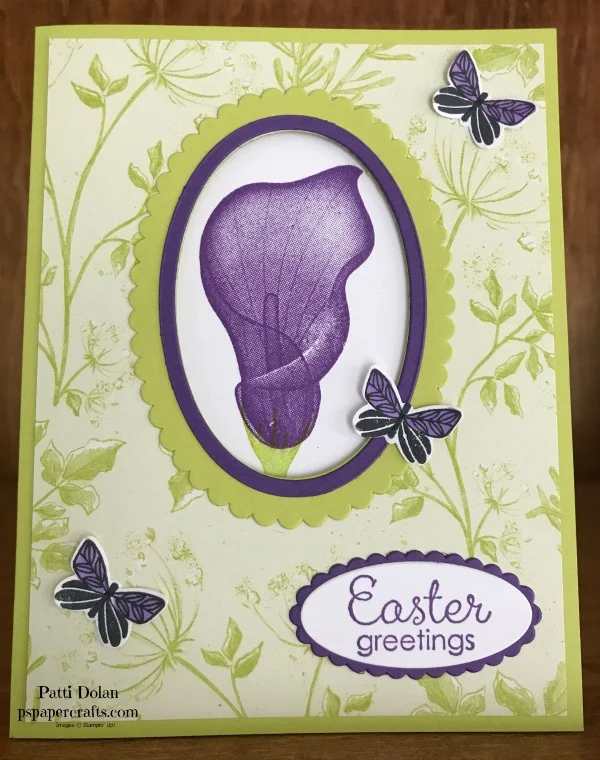
Using the largest scalloped oval and the 4th largest oval cut a piece of Lemon Lime Twist Cardstock. Lay the oval within the scalloped oval and cut together to create a scalloped layer.
His Grace / Thinking Of You & Easter Cards
I love the floral images in the His Grace Stamp Set. You definitely need to use the Stamparatus to line it up correctly, but that was easy to do. The colors for these cards are Highland Heather and Granny Apple Green; what a great combination!
Take a look at the video to see how to stamp this with the Stamparatus!
Using the sentiment from Rooted in Nature, I made a great Thinking Of You Card. The flowers were colored with a Light Highland Heather Stampin’ Blends Marker and the leaves with a Light Granny Apple Green Stampin’ Blends Marker. You can get a combo pack or just the singles. I used the Color Lifter to do some cleanup. All these choices are listed in the Product at the end of the post for easy shopping.
This card was the reason I purchased this set. It’s a beautiful Easter Card. The card is cut as a top-folding but I have it made as a side-folding card. Watch the video to see what I mean.
Card Dimensions:
Highland Heather Card Base - 4 1/4 x 8 1/2, scored at 5 1/2 OR
Granny Apple Green Card Base - 4 1/4 x 8 1/2, scored at 5 1/2Whisper White Layer - 5 1/4 x 4
If you want any of the products I used on this project, just click on the item below or the Shop Now button and it will bring you to my Online Store. Please use the current Host Code when you go to checkout your order. You can also click directly on an item to order.
All Adorned - Fun FREE Stamp Set During Sale-A-Bration!
This was a fun card to make with the All Adorned Stamp Set. You can get this for FREE with a $50 purchase through March 31, 2019. I love the combination of Tranquil Tide and Mint Macaron. Just a touch of Fresh Fig pulls it all together.
The dimensions are:
Mint Macaron Card Base - 5 1/2 x 8 1/2, scored at 4 1/4
Fresh Fig Layer - 5 1/8 x 3 7/8
Very Vanilla Layer - 5 x 3 3/4
First stamp the sentiment with the 3 hearts below so you get an idea of where to stamp the images.
Next stamp the smaller image with Tranquil Tide to create at pattern, leaving a little space for the second image.
I like stamping the darker image first with this type of stamp so you can see through to stamp the second image. Line up the dark dots in the center of the circles.
Stamp the second image with Mint Macaron Ink. If its doesn’t line up perfectly, that’s ok. When it’s all finished, it won’t be noticeable.
I added some Fresh Fig Ruffled Ribbon to the side. No need for a bow with this ribbon. It’s pretty enough to stand on its own.
Here’s a look at the inside. The corner stamped image is so pretty.
If you want any of the products I used on this project, just click on the item below or the Shop Now button and it will bring you to my Online Store. Please use the current Host Code when you go to checkout your order. You can also click directly on an item to order.
HURRY, Sale-A-Bration ends March 31, 2019
Six Super Simple Greeting Cards
Using the Happiness Blooms Memories & More Cards along with the coordinating Cards & Envelopes, I was able to quickly make these six cards. I love the colors and that it coordinates with the other products in the Happiness Blooms Suite.
Watch the video to see all six cards. I add embellishments at the end!
I used a 4x6 and a 3x4 Memories & More card for this one. The smaller card was backed with a 3 1/4 x 4 1/4 piece of Night of Navy Cardstock and then popped up with Dimensionals. One of the stickers was added below the sentiment.
The 3x4 Memories & More card was backed with a 3 1/4 x 4 1/4 layer of Pineapple Punch Cardstock and popped up with Dimensionals. Some of the Lovely Lipstick Enamel Dots were added to finish it off.
This is probably the most complicated card but believe me, it was easy. A piece of Pineapple Punch Ribbon was adhered around the 4x6 Memories & More Card and then attached to the card base. I stamped a Happy Birthday sentiment with Night Of Navy Ink on a piece of Whisper White Cardstock and then punched it with the Pretty Label Punch. A second label was punched in Night of Navy and then cut in half and adhered to the white label to give it a background layer. This was attached using Dimensionals and then a bow was attached with a glue dot. Some of the stickers were added and then some Pineapple Punch Enamel Dots added to the centers to make them pop.
This is one of the smaller notecards. I stamped the sentiment from the Forever Lovely Stamp Set with Lovely Lipstick Ink. A few Lovely Lipstick Enamel Dots were added to step it up a little.
This was really easy; just a 3x4 Memories & More Card attached to the small card base.
For this one I just attached a 4x6 Memories & More Card on the larger card base.
Here’s a closer look at the Memories & More Card Pack.
This kit makes memory keeping a snap. Just adhere to a card front from the Happiness Blooms Memories & More Cards & Envelopes for instant cards.
* 50 total double-sided cards (2 each of 25 designs) in 3" x 4" (7.6 x 10.2 cm) and 4" x 6" (10.2 x 15.2 cm) sizes
* 6 single-sided 4" x 6" (10.2 x 15.2 cm) specialty cards
* 4 sticker sheets
Coordinating colors: Call Me Clover, Calypso Coral, Night of Navy, Lovely Lipstick, Pineapple Punch, white
The coordinating cards and envelopes really make it easy to create great cards.
Simplify your cardmaking. Just adhere cards from the Happiness Blooms Memories & More Card Pack to these card bases, and you’re done.
Use small note cards with 3" x 4" (7.6 x 10.2 cm) Memories & More cards. Use large note cards with 4" x 6" (10.2 x 15.2 cm) Memories & More cards.
* 20 Night of Navy card bases: 10 each in 2 sizes
* 20 coordinating envelopes: 10 each in 2 sizes
Coordinating colors: Night of Navy, white
If you want any of the products I used on this project, just click on the item below or the Shop Now button and it will bring you to my Online Store. Please use the current Host Code when you go to checkout your order. You can also click directly on an item to order.
Floral Romance Feminine Birthday Card
The Floral Romance Designer Series Paper is just gorgeous! Some of the sheets are vellum and I love the floral design on the one I used on these cards. I backed the vellum with Whisper White to make it brighter.
The video below will walk you through step by step on how to make this card.
The sentiment is from the Happy Birthday Gorgeous Stamp Set. That’s a good one to have for birthday sentiments. I cut a Whisper White label using the Stitched Label Framelits and then stamped the sentiment in Fresh Fig. The Frosted Flower Embellishments add a nice touch to bring it all together. I love how everything coordinates so well with Stampin’ Up! products.
The inside sentiment is from Forever Lovely. The stems and leaves were stamped with Pear Pizzaz Ink and the flowers with Fresh Fig Ink. These images are from the Happy Birthday Gorgeous Stamp Set.
The other card has the Wishing You A Lovely Day on the outside and the Happy Birthday on the inside. I tied a piece of Whisper White Bakers Twine around and tied a bow.
Measurements for the cards:
Fresh Fig Card Base - 5 1/2 x 8 1/2, scored at 4 1/4
Whisper White Layer to put behind DSP Layer - 5 1/4 x 4
Floral Romance DSP Layer - 5 1/4 x 4
Scrap of Whisper White for Label
If you want any of the products I used on this project, just click on the item below or the Shop Now button and it will bring you to my Online Store. Please use the current Host Code when you go to checkout your order. You can also click directly on an item to order.
St. Patrick's Day - Good Luck Card
When I first saw this Happiness Blooms Designer Series Paper, I thought about St. Patrick’s Day and shamrocks. I knew I had to make some sort of shamrock card with it. Does that ever happen to you? You see something and immediately start thinking about how you are going to use it? Well, here’s what I came up with!
You can watch the video below to see how I pieced it all together.
Going through my framelits I found the perfect heart to make a shamrock with from the Support Ribbon set. I cut out three hearts from Call Me Clover Cardstock and then pieced them together to make the shamrock. I cut a stem freehand. To cover the center, I added a Happiness Blooms Enamel Dot and then adhered 3 dots at the bottom right to pull it altogether.
Measurements:
Call Me Clover Card Base - 5 1/2 x 8 1/2, scored at 4 1/4
Happiness Blooms DSP - 5 1/4 x 4
Call Me Clover Layer - 4 1/8 x 2 3/4
Whisper White Stitched Rectangle - 4th largest
Scraps of Call Me Clover for hearts and stem
The inside is pretty simple; I stamped 3 clover images from the Amazing Life Stamp Set. I’ll write Happy St. Patrick’s Day and a note.
If you want any of the products I used on this project, just click on the item below or the Shop Now button and it will bring you to my Online Store. Please use the current Host Code when you go to checkout your order. You can also click directly on an item to order.
Home To Roost - Just A Note
Here’s one more card with the rooster. I just couldn’t get enough of this stamp set.
This is free during Sale-A-Bration which ends March 31, 2019. The rooster image is great for masculine cards and I love the sentiments. I stamped the Just a note…. sentiment with Memento Black Ink on a 1/2” strip of Whisper White and then layered it on a 3/4” strip of Basic Black. The Banner Triple Punch was used to get the banner ends.
The colors are Calypso Coral and Basic Black. Below are the dimensions.
Calypso Coral Card Base - 5 1/2 x 8 1/2, scored at 4 1/4
Basic Black Layer - 5 1/4 x 4
Happiness Blooms Layer - 5 x 3 3/4
Happiness Blooms Strip - 4 1/4 x 3/4
Basic Black Scalloped Square
Whisper White Square 2 1/4 x 2 1/4
Basic Black Strip 3/4 x approx. 2 1/4
Whisper White Strip 1/2 x approx 2 1/4
The rooster was stamped in Memento Black Ink on the small white square and then colored with Watercolor Pencils. I used a Blender Pen over the Watercolor Pencils. The square was adhered to a Basic Black Scalloped Square and then popped up over the DSP strip using Dimensionals.
On the inside I just stamped the grass with Calypso Coral Ink, stamping directly and then stamping again without re-inking to get lighter shades.
If you want any of the products I used on this project, just click on the item below or the Shop Now button and it will bring you to my Online Store. Please use the current Host Code when you go to checkout your order. You can also click directly on an item to order.
Home To Roost - Masculine Birthday Card
This week I’m working with the Home To Roost Stamp Set which is FREE during Sale-A-Bration with a $50 order. This is a great birthday card for a guy don’t ya think?
Start off with a Bermuda Bay card base (5 1/2 x 8 1/2, scored at 4 1/4). Layer a 5 1/4 x 4 piece of Early Espresso and then add a 5 x 3 3/4 piece of Wood Textures Designer Series Paper (one of my favorites).
Stamp the Sentiment (from Perennial Birthday) in Bermuda Bay and the Rooster in Memento Black Ink. Then color using Stampin’ Blends (Bermuda Bay, Daffodil Delight and Pumpkin Pie) The hill was colored with Light Crumb Cake.
I wanted to stamp the grasses around the rooster without getting it on the rooster so I used the Masking Technique. To do this, stamp the image on a Post-It Note and cut around it. I cut close just at the bottom but didn’t do much with the top because I wasn’t going to stamp to high over the rooster. Adhere the Post-It Note over the stamped rooster.
Stamp the grasses with Crumb Cake Ink. I stamped direct and then without re-inking stamped again to get different shades.
Lift off the Post-It Note and you will see the rooster is clean, it was protected from the ink.
I wanted to add some gems to the card so I colored 3 Rhinestone Basic Jewels with the Bronze Stampin’ Blends Marker. These were added to the top left corner.
The sentiment on the inside is from the Perennial Birthday Stamp Set as well. It was stamped with Bermuda Bay Ink and the grasses were stamped with Crumb Cake Ink using the same method of stamping direct and then stamping a second time without re-inking.
If you want any of the products I used on this project, just click on the item below or the Shop Now button and it will bring you to my Online Store. Please use the current Host Code when you go to checkout your order. You can also click directly on an item to order.
Home To Roost - Masculine Card
The Home To Roost Stamp Set is a great one to have to make masculine cards and its FREE during Sale-A-Bration with a $50 order.
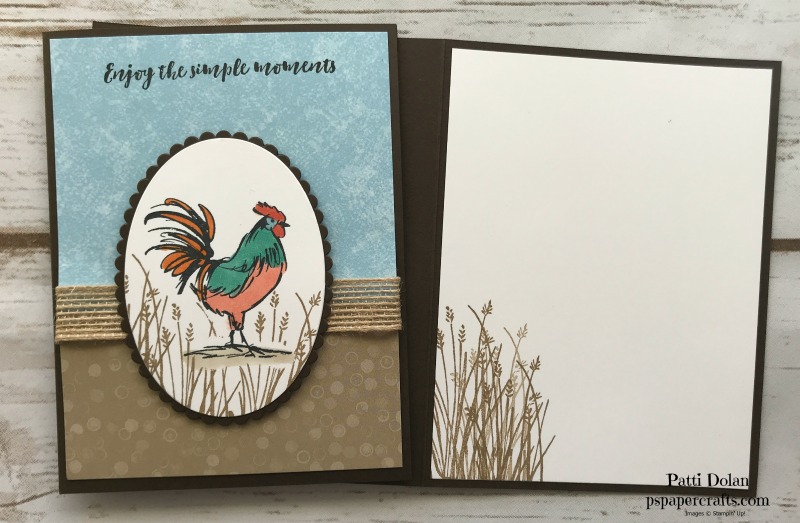
The Tranquil Textures Designer Series Paper has some great patterns and I had this Balmy Blue paper in mind for a sky background for a while. I thought about it when I saw the Rooster stamp. The Crumb Cake pattern with the dots, coordinates so well with it.
Take a look at the video to follow along with me while I make the card.
I used Stampin’ Blends Markers to color the rooster. This one was colored with Poppy Parade, Bermuda Bay, Pumpkin Pie and Balmy Blue. I used some Crumb Cake to color the hill he’s standing on.
I used the masking technique to stamp the grasses around him with Crumb Cake Ink. The sentiment was stamped with Early Espresso Ink.
For this card, I swapped out the Poppy Parade with Calypso Coral. The Burlap Ribbon adds a nice rustic touch to finish off the card.
For the inside, I just stamped the grasses in Crumb Cake Ink. I stamped straight on and then stamped again without re-inking to get a lighter shade.
If you want any of the products I used on this project, just click on the item below or the Shop Now button and it will bring you to my Online Store. Please use the current Host Code when you go to checkout your order. You can also click directly on an item to order.
Painted Seasons Thank You
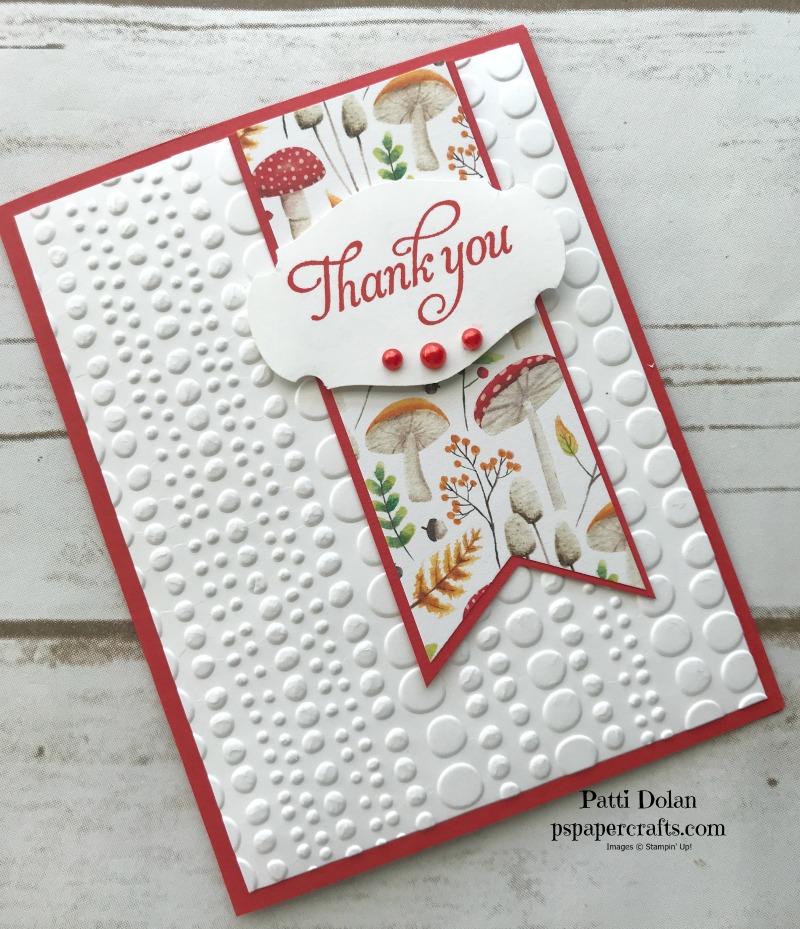
Here’s another card I made using the Painted Seasons Designer Series Paper (DSP). I love how well it coordinates with Poppy Parade Ink and Cardstock.
The card base is Poppy Parade (5 1/2 x 8 1/2, scored at 4 1/4) with a 5 1/4 x 4 layer of Whisper White Cardstock. The banner pieces are 1 3/4 x 4 1/4 (Poppy Parade) and 1 5/8 x 4 1/4.
The Dot To Dot Embossing folder gives you such a fun look and I think it goes well with the little dots on the mushrooms.
Using the Banner Triple Punch, I punched the tail end of the DSP and the background layer. I punch them together and then offset a bit at the tail and cut any extra at the top to make them even.
The sentiment is from the Humming Along Stamp set and it was punched out using the Story Label Punch which will be available March 1 thru March 31. I colored some Pearls with a Dark Poppy Parade Stampin’ Blends Marker. I love how you can coordinate everything with the same color.
I like how it came out. Its a bright and fun card to give to someone.
If you want any of the products I used on this project, just click on the item below or the Shop Now button and it will bring you to my Online Store. Please use the current Host Code when you go to checkout your order. You can also click directly on an item to order. The DSP is FREE as a bundle with the Painted Seasons Stamp Set with a $100 purchase during Sale-A-Bration.
Beautiful Succulents - Birthday Card
I’m having fun with the Painted Seasons Bundle. This is one of the FREE Sale-A-Bration items you can get if you spend $100 on Stampin’ Up! products. You get the stamp set and coordinating Designer Series Paper (DSP).
The colors in the DSP are perfect for stamping succulents. See how I added some pink to the tips, just like the DSP.
The main colors for this card are Lemon Lime Twist and the sentiment and popped up succulent are in Pool Party. The sentiment is from the Better Together Stamp Set from the Annual Catalog. It has some great sentiments; it’s a good set to have on-hand
I did the opposite on this card using Pool party as the main color and then stamping the sentiment and the popped up succulent in Lemon Lime Twist. Using a Stampin’ Blends Marker I added a little pink to the tips of each leaf.
The Dimensions are:
Lemon Lime Twist or Pool Party Card Base - 5 1/2 x 8 1/2, scored at 4 1/4
Painted Seasons DSP Layer - 5 1/4 x 4
Lemon Lime Twist or Pool Party Stitched Rectangle - 3rd from the largest
Whisper White Stitched Rectangle - 4th from the largest
Scrap for popped up succulent
Which color combo do you like better? Here’s a look at the inside. The inside sentiment is from the same Better Together Stamp Set.
Want more FREE product? The best deal around is to purchase the Starter Kit for $99 and get $175 worth of product along with free shipping. You’ll get a 20% discount on future orders. Interested? Email me or post a comment.
If you want any of the products I used on this project, just click on the item below or the Shop Now button and it will bring you to my Online Store. Please use the current Host Code when you go to checkout your order. You can also click directly on an item to order. Remember the Painted Seasons Bundle is FREE during Sale-A-Bration with a $100 order.
Painted Seasons - Get Well Card
Stampin’ Up! has come out with a second release of their Sale-A-Bration products that you can earn for FREE with qualifying purchases. One of my favorites from the second release is the Painted Seasons Bundle. The images on the stamp set and the Designer Series Paper (DSP) are gorgeous!
As you watch the video, you can see how easy it was to make this card. It’s simple but the DSP really makes it beautiful.
The sentiments are from the Needle & Thread Stamp Set. I just love the font on the “Sending you happiness & love” sentiment.
Here are the dimensions:
Call Me Clover card base - 5 1/2 x 8 1/2, scored at 4 1/4
Whisper White layer - 5 1/4 x 4
Painted Seasons DSP - 5 x 3 3/4
Call Me Clover strip - 4 1/4 x 1
Whisper White strip - 4 1/4 x 3/4
On the inside, I stamped the flower image with Mango Melody Ink, the sentiment with Call Me Clover Ink and the butterflies with Poppy Parade Ink. I stamped the butterflies on scrap before stamping on the cardstock to get a lighter color.
During Sale-A-Bration, you can get FREE products by spending $50 or $100 at my Online Store. That can be any product from the Annual Catalog, Occasions Catalog, Paper Pumpkin subscriptions or even the Clearance Rack!
If you want any of the products I used on this project, just click on the item below or the Shop Now button and it will bring you to my Online Store. Please use the current Host Code when you go to checkout your order. You can also click directly on an item to order.
Second Release Sale-A-Bration
Stampin’ Up! has a second release of their Sale-A-Bration products. There are new FREE items to choose from if you spend $50 or $100.
One of my favorite new items is the Painted Seasons Bundle. The Bundle includes a Stamp Set and some gorgeous Designer Series Paper. These are FREE with a $100 order. You can use this for all four seasons!
Take a look at this video to get a closer look at the Painted Seasons Bundle.
Click below to shop my online store and see the new products added to Sale-A-Bration!
If you order in the month of February, you will also receive a free pdf with pictures, instructions and supply lists for 8 beautiful projects. I’m collaborating with 7 other Demonstrators to create this pdf and will make it available for any order you place with me during the month of February. Just go to my online store and place your order and I will make the pdf available to you.
This month’s projects are all created with the products from the All My Love Suite.
Masculine Valentine Card
Sometimes you need to add a little wood to a project to make it more masculine. Valentines are usually so pretty; what about the guys? Wood Textures Designer Series Paper to the rescue!!!
The Be Mine Stitched Framelits have so many different options. I just love all the hearts that are connected together. Take a look at my video below to see how I used the Multipurpose Adhesive Sheets to adhere the hearts.
The card base is Lovely Lipstick Cardstock (5 1/2 x 8 1/2, scored at 4 1/4). I stamped the sentiment with Lovely Lipstick Ink on a layer of Whisper White Cardstock (5 1/4 x 4). All the hearts were cut from the Wood Texture DSP and I love all the shading of the wood.
The sentiment on the inside is from the Forever Lovely Stamp Set. I added some of the extra hearts from the cutout to the inside.
If you want any of the products I used on this project, just click on the item below or the Shop Now button and it will bring you to my Online Store. Please use the current Host Code when you go to checkout your order. You can also click directly on an item to order.
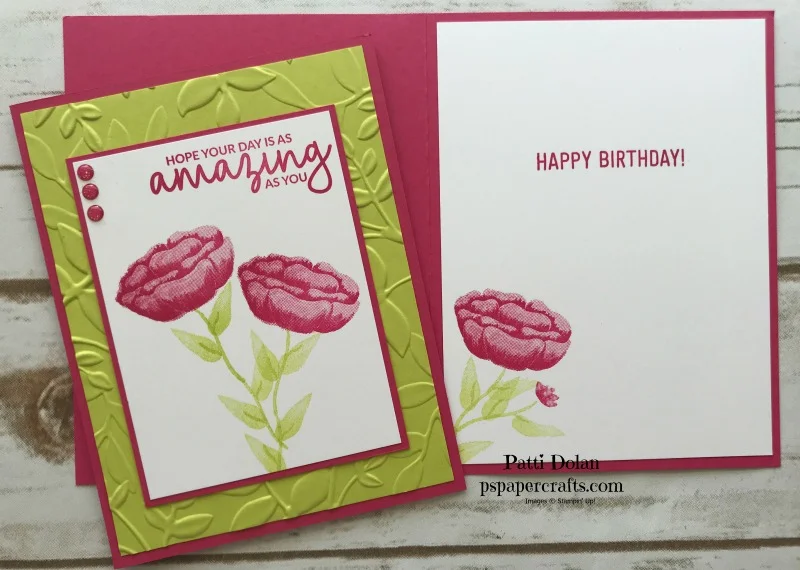
Simple Stamping - You Are Amazing
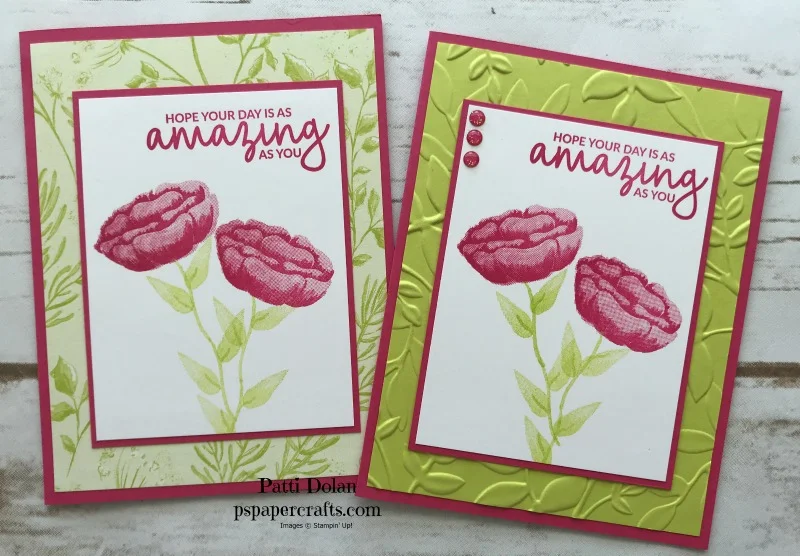
Stampin’ Up! is asking demonstrators to make simple cards to show how easy it is to create a beautiful card. This month it’s stamps, ink, cardstock and Designer Series Paper. I made the one on the left for this challenge and then the one on the right is stepped up a little but still very easy.
This stamp set is so pretty. Its called Incredible Like You and the flower images are two-step stamping which give such a gorgeous image with varied shading. I just love it!
The cardstock is Melon Mambo and the ink is Lemon Lime Twist. The Botanical Butterfly Designer Series Paper (DSP) is free during Sale-A-Bration
To step it up a little I used the Layered Leaves Embossing Folder and added some Glitter Dots. Which do you like better?
The Dimensions are:
Melon Mambo Card Base - 5 1/2 x 11 1/2, scored at 4 1/4
Botanical Butterfly DSP or Embossed Lemon Lime Twist Layer - 5 1/4 x 4
Melon Mambo Layer - 4 1/8 x 3 1/8
Whisper White Layer 4 x 3
Here’s a look at the inside. I took the Happy Birthday sentiment from the Amazing Life Stamp Set.
If you want any of the products I used on this project, just click on the item below or the Shop Now button and it will bring you to my Online Store. Please use the current Host Code when you go to checkout your order. You can also click directly on an item to order.
Pretty Flowering Desert
I really love this Flowering Desert Stamp Set. You can use the cactus image or make your own cactus with the pieces. Add some flowers and you have a beautiful scene. Have you ever been in a desert to see flowering cactuses? It is just amazing!
The card base is Poppy Parade (5 1/2 x 8 1/2, scored at 4 1/4) and then just a layer of Whisper White (5 1/4 x 4) The rest is stamps and inks; oh and some Wink of Stella.
The cactus pieces were stamped in Pear Pizzaz and Old Olive. Just stamp the big one and add some of the smaller right on top. The flowers were stamped in Poppy Parade and then I added some Wink Of Stella to give them some shine. I love that color, so bright and fun. The other plants were stamped in Granny Apple Green, So Saffron and Old Olive.
I wanted to make this a birthday card so I used the inside sentiment from the Hello Cupcake Stamp Set (Free during Sale-A-Bration). I added some of the plants and flowers to the bottom. The plants were stamped in Granny Apple Green and the flowers and sentiment in Poppy Parade.
If you want any of the products I used on this project, just click on the item below or the Shop Now button and it will bring you to my Online Store. Please use the current Host Code when you go to checkout your order. You can also click directly on an item to order.
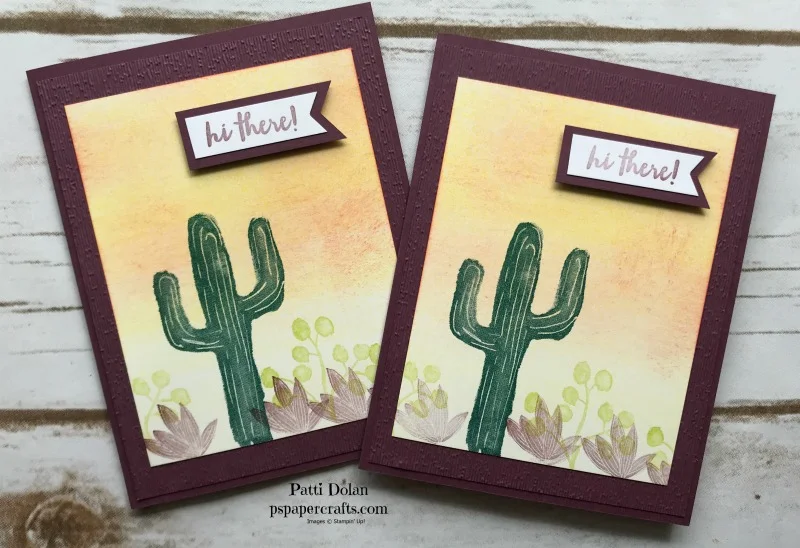
Sunset In The Desert
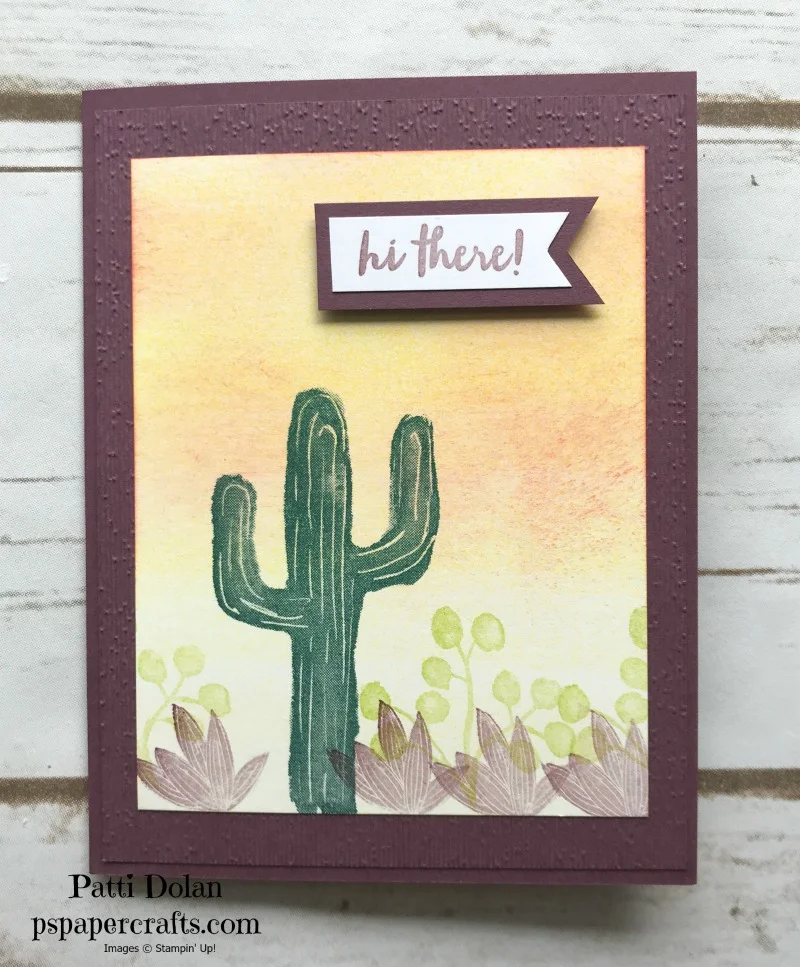
Today’s card has a beautiful desert scene using the Flowering Desert Stamp Set from the 2019 Occasions Catalog.
I created the sunset by sponging the Whisper White layer with Pineapple Punch Ink using a Sponge Brayer. I then took a sponge and added some Calypso Coral. I am happy with how it came out. The Fresh Fig layer behind the scene was embossed using the Subtle Embossing Folder. Check out the video to see how I did this.
The sentiment was stamped on a piece of Whisper white and then cut using the Banner Triple Punch. It was adhered using Dimensionals to give it a little dimension.
Here are the dimensions:
Fresh Fig card base - 5 1/2 x 8 1/2, scored at 4 1/4
Fresh Fig Layer - 5 1/4 x 4, embossed with Subtle Embossing Folder
Whisper White Layer - 4 1/2 x 3 1/2
Strip of Whisper White - 1/2 wide
Strip of Fresh Fig - 3/4 wide
If you want any of the products I used on this project, just click on the item below or the Shop Now button and it will bring you to my Online Store. Please use the current Host Code when you go to checkout your order. You can also click directly on an item to order.
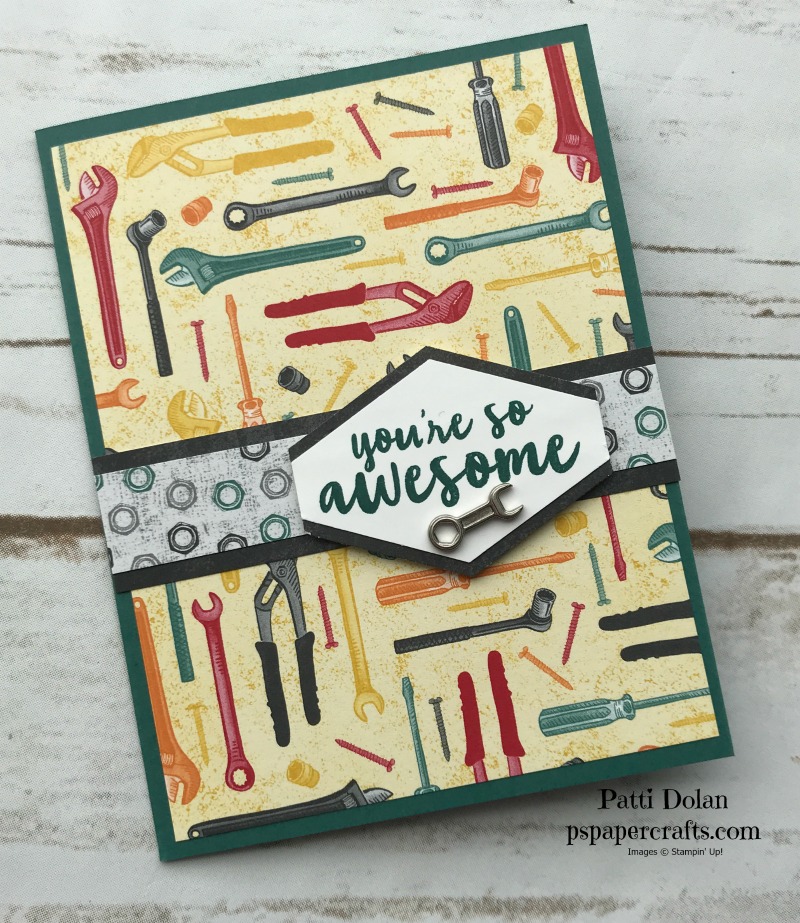
Great Masculine Thank You Card
Today I made a masculine Thank You card for some men at my church who help out with small projects for my widow’s group. They are an awesome group of men and have really come through for some of the women. I used products from the Classic Garage Suite in the Occasions Catalog.
This is a great stamp set for masculine cards. It’s perfect for Father’s Day, Birthdays and of course Thank You cards. There is a coordinating 6x6 Designer Series Paper pack with images relating to cars, tool, tire tracks and most have a grungey look….is that a word?
Here’s the dimensions:
Tranquil Tide Card Base - 5 1/2 x 8 1/2, scored at 4 1/4
Classic Garage DSP Layer - 5 1/4 x 4
Strips of Classic Garage DSP - one at 4 1/4 x 1 and one at 4 1/4 x 3/4
Whisper White for sentiment punched with Tailored Tag Punch
Classic Garage DSP punched with Tailored Tag Punch and then cut in half.
Layer the DSP on the card base the the two strips of DSP together and adhere to card base.
Stamp your sentiment on the Whisper White tag with Tranquil Tide Ink. I used the sentiment from the Flowering Desert Stamp Set. You can use whatever fits the tag. Cut the Classic Garage DSP label in half and then adhere to the back side of the label leaving a space so that it gives you a nice boarder. I used Multi-Purpose Liquid Glue so I can adjust it a little before the glue dries.
Look at these Classic Garage Metal Elements! They are just perfect for a guy card. Some are keys and some are wrenches. I used a very small piece of Tear & Tape Adhesive to make sure it sticks good; it has some weight to it.
For the inside I used the sentiment from the Butterfly Gala Stamp Set. The tool box was stamped in Real Red with a stamp from the Geared Up Garage Stamp Set.
I’m happy with the way the card turned out and think the men will like it too!
If you want any of the products I used on this project, just click on the item below or the Shop Now button and it will bring you to my Online Store. Please use the current Host Code when you go to checkout your order. You can also click directly on an item to order.
Gorgeous Lily Sympathy Card
Today I made some beautiful sympathy cards using the FREE Lasting Lily Stamp Set. Yes, it’s FREE during Sale-A-Bration with a $100 order. Aren’t they just gorgeous?
Watch the video below to see how I made these cards.
For this card, I used Gorgeous Grape Cardstock and Ink for the Lilies. The stems and leaves were stamped in Granny Apple Green. I just love this color combination. The Whisper White Layer was cut using the second largest rectangle from the new Stitched Rectangle Framelits. The sentiment was stamped and then cut using the Tailored Tag Punch. A few Glitter Enamel Dots and some Mini Striped Ribbon put the finishing touches on this card.
This card was stamped in Calypso Coral and Pear Pizzaz and has a Calypso Coral card base. The sentiment was stamped on a smaller stitched rectangle and a pretty butterfly from the Beauty Abounds Stamp Set was added.
Below is the supply list used for these card. You can order these products by clicking the Order Now button and using the current Host Code
Sweet and Simple Valentine's Day Card
Ready to make a quick Valentine’s Card? I used the Meant To Be Stamp set to make my own background paper. Aren’t they pretty?
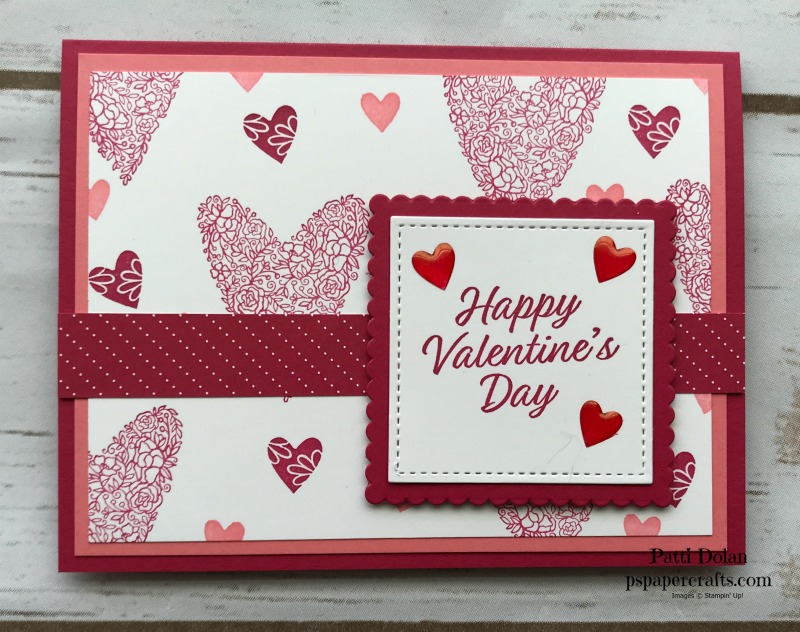
Starting with the largest heart image, I inked it with Lovely Lipstick Ink and then stamped off (stamp on scrap first) and then stamped on the cardstock layer. I stamped randomly and made sure I went off the paper. Next, I inked the smaller heart with Lovely Lipstick and stamped directly onto the cardstock layer. Last was the smallest heart which I stamped in Flirty Flamingo ink.
The first one has a piece of Lovely Lipstick ribbon wrapped around it and this one below has a strip of All My Love Designer Series Paper adhered to the base. Which do you like better? The Hearty Epoxy Droplets were colored with my Dark Real Red Stampin’ Blends and then adhered around the sentiment.
Dimensions:
Lovely Lipstick Card Base - 5 1/2 x 8 1/2, scored at 4 1/4
Flirty Flamingo Layer - 5 1/4 x 4
Whisper White Layer - 5 x 3 3/4
Card #2 - 5 1/2 x 3/4 strip of All My Love DSP
Whisper White - Second Largest Stitched Shape Square
Lovely Lipstick - Third Largest Scalloped Square


