Be Dazzling Gorgeous Leaves

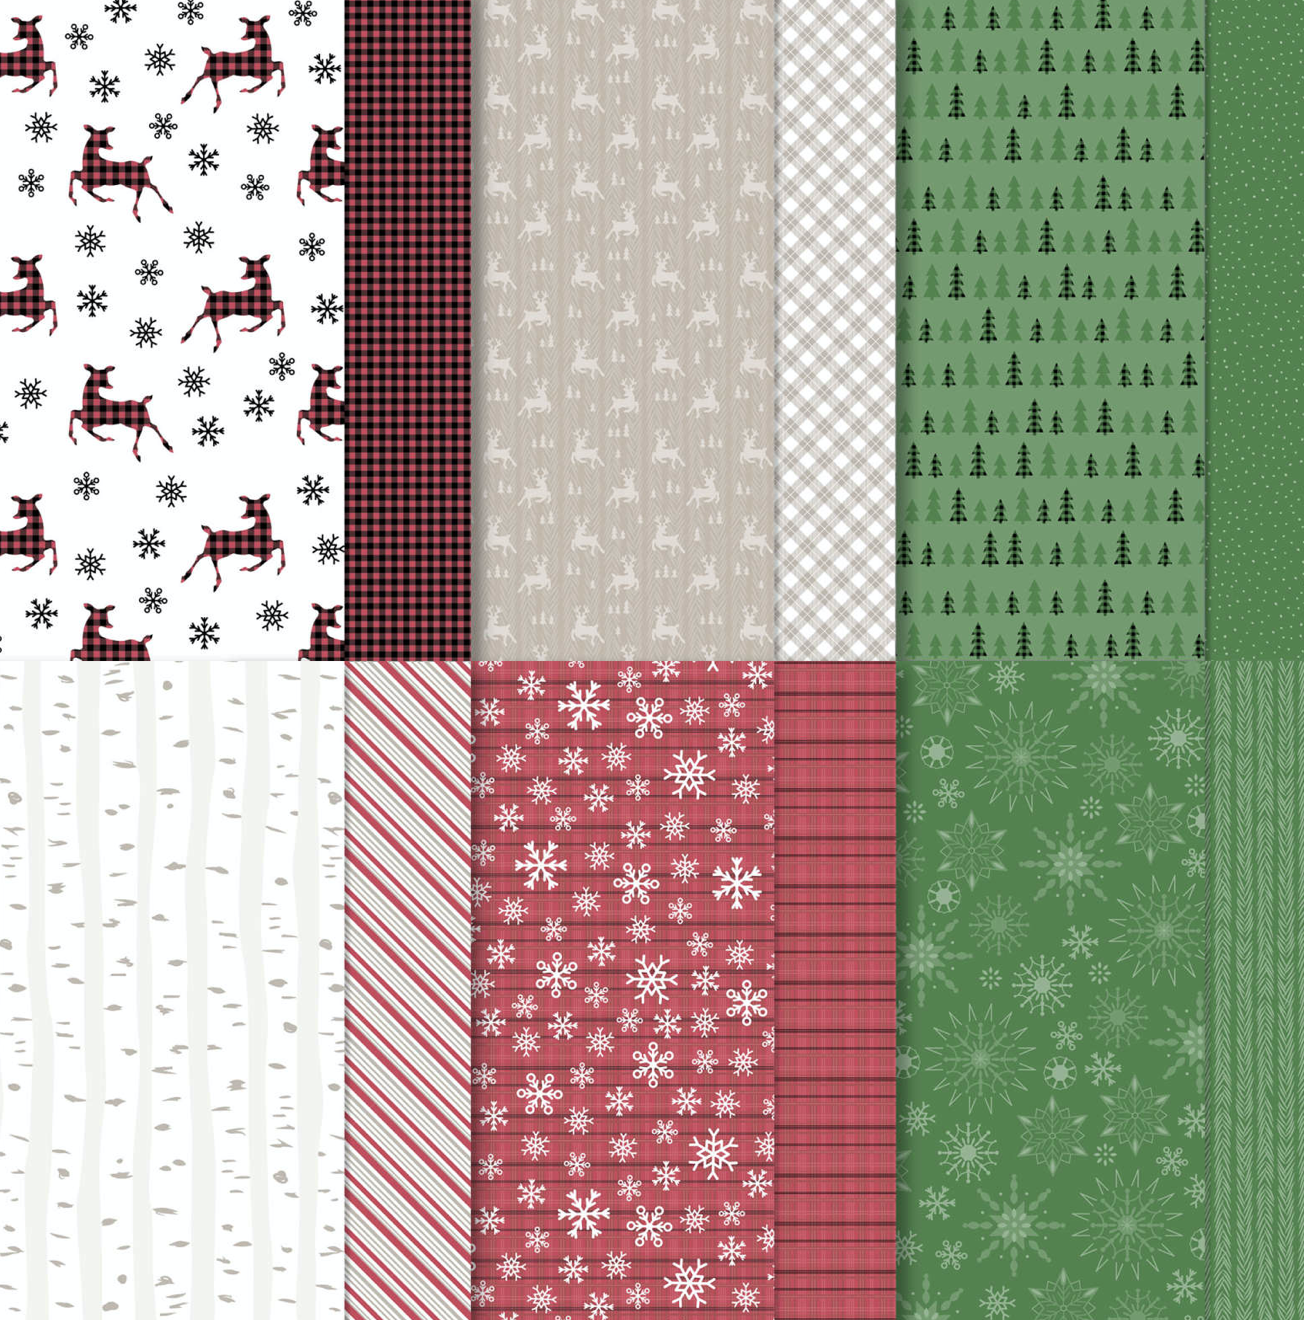
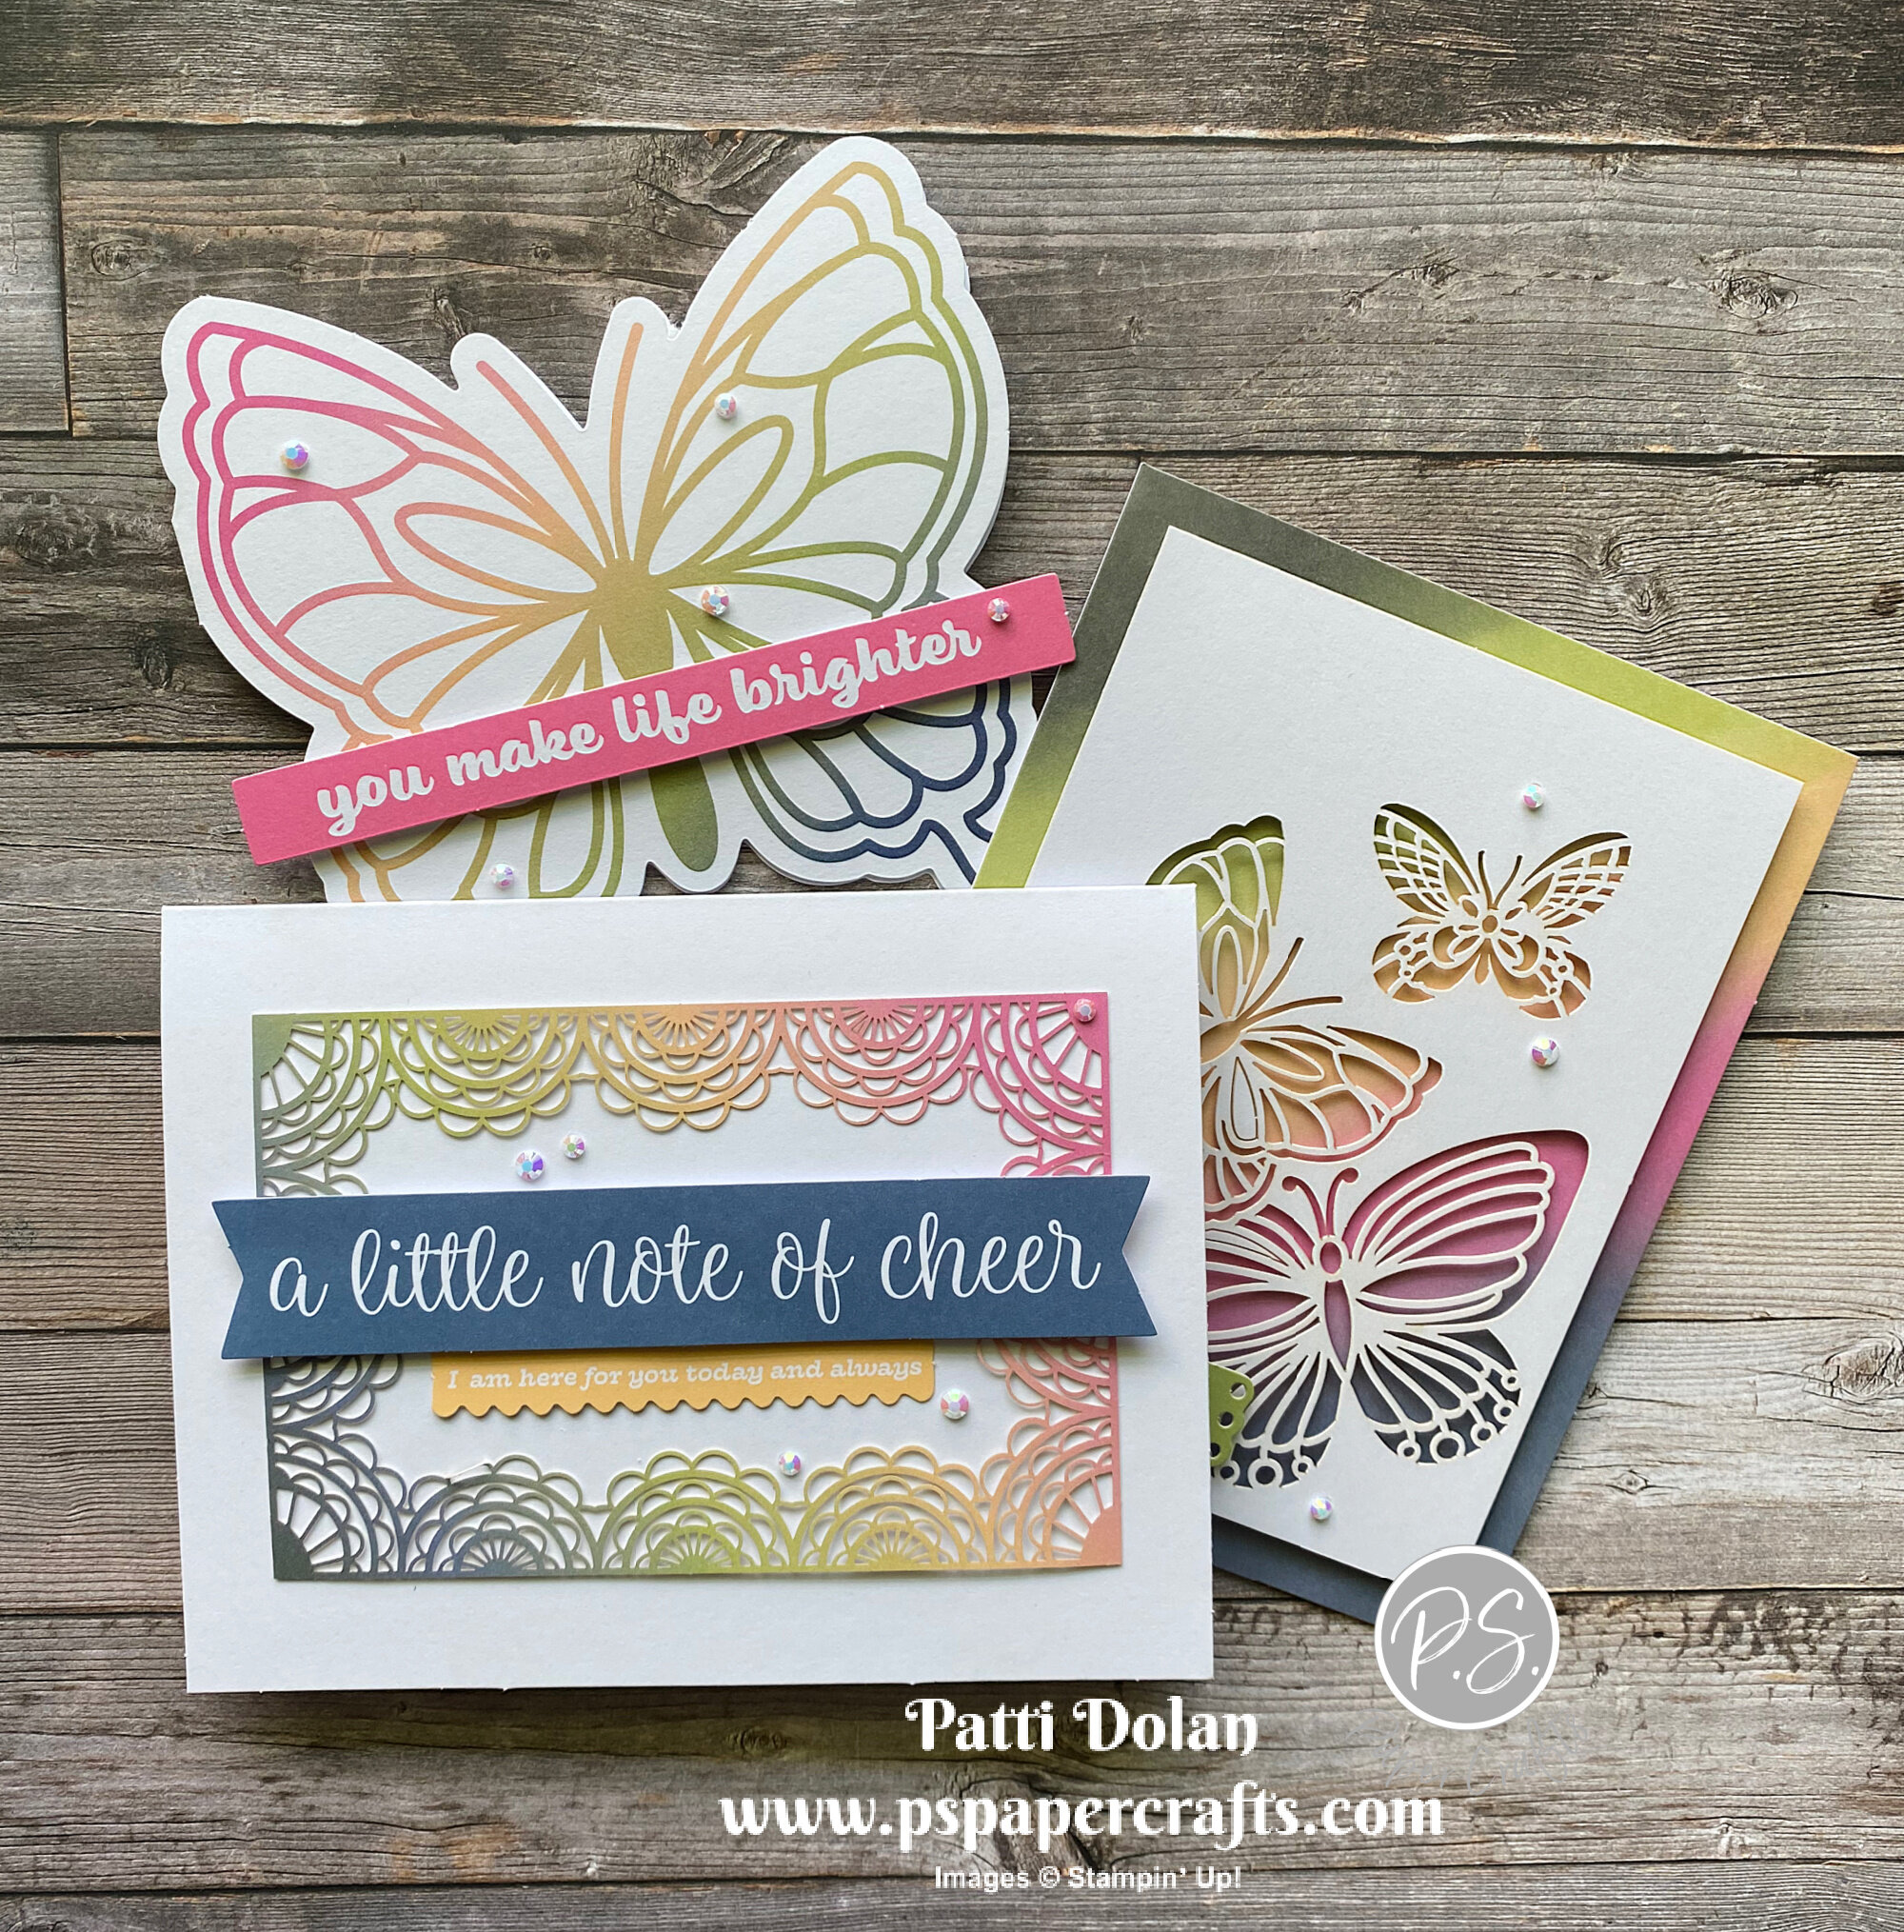
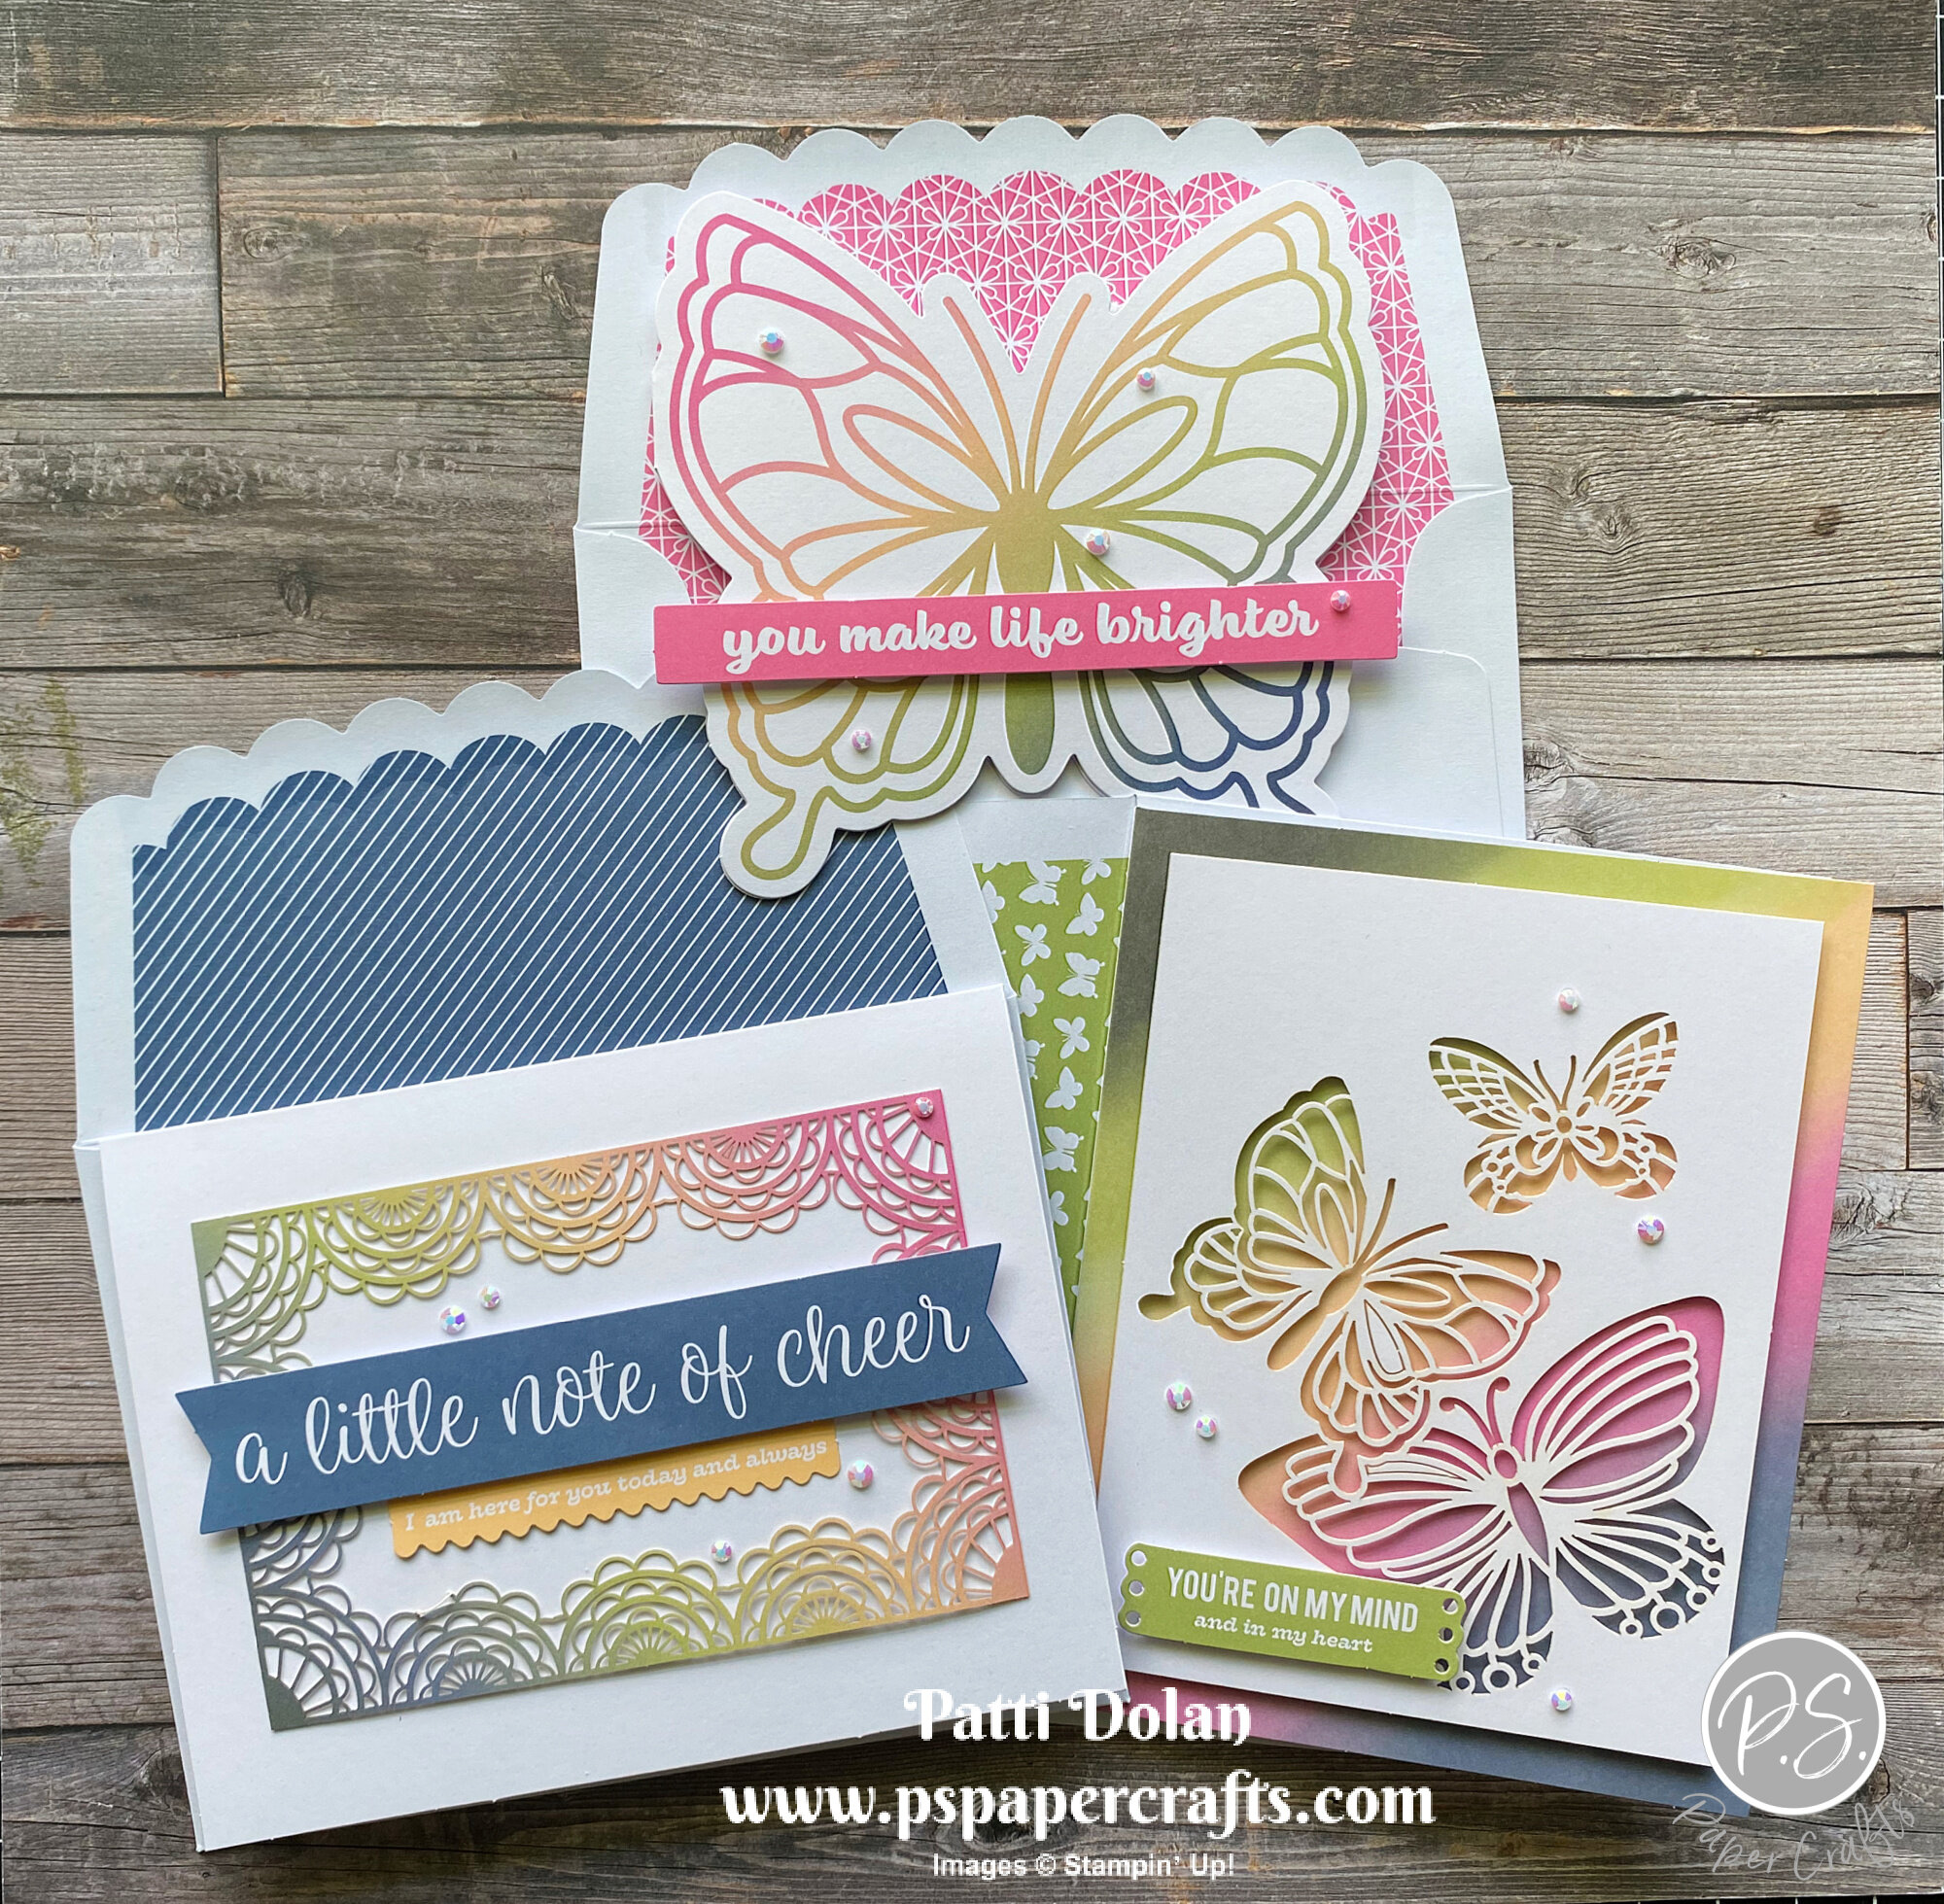
The Be Dazzling Specialty Paper is so gorgeous and you can color it with Stampin’ Blends to make it even more beautiful!


In my video I’ll show you how to cut and color the Intricate Leaves with the Be Dazzling Specialty Paper to make this card.


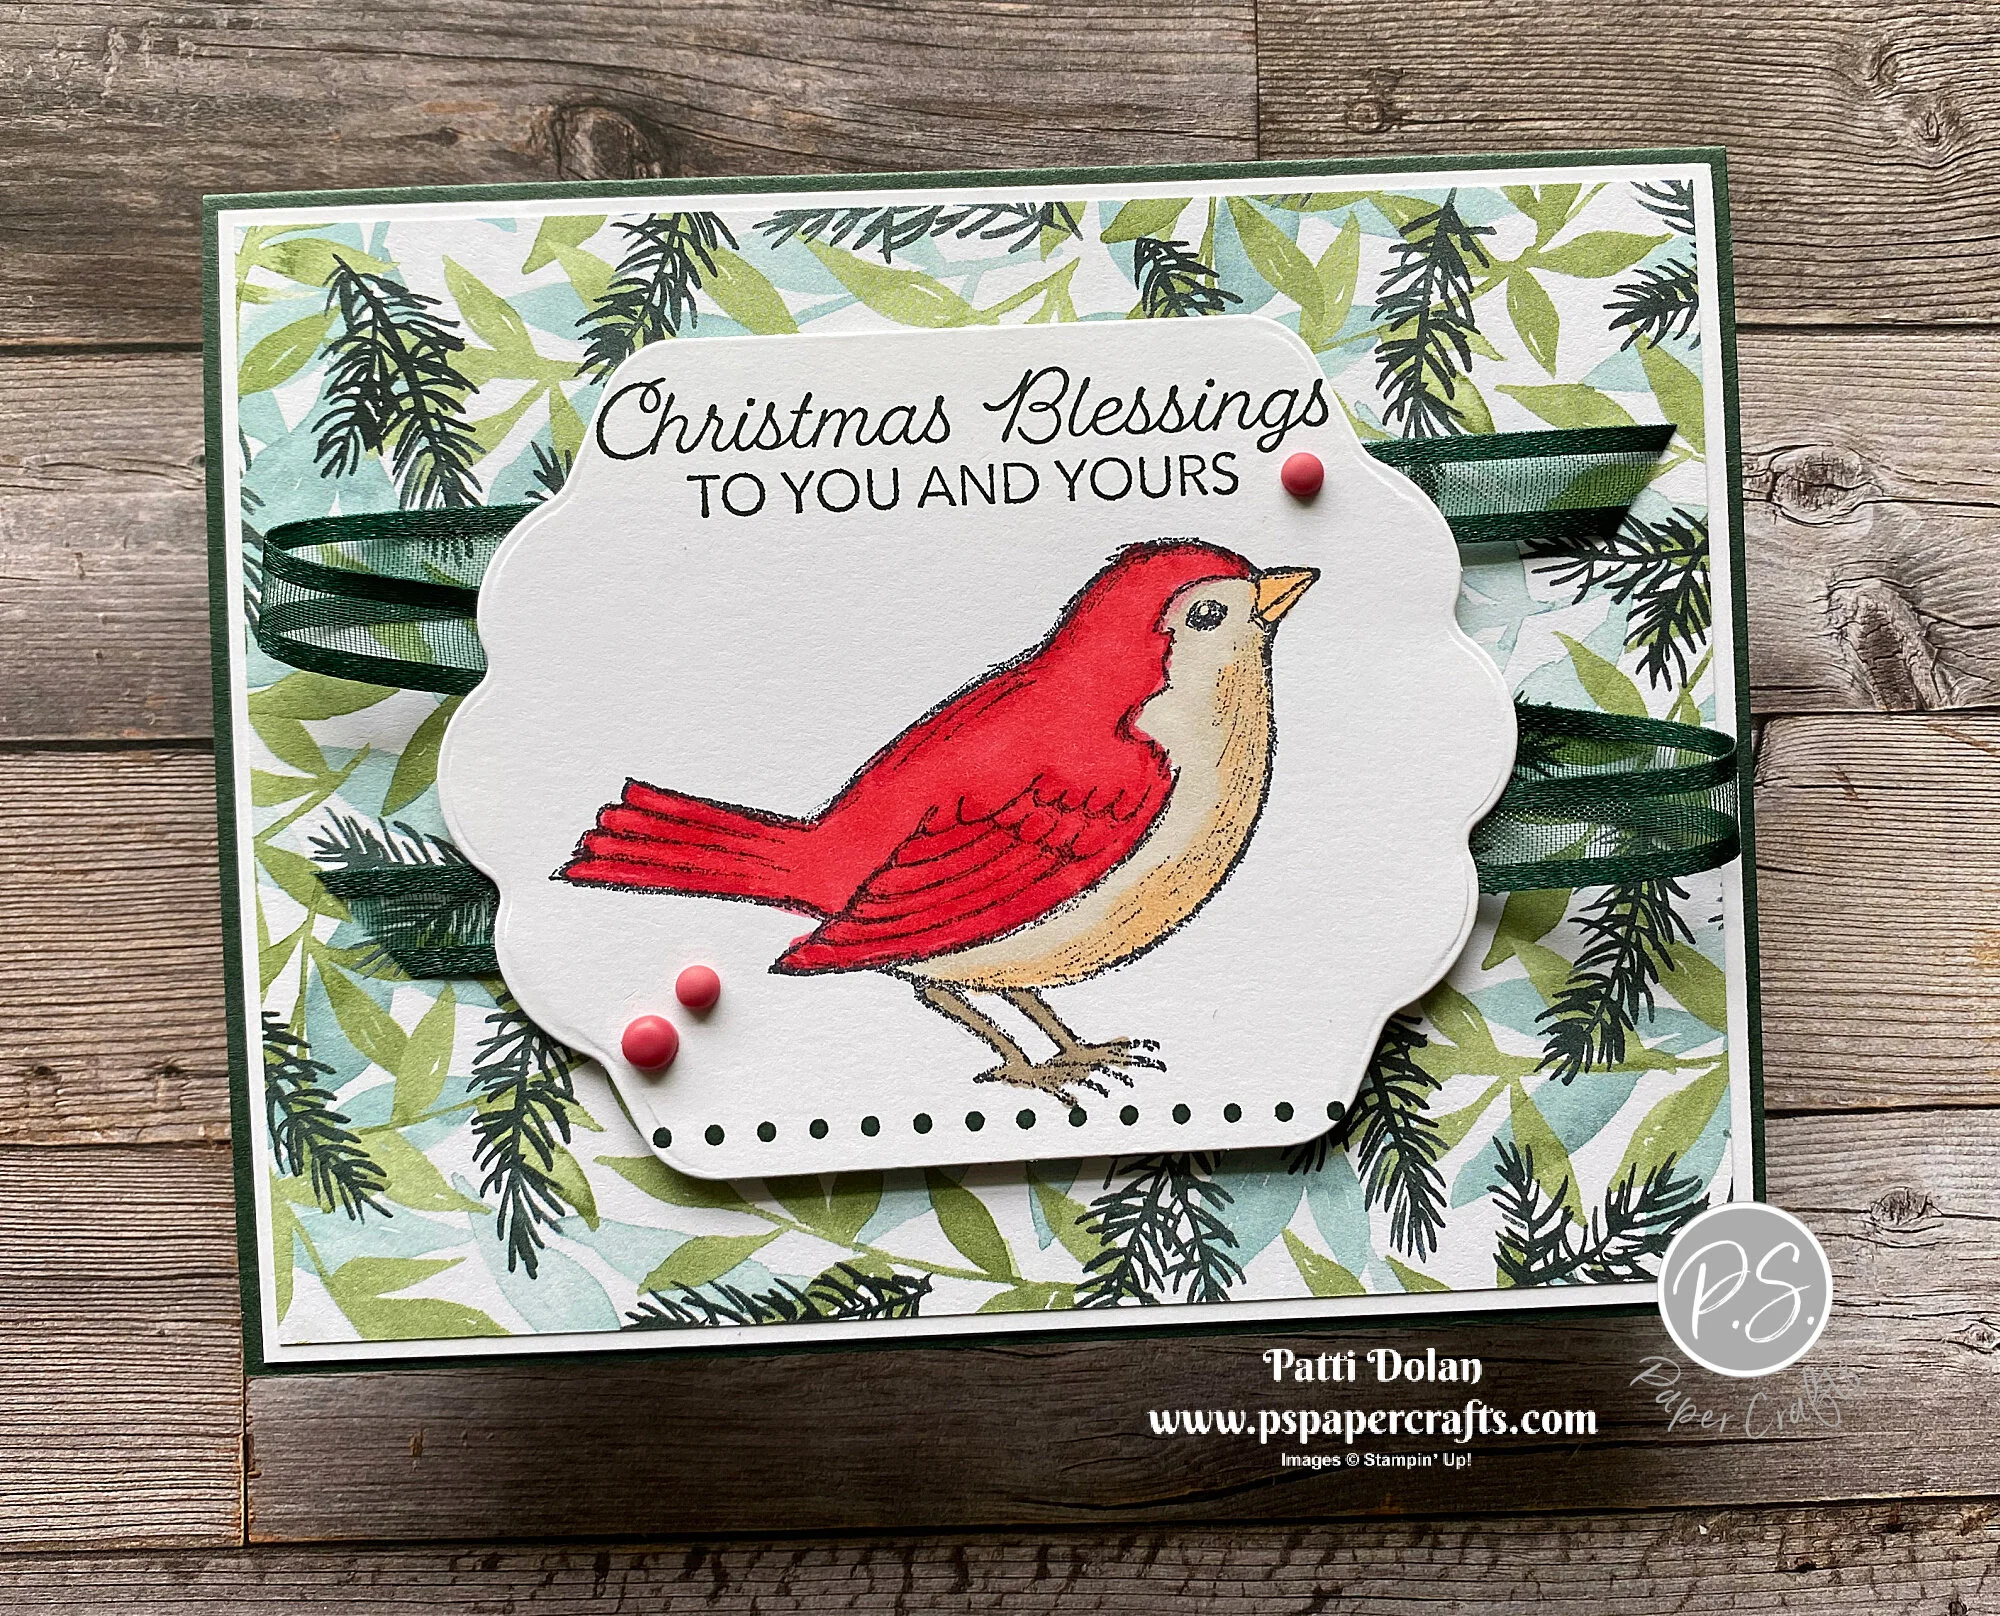
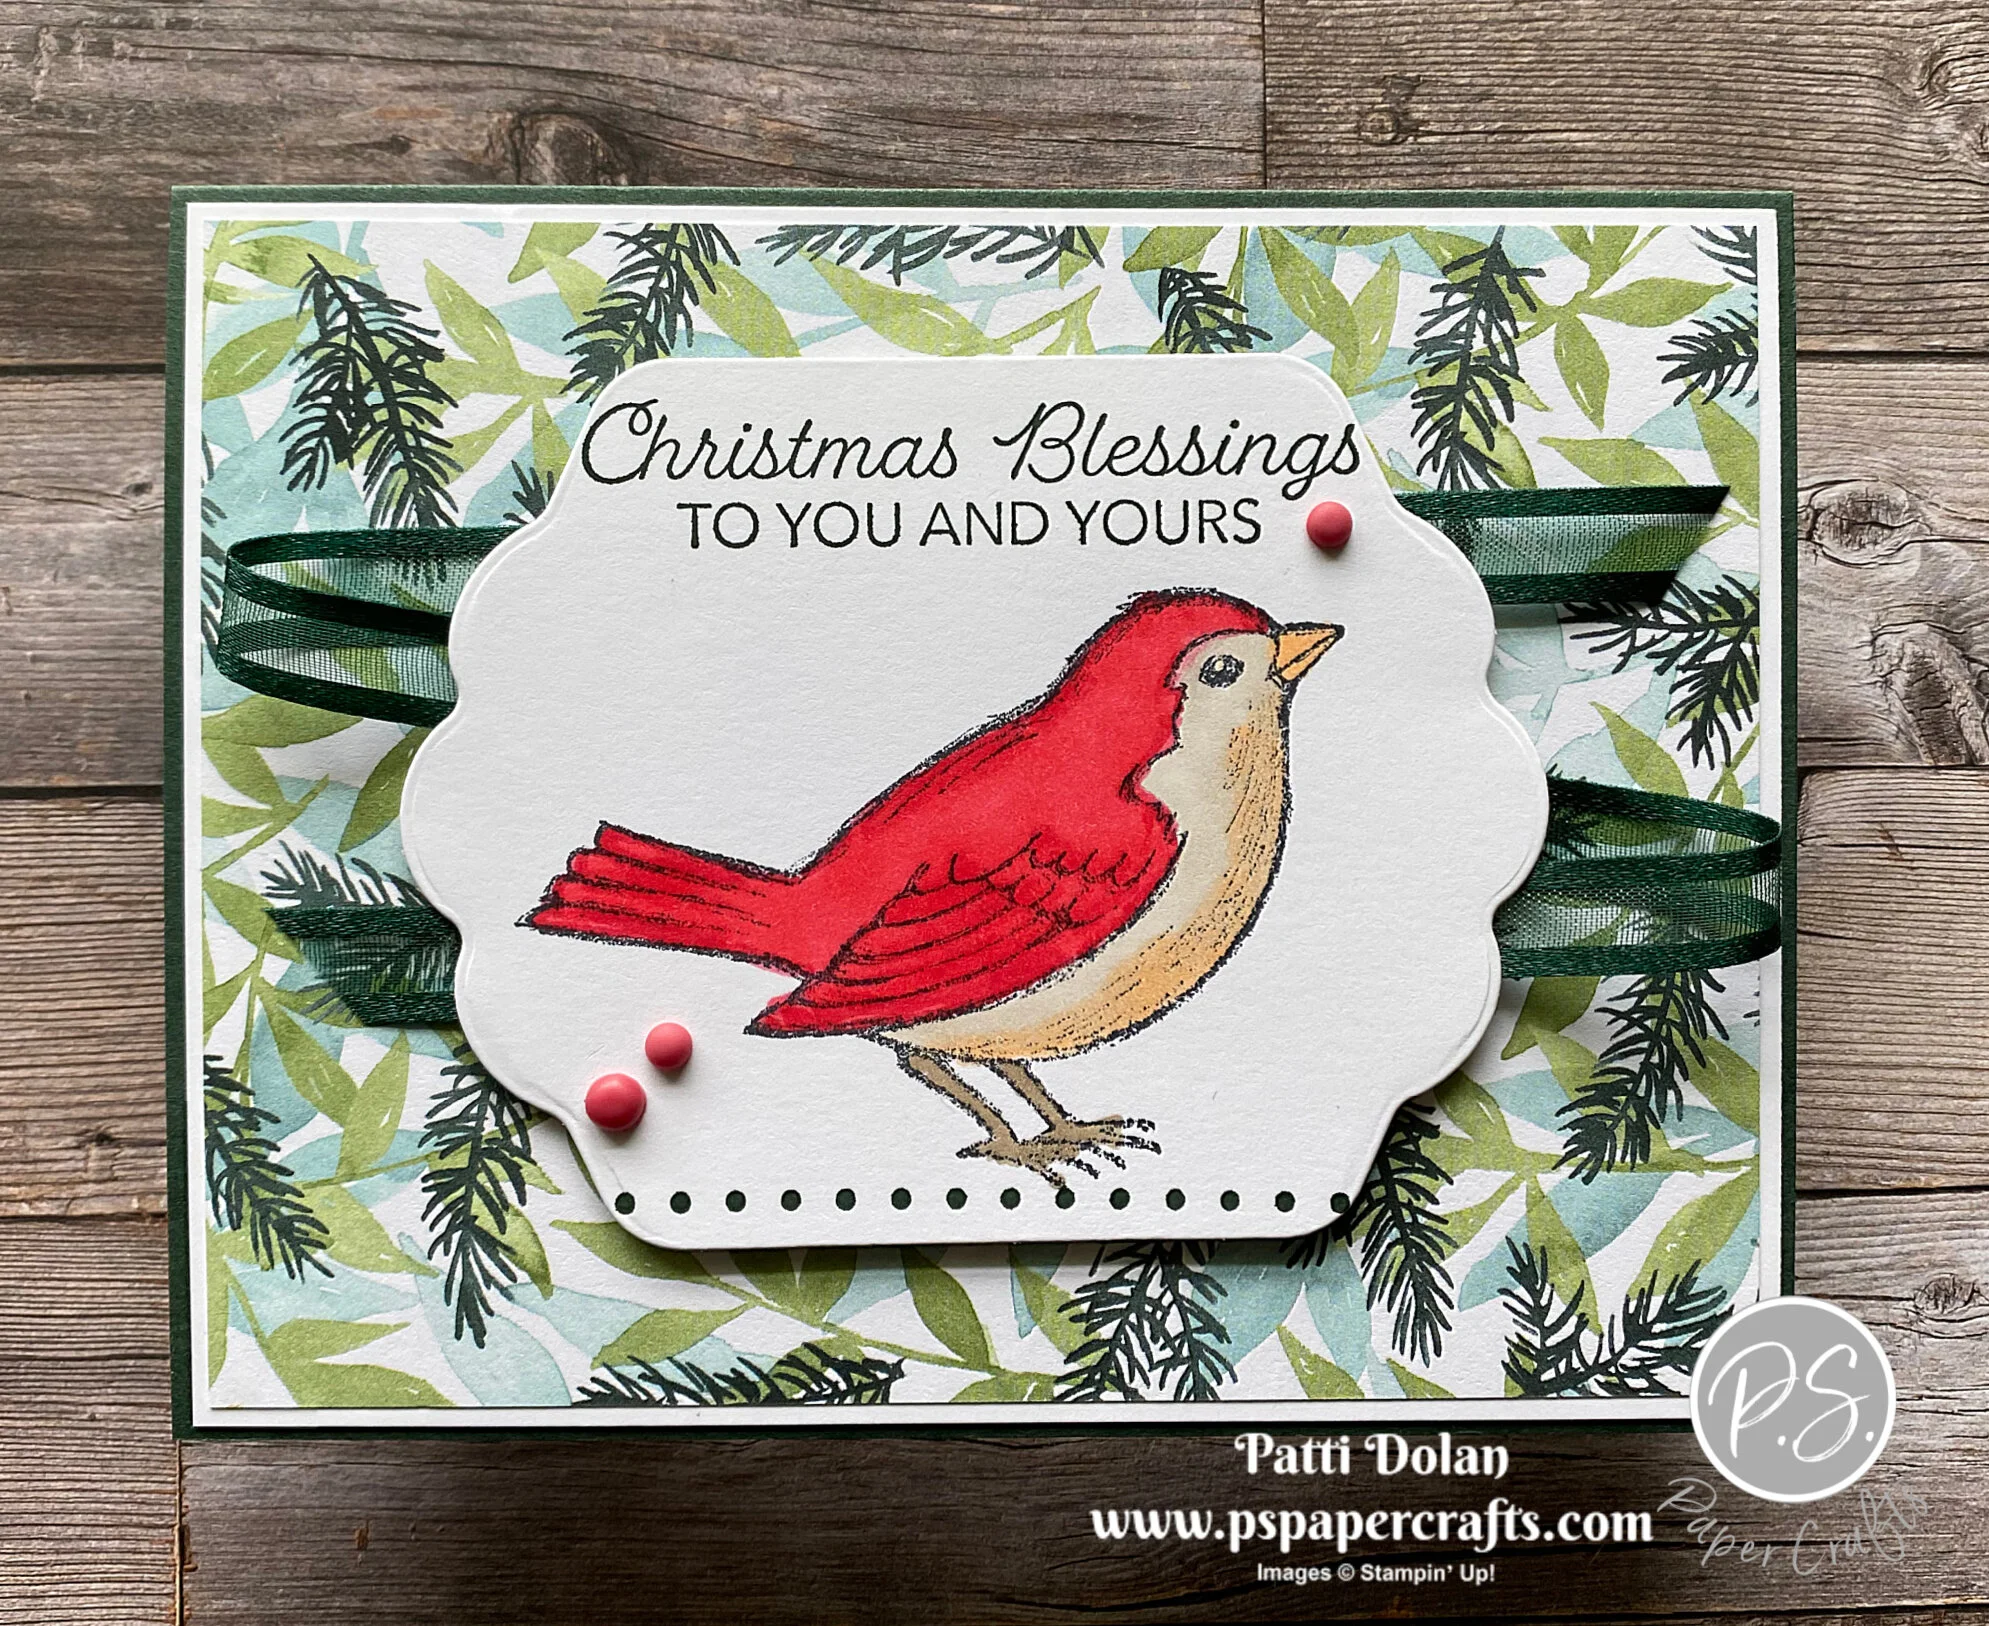
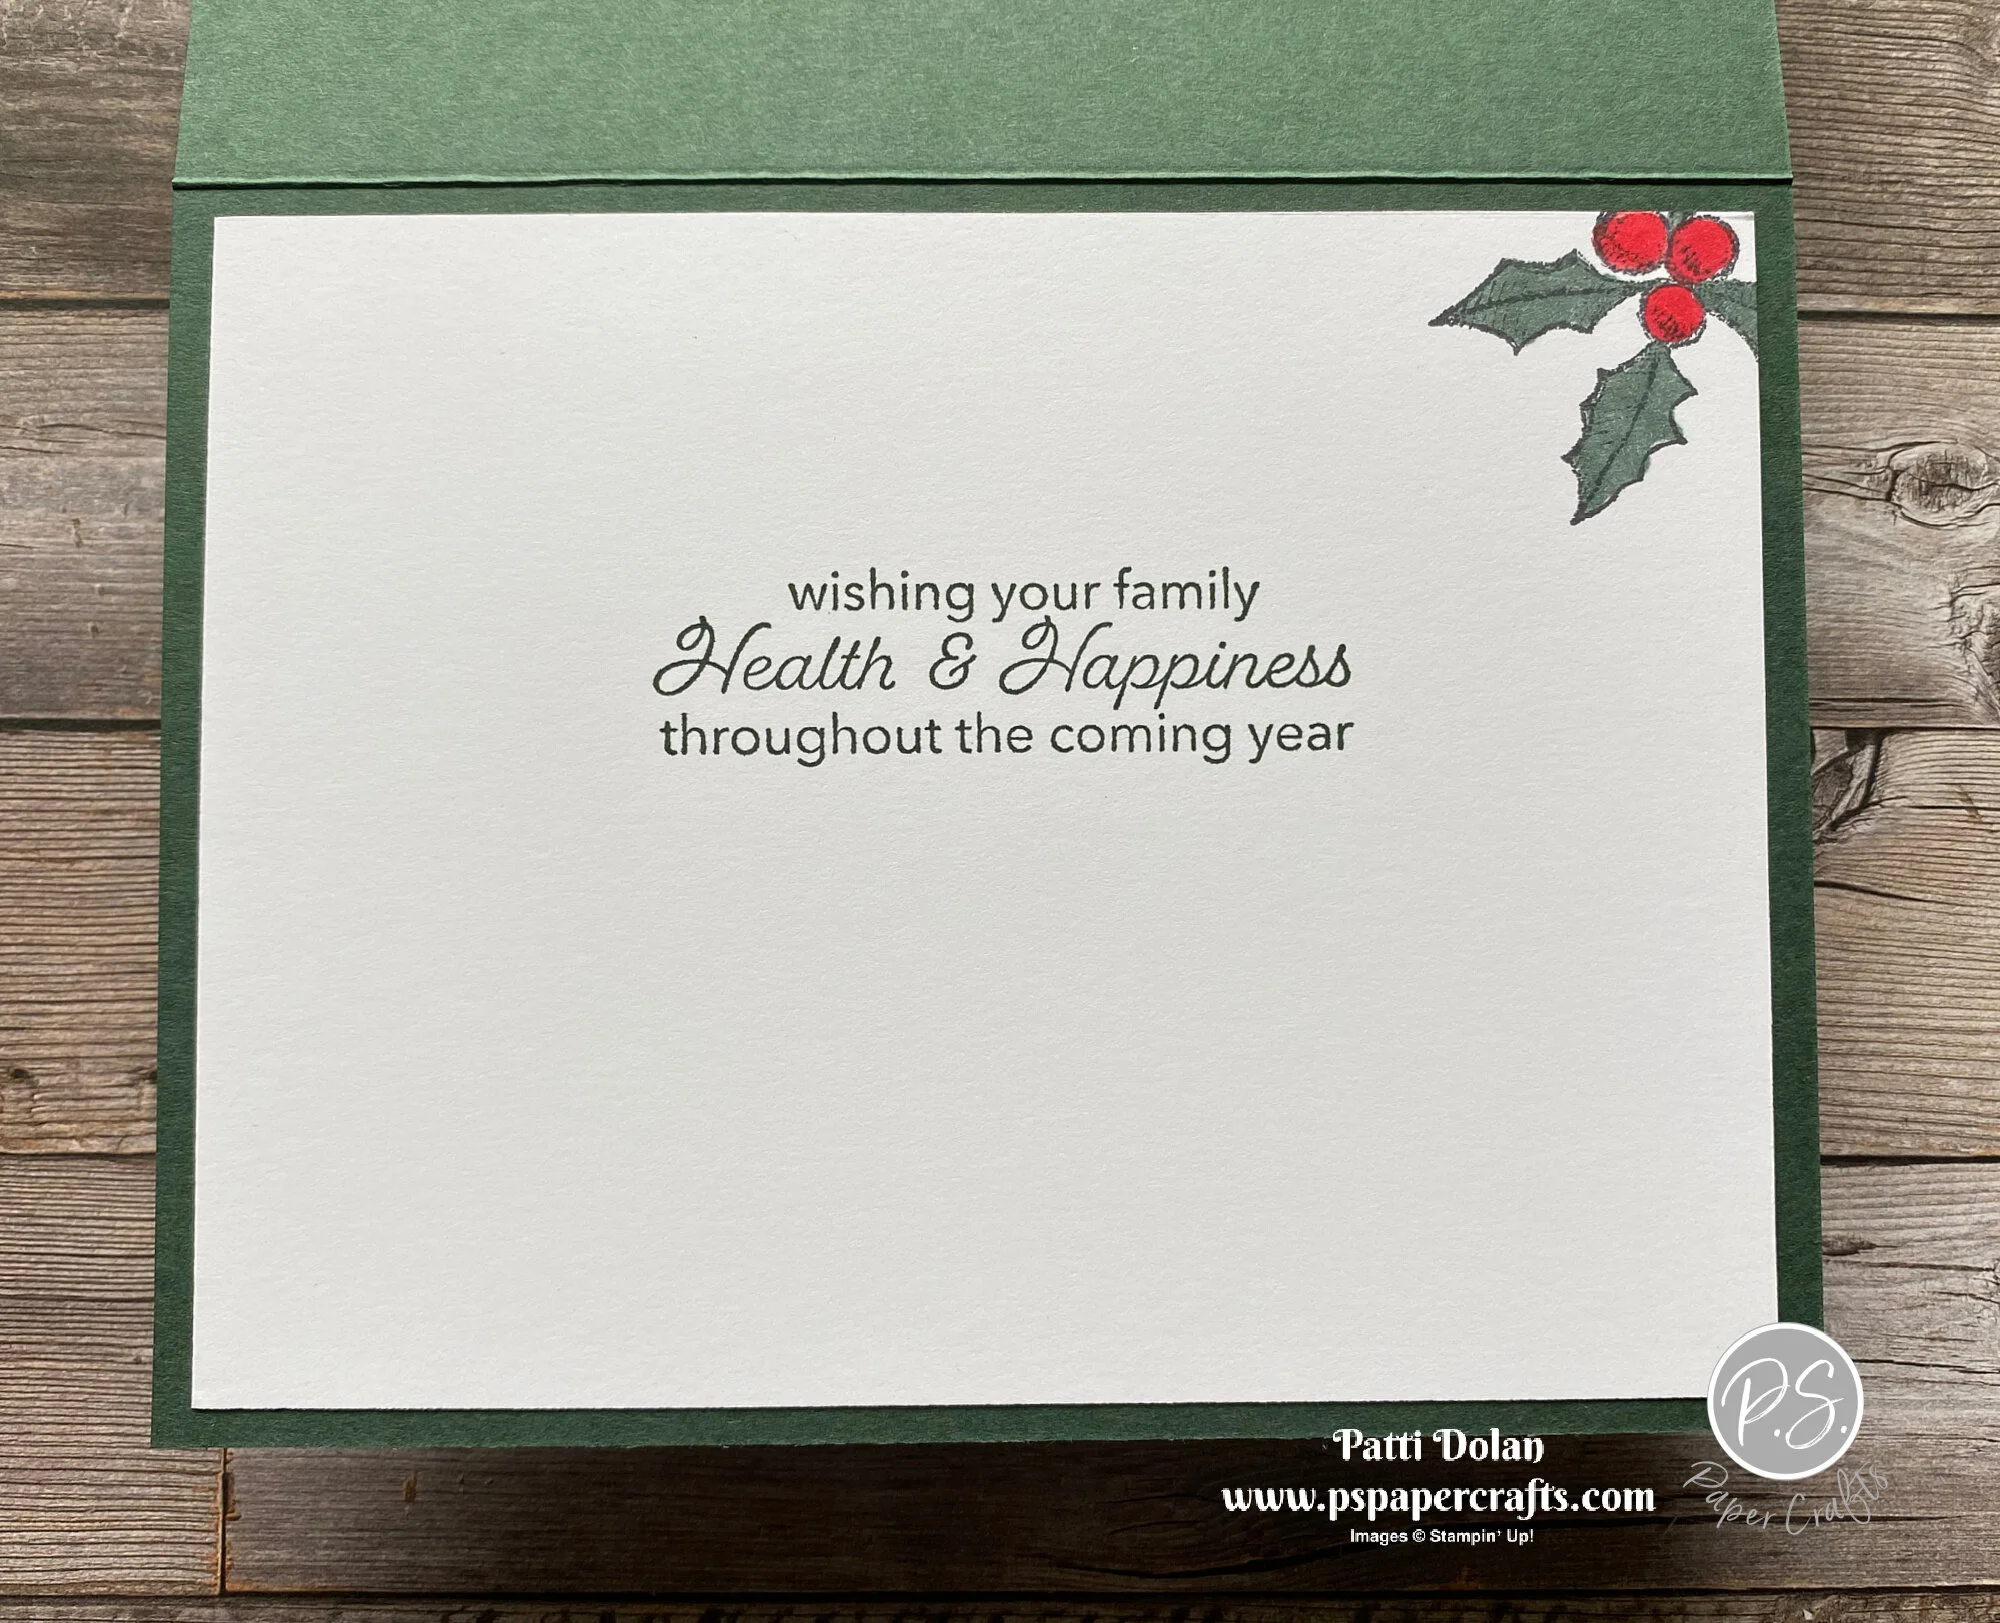
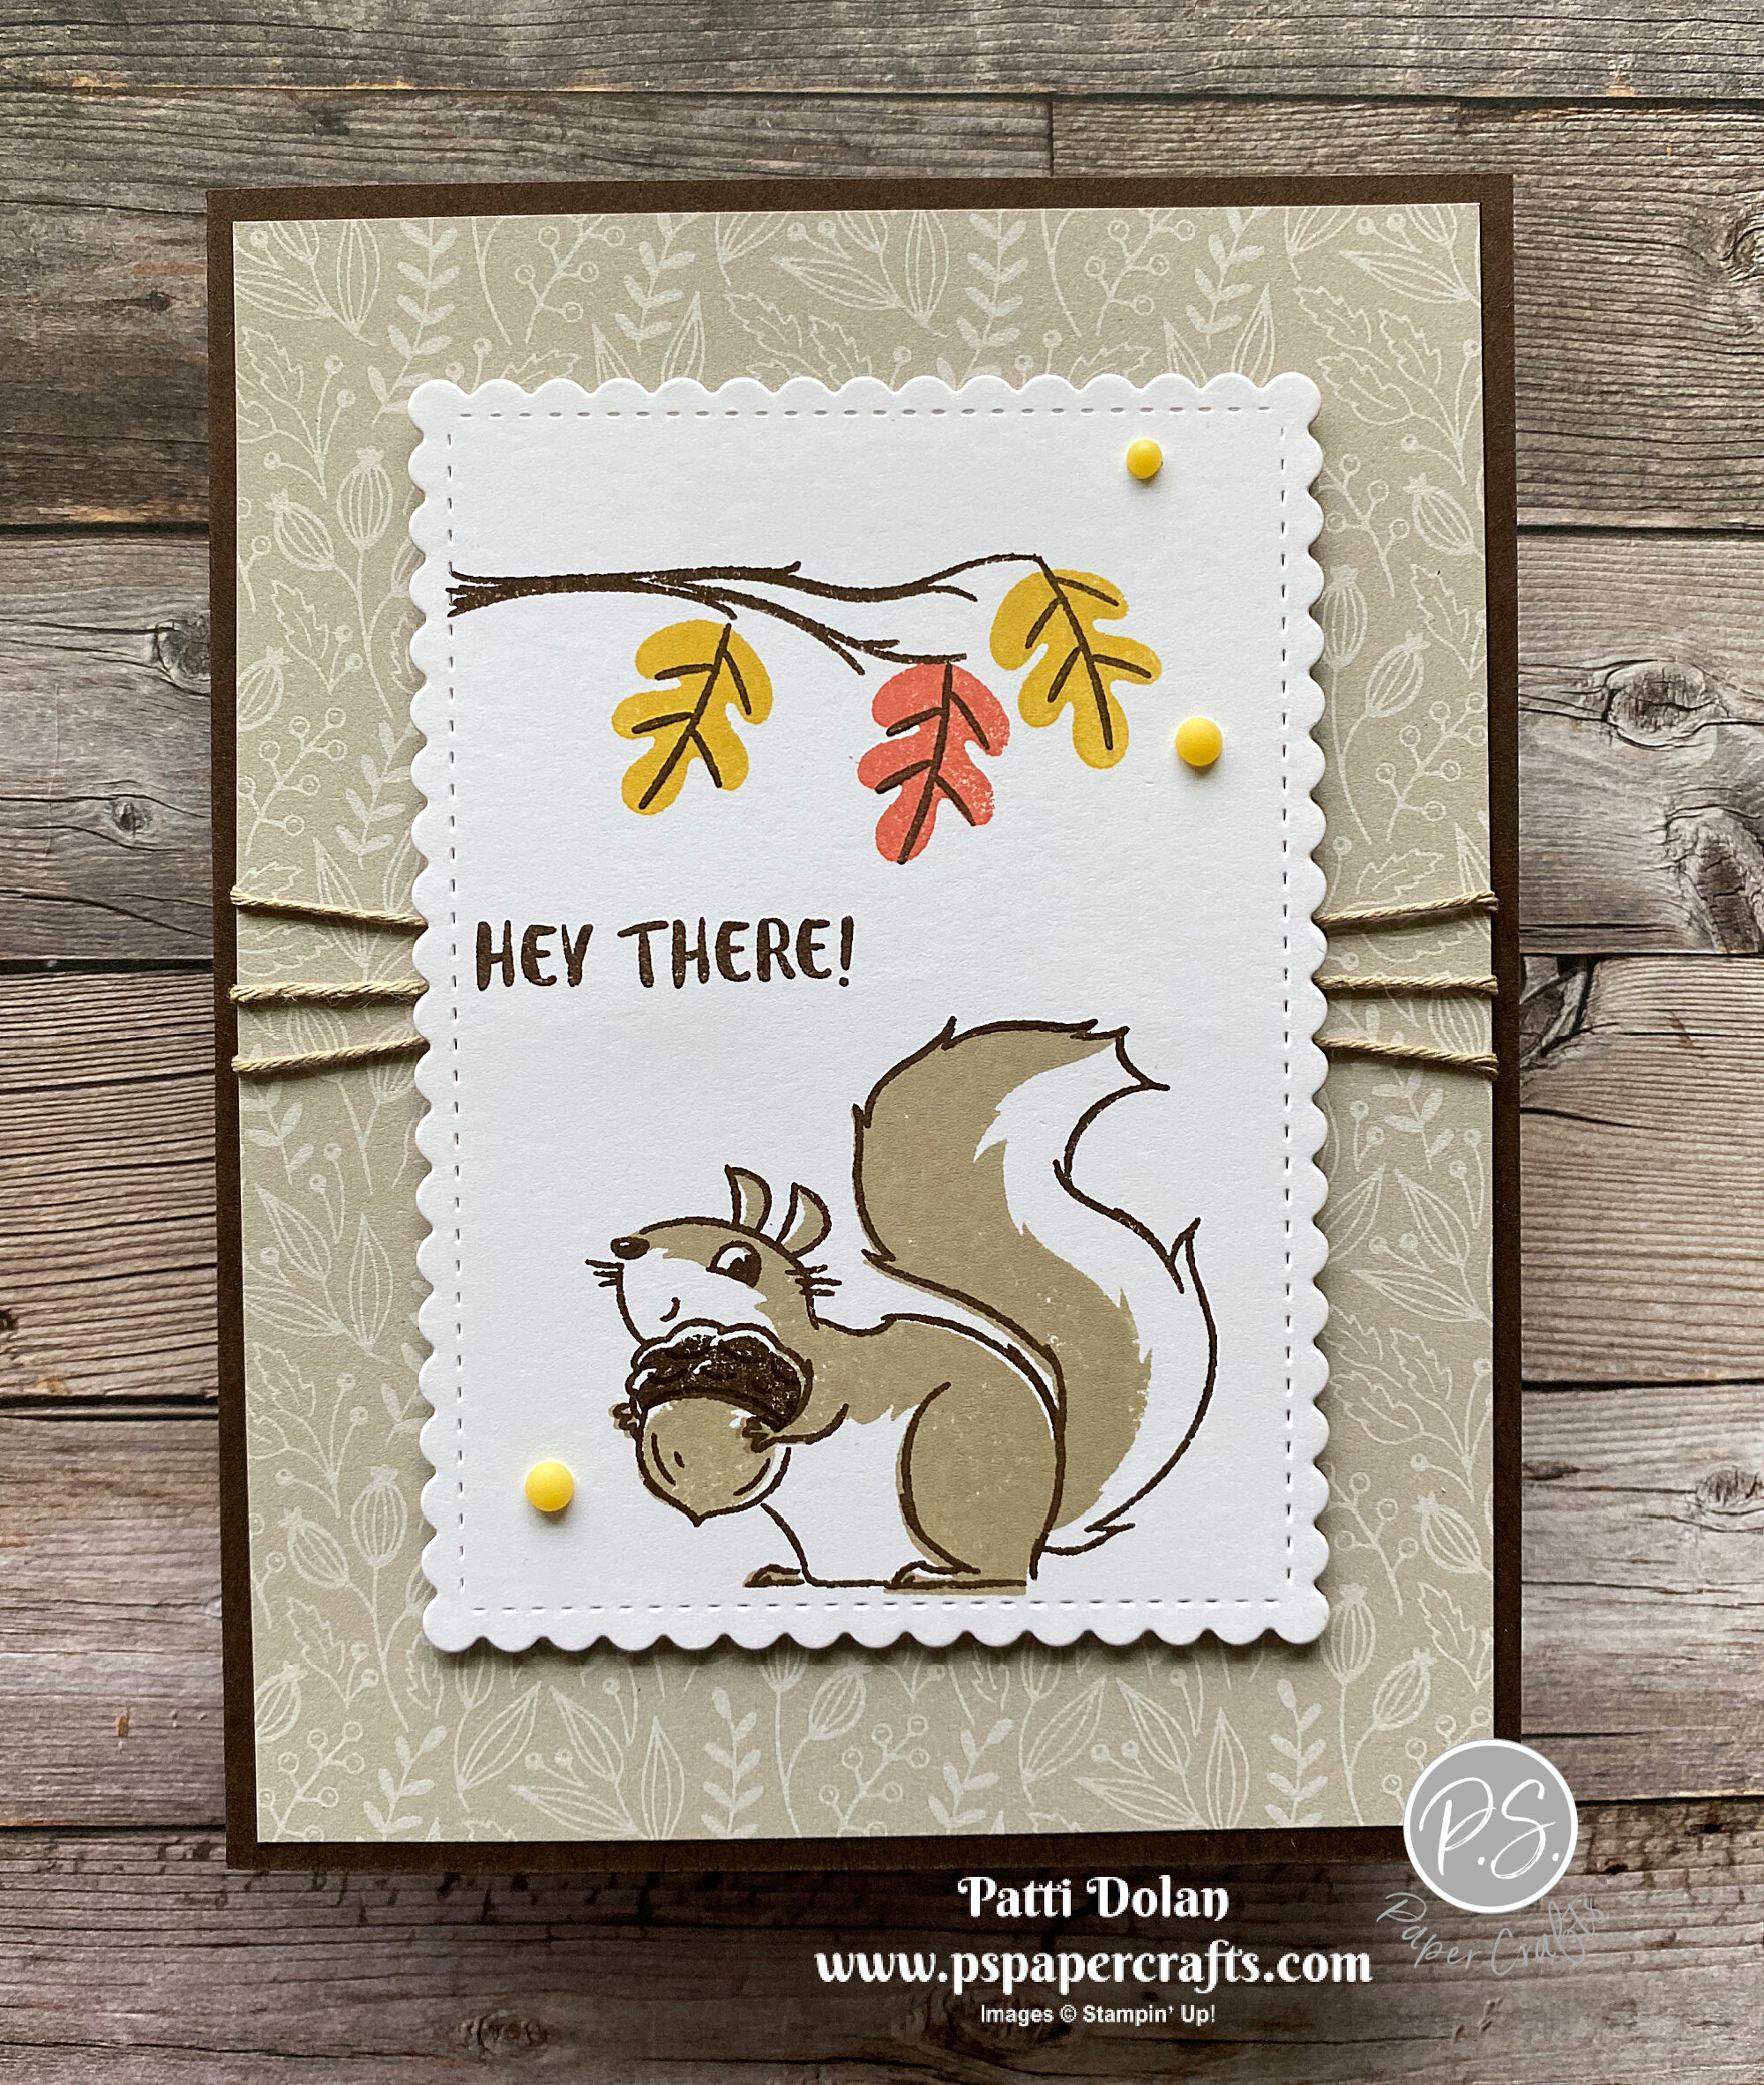
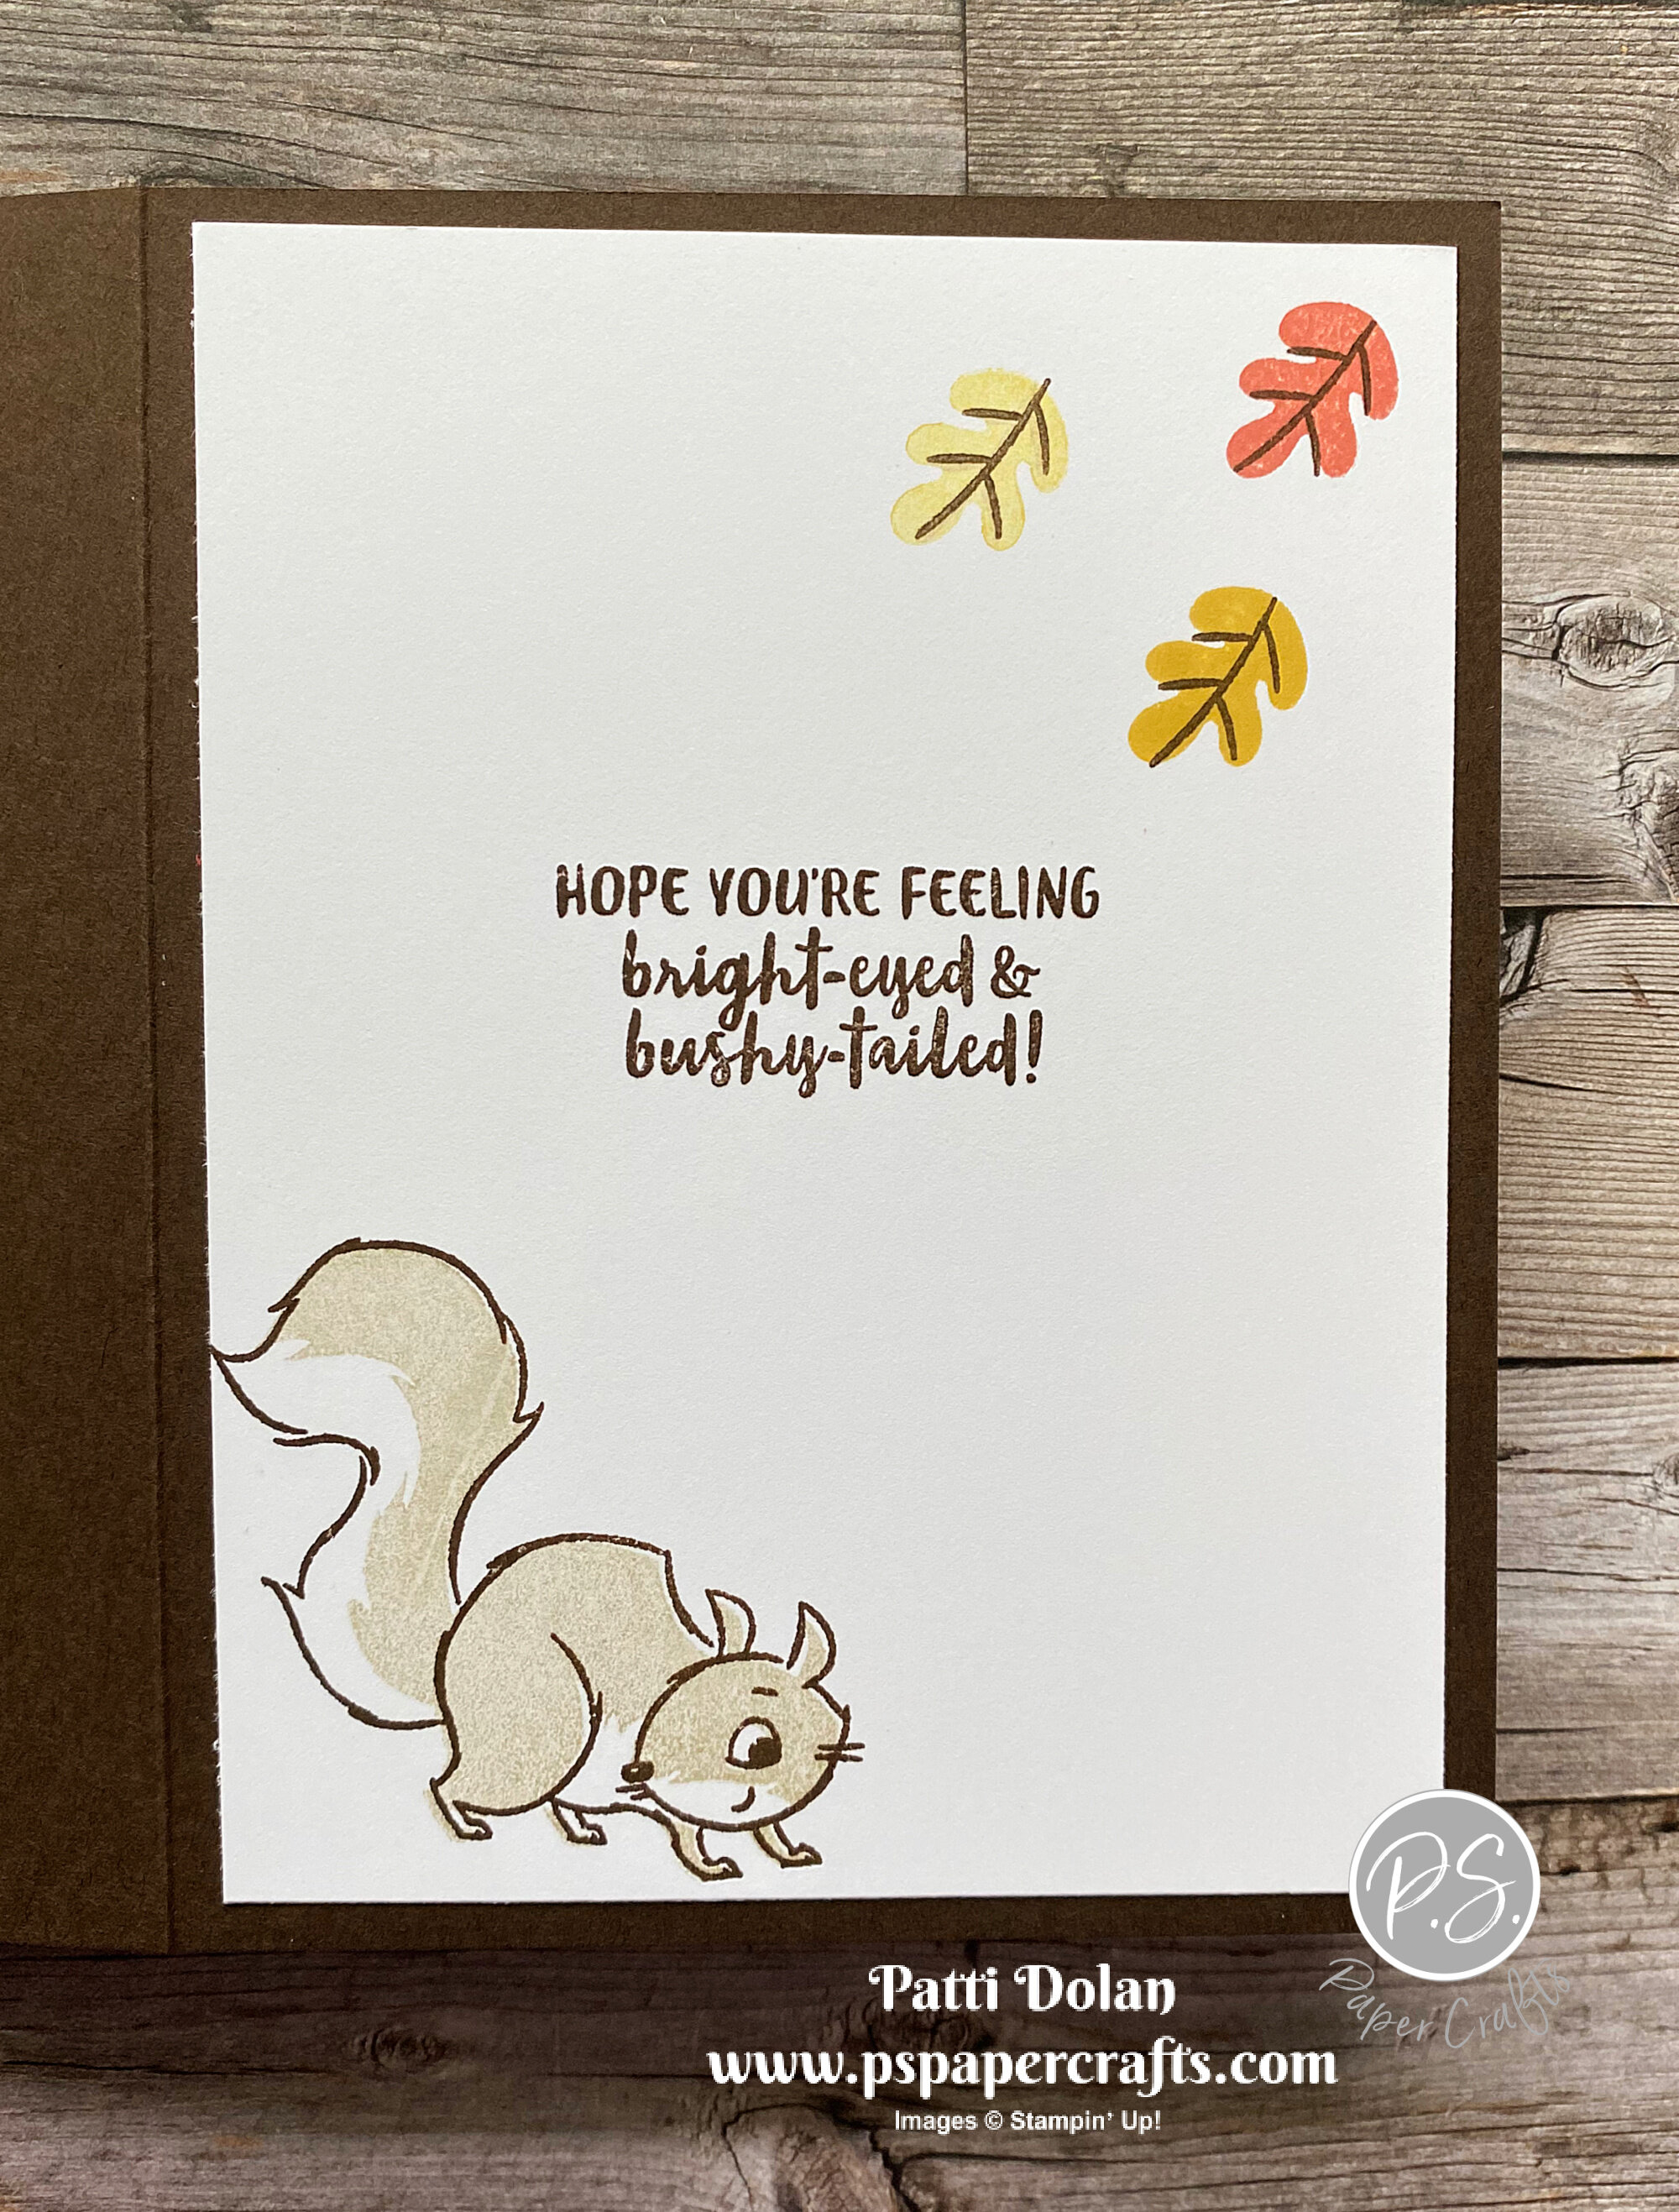
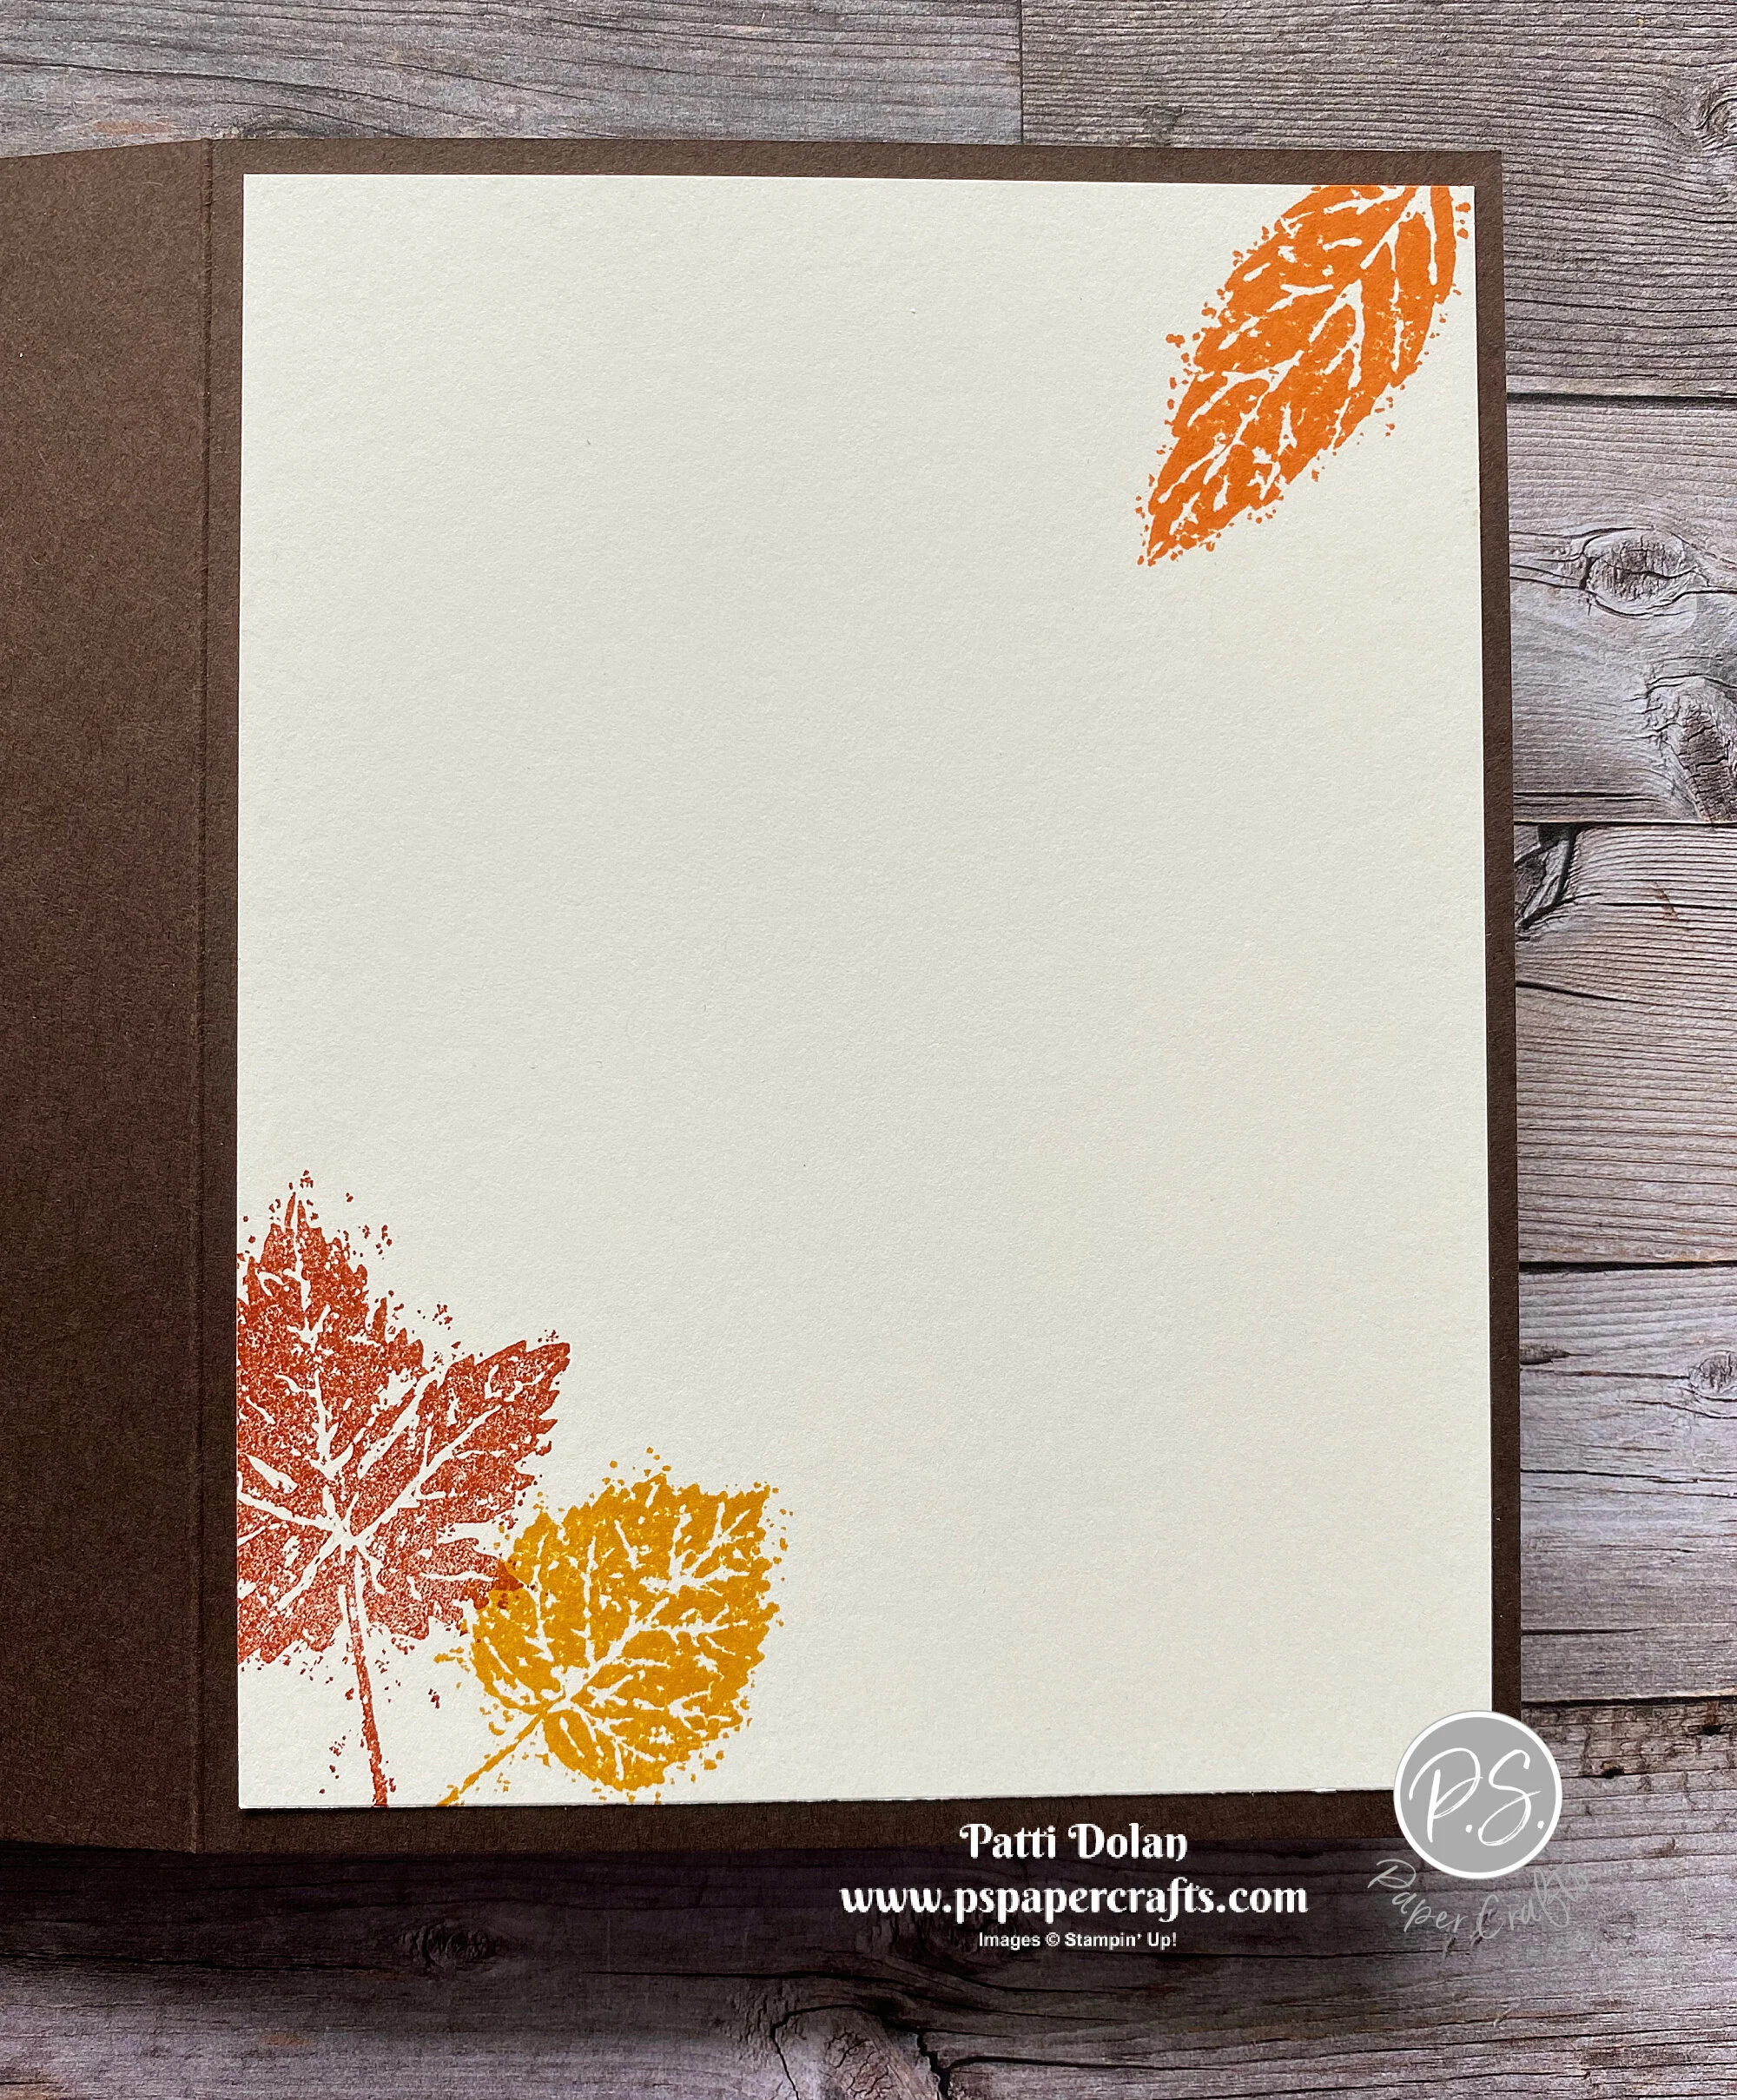
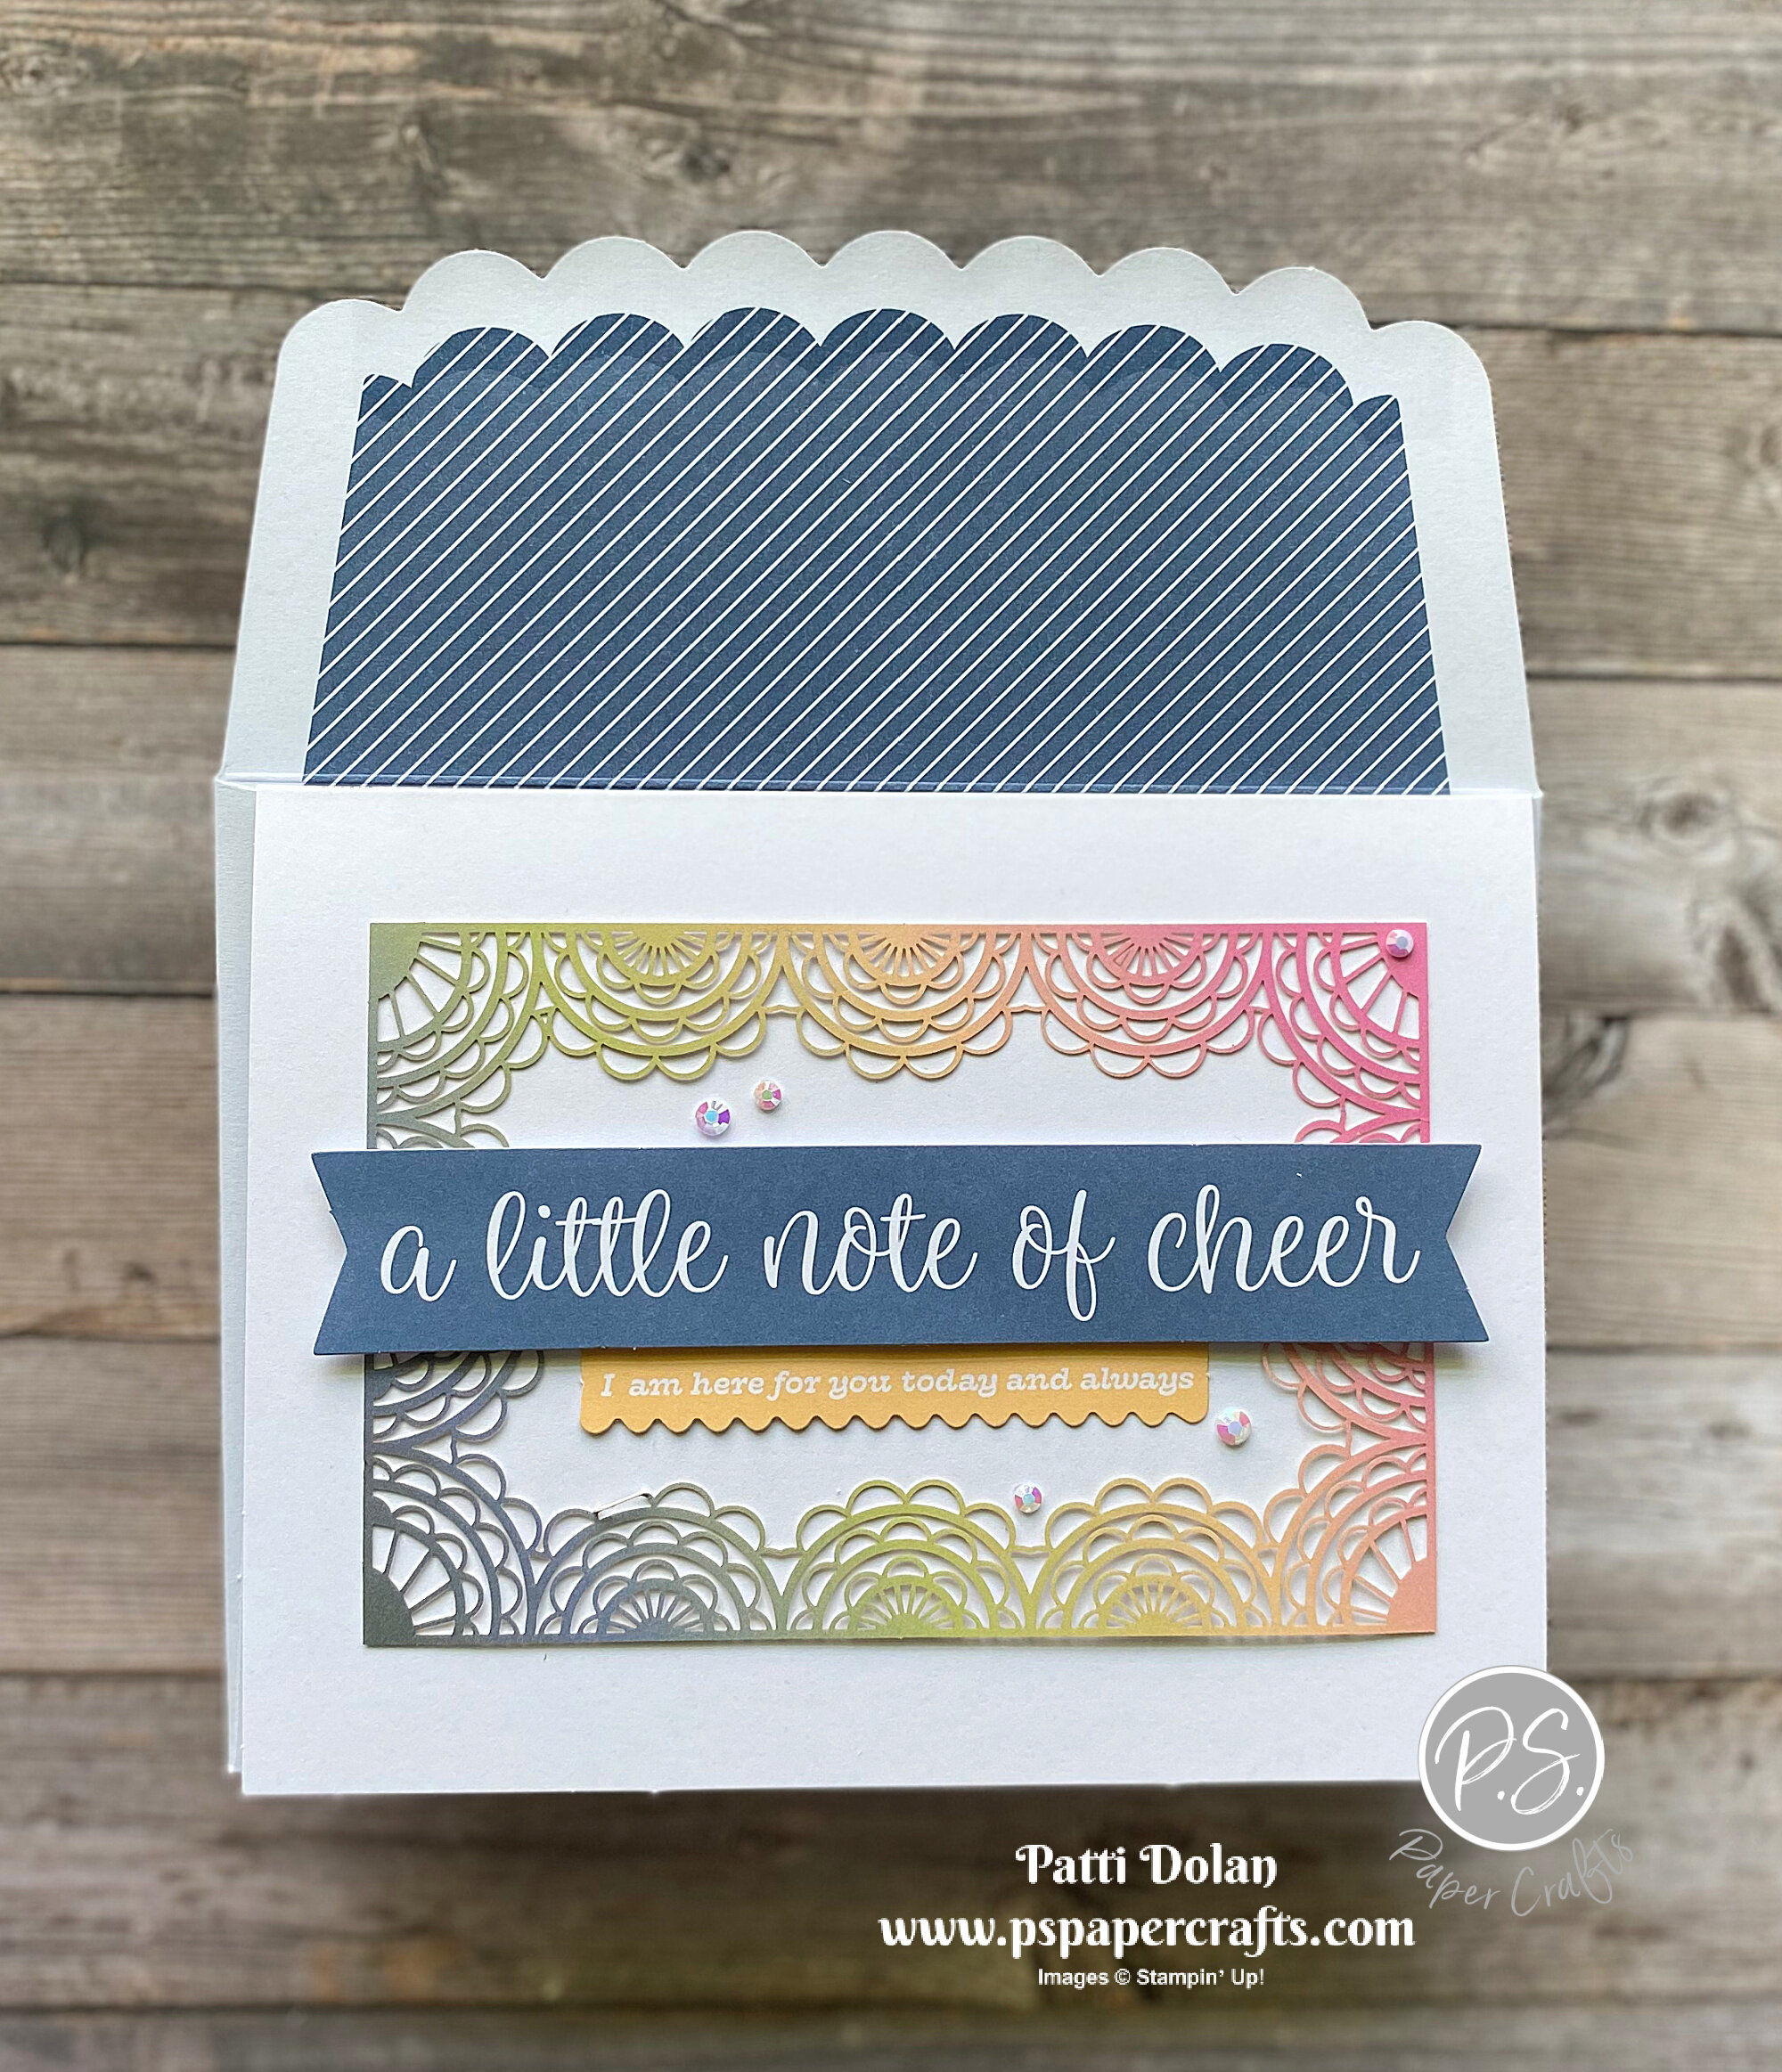
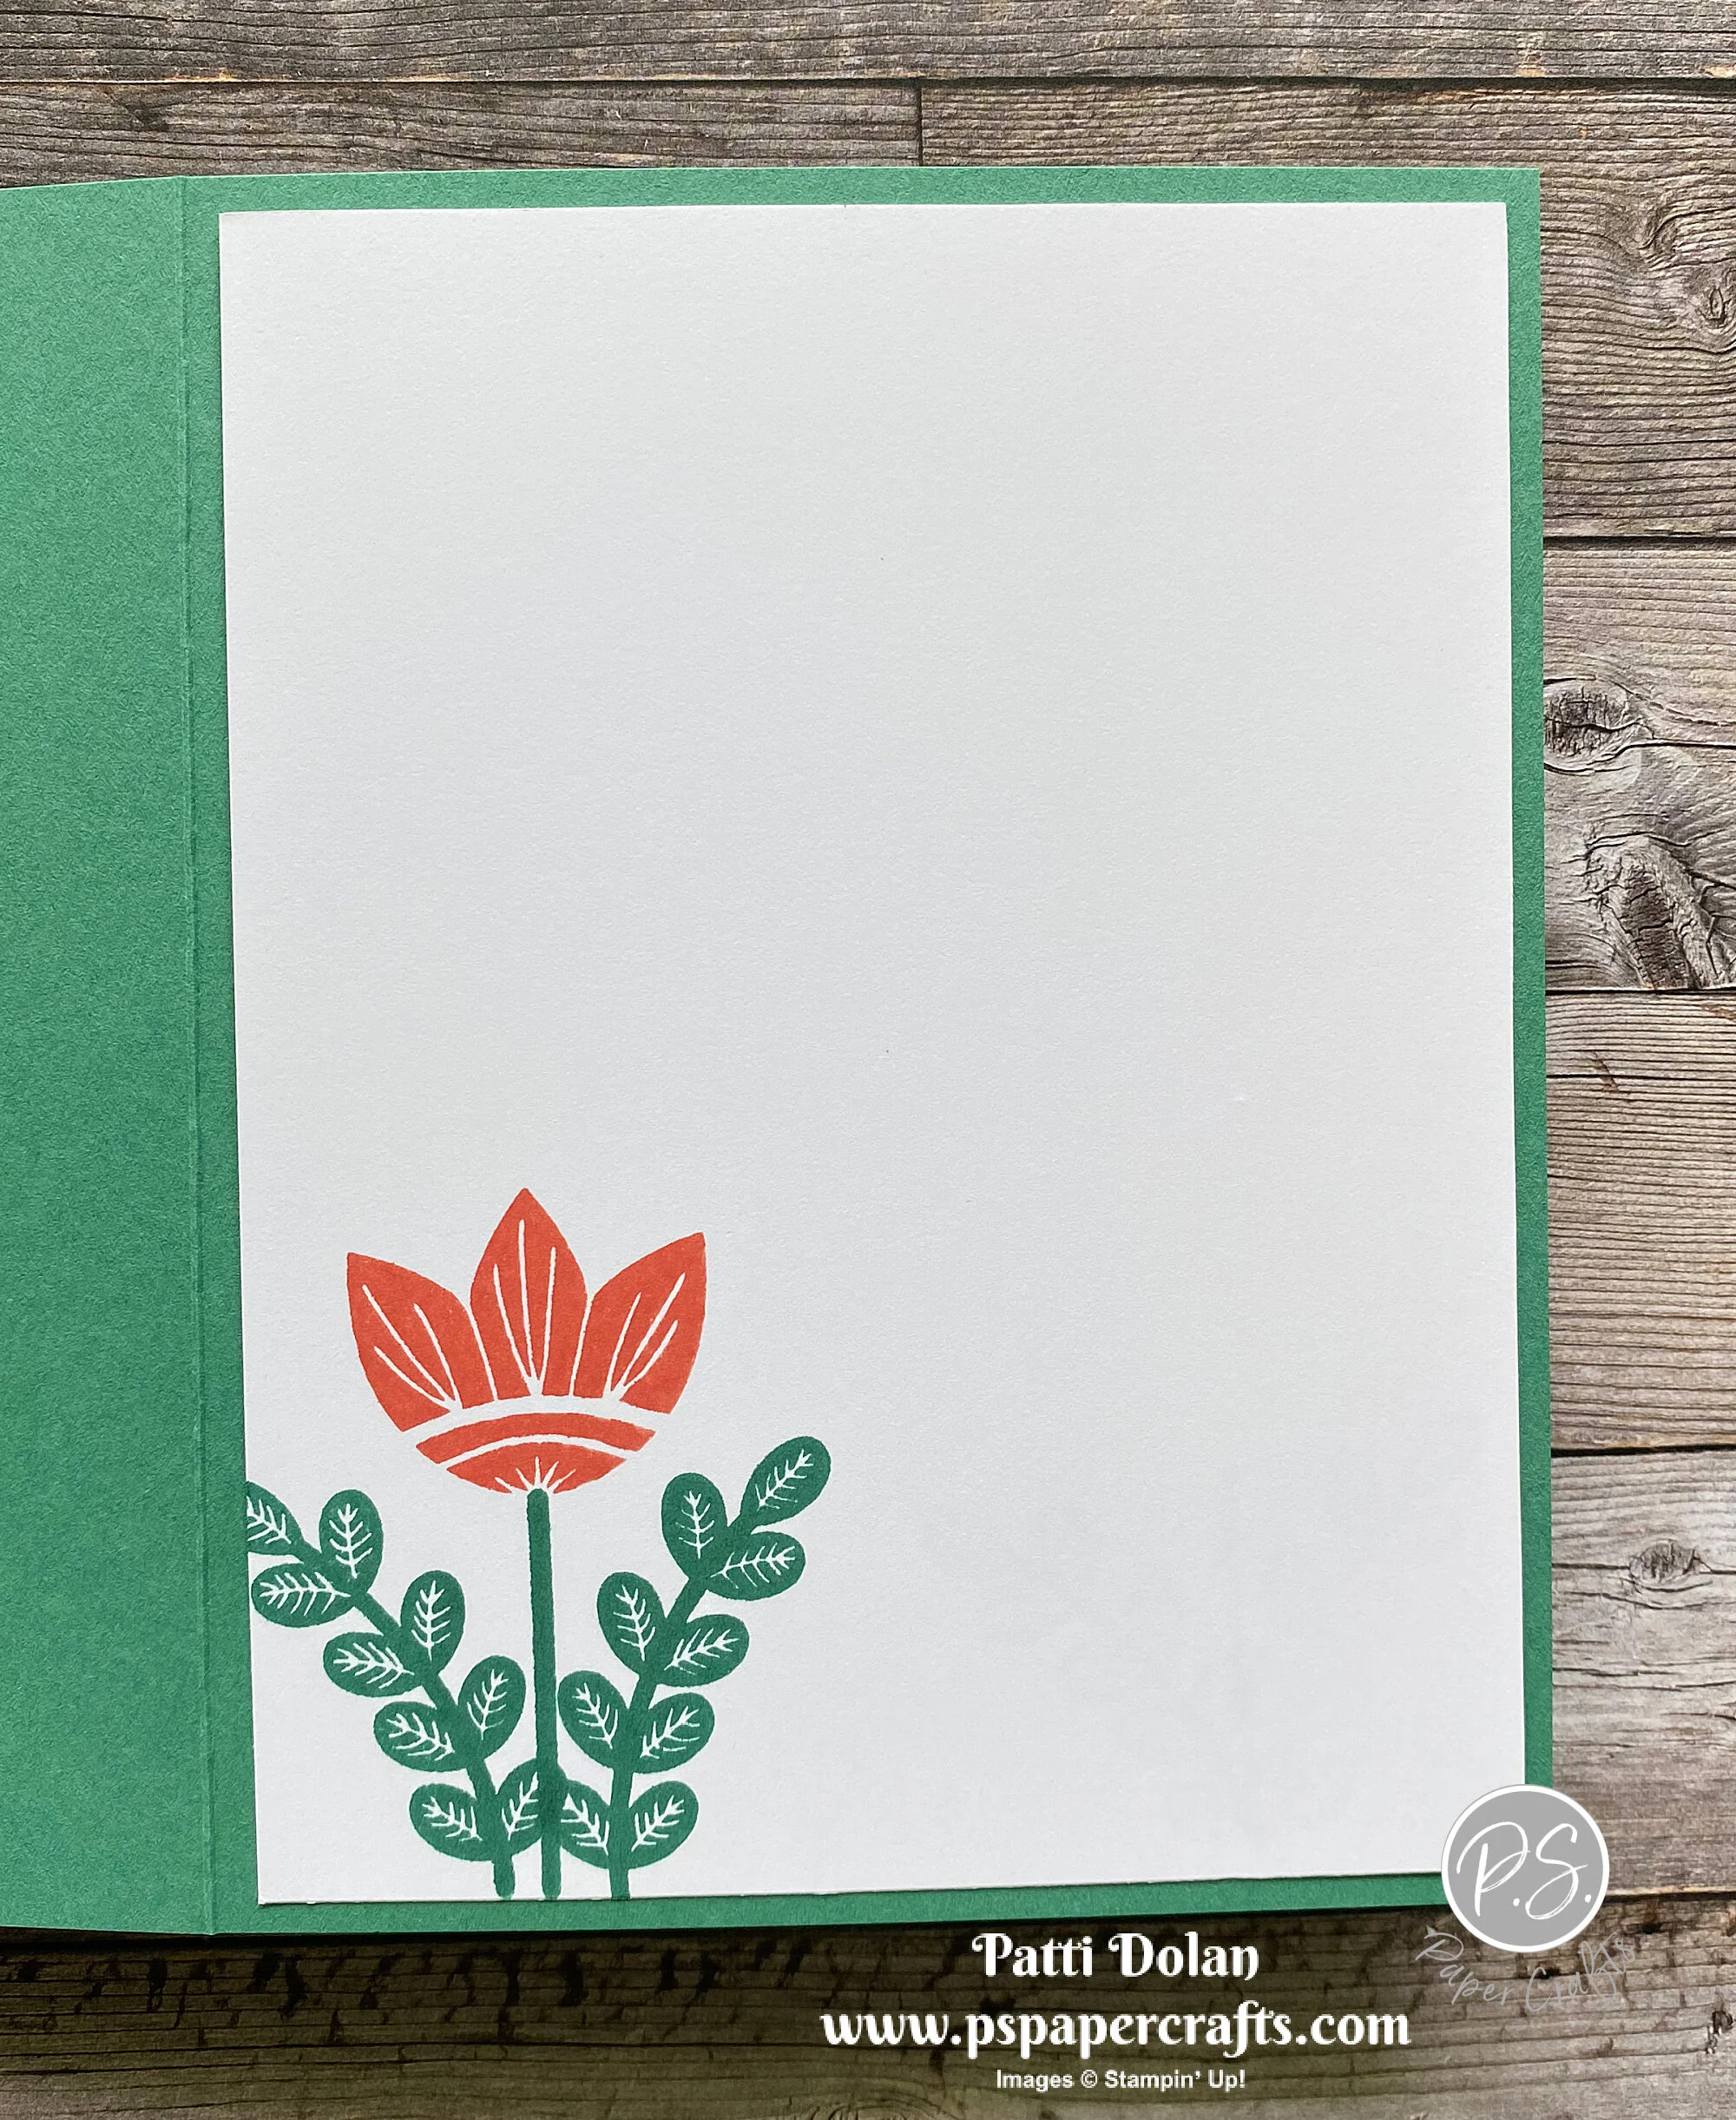
The Gorgeous Leaves Stamp Set has beautiful leaf images which I stamped on the inside layer. The Intricate Leaves Dies can cut the stamped image and also has the dies for the leaves I used on these cards.

 
Screen Shot 2021-08-17 at 8.04.24 PM.png
 

The Be Dazzling Specialty Paper is a Sale-A-Bration Product which means you can get it for FREE when you spend $50 on Stampin’ Up! Products during the Sale-A-Bration event.

 
Screen Shot 2021-08-17 at 8.14.16 PM.png
 

Tips & Instructions

  • Old Olive Card Base - 5 1/2 x 8 1/2, score at 4 1/4

  • Basic White Layer - 5 1/4 x 4, emboss with the Timber 3D Embossing Folder.

  • Cut leaves from Be Dazzling Specialty Paper and color with Stampin’ Blends (Old Olive, Rich Razzleberry and Cinnamon Cider).

  • Wrap a piece of Fine Art Ribbon around the embossed layer and adhere to the back. Adhere layer to card base.

  • Arrange and adhere leaves to card using Liquid Glue.

  • Stamp sentiment (from Inspired Thoughts Stamp Set) with Old Olive Ink on Basic White Cardstock and punch with Tailored Tag Punch. Adhere to card using Dimensionals.

  • Tie bow with ribbon and adhere to label using a Glue Dot.

 
Be Dazzling Gorgeous Leaves Card1.jpeg
 

On the inside stamp sentiment if you want with Old Olive Ink. Stamp leaves with Old Olive Ink and also with Cinnamon Cider and Rich Razzleberry Inks, stamping off first.

 
Be Dazzling Gorgeous Leaves inside.jpeg
 

Supply List

Great Tidings - Three Wise Men Christmas Card

I made this beautiful Christmas Card using the Great Tidings Bundle. I love the cut out for the layer that the wisemen fit in.

 
Great Tidings - Three Wise Men2.jpeg
 

The stamp set has some beautiful sentiments. One of my favorite’s is the one I used; “Wise men still seek Him”. The dies fit the wisemen so nicely.


I really enjoyed coloring these three wisemen from the Great Tidings Stamp Set with Stampin’ Blends.

 
Great Tidings - Three Wise Men Blends.jpeg
 

Tips & Instructions

  • Night Of Navy Card Base - 5 1/2 x 8 1/2, score at 4 1/4

  • Basic White Layer - 5 3/8 x 4 1/8, adhere to card base.

  • Night Of Navy Layer - 5 1/4 x 4, cut out with large cut out die leaving room for the sentiment at the bottom. Adhere to card using Dimensionals.

  • Stamp star with Daffodil Delight Ink and cut out with coordinating die. Add some Wink Of Stella.

  • Stamp the 3 wisemen with Black Memento Ink on Basic White Cardstock.

  • Color the wisemen with Stampin’ Blends. The faces and hands were colored with Light Crumb Cake.

    • For the first one I used Dark Blackberry Bliss, Light Highland Heather, Light Mint Macaron and Daffodil Delight.

    • The second was colored with Light and Dark Balmy Blue and Dark Daffodil Delight; the gift is Dark Smoky Slate.

    • The third was colored with Dark Evening Evergreen, Light Blackberry Bliss, Light Soft Succulent and Dark & Light Smoky Slate; the gift is Light & Dark Balmy Blue.

  • Cut out the wisemen with coordinating dies and adhere them to the white layer behind the cut out.

  • Stamp sentiment on 1/2” strip of Basic White with Night Of Navy Ink. Punch both ends with the Banners Pick A Punch. Adhere using Dimensionals.

 
Great Tidings - Three Wise Men1.jpeg
 

On the inside stamp the sentiment with Night Of Navy Ink and the star with Daffodil Delight Ink. Stamp the gifts with Black Memento Ink and color with Stampin’ Blends. I used Dark & Light Balmy Blue, Dark Daffodil Delight, Light Highland Heather, Light Blackberry Bliss, Light Smoky Slate, Light Mint Macaron and Light Soft Succulent.

 
Great Tidings - Three Wise Men inside.jpeg
 

Supply List

Sketch Saturday - Penguin Place

I made this cute birthday card for my granddaughter for this week’s sketch challenge. I used the Penguin Place Bundle along with the Sale-A-Bration Penguin Playmates Designer Series Paper. So cute, right?

 
Sketch Saturday - Penguin Place.jpeg
 

Here’s the sketch for this week’s Atlantic Heart Sketch Challenge that I used for the card.

 
Screen Shot 2021-08-13 at 5.22.09 PM.png
 

The Penguin Place Bundle is so adorable. You can buy them separately but you save 10% if you purchase them as a bundle. There are so many little extras in the stamp set like a hat, antlers, presents and the cute bow I used.

 
Screen Shot 2021-08-13 at 5.13.27 PM.png
 

The Penguin Playmates Designer Series Paper is FREE if you spend $50 on Stampin’ Up! products (before shipping & tax). So purchase the bundle, a coordinating ink pad, cardstock and a package of Dimensionals and you can get the paper for free.

 
Screen Shot 2021-08-13 at 5.10.58 PM.png
 

Tips & Instructions

  • Fresh Freesia Card Base - 5 1/2 x 8 1/2, score at 4 1/4

  • Cut 2 strips of Penguin Playmates Designer Series Paper -

    • one at 5 1/4 x 1 3/4 (dots)

    • one at 5 1/4 x 1 1/4 (stripes)

  • Cut Basic White strip at 5 1/4 x 3/4 and emboss using the Dots Embossing Folder.

  • Adhere the 3 strips as shown on the card leaving a border around each.

  • Stamp the sentiment (from A Grand Kid Stamp Set) on Basic White Cardstock with Fresh Freesia Ink and cut using the Tasteful Labels Die.

  • Punch the penguin from the Designer Series paper with Penguin Punch. I didn’t have the punch….forgot to order it so I fussy cut it.

  • Stamp the bow with Fresh Freesia Ink and fussy cut. Adhere to penguin and then adhere penguin to label.

  • Adhere label to card using Dimensionals.

  • Tie bow with Fresh Freesia Open Weave Ribbon and add with a Glue Dot.

  • Add a Pastel Pearl to label.

 
Sketch Saturday - Penguin Place Card2.jpeg
 

On the inside stamp sentiment with Fresh Freesia Ink (from A Grand Kid Stamp Set). Stamp penguin with Black Memento Ink, beak and feet with Calypso Coral Ink and bow with Fresh Freesia Ink. Stamp balloon with Fresh Freesia Ink and string with Black Memento Ink.

 
Sketch Saturday - Penguin Place inside.jpeg
 

Supply List

Celebrate Sunflowers using Soft Pastels

I love how this card turned out using the Soft Pastels Assortment. I stamped the sunflowers and then colored with the pastels.

 
Celebrate Sunflowers using Soft Pastels card2.jpeg
 

Watch the video to see how to use the Soft Pastels Assortment. They were easy to apply and create a beautiful result.


These easy to use chalk pastels work with a variety of coloring tools like Stampin' Up!'s Sponge Daubers, Blending Brushes, and Water Painters.

 
Screen Shot 2021-08-12 at 11.22.12 PM.png
 

Tips & Instructions

  • Early Espresso Card Base - 5 1/2 x 8 1/2, score at 4 1/4

  • Very Vanilla Layer - 5 1/4 x 4

  • Stamp the large sunflower with Soft Suede Ink on the bottom left corner of the Very Vanilla Layer. Cut the sunflower from a piece of Post-It Note using the coordinating Sunflower Dies to create a mask.. Lay the Post-It Note flower over the stamped flower and stamp the leaves with Evening Evergreen Ink. Stamp the smaller sunflowers, masking the first when stamping the second.

  • Using the pastels, color the flowers, flower centers and leaves. I used Mango Melody, Poppy Parade and Granny Apple Green. Rub in the chalk using Sponge Daubers. Wipe with a tissue or paper towel.

  • Stamp sentiment (from the Sunny Sentiments Stamp Set) with Soft Suede Ink.

  • Adhere layer to card base.

  • Add a Genial Gem.

 
Celebrate Sunflowers using Soft Pastels card1.jpeg
 

On the inside stamp the large sunflower with Soft Suede Ink and color with the Soft Pastels.

 
Celebrate Sunflowers using Soft Pastels inside.jpeg
 

Supply List

Pretty Pumpkin Fall Card

I made this beautiful card using the Detailed Pumpkin Dies and Paper Lattice. I used the Copper Foil Sheets for the pumpkin and the embossed strip. A few Brushed Metallic Dots finish off the card. No sentiment needed!

 
Pretty Pumpkin Fall Card2.jpeg
 

The Detailed Pumpkin Dies in the Pretty Pumpkins Bundle are really cool. I love the intricate pattern on the one that I used on the card.

 
Screen Shot 2021-08-11 at 5.17.20 PM.png
 

Tips & Instructions

  • Pumpkin Pie Card Base - 5 1/2 x 8 1/2, sore at 4 1/4

  • Very Vanilla Layer - 5 1/8 x 3 3/8, adhere behind the Paper Lattice. Adhere to card base.

  • Copper Foil Strip - 4 x 5/8, emboss with the Tasteful Textile 3D Embossing Folder. Adhere to card.

  • Cut pumpkin from a piece of Copper Foil Sheet using the Detailed Pumpkin Dies. Adhere to a 3 3/4 x 2 1/4 piece of Vellum Cardstock. Add some Brushed Metallic Adhesive Dots to the vellum. Adhere vellum layer to card putting small amounts of Liquid Glue behind the dots and the pumpkin (to hide the glue).

 
Pretty Pumpkin Fall Card1.jpeg
 

On the inside stamp the pumpkin image with Versamark and heat emboss with Copper Embossing Powder.

 
Pretty Pumpkin Fall Card inside.jpeg
 

Supply List

Sweet Little Stockings Christmas Card

This card is cuteness overload with the adorable little puppy and the fun sentiment. I used the Sweet Little Stockings Bundle to make it.

 
Sweet Little Stockings Christmas Card2.jpeg
 

In the video I’ll show you how you can cut the stockings from the Designer Series Paper with the dies and all the steps to make this card.


You have lots of options with this stamp set. You can stamp different sizes of the stockings and add a puppy, kitten or mouse. The sentiments are so fun!

 
Sweet Little Stockings Christmas stamp2.jpeg
 

The Sweet Stockings Designer Series Paper has the cutest prints and the colors are so bright and cheerful for Christmas.

 
Screen Shot 2021-08-10 at 10.01.37 PM.png
 

Tips & Instructions

  • Thick Basic White Card Base - 5 1/2 x 8 1/2, score at 4 1/4

  • Cherry Cobbler Layer - 5 1/4 x 4

  • Basic White Strip - 4 x 1

  • Sweet Stockings Designer Series Paper Strip - about 3/4”, adhere to white strip. Adhere strip to Cherry Cobbler Layer, then to card base.

  • Cut large stitched banner from Basic White Cardstock using the Stocking Dies. Stamp sentiment at the top with Cherry Cobbler Ink.

  • Cut stocking (medium or small) from the Designer Series Paper using the Stocking Dies.

  • Stamp the puppy (or kitten) and the cap with Black Memento Ink and color with Stampin’ Blends. I used Crumb Cake and Cherry Cobbler. Add some Wink Of Stella to the cap’s brim and pom pom. Cut with coordinating dies.

  • Adhere to banner and then adhere banner to card using Dimensionals.

  • Add some Subtle Shimmer Sequins.

 
Sweet Little Stockings Christmas Card1.jpeg
 

On the inside stamp the sentiment with Cherry Cobbler Ink. I stamped the Very Merry and then just the “Christmas” below it. Stamp the presents with Black Memento Ink and color with Cherry Cobbler and Old Olive Stampin’ Blends.

 
Sweet Little Stockings Christmas inside.jpeg
 

Supply List

Merry Melody Christmas Card

This new Merry Melody 3D Embossing Folder creates such a beautiful impression. The catalog doesn’t do it justice. I embossed a piece of the new Gold Shimmer Vellum and love how it turned out.

 
Merry Melody Christmas Card2.jpeg
 

Here’s a closeup of the embossed layer; it’s so crisp and clean.

 
Merry Melody Christmas Card closeup.jpeg
 

Tips & Instructions

  • Just Jade Card Base - 5 1/2 x 8 1/2, score at 4 1/4

  • Basic White Layer - 5 1/4 x 4

  • Gold Shimmer Vellum - 5 x 3 3/4, emboss using the Merry Melody 3D Embossing Folder. Make sure you use the Specialty Plate with the 3D Embossing Folder.

  • Adhere embossed layer to white layer. I used Stampin’ Seal behind the notes and it didn’t show through.

  • Wrap piece of Just Jade & Gold Braided Ribbon around the layer and adhere to back. Adhere layer to card base.

  • Stamp sentiment with Versamark on Basic White Cardstock, add Gold Embossing Powder and heat with Heat Tool.

  • Cut sentiment using the Seasonal Label Dies and adhere with Dimensionals.

  • Tie bow with ribbon and adhere using a Glue Dot.

  • Add some Brushed Metallic Adhesive Backed Dots.

 
Merry Melody Christmas Card1.jpeg
 

On the inside stamp sentiment with Versamark and emboss with Gold Embossing Powder. Cut 5 1/4 x 3/8 strip of the Gold Shimmer Vellum and emboss with the Merry Melody 3D Embossing Folder. Adhere to bottom of inside layer.

 
Merry Melody Christmas Card inside.jpeg
 

Supply List

Sketch Saturday - Peaceful Prints

For this week’s sketch challenge I used the Peaceful Prints Designer Series Paper which is FREE during Sale-A-Bration with a qualifying order.

 
Sketch Saturday - Christmas To Remember.jpeg
 

This is the sketch I used from the Atlantic Hearts Sketch Challenge.

 
Screen Shot 2021-08-06 at 9.37.28 PM.png
 

Here’s a closer look at the Peaceful Prints Designer Series Paper. The rustic patterns are great for masculine cards.

 
Screen Shot 2021-08-06 at 10.08.42 PM.png
 

Tips & Instructions

  • Real Red Card Base - 5 1/2 x 8 1/2, score at 4 1/4

  • Basic Black Layer - 5 1/4 x 3 3/4

  • Basic White Layer - 5 x 3 1/4

  • Peaceful Prints Designer Series Paper

    • 2 trees 3 1/4 x 1 1/2

    • 2 plaid 1 1/2 x 1 1/2

  • Assemble and adhere Designer Series Paper pieces on white layer. Adhere layer to black layer.

  • Adhere layer to card base using a piece of Foam Adhesive Sheet or Dimensionals.

  • Stamp sentiment on scrap of Basic White Cardstock with Real Red Ink and fussy cut leaving a white border around it.

  • Fold a piece of ribbon and adhere using Glue Dots and adhere sentiment using Dimensionals.

 
Sketch Saturday - Christmas To Remember2.jpeg
 

On the inside adhere a 4 x 3/4 strip of the Designer Series Paper. Stamp sentiment with Real Red Ink.

 
Sketch Saturday - Christmas To Remember inside.jpeg
 

Supply List

Peaceful Cabin Christmas Card

The Peaceful Place Suite of products in the new Mini Catalog is just beautiful!!! I was so excited to start using it to make this Christmas Card for my son!

 
Peaceful Cabin Christmas Card2.jpeg
 

In the video I’ll show you the products in the suite and show you how to make this card.


This is the log home that my husband built in NY. We raised our kids there and sold it to my son when we moved to Florida. I love to go up and visit my son and grandkids here. This picture is from last winter.

 
Log Home.jpeg
 

The Peaceful Cabin Bundle has the stamps and dies to create a beautiful winter scene. I love that you can cut the slope along with the cabin.

 
Screen Shot 2021-08-05 at 10.52.05 PM.png
 

I can’t say enough about how beautiful the Peaceful Place Specialty Designer Series Paper is. Watch the video to see each sheet.

 
Screen Shot 2021-08-05 at 10.52.27 PM.png
 

Tips & Instructions

  • Evening Evergreen Card Base - 5 1/2 x 8 1/2, score at 4 1/4

  • Silver Foil Specialty Paper - 5 1/4 x 4 (Tip - use a die to cut out the center to use for another project).

  • Peaceful Place Specialty Designer Series Paper - 5 x 3 3/4. Adhere to Silver Foil layer and then to card base.

  • Basic White Cardstock -3 3/4 x 3 - stamp cabin with Soft Suede Ink and cut using coordinating Cabin Die with slope. Adhere to bottom of Designer Series Paper layer.

  • Cut 2 small evergreen trees from Evening Evergreen Cardstock and adhere to both sides of the cabin.

  • Stamp sentiment with Evening Evergreen Ink on a scrap of Basic White Cardstock and punch with the Essential Tag Punch. Trim the bottom of tag and adhere to card using Dimensionals.

  • Add 3 Evening Evergreen Jewels to tag.

 
Peaceful Cabin Christmas Card1.jpeg
 

On the inside stamp 2 evergreen trees and the sentiment with Evening Evergreen Ink.

 
Peaceful Cabin Christmas inside.jpeg
 

Supply List

Happy Holly-Days Christmas Card

I made this sweet Christmas Card using the Happy Holly-Days Stamp Set from the new Mini Catalog. The background layer is from the Painted Christmas Designer Series Paper.

 
Happy Holly-Days Christmas Card2.jpeg
 

This Stamp Set has great Christmas sentiments and that bird is so pretty!

 
Happy Holly-Days Christmas stamp.jpeg
 

The Painted Christmas Designer Series Paper is gorgeous. I love all the patterns and colors; I will be using lots of it this year.

 
Screen Shot 2021-08-05 at 1.07.32 PM.png
 

Tips & Procedures

  • Evening Evergreen Card Base - 5 1/2 x 8 1/2, score at 4 1/4

  • Basic White Layer - 5 3/8 x 4 1/8, adhere to card base.

  • Painted Christmas Designer Series Paper - 5 1/4 x 4, adhere to card.

  • Basic White Cardstock - cut with the largest Seasonal Labels Dies.

  • Stamp the bird with Black Memento Ink and color with Stampin’ Blends. I used Poppy Parade, Crumb Cake and Pale Papaya.

  • Stamp the dots below the bird and the sentiment above the bird using Evening Evergreen Ink.

  • Lay a piece of Evening Evergreen Open Weave Ribbon on the card and adhere with a piece of tape. I laid the label over before adhering the ribbon to get placement.

  • Adhere the label over the ribbon with Dimensionals.

  • Add some Decorative Matte Dots.

 
Happy Holly-Days Christmas Card1.jpeg
 

On the inside stamp sentiment with Evening Evergreen Ink. Stamp the holly with Black Memento Ink and color with Dark Poppy Parade and Light Evening Evergreen Stampin’ Blends.

 
Happy Holly-Days Christmas inside.jpeg
 

Supply List

Nuts About Squirrels Card

This Nuts About Squirrels Stamp Set is so darn cute!!! It’s from the New Mini Catalog and it just makes me smile!

 
Nuts About Squirrels Card2.jpeg
 

In the video below I’ll show you how to use the two-step stamps to create these cute squirrels. I’ll also show you the pretty papers in the Tidings Of Christmas Designer Series Pack.


These squirrels are so fun and I love the sentiments in this stamp set.

 
Nuts About Squirrels stamp.jpeg
 

Tips & Instructions

  • Early Espresso Card Base - 5 1/2 x 8 1/2, score at 4 1/4

  • Tidings Of Christmas Designer Series Paper - 5 1/4 x 4, wrap Baker’s Twine around layer 3 times and adhere in the back, then adhere layer to card base.

  • Basic White Cardstock - cut with the largest rectangle from the Stitched So Sweetly Dies.

  • Stamp the squirrel and acorn with Early Espresso and Sahara Sand Inks. Stamp branch and sentiment with Early Espresso Ink. Stamp the leaf veins with Early Espresso Ink and the leaves with Bumblebee and Calypso Coral Ink.

  • Adhere layer to card using Dimensionals.

  • Add some Bumblebee Decorative Matte Dots.

 
Nuts About Squirrels Card1.jpeg
 

On the inside stamp the other squirrel with Early Espresso Ink and the inside with Sahara Sand Ink, stamping off first. Stamp the sentiment and leaf veins with Early Espresso Ink and the leaves with Calypso Coral and Bumblebee Inks. I stamped one of the leaves a second time without re-inking to get a lighter shade.

 
Nuts About Squirrels Card inside.jpeg
 

Supply List

Autumn Thankful Card

I love Autumn; it’s my favorite time of the year. I couldn’t wait to start making cards using products from the new Mini Catalog.

 
Autumn Thankful Card2.jpeg
 

I used lots of new products on this card to give you a sample of what they look like. The new Cork Specialty Paper and the Timber 3D Embossing Folder were used to create the background layer. I added a piece of the Diamond Weave Ribbon. The sentiment is from the Pretty Pumpkins Stamp Set and the leaves are from the Gorgeous Leaves Stamp Set. I finished off the card with some Brushed Metallic Adhesive-Backed Dots.

Tips & Instructions:

  • Early Espresso Card Base - 5 1/2 x 8 1/2, score at 4 1/4

  • Very Vanilla Layer - 5 1/4 x 4, emboss using the Timber 3D Embossing Folder.

  • Cork Specialty Paper - 4 x 1 1/2, adhere to Very Vanilla Layer.

  • Wrap piece of Diamond Weave Ribbon around layer at the seam and adhere to back of layer. Adhere layer to card.

  • Cut piece of Very Vanilla Cardstock using the Tasteful Labels Dies. Stamp sentiment with Early Espresso Ink.

  • Color the the stamp with the small group of 3 leaves with Stampin’ Write Markers. I used Pumpkin Pie, Crushed Curry and Cajun Craze. Breath on the stamp to moisten the ink and stamp around sentiment. Do this 4 times. Adhere label to card using Dimensionals.

  • Add some Brushed Metallic Adhesive-Backed Dots.

 
Autumn Thankful Card1.jpeg
 

On the inside stamp leaves using Cajun Craze, Crushed Curry and Pumpkin Pie Inks. If you don’t have the ink pads, you an color with the Stampin’ Write Markers.

 
Autumn Thankful inside.jpeg
 

Supply List

New Mini Catalog & Sale-A-Bration Starts Today!!!

Today's the Day!!!  You can start shopping from the new Mini Catalog and start earning Sale-A-Bration products!!!

 
Screen Shot 2021-08-02 at 10.12.15 AM.png
 

The new Mini Catalog is your passport to stunning seasonal projects! It contains all the products you’ll need to craft, create, and celebrate during Halloween, Christmas, and more.


Along with the Mini Catalog Launch, Stampin' Up! has added a second Sale-A-Bration Promotion! When you place a qualifying order, you can choose a free Sale-A-Bration product.

 
Screen Shot 2021-08-02 at 10.21.22 AM.png
 

During this round of Sale-A-Bration, some products will only be available while supplies last. This means that once they’re gone, they’re gone for good! The Sale-A-Bration products with limited supply include:

  • 156629 Be Dazzling 6" x 6" (15.2 x 15.2 cm) Specialty Paper

  • 156600 Sheep Dies

  • 156618 Summer Shadows Dies

All other Sale-A-Bration products will be available throughout the promotion. High demand can send these products into backorder and delay shipping, but the supply will not run out; all orders placed will be honored.


To make Sale-A-Bration even better, you'll get to pick a qualifying bundle from the new Mini Catalog to add to your Starter Kit -- for free! There couldn't be a better time to join the Stampin' Up! family.

 
Screen Shot 2021-08-02 at 10.33.58 AM.png
 

When you purchase the Starter Kit for $99 (US), you get:

  • $125 in product, your choice

  • Free qualifying bundle from the new Mini Catalog (see list below)

  • Free Shipping on this order

  • 20% discount on future orders with potential for a 25% discount

  • Access to new product releases, and pre-ordering

  • Joining my team gives you access to multiple FaceBook groups with great tips, training, sharing, encouragement and lots of fun!

 
Screen Shot 2021-08-02 at 9.54.45 AM.png
 

There's no pressure to sell. You can join and enjoy the 20% discount or you sell to a few friends or you can go full board and do this as a business. Whatever your interest, there's something for you.

If you have any questions and want to discuss this with me, please email me and we can schedule a call.

patti@pspapercrafts.com

Beautifully Penned Birthday Card

I created this pretty birthday card using Beautifully Penned Designer Series Paper which you can earn for FREE with a $50 order during Sale-A-Bration.

 
Beautifully Penned Birthday Card2.jpeg
 

The paper coordinates with the Hand-Penned Petals Bundle. All the papers in the pack are black and white patterns! Sale-A-Bration starts August 3rd, along with the new Mini Catalog and you can earn FREE products when you spend $50 or $100 (before shipping & tax).

 
Beautifully Penned Birthday Card stamp.jpeg
 

Tips & Instructions

  • Basic Black Card Base - 5 1/2 x 8 1/2, score at 4 1/4.

  • Basic White Layer - 5 3/8 x 4 1/8

  • Beautifully Penned Designer Series Paper - 5 1/4 x 4, adhere to white layer and wrap a piece of Flirty Flamingo Metallic Ribbon around the layers adhering it to the back. Adhere layers to card base.

  • Stamp the large floral image on Basic White Cardstock with Black Memento Ink. Cut out using the coordinating Penned Flower Dies. Stamp the large flowers with Flirty Flamingo Ink, stamping off first to get a lighter shade. Stamp smaller flowers with Flirty Flamingo directly. Stamp leaves with Soft Succulent Ink, stamping off first to get a lighter shade.

  • Cut rectangle using the Stitched So Sweetly Dies. Stamp sentiment (from Sweet As A Peach Stamp Set) at the bottom of the rectangle using Black Memento Ink.

  • Adhere floral image to rectangle using Dimensionals and then adhere to card.

  • Tie bow with ribbon and adhere using Glue Dot.

 
Beautifully Penned Birthday Card1.jpeg
 

On the inside stamp the large floral image and the sentiment with Black Memento Ink. The sentiment is from the Sweet As A Peach Stamp Set.

 
Beautifully Penned Birthday Card inside.jpeg
 

Supply List

(Note, the FREE Designer Series Paper will be available to order starting August 3, 2021)

Sketch Saturday - Sweet Strawberry

For this week’s Sketch Challenge, I used the Sweet Strawberry Bundle. Summer is the perfect time of the year to make a card with strawberries!


The sketch I used is from the weekly Atlantic Hearts Sketch Challenge. I love doing their challenges. You should play along too!

 
Screen Shot 2021-07-23 at 9.56.25 PM.png
 

I love when there is a punch that coordinates with a stamp set. It makes it so easy to stamp and punch the images. The sentiments are a nice mix of script and print.

 
Screen Shot 2021-07-23 at 10.12.10 PM.png
 

Tips & Instructions

  • Granny Apple Green Card Base - 5 1/2 x 8 1/2, score at 4 1/4

  • Basic White Layer - 5 1/4 x 4

  • Basic White Square - 2 x 2, emboss with the Tasteful Textiles 3D Embossing Folder.

  • Cut Basic White circle with Layering Circle Dies. Stamp sentiment with Poppy Parade Ink.

  • Cut Granny Apple Green scalloped circle with Layering Circle Dies and adhere to back of white circle.

  • Stamp two strawberries with Poppy Parade Ink on Basic White Cardstock. Stamp the outline straight on and the filler stamping off first. Punch using coordinating punch.

  • Stamp 3 leaves and two berry tops with Granny Apple Green Ink on Basic White Cardstock. Stamp the outline straight on and the filler stamping off first. Punch using coordinating punch.

  • Cut a piece of Fine Art Ribbon to about 5 1/2” and banner one end. Adhere across white layer wrapping around the one end and adhere to back. Adhere layer to card base.

  • Arrange all the pieces as shown in the photo. Use Dimensionals for the sentiment and strawberries.


On the inside, stamp the leaves and flowers image with Granny Apple Green Ink.


Supply List

Notes of Cheer Card Kit

Stampin’ Up! has some great, new kits. I used the Notes Of Cheer Card Kit to make these pretty, colorful cards. These were so simple to make and I didn’t even stamp!!!

 
Notes of Cheer Card Kit all2.jpeg
 

In the video you’ll see me open the box and show you all that you get. I’ll make one of each of the three designs.


The kit contains everything you need to create 9 cards, 3 each of 3 designs. There are pretty envelopes for each card, sentiments, rhinestones and adhesive. I used my Take Your Pick Tool to help with the rhinestones but you can use tweezers or scissors or whatever you have on hand.

 
Screen Shot 2021-07-22 at 10.48.39 PM.png
 

I think this is my favorite card. The card front has a pretty watercolor look which peeks through behind the butterflies.


This is such a cute card and I will send it to my granddaughter just to let her know how special she is.

 
Notes of Cheer Card Kit butterfly.jpeg
 

I love that delicate background layer and the sentiments on this one.

 
Notes of Cheer Card Kit blue.jpeg
 

You can get a group of friends together and make these cards. They are perfect for new card makers or someone who doesn’t have a lot of supplies.

You can also host a party, online or in person and make a kit. Email me and we can plan it out.

patti@pspapercrafts.com

 
Notes of Cheer Card Kit all.jpeg
 

Supply List

Delicate Dahlias - Sneak Peek!!!

To outline or not to outline!!! I used the FREE Sale-A-Bration Stamp Set to create these two cards.

On one card I used the outline stamp and the filler and the other I used just the filler. Two very different looks.

Which do you like better?

 
Delicate Dahlias Both.jpeg
 

The Delicate Dahlias Stamp Set is FREE with a qualifying order during Sale-A-Bration which starts August 3, 2021. The images are so pretty in this set.

 
Delicate Dahlias Stamp Set.jpeg
 

Tips & Instructions - Note use a cushion (I used a Piercing Mat) to get a good image when stamping with the large dahlia filler stamp.

  • Basic Black Card Base - 5 1/2 x 8 1/2, score at 4 1/4

  • Basic White Layer - cut using the largest die from the Scalloped Contours Dies.

  • Stamp the outline for the large dahlia using Black Memento Ink, then stamp the filler using Flirty Flamingo Ink. Check the petals to find one to help guide you for lining it up.

  • Draw stem using a Pear Pizzazz Stampin’ Write Marker (use the thick end). Lightly draw an outline for the stem using a Basic Black Stampin’ Write Market (use the thin end).

  • Stamp the sentiment with Black Memento Ink at the bottom, right corner.

  • Stamp two sets of the outline for the leaves with Black Memento Ink and the filler using Pear Pizzazz Ink, stamping off first to get a lighter shade.

  • Adhere layer to card base using Dimensionals.

  • Add 3 Opal Rounds to top corner.

 
Delicate Dahlias Outlined Card1.jpeg
 

On the inside stamp the smaller flower outlines and leaves with Black Memento Ink. Stamp the flower fillers with Flirty Flamingo Ink. Stamp the leaf fillers with Pear Pizzazz Ink, stamping off first.

 
Delicate Dahlias Outlined inside.jpeg
 

Follow the instructions above only don’t stamp the outlines with the black ink. Use a Pear Pizzazz Card Base.

 
Delicate Dahlias No Outline Card1.jpeg
 

On the inside, stamp the flowers and leaves without the outlines.

 
Delicate Dahlias No Outline inside.jpeg
 

Supply List - Note the Delicate Dahlias Stamp Set will be available beginning August 3, 2021.

In Symmetry Thank You Card

I designed this beautiful card using the In Symmetry Stamp Set and the coordinating Sweet Symmetry Designer Series Paper. The paper is on sale during the month of July, 2021. This paper reminds me of Pennsylvania Dutch designs.

 
In Symmetry Thank You Card2.jpeg
 

In the video I’ll show you how to make this card using the Tailor Made Tag Dies. I started from the bottom of the tag and working my way up. I masked the sentiment to just get the Thanks part.


The images in the stamp set are beautiful and give you a very crisp, sharp image. You can create different flowers with those fun leaves.

 
In Symmetry Thank You Card stamp.jpeg
 

Tips & Instructions

  • Just Jade Card Base - 5 1/2 x 8 1/2, score at 4 1/4

  • Sweet Symmetry Designer Series Paper - 5 1/4 x 4, adhere to card base.

  • Using the Tailor Made Tag dies cut the largest tag from the Sweet Symmetry Designer Series Paper and the next largest tag from a piece of Basic White Cardstock.

  • Stamp the sentiment with Calypso Coral Ink at the very bottom of the white tag, masking off the part you don’t want with Post-It Notes (see video). Next, stamp the stem and leaves with Just Jade Ink. Lastly, stamp the flower with Calypso Coral Ink.

  • Cut the ring for the tag from Calypso Coral Cardstock and adhere around the hole on the white tag. Fold piece of Baker’s Twine in half, feed through the top of both tags and tie a bow.

  • Adhere tag at an angle to card using Dimensionals.

 
In Symmetry Thank You Card1.jpeg
 

On the inside stamp the leaf images and stem with Just Jade Ink. Stamp the flower with Calypso Coral Ink

 
In Symmetry Thank You inside.jpeg
 

Supply List

Simple Monochromatic Birthday Card

I used the Biggest Wish Stamp Set and Polished Pink to create this simple monochromatic Birthday Card! This is such a bright and pretty color for this card.

 
Biggest Wish Monochromatic Birthday card2.jpeg
 

The Biggest Wish Stamp Set has big bold sentiments. You can mix them up to create the sentiment you want.

 
Biggest Wish Monochromatic Birthday stamp.jpeg
 

I lightly sponged the embossed layer to just pick up some color for the background layer.

Tips & Instructions

  • Polished Pink Card Base - 5 1/2 x 8 1/2, score at 4 1/4

  • Basic White Layer - 5 1/4 x 4, emboss using the Painted Texture 3D Embossing Folder. Lightly sponge layer using Polished Pink Ink and a Sponge Dauber. I rubbed off most of the ink on a piece of scrap paper first and just added a light tough to the high points of the embossed layer.

  • Wrap piece of Polished Pink Open Weave Ribbon around layer and adhere to the back. Adhere layer to card base.

  • Stamp sentiment with Polished Pink Ink on Basic White Cardstock that was cut using the Stitched So Sweetly Dies. Adhere to card using Dimensionals. Add some Loose Flower Flourishes using Glue Dots.

  • Tie bow with ribbon and adhere using a Glue Dot.

 
Biggest Wish Monochromatic Birthday card1.jpeg
 

On the inside layer, stamp the sentiment with Polished Pink Ink. This sentiment is from the A Grand Kid Stamp Set. Add some confetti (from Biggest Wish) if you want using Polished Pink Ink.

 
Biggest Wish Monochromatic Birthday inside.jpeg
 

Supply List

Daisy Garden Double Layer Card

I used the Daisy Garden Stamp to create this Double Layer Card. I was planning to make a Triple Layer Card but liked the way this looked so went with it.

 
Daisy Garden Double Layer Card2.jpeg
 

The Daisy Garden Stamp is one large background Stamp. I used the Stamparatus which allowed me to stamp a couple of times to get good coverage.

 
Daisy Garden Double Layer Stamp.jpeg
 

Tips & Instructions

  • Early Espresso Card Base - 5 1/2 x 8 1/2, score at 4 1/4

  • Early Espresso Layer - 4 1/2 x 3 1/4

  • Basic White Layers - one at 5 x 3 3/4 and one at 4 1/4 x 3. Adhere layers together with a tiny bit of an adhesive where you can easily separate the layers after stamping and coloring. I used Stampin’ Seal. Stamp the daisies image with Crumb Cake Ink.

  • You’ll see a gap between the layers and that’s ok. The Early Espresso Layer will hide the gap. Color leaves with a Soft Sea Foam and the petals with So Saffron Stampin’ Write Markers.

  • Color flower centers with Wink Of Stella.

  • Separate the white layers and adhere the Early Espresso Layer between. Adhere the layers to the card base using Dimensionals.

  • Stamp sentiment on 1/2 strip of Basic White Cardstock and punch both ends with the Banner Pick A Punch. Adhere to card.

  • Add a Genial Gem to the sentiment.

 
Daisy Garden Double Layer Card1.jpeg
 

On the inside stamp a portion of the daisies and color like you did on the card front.

 
Daisy Garden Double Layer inside.jpeg
 

Supply List