Peaceful Poppies Sympathy Card

I made this sympathy card for a friend. The Peaceful Poppies Designer Series Paper made it easy to pull a quick card together.

 
Peaceful Poppies Sympathy card2.jpg
 

This Designer Series Paper is one of my favorites in the Mini Catalog. The colors are so pretty and vibrant.

 
Peaceful Poppies DSP.png
 

Tips & Instructions

  • Poppy Parade Card Base - 5 1/2 x 8 1/2, score at 4 1/4

  • Basic Black Layer - 5 3/8 x 4 1/8

  • Peaceful Poppies Designer Series Paper Layer - 5 1/4 x 4, adhere to black layer

  • Stamp sentiment (from Peaceful Moments) on scrap of Whisper White Cardstock and cut with Painted Labels Die

  • Cut scrap of Basic Black Cardstock with larger Painted Labels Die

  • Punch slit on each side of the black label using Label Me Fancy Punch and feed piece of Polka Dot Tulle Ribbon through slits

  • Adhere sentiment to black label and attach to card using Dimensionals and then adhere the ribbon to back

  • Adhere layer to card base

  • Color 2 pearls with Dark Poppy Stampin Blends and adhere to label

 
Painted Poppies Sympathy Card.jpg
 

On the inside stamp sentiment and poppy with Black Memento Ink. Color flower with Dark Old Olive and Light Poppy Parade Stampin’ Blends.

 
Peaceful Poppies Sympathy inside.jpg
 

Supply List

Scrappy Strip Dinoroar Birthday Card

These Scrappy Strip style cards seem to be all the rage right now. I decided to make mine a little different using a set pattern and cutting it up. Most of these style cards use various patterns and solids to create a unique design.

 
Scrappy Cards All.jpg
 

Watch the video below to see how to make the fun dinosaur card.


I love these dinosaurs for a child’s card. They are cute and fun!

 
Scrappy Dinoraur Card3.jpg
 

Tips & Instructions

  • Pretty Peacock Card Base - 5 1/2 x 8 1/2, score at 4 1/4

  • Pretty Peacock Layer - 5 1/4 x 4

  • Dinoroar Designer Series Paper (I used 6x6) - slice up strips making angles to get variations on sizes and angles. Make sure your very first piece is a straight edge.

  • Adhere strips to 5 1/4 x 4 layer leaving space between strips, using a Silicone Craft Sheet to keep adhesive from sticking to your work area

  • Cut off ends that are hanging over and adhere layer to the card base

  • Stamp sentiment (from Bonanza Buddy) on 1/2 strip of Whisper White Cardstock with Pretty Peacock Ink and cut to leave just a little space on each side

  • Adhere strip to piece of 5/8 Pretty Peacock Cardstock and cut end to leave just a small border

  • Adhere to card using Dimensionals

  • Adhere Dinoroar Enamel Shapes to each side of the sentiment

 
Scrappy Dinoraur Card1.jpg
 

On the inside, stamp sentiment (from Bonanza Buddies) with Pretty Peacock Ink. Stamp balloon strings with black ink and balloons with Lovely Lipstick Ink, stamping off to get lighter shades.

 
Scrappy Dinoroar Inside.jpg
 

Here’s another card I made using the Peaceful Poppies Designer Series Paper and Peaceful Moments Stamp Set.

 
Scrappy Painted Poppies.jpg
 

Supply List

Clearance Rack Refresh

Screen Shot 2020-04-14 at 2.41.47 PM.png

New items have been added to the Clearance Rack at Stampin' Up! Supplies are limited, and with discounts up to 60%, products will go quickly. 


Use Host Code KQ4NAD9V for orders under $150

 
Loyalty Rewards.jpg
 

Don't forget my Loyalty Rewards Program.  For every $50 you spend (before shipping and tax) you get one rewards point.  After you earn 10 points, you can pick a stamp set for free.  

Click the Loyalty Rewards Button at the top of this blog for details.


Beautiful Friendship Card

Hydrangeas are one of my favorite flowers and this stamp has lots of texture built right in to give you light and dark on the images to create a gorgeous bunch of them. I love how you can stamp them all around, overlapping them.

 
Beautiful Friendship Card2.jpg
 

The Beautiful Friendship Stamp Set has such pretty images and sentiments. I used the new Ornate Floral 3D Embossing Folder for the background.

 
Beautiful Friendship Card supplies.jpg
 

Tips & Instructions

  • Night Of Navy Card Base - 5 1/2 x 8 1/2, score at 4 1/4

  • Whisper White Layer - 5 3/8 x 4 1/8 and adhere to card base

  • Seaside Spray Layer - 5 1/4 x 4, emboss with the Ornate Floral 3D Embossing Folder and adhere to card

  • Whisper White - cut largest Stitched So Sweetly Die

  • Stamp sentiment with Night Of Navy Ink

  • Stamp hydrangeas with Seaside Spray Ink around overlapping to fill the layer

  • Adhere to card using Dimensionals

  • Add Rhinestones

 
Beautiful Friendship Card1.jpg
 

On the inside stamp hydrangeas across the bottom with Seaside Spray Ink.

 
Beautiful Friendship Card inside.jpg
 

Supply List

Sketch Saturday - Music From The Heart

I used the Music From My Heart Stamp Set for today’s sketch. The colors are all the 2018-2020 In Colors which will retire in June with the new catalog and new In Colors.

 
Sketch Saturday - Music From The Heart1.jpg
 

The sketch is from the CAS(E) This Sketch Challenge from Splitcoaststampers.

 
Screen Shot 2020-04-11 at 10.39.00 AM.png
 

Tips & Instructions

  • Blueberry Bushel Card Base - 5 1/2 x 8 1/2, score at 4 1/4 (I have to admit that I didn’t have Blueberry Bushel Cardstock so I used Night Of Navy which worked fine.)

  • Whisper White Layer - 5 1/4 x 4

  • Using the 2018-2020 In Color Stampin’ Write Markers (Lovely Lipstick, Blueberry Bushel, Call Me Clover, Grapefruit Grove, Pineapple Punch) color each line directly on the stamp in a different color and stamp across bottom of layer; repeat to get two sets, multi-colored

  • Stamp Treble Clef with Blueberry Bushel and the rest of the notes with different colors

  • Adhere layer to card base

  • Stamp sentiment on 1/2” scrap of Whisper White with Blueberry Bushel Ink and punch one end using Banner Triple Punch

  • Cut 5/8” strip of Blueberry Bushel Cardstock and punch on end using Banner Triple Punch and adhere to sentiment strip

  • Adhere sentiment to card using Dimensionals

 
Sketch Saturday - Music From The Heart2.jpg
 

On the inside stamp notes using different colors across the bottom.

 
Sketch Saturday - Music From The Heart - inside.jpg
 

Supply List

Fun Butterfly Card using the Masking Technique

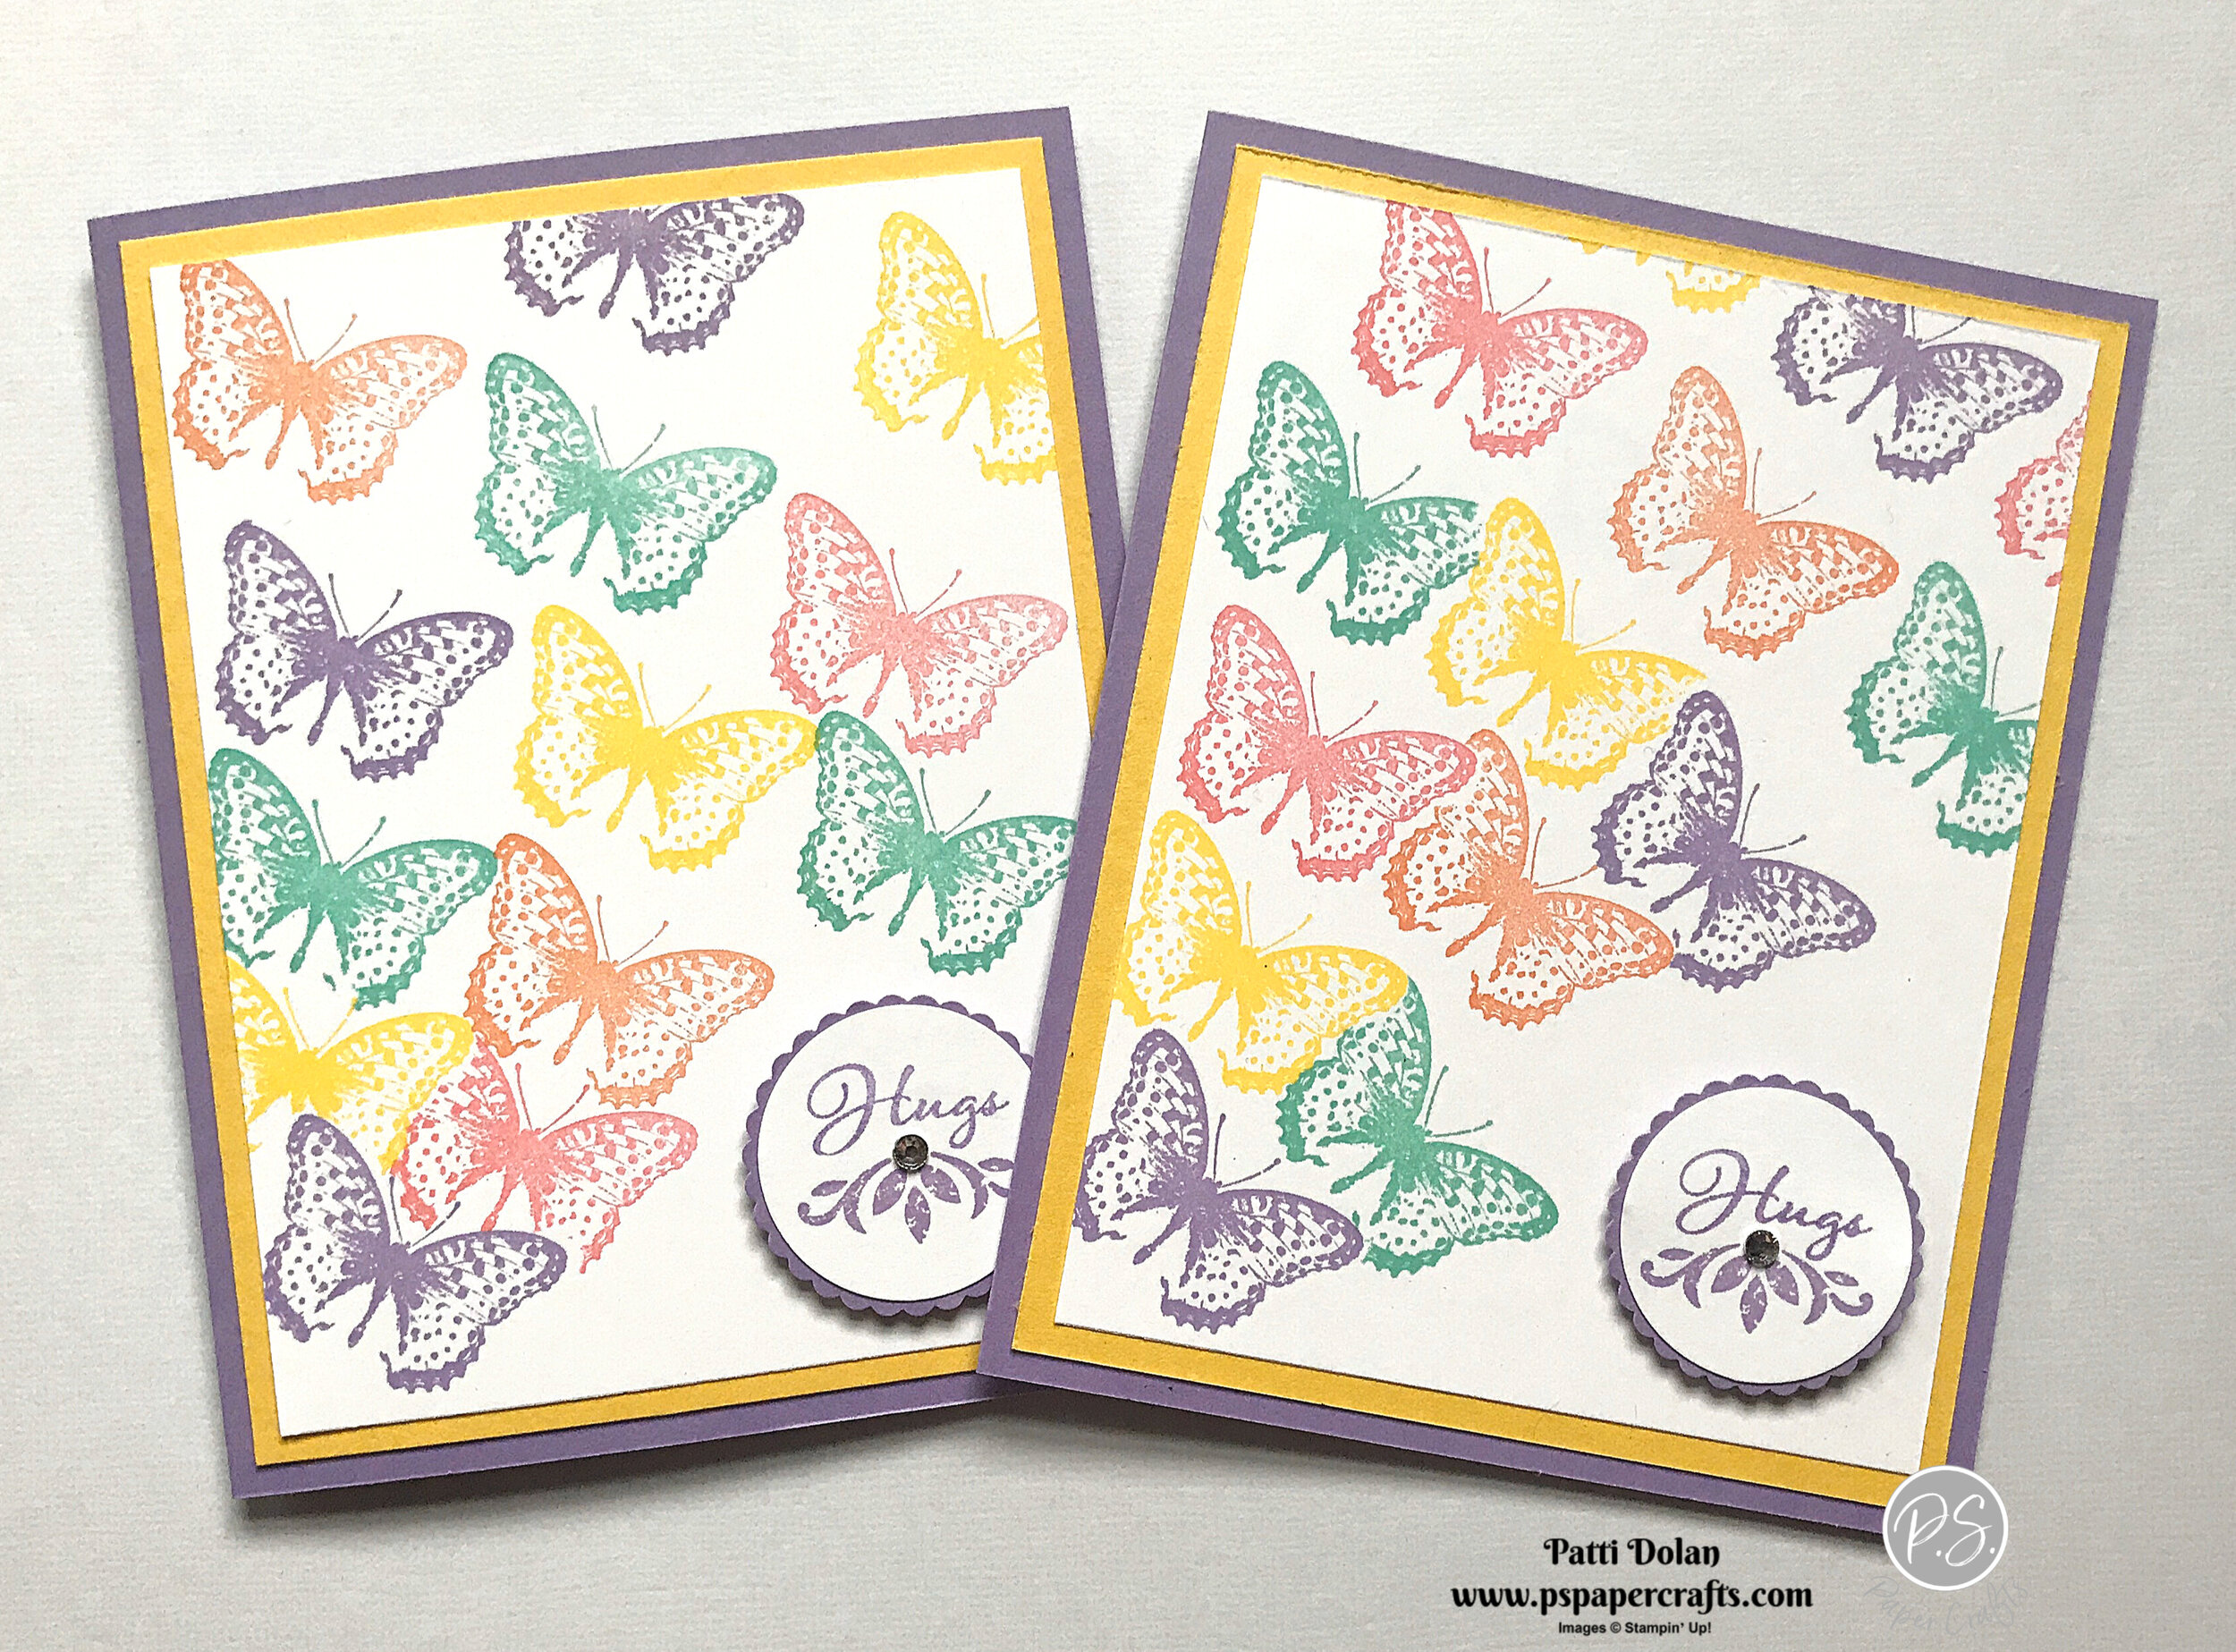
This is such a bright and cheerful card to send someone right now to let them know you’re thinking of them.

 
Fun Butterfly Card - Masking Technique both.jpg
 

Watch the video to see how I used the masking technique on this card.


Each card will come out a little differently. Have fun with it, pick whatever colors you like.

 
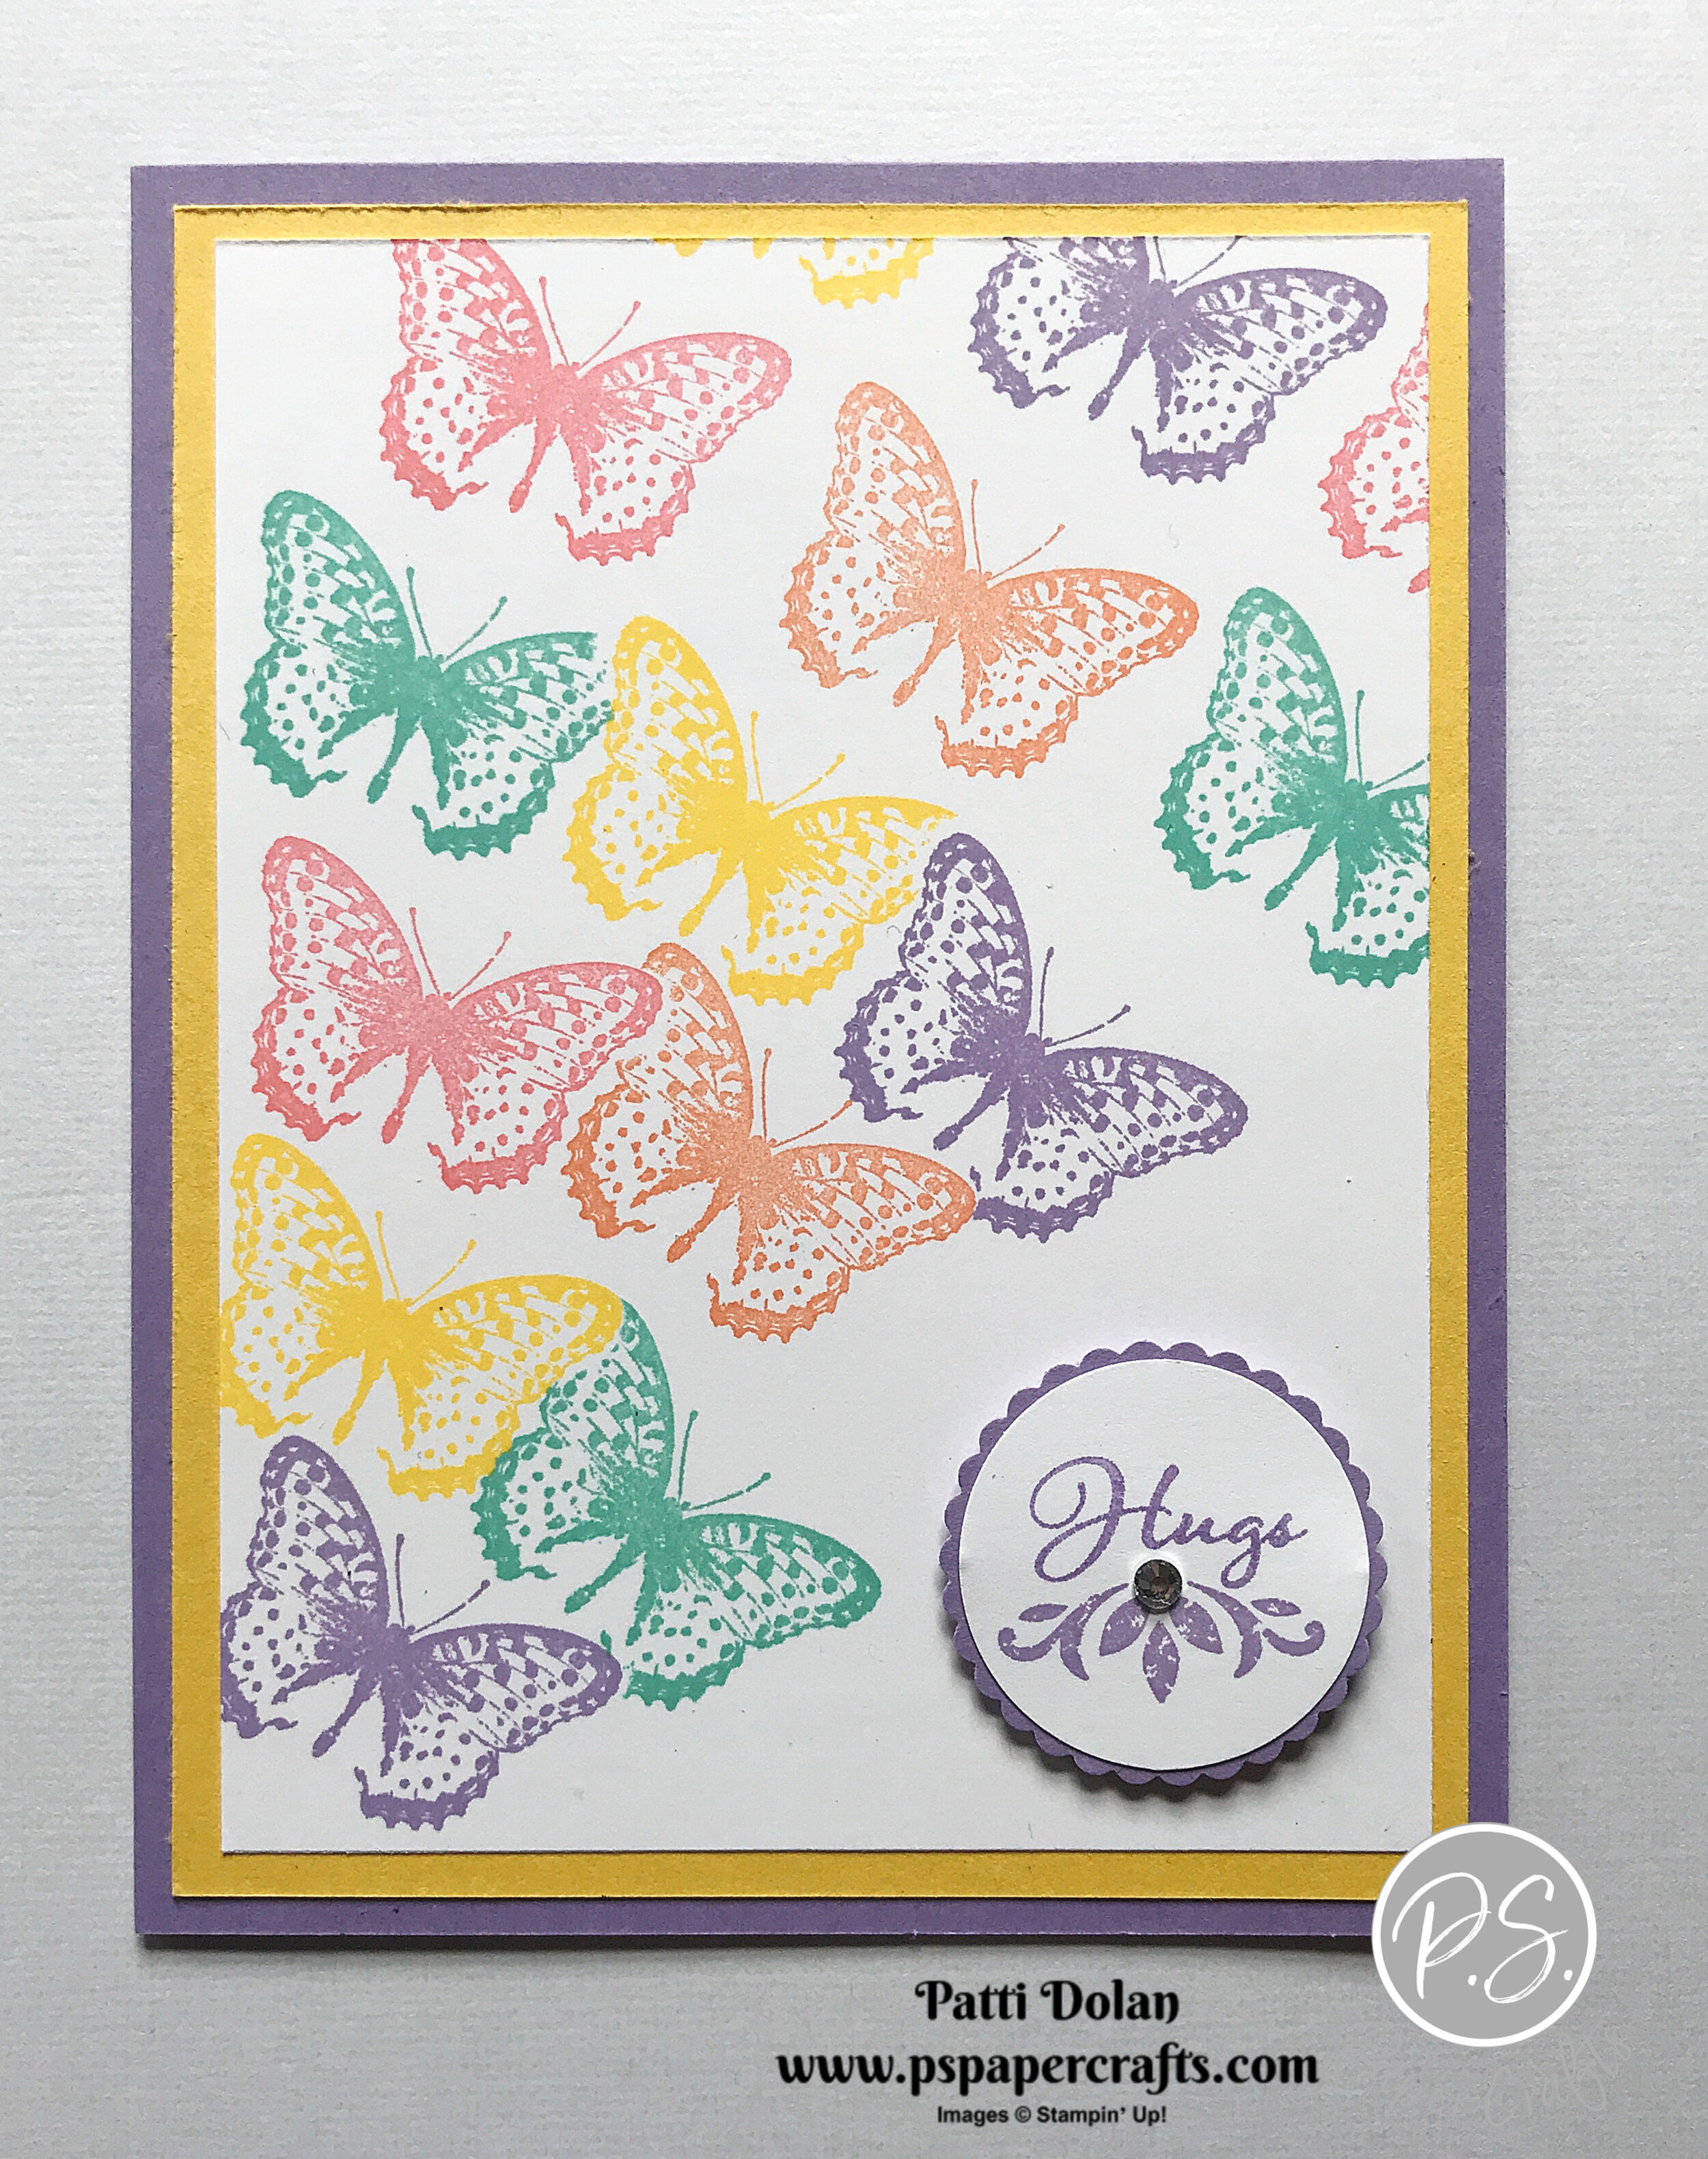
Fun Butterfly Card - Masking Technique card2.jpg
 

Tips & Techniques

  • Highland Heather Card Base - 5 1/2 x 8 1/2, score at 4 1/4

  • Daffodil Delight Layer - 5 1/4 x 4

  • Whisper White Layer - 5 x 3 3/4

  • Color the word “Hugs” directly on the stamp with a Highland Heather Stampin’ Write Marker, breath on it and stamp on a scrap of Whisper White Cardstock

  • Stamp flourish image below the sentiment with Highland Heather Ink and punch with 1 1/4” Circle Punch

  • Punch scrap of Highland Heather Cardstock with 1 3/8” Scalloped Punch and adhere to sentiment circle

  • Place sentiment on Whisper White layer to get placement for butterflies and stamp butterflies in various colors using the masking technique at the bottom where they are close to each other and then spread them out as you stamp up the card as shown on the video

  • Adhere layers together and to card base

  • Adhere sentiment with Dimensionals

  • Add Rhinestone to sentiment

 
Fun Butterfly Card - Masking Technique card1.jpg
 

Supply List

Hugs Prayers Love Card

I used the new Ornate Garden Specialty Designer Series Paper to create this card. This is an early release product in the upcoming Annual Catalog that you can purchase now and it’s beautiful!

 
Hugs Prayers Love Card3.jpg
 

The sentiment is from the Positive Thoughts Stamp Set and I think it is perfect for what’s going on right now with everyone staying at home during the COVID-19 Pandemic. Wouldn’t you love to receive a pretty card in the mail like this?

 
Hugs Prayers Love Card with stamp set.jpg
 

Tips & Techniques

  • Old Olive Card Base - 5 1/2 x 8 1/2, score at 4 1/4

  • Ornate Garden Specialty Designer Series Paper - 5 1/4 x 4

  • Stamp sentiment with Terracotta Tile Ink on a scrap of Whisper White Cardstock and punch with 2” Punch

  • Punch scrap of Terracotta Tile Cardstock with Starburst Punch and adhere to sentiment circle

  • Wrap ribbon around Designer Series Paper and adhere in back; adhere layer to card base

  • Adhere sentiment to card using Dimensionals

  • Cut small butterfly with Nature’s Thoughts Die (or any butterfly punch or die) with scrap of Daffodil Delight Cardstock and adhere to circle

  • Add Rhinestones to butterfly

 
Hugs Prayers Love Card2.jpg
 

On the inside stamp sentiment with Terracotta Tile Ink, butterfly with Daffodil Delight Ink and greenery with Old Olive Ink, stamping multiple times without re-inking.

 
Hugs Prayers Love Card inside.jpg
 

Supply List

Pineapple Hello - Technique Card

I used a few different techniques to make these cards that I think you may want to try with these dies and stamps or others. I used the Timeless Tropical Bundle and Tropical Oasis Designer Series Paper.

 
Pineapple Technique Card both.jpg
 

Make sure you stay until the end to see what I do on the inside of the card.


Tips & Techniques

  • Pool Party Card Base - 5 1/2 x 8 1/2, score at 4 1/4

  • Tropical Oasis Designer Series Paper (Pool Party pattern) - 5 1/2 x 4 1/4, adhere to card base

  • Tropical Oasis Designer Series Paper (Early Espresso pattern) - cut with second largest Stitched Rectangle Die

  • Sponge Pretty Peacock Ink on pineapple top die and cut piece of Pear Pizzazz Cardstock with die-cutting machine

  • Sponge Soft Suede Ink on pineapple die and cut piece of Crushed Curry Cardstock with die-cutting machine

  • Adhere pineapple bottom and top to brown layer and then adhere the layer to card using Dimensionals

  • Stamp sentiment on small piece of the Pool Party Designer Series Paper and punch with Classic Label Punch and adhere to card

  • Tie bow with 2 pieces of Linen Thread and adhere using a Mini Glue Dot

 
Pineapple Technique Card1.jpg
 

Using Stampin’ Write Markers, color palm tree stamp - trunk with Soft Suede and the palms with Pear Pizzazz. Use Thumping Technique with Garden Green and Pretty Peacock Markers on the palms. Breathe on stamp and then stamp image on inside layer.

 
Pineapple Technique Card inside.jpg
 

Supply List

Cross Of Hope Easter Card

I thought the Ornate Border Die went really well with the Cross Of Hope Die so I put them together to make this pretty Easter Card.

 
Cross Of Hope Easter Card2.jpg
 

Tips & Instructions

  • Basic Gray Card Base - 5 1/2 x 8 1/2, score at 4 1/4

  • Petal Pink Layer - 5 1/2 x 4 1/4, cut edge with Ornate Border Die

  • Basic Gray Layer - 5 1/2 x 3 1/4

  • Whisper White Layer 5 1/2 x 3, stamp sentiment with Basic Gray Ink (from A Wish For Everything)

  • Adhere layers to card base

  • Cut solid Cross from Basic Gray Cardstock and cut intricate Cross from Petal Pink Cardstock, adhere together and then adhere to card using Dimensionals

  • Add largest Rhinestone to center of Cross

 
Cross Of Hope Easter Card.jpg
 

On the inside stamp sentiment (from A Wish For Everything) and flourish (from Hold On To Hope) with Basic Gray Ink.

 
Cross Of Hope Easter Card inside.jpg
 

Supply List

Sketch Saturday - Sailing Home

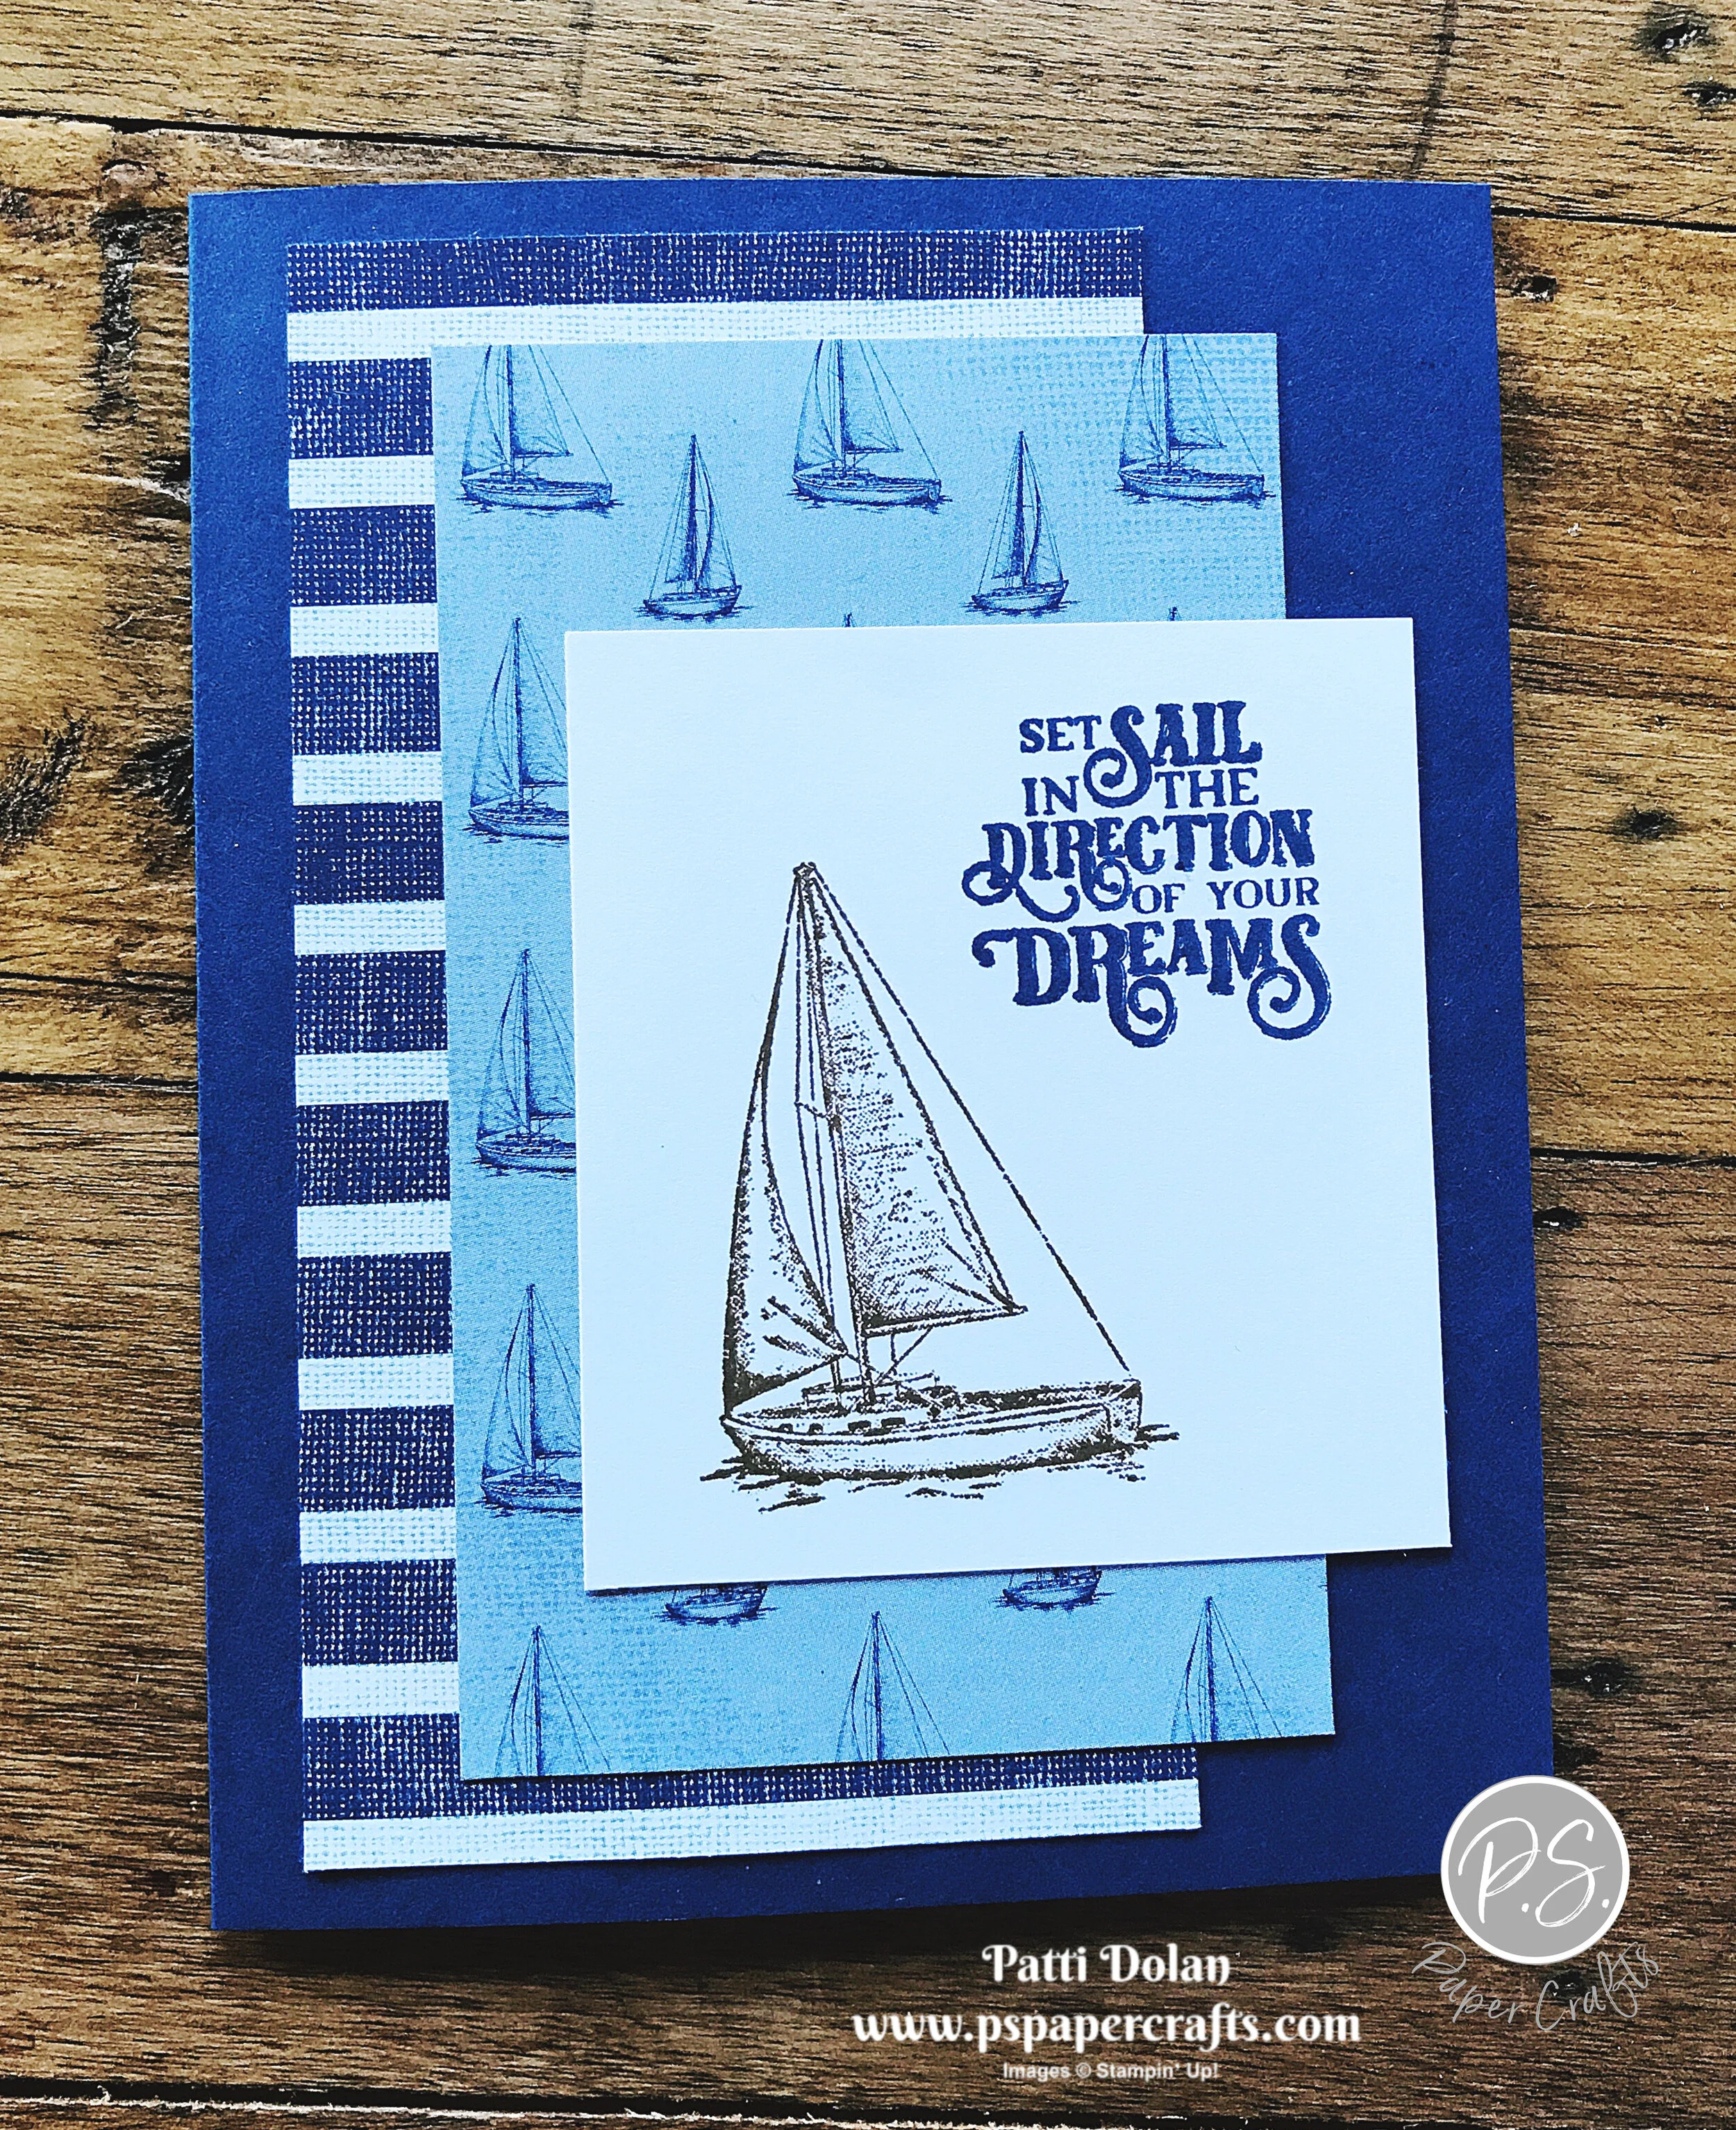
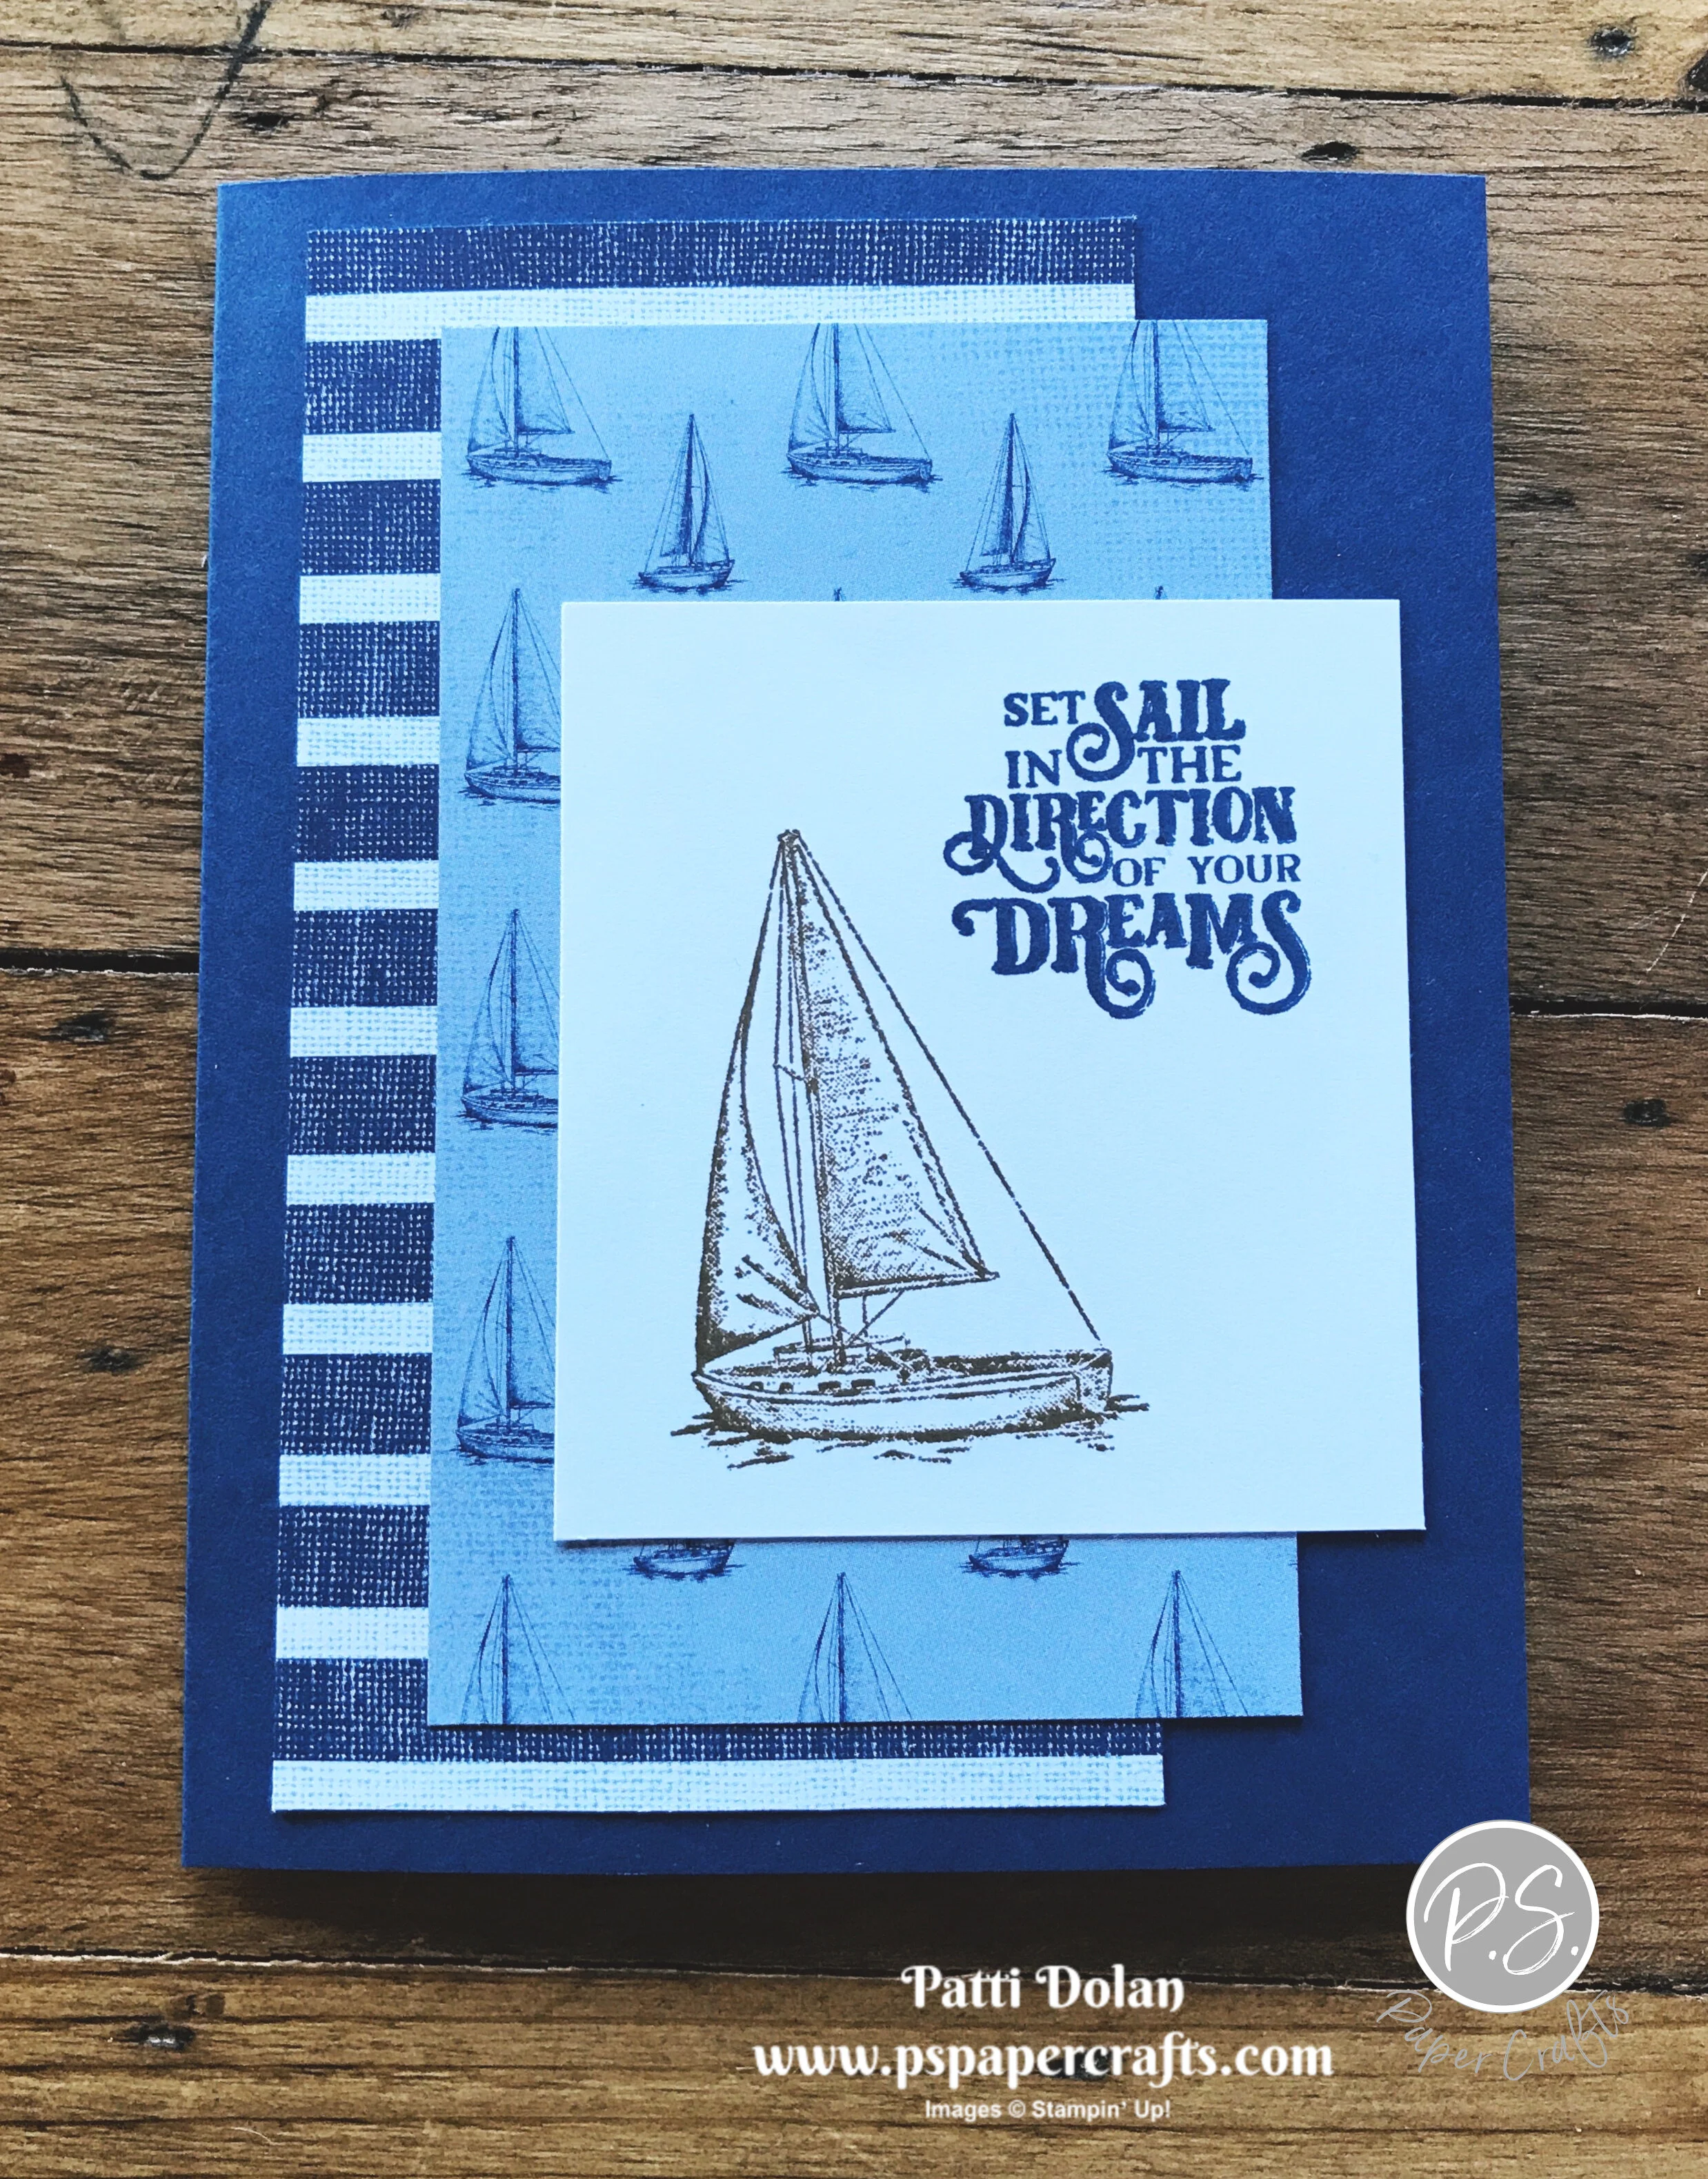
I’ve been using so many of the newer products lately, that it felt good to go back to the Annual Catalog and use the Sailing Home Stamp Set for this sketch.

 
Sketch Saturday - Sailing Home card2.jpg
 

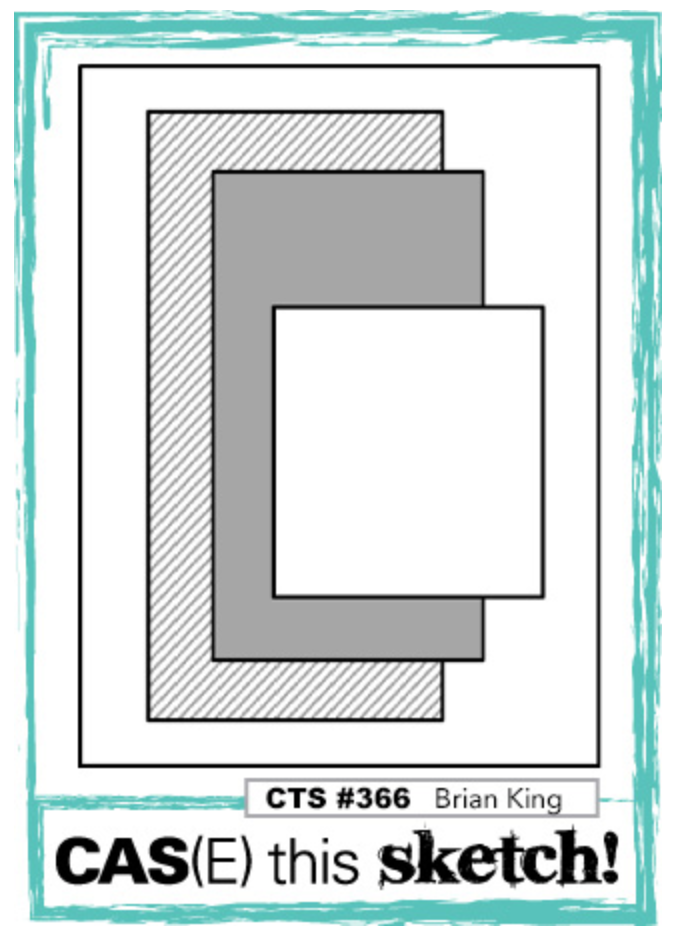
Here’s the sketch. Its a Splitcoaststampers CAS(E) This Sketch Challenge.

 
Screen Shot 2020-04-04 at 1.15.32 PM.png
 

Tips & Instructions

  • Night Of Navy Card Base - 5 1/2 x 8 1/2, score at 4 1/4

  • Come Sail Away Striped Designer Series Paper - 5 1/8 x 2 3/4

  • Come Sail Away Sailboat Designer Series Paper - 4 1/2 x 2 3/4

  • Whisper White Cardstock - 3 x 2 3/4

  • Stamp sentiment with Night Of Navy Ink and sailboat with Soft Suede Ink on Whisper White Layer

  • Adhere all layers as shown to card base

 
Sketch Saturday - Sailing Home card1.jpg
 

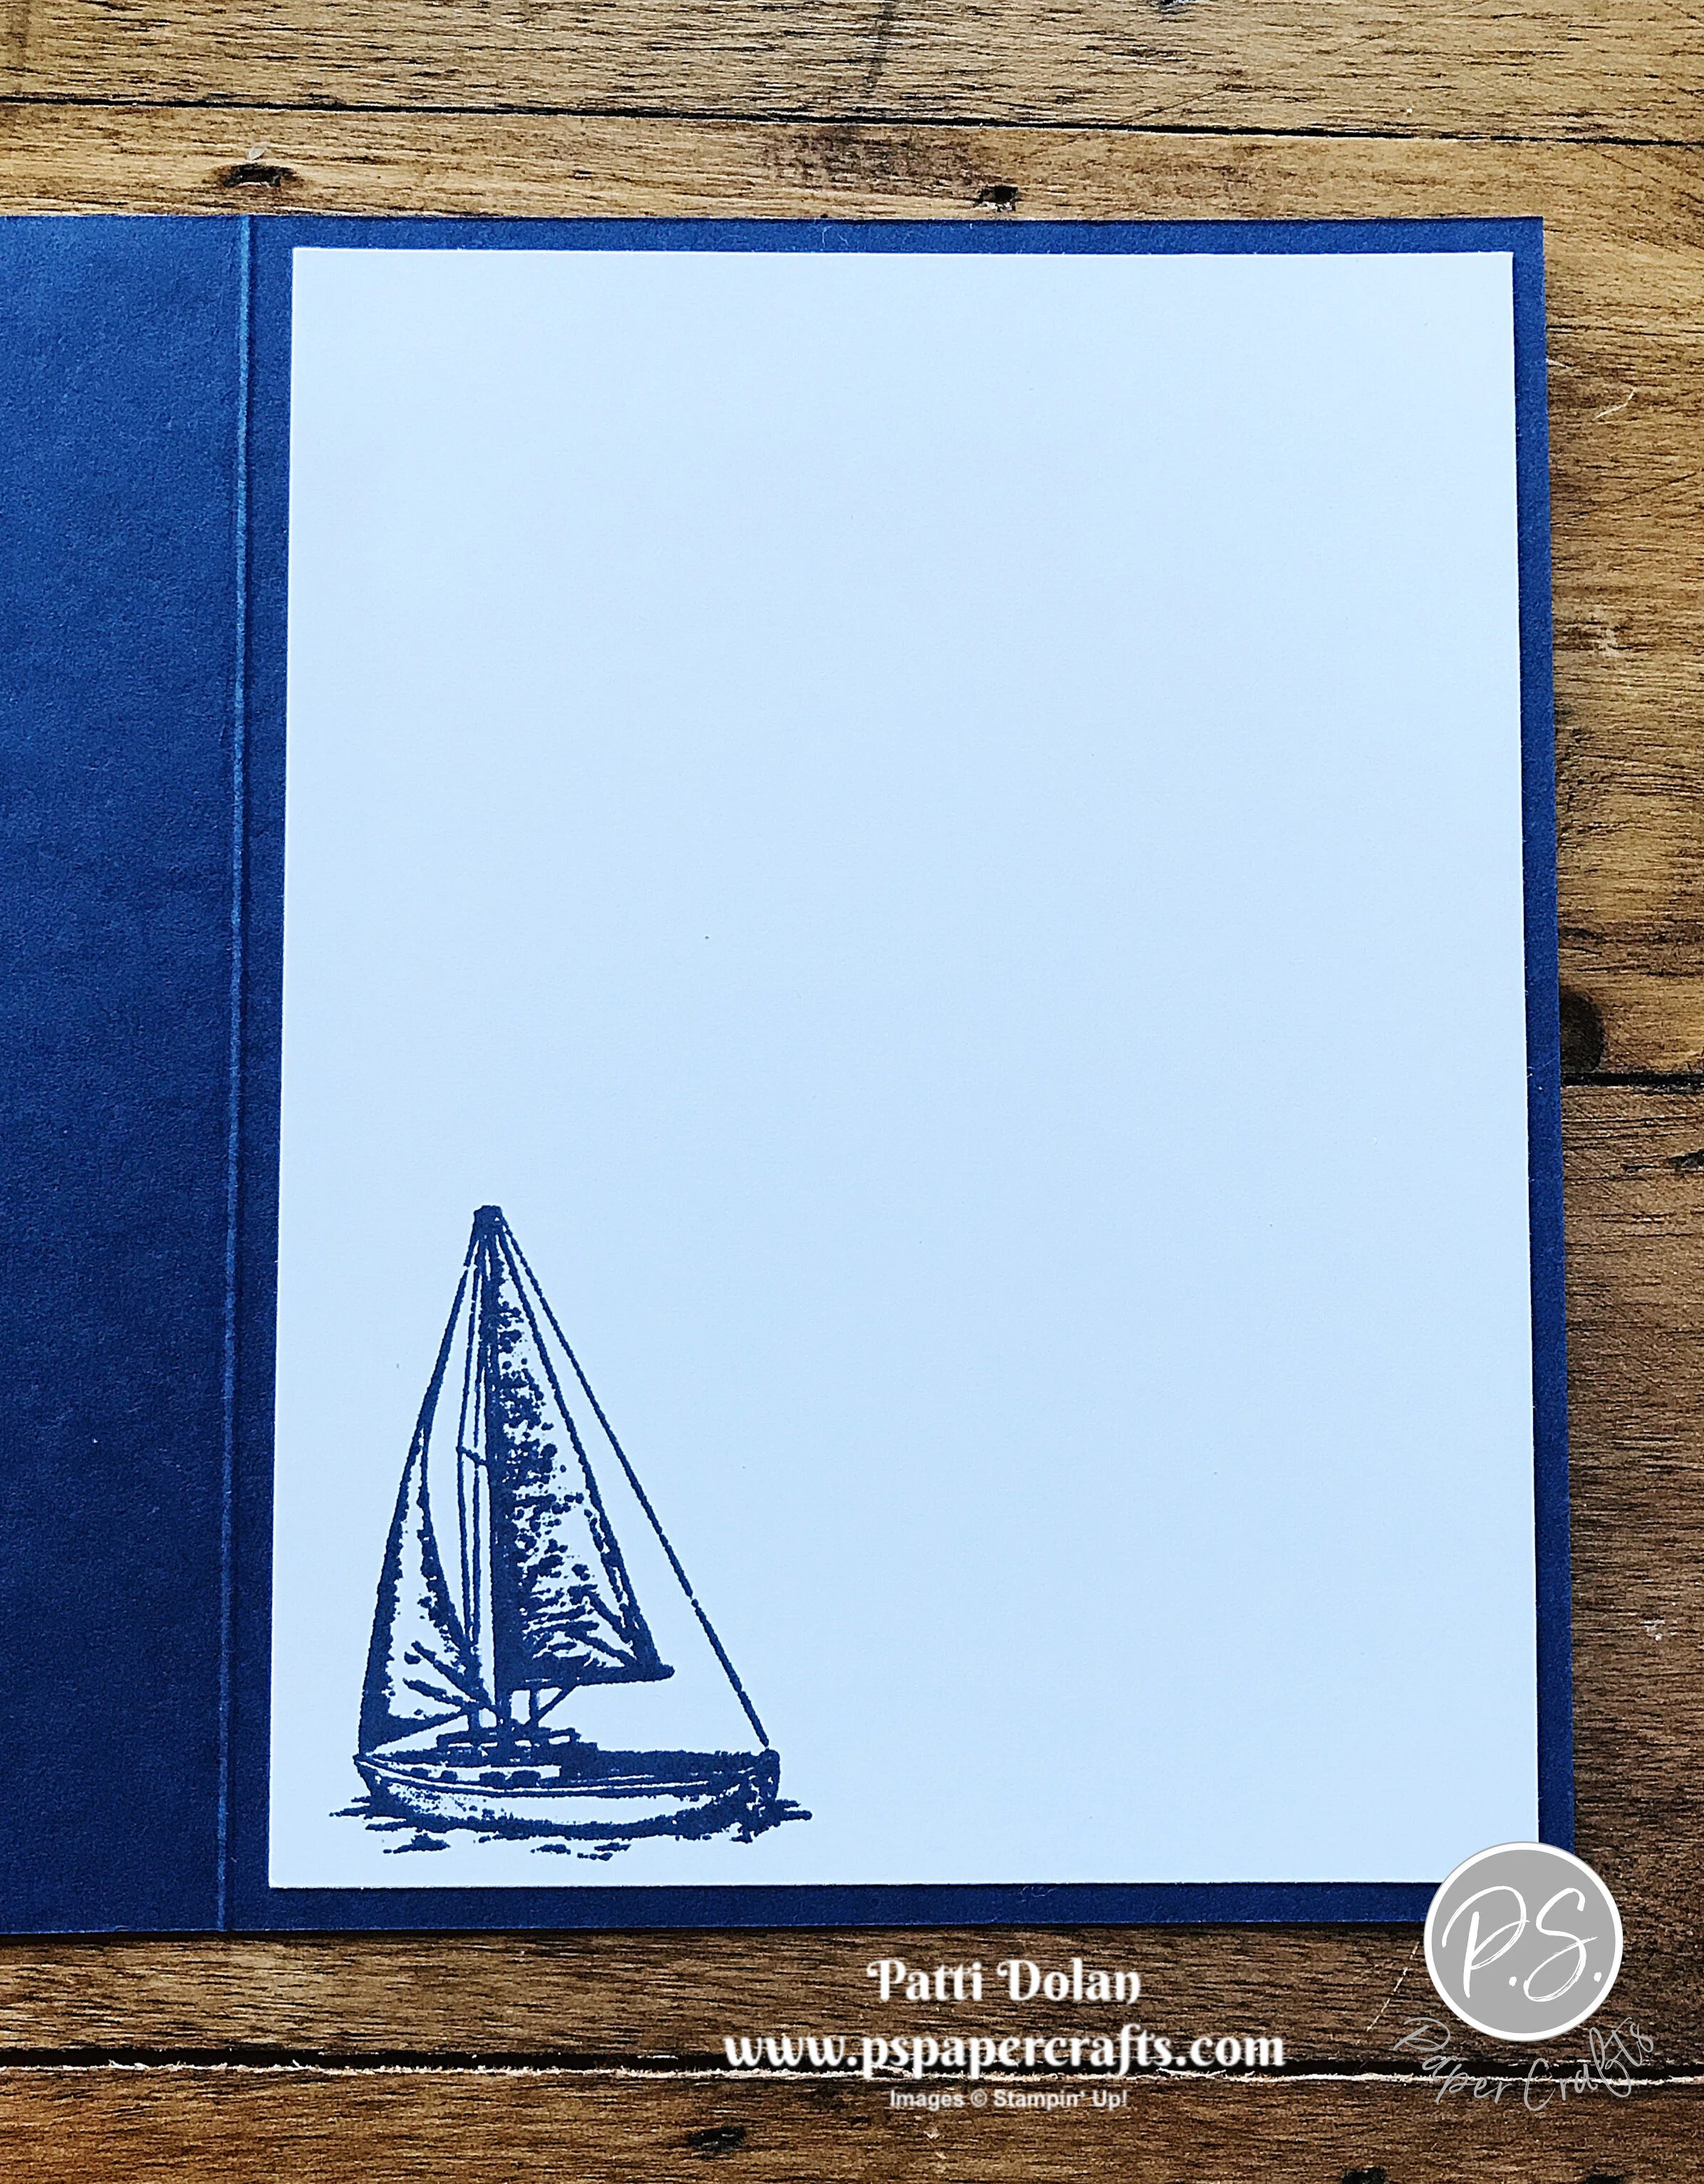
On the inside stamp sailboat with Night Of Navy Ink.

 
Sketch Saturday - Sailing Home inside.jpg
 

Supply List

Ornate Garden - you're amazing!!!

Here’s another card using the new Ornate Garden Suite. The dies cut such delicate layers; a simple flower becomes an elegant card!

 
Ornate Garden - you're amazing2.jpg
 

Watch the video to see how to make this card and some tips on cutting out these intricate dies.


Tips & Instructions

  • Basic Black Card Base - 5 1/2 x 8 1/2, score at 4 1/4

  • Granny Apple Green - cut largest Ornate Layers Die and adhere to card base

  • Whisper White - cut Ornate Layers Dies

  • Stamp sentiment and flower on white layer with Black Memento Ink and color with Stampin’ Blends (Light Granny Apple Green, Light Daffodil Delight and Dark Crumb Cake)

  • Add Wink of Stella to flower and leaf

  • Adhere layer to card using Dimensionals

  • Add Rhinestone to each corner

 
Ornate Garden - you're amazing1.jpg
 

Supply List

Ornate Garden Thinking of You

I made a simple Thinking of You card for a friend who’s husband is in the hospital. I used the new Ornate Garden Specialty Designer Series Paper and one of the Ornate Layer Dies. So simple, but so pretty!

 
Ornate Garden Thinking of You Card2.jpg
 

Tips & Instructions

  • Terracotta Tile Card Base - 5 1/2 x 8 1/2, score at 4 1/4

  • Ornate Garden Specialty Designer Series Paper - 5 1/4 x 4

  • Whisper White scrap - stamp sentiment (from Peaceful Moments) with Terracotta Tile Ink and cut with Ornate Layer Die

  • Wrap piece of ribbon around Designer Series Paper and adhere layer to card base

  • Adhere sentiment layer using Dimensionals

  • Tie bow and adhere using a Mini Glue Dot

  • Add 3 Gilded Gems

 
Ornate Garden Thinking of You Card1.jpg
 

On the inside stamp floral image at top and bottom corner using Black Memento Ink and color with Stampin’ Blends (Light Old Olive for the leaves, Light Daffodil Delight for the flowers and Dark Crumb Cake for the flower center.

 
Ornate Garden Thinking of You inside.jpg
 

Supply List

Ornate Garden Thank You Card

Stampin’ Up! has a surprise for you - an early release of the Ornate Garden Suite of products. Starting today, you can purchase these products and get an early peek at what’s in store for you in the annual catalog which launches in June. Isn’t that great?

 
Ornate Thank You Cards Both.jpg
 

Watch the video to see all the products in this suite and how I made these cards.


Tips & Instructions

  • Purple Posy or Petal Pink Card Base - 5 1/2 x 8 1/2, score at 4 1/4

  • Gorgeous Grape or Flirty Flamingo Layer - 5 1/2 x 4 1/4, cut floral border along edge and adhere to card base

  • Whisper White - cut with the stitched rectangle and stamp sentiment

  • Purple Posy or Petal Pink - cut rectangle with lace edge and adhere sentiment layer to it

  • Adhere sentiment to card using Dimensionals

  • Add Pearls or Glitter Dots to center of flowers

This one is Purple Posy and Gorgeous Grape and the sentiment is stamped with Gorgeous Grape Ink.

 
Ornate Thank You Card purple2.jpg
 

This one is Petal Pink and Flirty Flamingo. I stamped the sentiment in Black Memento Ink.

 
Ornate Thank You Card pink.jpg
 

The flyer below shows all the products in the suite. You can order the entire suite with a single Item Number or buy individually.

 
Screen Shot 2020-03-31 at 5.18.10 PM.png
 
 
Screen Shot 2020-03-31 at 5.18.27 PM.png
 
 
Screen Shot 2020-03-31 at 5.18.51 PM.png
 

Supply List for these cards

I Miss Your Face Card

The sentiment on this card is just perfect for our current situation in the world with everyone in quarantine. There are so many people that I can say “I miss your face” to. How about you?

 
I Miss Your Face card2.jpg
 

I used the Tags In Bloom Stamp set which is FREE today, the last day of Sale-A-Bration, March 31, 2020 with a qualifying purchase. It coordinates with the Label Me Lovely and Label Me Fancy Punches.

 
I Miss Your Face Supplies.jpg
 

Tips & Instructions

  • Old Olive Card Base - 4 1/4 x 11, score at 5 1/2 (top folding card)

  • Daffodil Delight Layer - 5 1/4 x 4

  • Whisper White Layer - 5 1/8 x 3 3/78, emboss with Layered Leaves 3D Embossing Folder (be sure to use the 3D Embossing Folder Plate) and adhere to Daffodil Delight Layer

  • Wrap layers with ribbon, adhering it to the back and adhere layer to card base

  • Whisper White - cut largest scalloped rectangle using the Stitched So Sweetly Dies

  • Stamp floral frame image with Black Memento Ink. Turn it and stamp again making sure you line up the frame. This will give you the flowers on top and bottom.

  • Color flowers and leaves with Stampin’ Blends Markers (Calypso Coral for flower center, Daffodil Delight for flowers and Old Olive for leaves. I used light and dark blends)

  • Stamp stitcheded frame with Black Memento Ink and sentiment with Old Olive Ink and punch with Label Me Lovely Punch. Adhere to Floral Label.

  • Adhere layer to card using Dimensionals

  • Add Wink Of Stella to the flowers and leaves to give them some shimmer

  • Tie bow and adhere with Mini Glue Dots

 
I Miss Your Face card.jpg
 

On the inside, stamp 3 flowers on top corner and 3 flowers on bottom corner and stamp a few leaves. Color with Blends the same way you colored them on the front. Stamp sentiment with Old Olive Ink.

 
I Miss Your Face inside.jpg
 

Supply List

Stampin' Blends vs. Stampin' Write Markers

 
Blends & Markers Picture.png
 

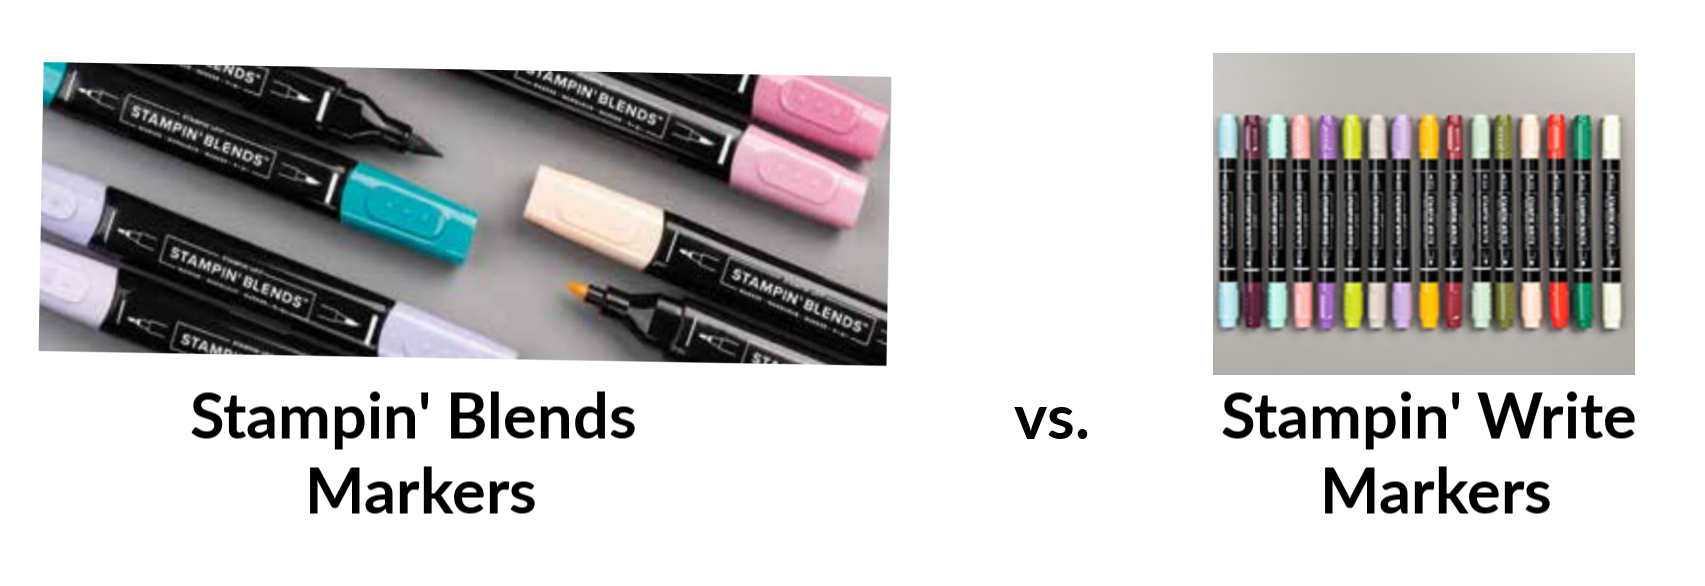
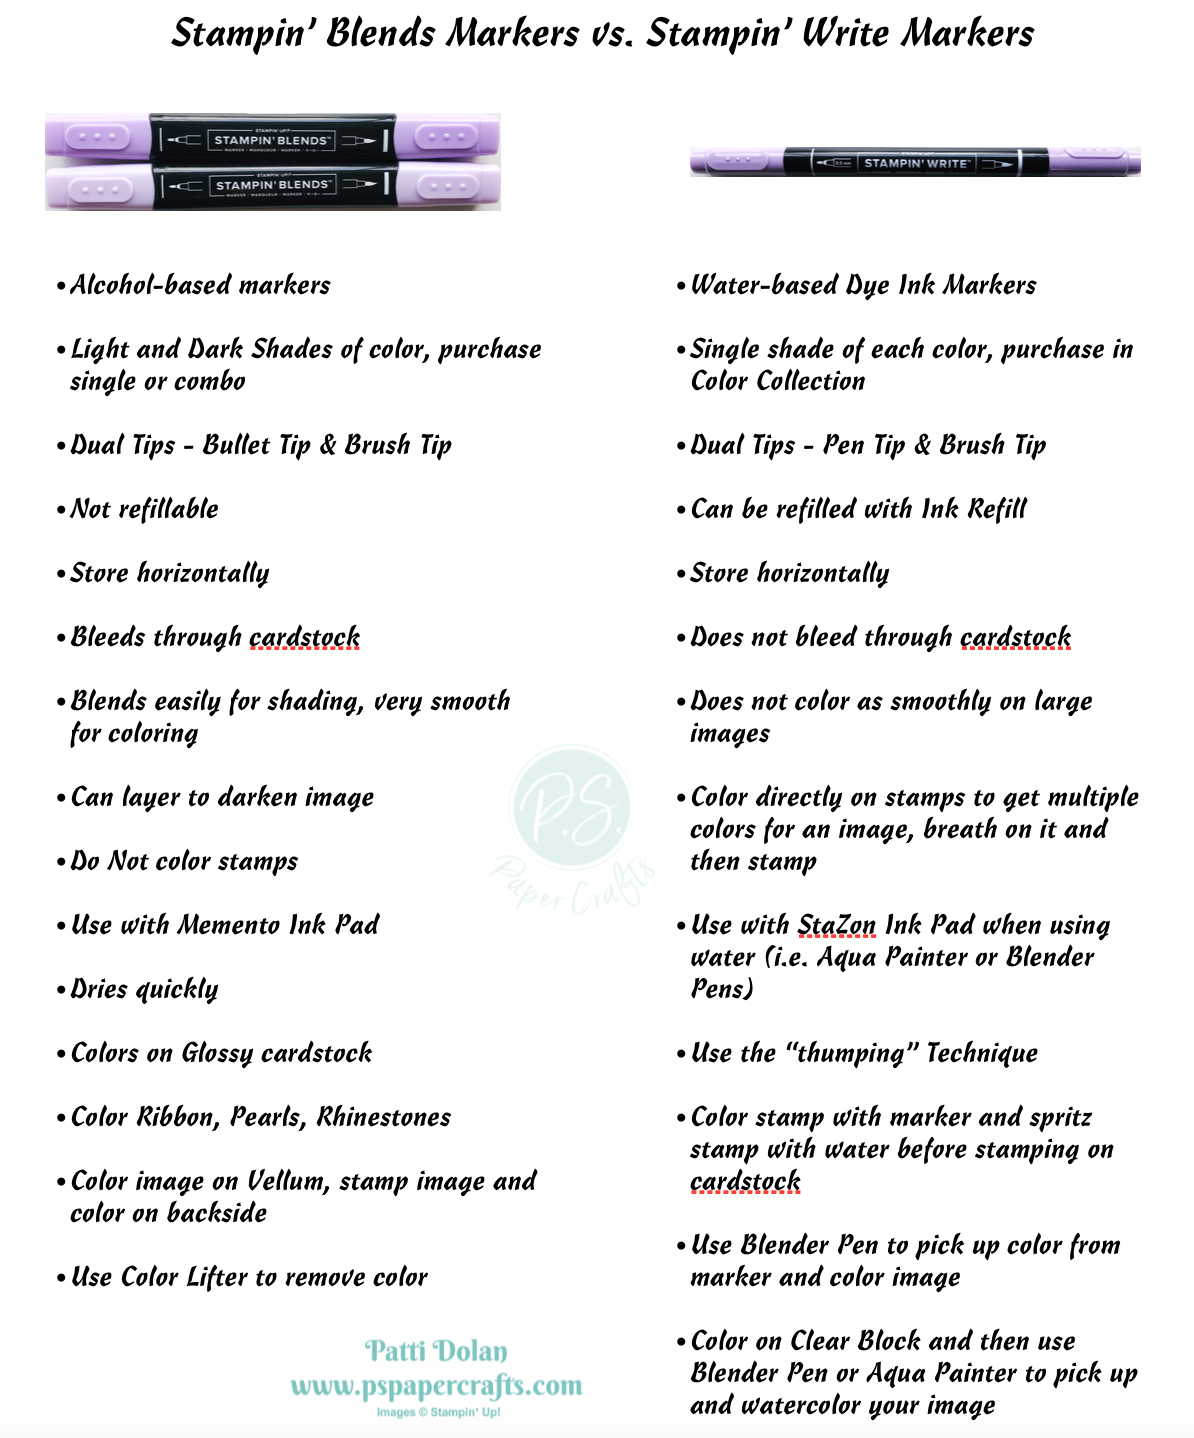
Sometimes there is confusion about what type markers to use for what purpose so I created this cheat sheet for you to use.  Below is a comparison between Stampin' Blends and Stampin' Write Markers.  Both have specific benefits and I'm not going to say one is better than the other.   I use both types regularly!

I love coloring with the Alcohol-Based Stampin' Blends but you can do some neat watercolor techniques with the Water-Based Stampin' Write Markers.

blends vs stampin write markers.png

I hope you find this helpful.  This information is based on my own use and experience. 

Sketch Saturday - Best Dressed

I had to use the Best Dressed Designer Series Paper again for today’s sketch. The floral patterns are so pretty!

 
Sketch Saturday - Best Dressed.jpg
 

The Sketch is from the CAS(E) This Sketch Challenge from Splitcoaststampers.

 
Screen Shot 2020-03-27 at 8.32.54 PM.png
 

Tips & Instructions

  • Old Olive Card Base - 5 1/2 x 8 1/2, score at 4 1/4

  • Blackberry Bliss Layer 5 1/4 x 4

  • Start with the floral design from the Best Dressed Designer Series Paper and using your Paper Trimmer cut a piece 5 1/8 and diagonal angles so it comes to a point at the bottom, mine is 1 1/2 at the top

  • Using the floral piece as a guide cut the green with white dots piece, mine is 1” at the top and 1 7/16 a the bottom

  • Emboss a piece of Purple Posy Cardstock with the Subtle Embossing Folder and cut diagonal using the floral piece as a guide, mine is 1 3/8 at the top and 2 3/8 at the bottom

  • Lay the pieces on the Blackberry Bliss layer spreading them slightly and leaving a border around and adhere each piece. You may have to trim the pieces to get them to fit.

  • Adhere layer to cardbase

  • Stamp sentiment (from Itty Bitty Birthdays) on Whisper White Scrap with Old Olive Ink and cut with All Dressed Up Die (or you can just stamp on strip of cardstock if you don’t have the dies)

  • Adhere sentiment to card using Dimensionals

  • Add Noble Peacock (Old Olive) Rhinestones

 
Sketch Saturday - Best Dressed2.jpg
 

On the inside, stamp sentiment with Old Olive Ink. Cut 2 strips of another floral pattern from the Best Dressed Designer Series Paper 1/2 x 5 1/4 and adhered to each side of the inside layer.

 
Sketch Saturday - Best Dressed inside.jpg
 

Supply List

Simple Birthday Gift Card Holder

I’m so excited to show you how to make this birthday card that has a pocket inside to hold a gift card. This Designer Series Paper with the Blackberry Bliss Cardstock is just gorgeous!

 
Simple Birthday Card with Gift Card Pocket2.jpg
 

Watch the video to see how easy it is to make this card.


Tips & Instructions

  • Blackberry Bliss Card Base - 4 1/4 x 11, score at 5 1/2 & 9 1/4

  • Best Dressed Designer Series Paper (floral) - 3 1/2 x 4

  • Best Dressed Designer Series Paper (striped) - 1 1/2 x 4

  • Fold Card base in half and fold at the 9 1/4 end and punch with edge of Label Me Lovely Punch

  • Adhere striped piece to right edge of card base, centering as shown in video

  • Stamp sentiment on scrap of Whisper White Cardstock with Blackberry Bliss Ink and punch with Label Me Lovely Punch

  • Wrap piece of ribbon around the floral paper and adhere to back, then adhere layer to card base

  • Adhere stamped label over ribbon using Dimensionals

  • Make bow and adhere using a Mini Glue Dot

  • Color 2 Rhinestones with Dark Blackberry Bliss Blends Marker and adhere to label

 
Simple Birthday Card with Gift Card Pocket3 (1).jpg
 

On the inside, stamp sentiment and flowers on piece of 3 1/2 x 4 Whisper White Cardstock with Blackberry Bliss Ink.

 
Simple Birthday Card with Gift Card Pocket Inside.jpg
 

Supply List

Sending Healing Hugs

I made another card using the Woven Threads Designer Series Paper which is FREE with a $50 order through March 31, 2020. Check yesterday’s blog post for a video showing this paper; it’s so pretty!

 
Sending Healing Hugs card2.jpg
 

Today’s card was made using the The So Sentimental Bundle. It has nice big sentiments and coordinating dies to cut the sentiment and have a background layer.

 
Sending Healing Hugs Supplies.jpg
 

Tips & Instructions

  • Terracotta Tile Card Base - 5 1/2 x 8 1/2, score at 4 1/4

  • Whisper White Layer - 5 3/8 x 4 1/8

  • Woven Threads Designer Series Paper Layer - 5 1/4 x 4, adhere only to the Whisper White Layer

  • Stamp sentiment using Terracotta Tile Ink on scrap of Whisper White Cardstock and cut with Stitched So Sweetly Label

  • Cut scrap of Terracotta Tile Cardstock using larger Label and punch each end with Label Me Fancy Punch to create a slit on each end.

  • Feed piece of ribbon through the slits and adhere the label to layer, wrapping the ends of the ribbon and adhering to the back. Adhere layer to card base

  • Adhere stamped label over the ribbon using Dimensionals

  • Add 3 Faceted Dots

 
Sending Healing Hugs card.jpg
 

On the inside adhere a 1/2 x 5 1/4 strip of the Designer Series Paper along the right side of inside layer. I left it blank so I can write my own note.

 
Sending Healing Hugs inside.jpg
 

Supply List

Note: Woven Heirlooms Designer Series Paper is FREE until March 31, 2020. Use Item #155883. After March 31, 2020, use Item #149497 until it retires

Woven Heirlooms Thinking Of You

I made these beautiful Thinking Of You cards using the Woven Heirlooms Stamp Set and Woven Threads Designer Series Paper.

 
Woven Heirlooms Thinking Of You both.jpg
 

The Woven Threads Designer Series Paper is a FREE item during Sale-A-Bration with a $50 order. Make sure you use Item #155883 by March 31, 2020 to get this free item.

 
Screen Shot 2020-03-25 at 3.23.58 PM.png
 

Watch my video to see how to make these cards.


Tips & Instructions

  • Pretty Peacock or Terracotta Tile Card Base

  • Pretty Posy or Seaside Spray Layer - 5 1/4 x 4

  • Woven Heirlooms Designer Series Paper - 2 pieces 5 1/8 x 3 7/8

  • On one piece of the Designer Series Paper mark the middle of 5 1/8 side with a pencil (at 2 9/16)

  • Using Paper Trimmer cut one point to the pencil mark and then cut the other point to pencil mark as shown in the video

  • Adhere layers aligning to left side and then adhere centered on the card base

  • Whisper White strip - 1 x 2 3/4, stamp sentiment with either Pretty Peacock or Terracotta Tile Ink

  • Adhere sentiment strip to 1 1/8 x 2 13/16 piece of Purple Posey or Seaside Spray Cardstock

  • Adhere sentiment to card using Dimensionals

  • Add Faceted Gems

 
Woven Heirlooms Thinking Of You1.jpg
 

I made one as a sympathy card and one a well wishing card. I love how both came out.

 
Woven Heirlooms Thinking Of You2.jpg
 

Supply List

Note: Woven Heirlooms Designer Series Paper is FREE until March 31, 2020. Use Item #155883. After March 31, 2020, use Item #149497 until it retires.

Dog Birthday Card!

Here’s a Birthday Card for a special friend! Lots of people are celebrating their pet’s birthday and I made this card to send to a friend’s dog. Isn’t it fun?

 
Dog Birthday Card2.jpg
 

I used the Happy Tails Stamp Set and the coordinating Dog Builder Punch along with the Birthday Bonanza Designer Series Paper.

 
Screen Shot 2020-03-23 at 10.02.40 PM.png
 
 
Screen Shot 2020-03-23 at 9.35.35 PM.png
 

Tips & Instructions

  • Bermuda Bay Card Base - 5 1/2 x 8 1/2, score at 4 1/4

  • Birthday Bonanza Designer Series Paper - 5 1/4 x 4, adhere to card base

  • Daffodil Delight Tag Layer - 2 x 4 1/2 after punched, punch with Tag Topper and Banner Triple Punch

  • Stamp dog and spots on Whisper White Cardstock with Soft Suede Ink and collar with Bermuda Bay Ink and punch

  • Stamp heart on Whisper White Cardstock with Real Red Ink and punch

  • Cut hat from Birthday Bonanza Designer Series Paper (I cut one from one of the Toucan Images)

  • Adhere heart to dog and adhere dog and hat to tag using Dimensionals, adhere Pom Pom to hat (I used Multipurpose Liquid Glue, let it set for a few minutes)

  • Stamp paw prints on tag with Soft Suede Ink

  • Stamp sentiment (from Timeless Tulips) with Bermuda Bay Ink and punch with Classic Label Punch and adhere with Mini Dimensionals

  • Feed Ribbon through topper and tie with piece of Bakers Twine

  • Adhere tag layer to card


On the inside stamp sentiment with Bermuda Bay Ink and some paw prints along the bottom with Soft Suede Ink.

 
Dog Birthday Card inside.jpg
 

Supply List