
Christmas Gift Bags
Today I’ll show you step by step how to use the Gift Bag Punch Board and in the process will make some beautiful Christmas gift bags.

Watch the video below and then come back to get the specific details on each bag.
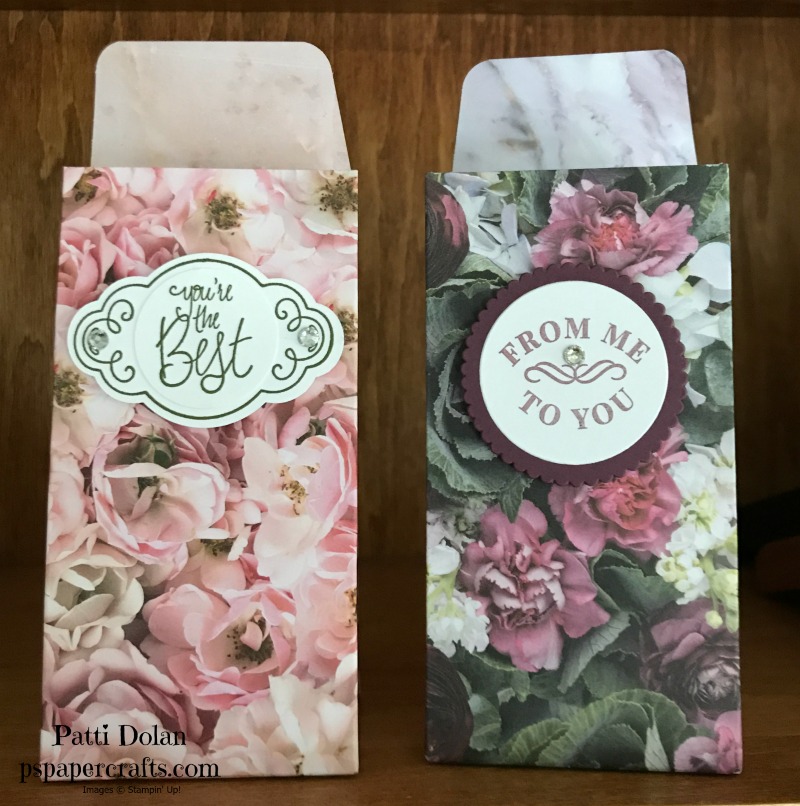
This is the small gift bag using a 10” x 6” piece of Sahara Sand Cardstock. I cut a small piece of Joyous Noel DSP to use to cover the front. Just measure the bag front to get the right size. The Spot Of Tea Thinlits has some pretty layering shapes for the sentiment. The sentiment is from the Better Together Stamp Set and was stamped with Merry Merlot Ink and then layered on Merry Merlot Glimmer Paper. The gorgeous ribbon is the Merry Merlot Copper Reversible Ribbon.

The punch board gives you some options to make a large, medium or small bag. Here are some examples.

The difference in the size is the bottom of the bag. The Large requires an 12” width, the Medium an 11” width and the small a 10” width. The height can vary between 4” and 12”
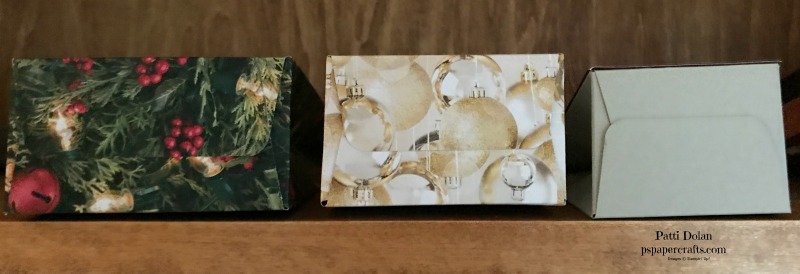
This medium bag uses a 11” x 8” piece of All Is Bright DSP. The Sentiment is from the Peaceful Noel Stamp Set and was stamped with Versamark and then Heat Embossed with Gold Emboss Powder. A layer of Gold Glimmer Paper was cut with the Layering Ovals Scalloped Thinlit.

The large bag was made with a 12” x 12” piece of All Is Bright DSP and some Real Red Mixed Satin Ribbon. The sentiment is from the Merry Christmas To All Stamp Set and was stamped with Real Red Ink on a Layering Square on a Real Red Scalloped Layering Square.

If you want any of the products I used on this project, just click on the item below or the Shop Now button and it will bring you to my Online Store. Please use the current Host Code when you go to checkout your order. You can also click directly on an item to order.
Product Of The Week Gift Bag Punch Board
The Punch Boards are so great to have on hand to make custom gift bags and envelopes. This week I’ll be featuring the Gift Bag Punch Board.

The instructions are printed right on the punch board but I would suggest you practice on some scrap paper before using it on your good paper. You can make Small, Medium or Large bags and vary the height. It even has a place to punch holes at the top of your bag for ribbon.
These are some samples from the catalog.

These are some of the gift bags I’ve made recently. I’ll walk you through the process on a video tomorrow so come back to see. I’ll have some alternative projects as well this week. This is a great tool to have in your toolbox.

To purchase the Gift Bag Punch Board, you can click on the product below and you’ll be brought to my Online Store.
Fun Koi Fish Card
Here’s my last card this week with the All The Good Things Stamp Set. It’s pretty simple and I just winged it with stamping the fish in a circle. I tried to get the placement pretty close and am happy with how it came out.

The card base is Early Espresso and it measures 4 3/4 x 9 1/2, scored at 4 3/4 so its a square card. The Sahara Sand layer is 4 1/2 x 4 1/2 and then the Whisper White layer is 4 1/4 x 4 1/4. I stamped the fish with Mango Melody ink. The flowers were stamped with Early Espresso ink and then added some Clear Epoxy Droplets to the center of each flower.
For the inside I masked the larger fish to just get the sentiment inked. I used the Stamparatus to get it placed in the center. The flowers are stamped with Mango Melody ink.

If you want any of the products I used on this project, just click on the item below or the Shop Now button and it will bring you to my Online Store. Please use the current Host Code when you go to checkout your order. You can also click directly on an item to order.
Wishing You All The Good Things....
What a great sentiment! These are the things we hope for when it comes to our loved ones.

To create this card I used the All The Good Things Stamp Set, The Chicken Wire Elements, Stampin’ Write Markers in Calypso Coral, Crushed Curry, Pumpkin Pie and Old Olive. I added some Wink of Stella and Rhinestones.

The card base is Old Olive and then the layer is the Chicken Wire Elements. I adhered it with Liquid Glue in the area behind the stamped layer to hide the glue. The image and sentiment were stamped on a piece of 3 x 4 Whisper White Cardstock and then layered on a piece of 3 1/8 x 4 1/8 Calypso Coral Cardstock.

They way I got the color variation on the koi fish was to color it with Stampin’ Write Markers. I colored most of the fish with Calypso Coral and then added some Crushed Curry and Pumpkin Pie here and there. The sentiment was colored with an Old Olive marker. I breathed on the entire stamp before stamping to be sure it was moist.

The koi fish on the inside were stamped with Calypso Coral and the sentiment in Old Olive.

If you want any of the products I used on this project, just click on the item below or the Shop Now button and it will bring you to my Online Store. Please use the current Host Code when you go to checkout your order. You can also click directly on an item to order.
Beautiful Bonsai Card using the "Thumping" Technique
This week I’m featuring the All The Good Things Stamp Set and thought the Bonsai tree would be perfect for the “thumping” technique. If you’re not familiar with this technique, watch the video below. It’s easy but gives a beautiful image.
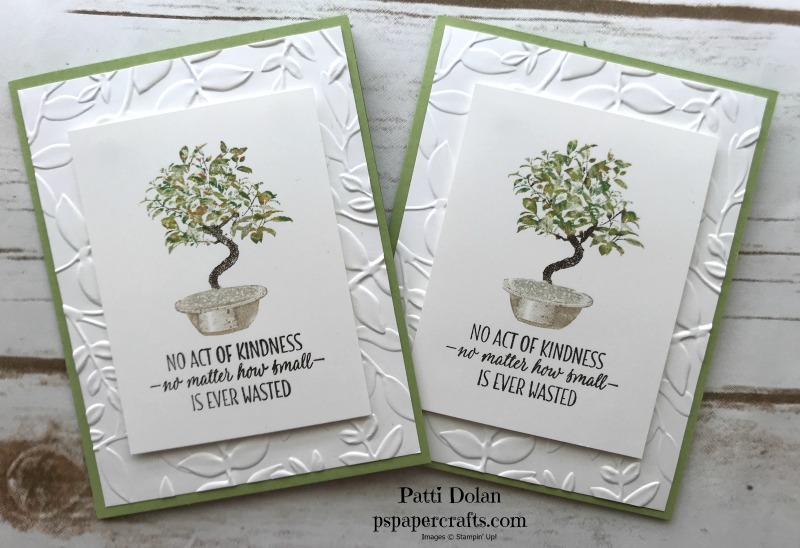
The card base is Pear Pizzaz and then I have a 5 1/4 x 4 layer of Whisper White that I embossed with the Layered Leaves Embossing Folder.
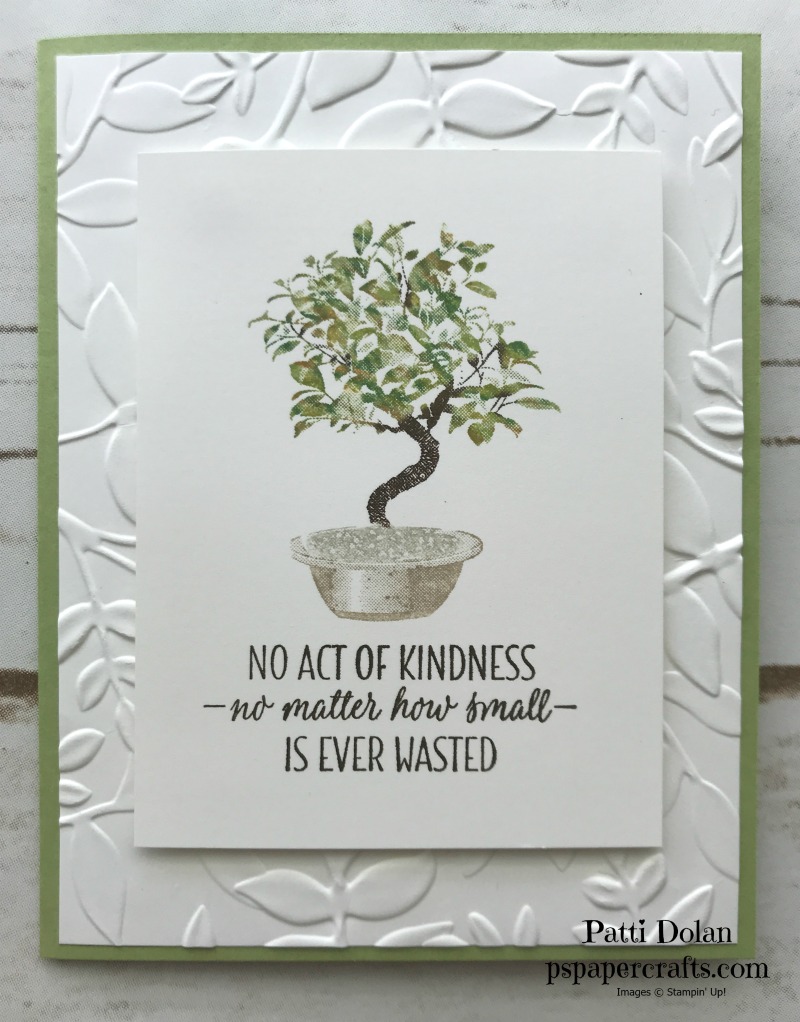
I used Stampin’ Write Markers to color the stamp and then breathed on it to moisten it before stamping on the 3 x 4 piece of Whisper White Cardstock. The sentiment and trunk/branches are Early Espresso; the pot is Crumb Cake; the sand is Sahara Sand. I covered the leaf area with Pear Pizzaz and then thumped with Old Olive, Granny Apple Green, Garden Green, Mango Melody and Pumpkin Pie. You can use whatever you have on hand.

`
Here’s the inside. I stamped the sentiment in Early Espresso and the flowers in Pear Pizzaz. Check out my quick little tip for lining up the flowers in my video.

If you want any of the products I used on this project, just click on the item below or the Shop Now button and it will bring you to my Online Store. Please use the current Host Code when you go to checkout your order. You can also click directly on an item to order.
I have the full pack of markers listed since I used some from each of the groups. You can use whatever brown, orange and green that you have if you don’t want to purchase the entire set.
Product Of The Week All The Good Things
I have a wonderful stamp set to feature this week. It’s called All The Good Things. I just love the sentiments and images.

These samples from the catalog are beautiful. You can try different techniques to color the bonsai tree and fish to get some great variations of color.

Tomorrow I’ll be posting a video to show you how I use the “thumping” technique to color the bonsai tree. I love how it turned out. Stay tuned….
You can click on the product below to get to my Online Store to order this product in either Clear Mount or Wood Mount.
November OnStage
I just returned from my trip to Orlando for the Stampin’ Up! OnStage Convention. I had a wonderful time and met so many fellow stampers. It is Stampin’ Up!’s 30th anniversary and they had 6,000 stampers at this convention. They really outdid themselves.
I stayed with Debie (in the middle), who I met last year at OnStage at Salt Lake City and then I met Carrie (on the right) this year. These wonderful ladies were my roommates for the weekend. We had a great time together.

Here’s some of my teammates. We had 13 of us in Orlando. My leader is Wendy, on the right in the first row. We were photo bombed by Kylie (just behind Wendy) who is the top demonstrator from Australia. It was so cool to meet people from all around the world and share the same passion.

At OnStage, we get to see the new Occasions Catalog and Sale-A-Bration flyer, demonstrations on new products, get lots of FREE stuff, mingle with top demonstrators, hear from the Stampin’ Up! founder, CEO, Executives. There are awards and lots of other fun things.
If you ever thought of signing up, let me know if you have questions. It’s something that I have really enjoyed and getting to go to OnStage has been a highlight of my year. AND I get to pre-order from the Occasions Catalog.
Sparkly Merry Christmas Card
The sentiments in the Merry Christmas Thinlits Dies are so versatile. You can cut out colored cardstock, foil paper, Designer Series Paper or Glimmer Paper to get different looks. I used the Gold Glimmer Paper on this card. Don’t you love the sparkle!!!
I stamped a random pattern using the star “swoosh” (is that what you call it?) from the Star of Light Stamp Set in Cherry Cobbler Ink on a Cherry Cobbler card base to add some interest. The border is a strip of All Is Bright DSP.
The stars are cut out of the Glimmer Paper using the Thinlits from the Start of Light Bundle. I adhered them with some Mini Glue Dots.

On the inside, I used that beautiful sentiment with a little flourish.

Simple Merry Christmas To All Card
This is a very easy card to make but it really is beautiful. I just love the sentiment from the Merry Christmas To All Stamp Set. I’ve been featuring this set all week; it has some great sentiments for the holidays.

The Under The Mistletoe Designer Series Paper provides a perfect Christmas background layer. Before I adhered it to the card base, I wrapped a piece of red ribbon around it.
The Sentiment was stamped with Real Red ink on a Whisper White square and then layered on a Real Red scalloped Square and adhered to the card using Dimensionals. Some holly leaves were stamped in Shaded Spruce and 3 Red Rhinestones were added to look like berries. I tied a short piece of ribbon around the ribbon on the card in a knot.

The inside has a sweet sentiment and some swirls that are included in this stamp set.

If you want any of the products I used on this project, just click on the item below or the Shop Now button and it will bring you to my Online Store. Please use the current Host Code when you go to checkout your order. You can also click directly on an item to order.
Merry Christmas To All & Dashing Deer
Some of my favorite colors for Christmas are Cherry Cobbler, Crumb Cake and Early Espresso. This color combination is a little rustic which I love. Isn’t the script for the Merry Christmas sentiment is so pretty?

All week I’m featuring the Merry Christmas to All Bundle and today I paired it with the Dashing Deer set. That deer is just beautiful! It’s stamped in Cherry Cobbler and then cut out with the coordinating die.

The card base is a half sheet of Cherry Cobbler cardstock which is scored at 4 1/4 to make a 5 1/2 x 4 1/4 card. The Crumb Cake layer is 5 1/4 x 4 and then I used a scrap of Very Vanilla to stamp the deer.

Here’s a quick tip for cutting the deer or really any die cutting. Use a Post-It Note to hold it in place before running it through your Big Shot.

The bow was tied with 2 strands of Linen Thread. There’s a tiny pearl that I colored in Dark Cherry Cobbler with a Stampin’ Blend Marker.

For the inside, I decided to use Crumb Cake to match the card front. Usually I use a piece of Whisper White or Very Vanilla but I like the way this came out. That sentiment is one of my favorites. It can be used outside or inside a card.

If you want any of the products I used on this project, just click on the item below or the Shop Now button and it will bring you to my Online Store. Please use the current Host Code when you go to checkout your order. You can also click directly on an item to order.
Product of the Week
As we are making our way to Christmas, I thought it would be good to highlight the Merry Christmas to All Bundle. With all these holiday sentiments, this is great bundle to use on its own or to use with another product.

The Thinlets can stand on their own with those large Merry, Holidays, Happy and Christmas dies. The frames for the smaller stamped images work so nicely together. Here are some samples from the catalog.

I’m going to enjoy making cards this week using this set so come back tomorrow to see what I’ve made.
You can purchase as a bundle and save 10% or purchase individually. Just click on the items and you will link to my Online Store.
Let it snow! Or at least, create a snowy wonderland using this incredible assortment of products. With two stamp sets,
paper, accessories, and dies, the only limit is your creativity!
These are the Products in the Snowflake Showcase. Hurry, they are only available until November 30 or while supplies last.


Below are some samples made using these products. Aren’t they beautiful?

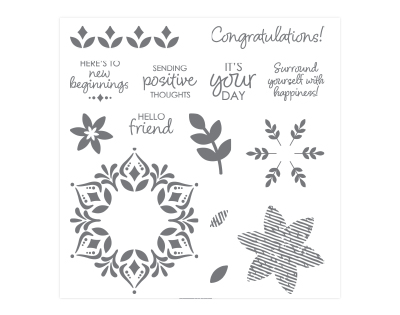
Country Home Harvest Blessings
The Country Home Stamp Set coordinates so well with the Country Lane Designer Series Paper and then layered on the Subtle Embossing Folder…what a combo!!!

Here’s what I used to create this card:
Early Espresso Card Base - 5 1/2 x 8 1/2, scored at 4 1/4
Crushed Curry Layer - 5 1/4 x 4, embossed with Subtle Embossing Folder
Designer Series Paper Layer - 4 x 3
Whisper White Large Layering Oval
Piece of Copper Trim to wrap around the front. Make a Bow and add it with a Mini Glue Dot after you attach the Oval with Dimensionals
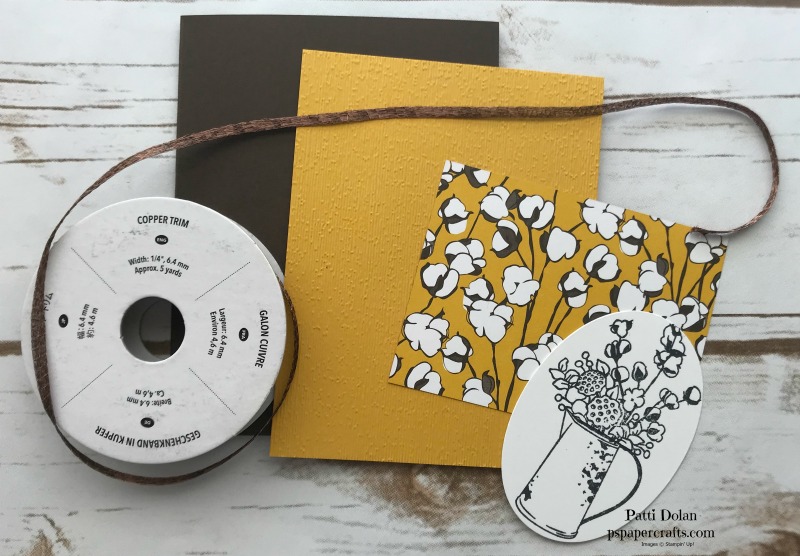
Stamp the pitcher and flowers on the Oval in Tuxedo Black Memento Ink. Color with Stampin’ Blends. Be sure that you have a piece of scrap under the oval since the blends will bleed through the back a little bit.
Add some Wink Of Stella to the cotton flowers to give them some shine. I don’t think you can see it here in the picture but it really does look beautiful and shimmery in person.
Stamp the sentiment in Early Espresso at the bottom of the Crushed Curry layer.

Here’s a peek at the inside. I was going to color the flowers but I actually like them just left in black.

If you want any of the products I used on this project, just click on the item below or the Shop Now button and it will bring you to my Online Store. Please use the current Host Code when you go to checkout your order. You can also click directly on an item to order.
Masculine Cards with Rooted In Nature
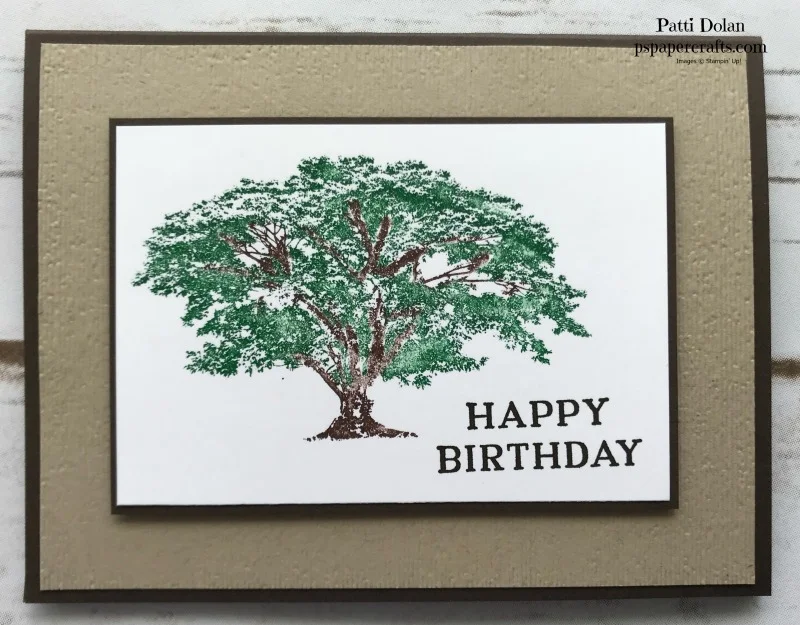
It seems like a natural fit to use the Subtle Embossing Folder with the Rooted In Nature Stamp Set to make a great masculine card. Can you see all the texture between the embossing folder and the tree that has multiple colors? I colored the tree stamp with Stampin’ Write Markers and then stamped so you can see the brown branches and green leaves.

The birthday card uses the sentiment from the Perennial Birthday Stamp Set. I think this is perfect to give to a guy. You don’t need to add anything more; it’s simple and the colors rustic.
Here are the dimensions:
Early Espresso Card Base - 5 1/2 x 8 1/2, scored at 4 1/4
Crumb Cake Embossed Layer - 5 1/4 x 4
Early Espresso Layer - 4 1/8 x 2 7/8
Whisper White Layer - 4 x 2 3/4