


Easy Peasy, Pretty Birthday Card!
Today I'll show you how to make this beautiful Birthday card. It's quick and easy, but very pretty.

The Perennial Birthday Stamp Set has some really nice sentiments and some pretty flower images. I used Powder Pink Cardstock and layered a strip of Marina Mist and then a pop of color from a strip of Sweet Soiree Designer Series Paper. If you stamp using the same color ink as the cardstock, you get a watermark look. That's what I did for the background.

Did you notice the label. I used the Pretty Label punch and punched one label with the sentiment on Whisper White Cardstock and then punched a second with Marina Mist Cardstock. I cut the Marina Mist in half and then glued it to the Whisper White label to give it a border.
You can see how I did this in the video below:
If you want any of the products I've demonstrated today, just click on the Shop Now button and it will bring you to my Online Store. Please use the current Host Code when you go to checkout your order. You can also click directly on an item to order.
Pretty Valentine Treat Box
Today I have a treat for you, well a treat box project that you can make for any occasion. I made these for my Stampin' Up! teammates for the last OnStage Convention that I attended. Today I'm making them for Valentine's Day. Aren't they cute?

I cut one of the Acetate Card Boxes in half and then added some beautiful Painted with Love Specialty Designer Series Paper. I added a band around them to keep them closed.
I made this one using one side of the DSP. Four pieces of Ghirardelli chocolates fit perfect inside....Mmmmm!

This is the exact same paper, just the other side is showing. Isn't it pretty with the gold foil. I just love this paper. I fit eight pieces of Dove chocolate in this one.

Here's the video to walk you through the steps.
The Dimensions are as follows:
- Cut Acetate Card Box in half (at the 4" mark)
- Cut DSP approx 5 1/2 by 4 7/16. Cut off edge of one side using die, border punch, etc.
- Score using the straight side (not the side you just cut with die) at 2 7/8 and 3 1/2
- Cut DSP for band at 1" by 9"
- Score band at 2 5/8 and 3 1/4 and 6 1/4 and 7
- Punch Berry Burst with 1 3/8 Scallop Circle Punch
- Punch Gold with 1 1/4 Circle Punch
- Punch Whisper White with 1 1/8 Scallop Circle Punch
This is the one that I made for my teammates. I used the Fresh Florals DSP and Powder Pink Cardstock and I cut the edge with the Swirly Snowflakes Thinlits Dies. I used self-adhesive, super slim and seriously strong magnets that I purchased at a local craft store.

Below are the supplies I used for the Valentine Boxes that I made in the video. You don't need all these exact items, you can use other DSP and other sentiment and heart stamps. Check out your stash or order what you need by clicking on the item or clicking on the SHOP NOW button.
Fun Eclipse Birthday Cards!
Have you tried making an Eclipse Card yet? Its so easy and so much fun. I've seen a lot of them lately on Pinterest and decided to give it a try.

I made a few of them for birthdays and I think I'll try one with LOVE for Valentine's Day. I'll post it here when I do. Today's video will show how I made the Birthday Girl and I'll have details on the other two as well.
I used the Picture Perfect Designer Series Paper (DSP) for this card. Its from the 2018 Occasions Catalog. The Large Letters Framelits made it so easy to cut out the letters. This was the first time I tried it on DSP and I think it came out great. The Sentiments are from the Picture Perfect Birthday set. Check out this suite on pages 4 & 5 of the Occasions Catalog.

Here's the video
This is a cute boy's birthday card. I used the FREE Party Panda stamp set. Its a Sale-A-Bration item. During Sale-A-Bration, you get free product for every $50 you spend. I think this is such a fun set.

My final card is a beautiful Birthday card using the Petal Palette Stamp Set and the new Stampin' Blends in Old Olive, Pink Pirouette and Daffodil Delight. Since I used 5 letters in this one for HAPPY, I wasn't able to fit it on an A2 card. I made it to fit into a legal size envelope.
The dimensions are:
Old Olive Card base - 9 1/4 x 8 and scored at 4
Basic Black layer - 8 3/4 x 3 1/4
Whisper White Layer - 8 1/2 x 3

Here are the products I used for all 3 of the cards. You can click on an item and it will bring me to my online store or you can click the Shop Now button on the top or right side to shop.
Give it a try and send me a picture and I'll post it on my blog for everyone to see!!!
Here's one more I made for Valentine's Day. I used the Heart Happiness Stamp Set and colored the flowers with the Stampin' Blends. The card base is Fresh Fig.

Fun Birthday Card Using The Bird Banter Stamp Set
Wouldn't receiving this card put a smile on your face? The birds from the Bird Banter Stamp Set in the new Occasions Catalog are just so cute!
I stamped the images using Memento Ink and then colored them with the new Stampin' Blends Markers. These are alcohol based markers so they blend beautifully. You can purchase a single marker, a combo pack (light and dark) or the entire collection. Of course, I had to have them all :)

I fussy cut the bottom bird and then attached him to a strip of Tutti-Frutti 6x6 Designer Series Paper. The adhesive backed Tutti-Fruttie Sequins add just the right finishing touch. The card base is Lemon Lime Twist so the colors all coordinate. This is what I love about Stampin' Up! everything coordinates!

Here's a peek at the inside. Aren't those birdies cute?

Take a look at my video to see how I made them and for tips on use the new Stampin' Up! Blends Markers.
Most of the products I used are from the 2018 Occasions Catalog. You can start ordering from it on January 3 so start making your wish list. Its also Sale-A-Bration time so for every $50 you spend, you get free product from the Sale-A-Bration brochure. Let me know if you need a catalog and I'll send one out to you.
Elegant Thank You Card using the Petal Passion Suite
After finishing with my Christmas cards and packaging, I was able to finally start playing with some of the new products from the Occasions Catalog. I absolutely love the Petal Passion Suite. I think the Designer Series Paper is just gorgeous!!! I hope you agree.
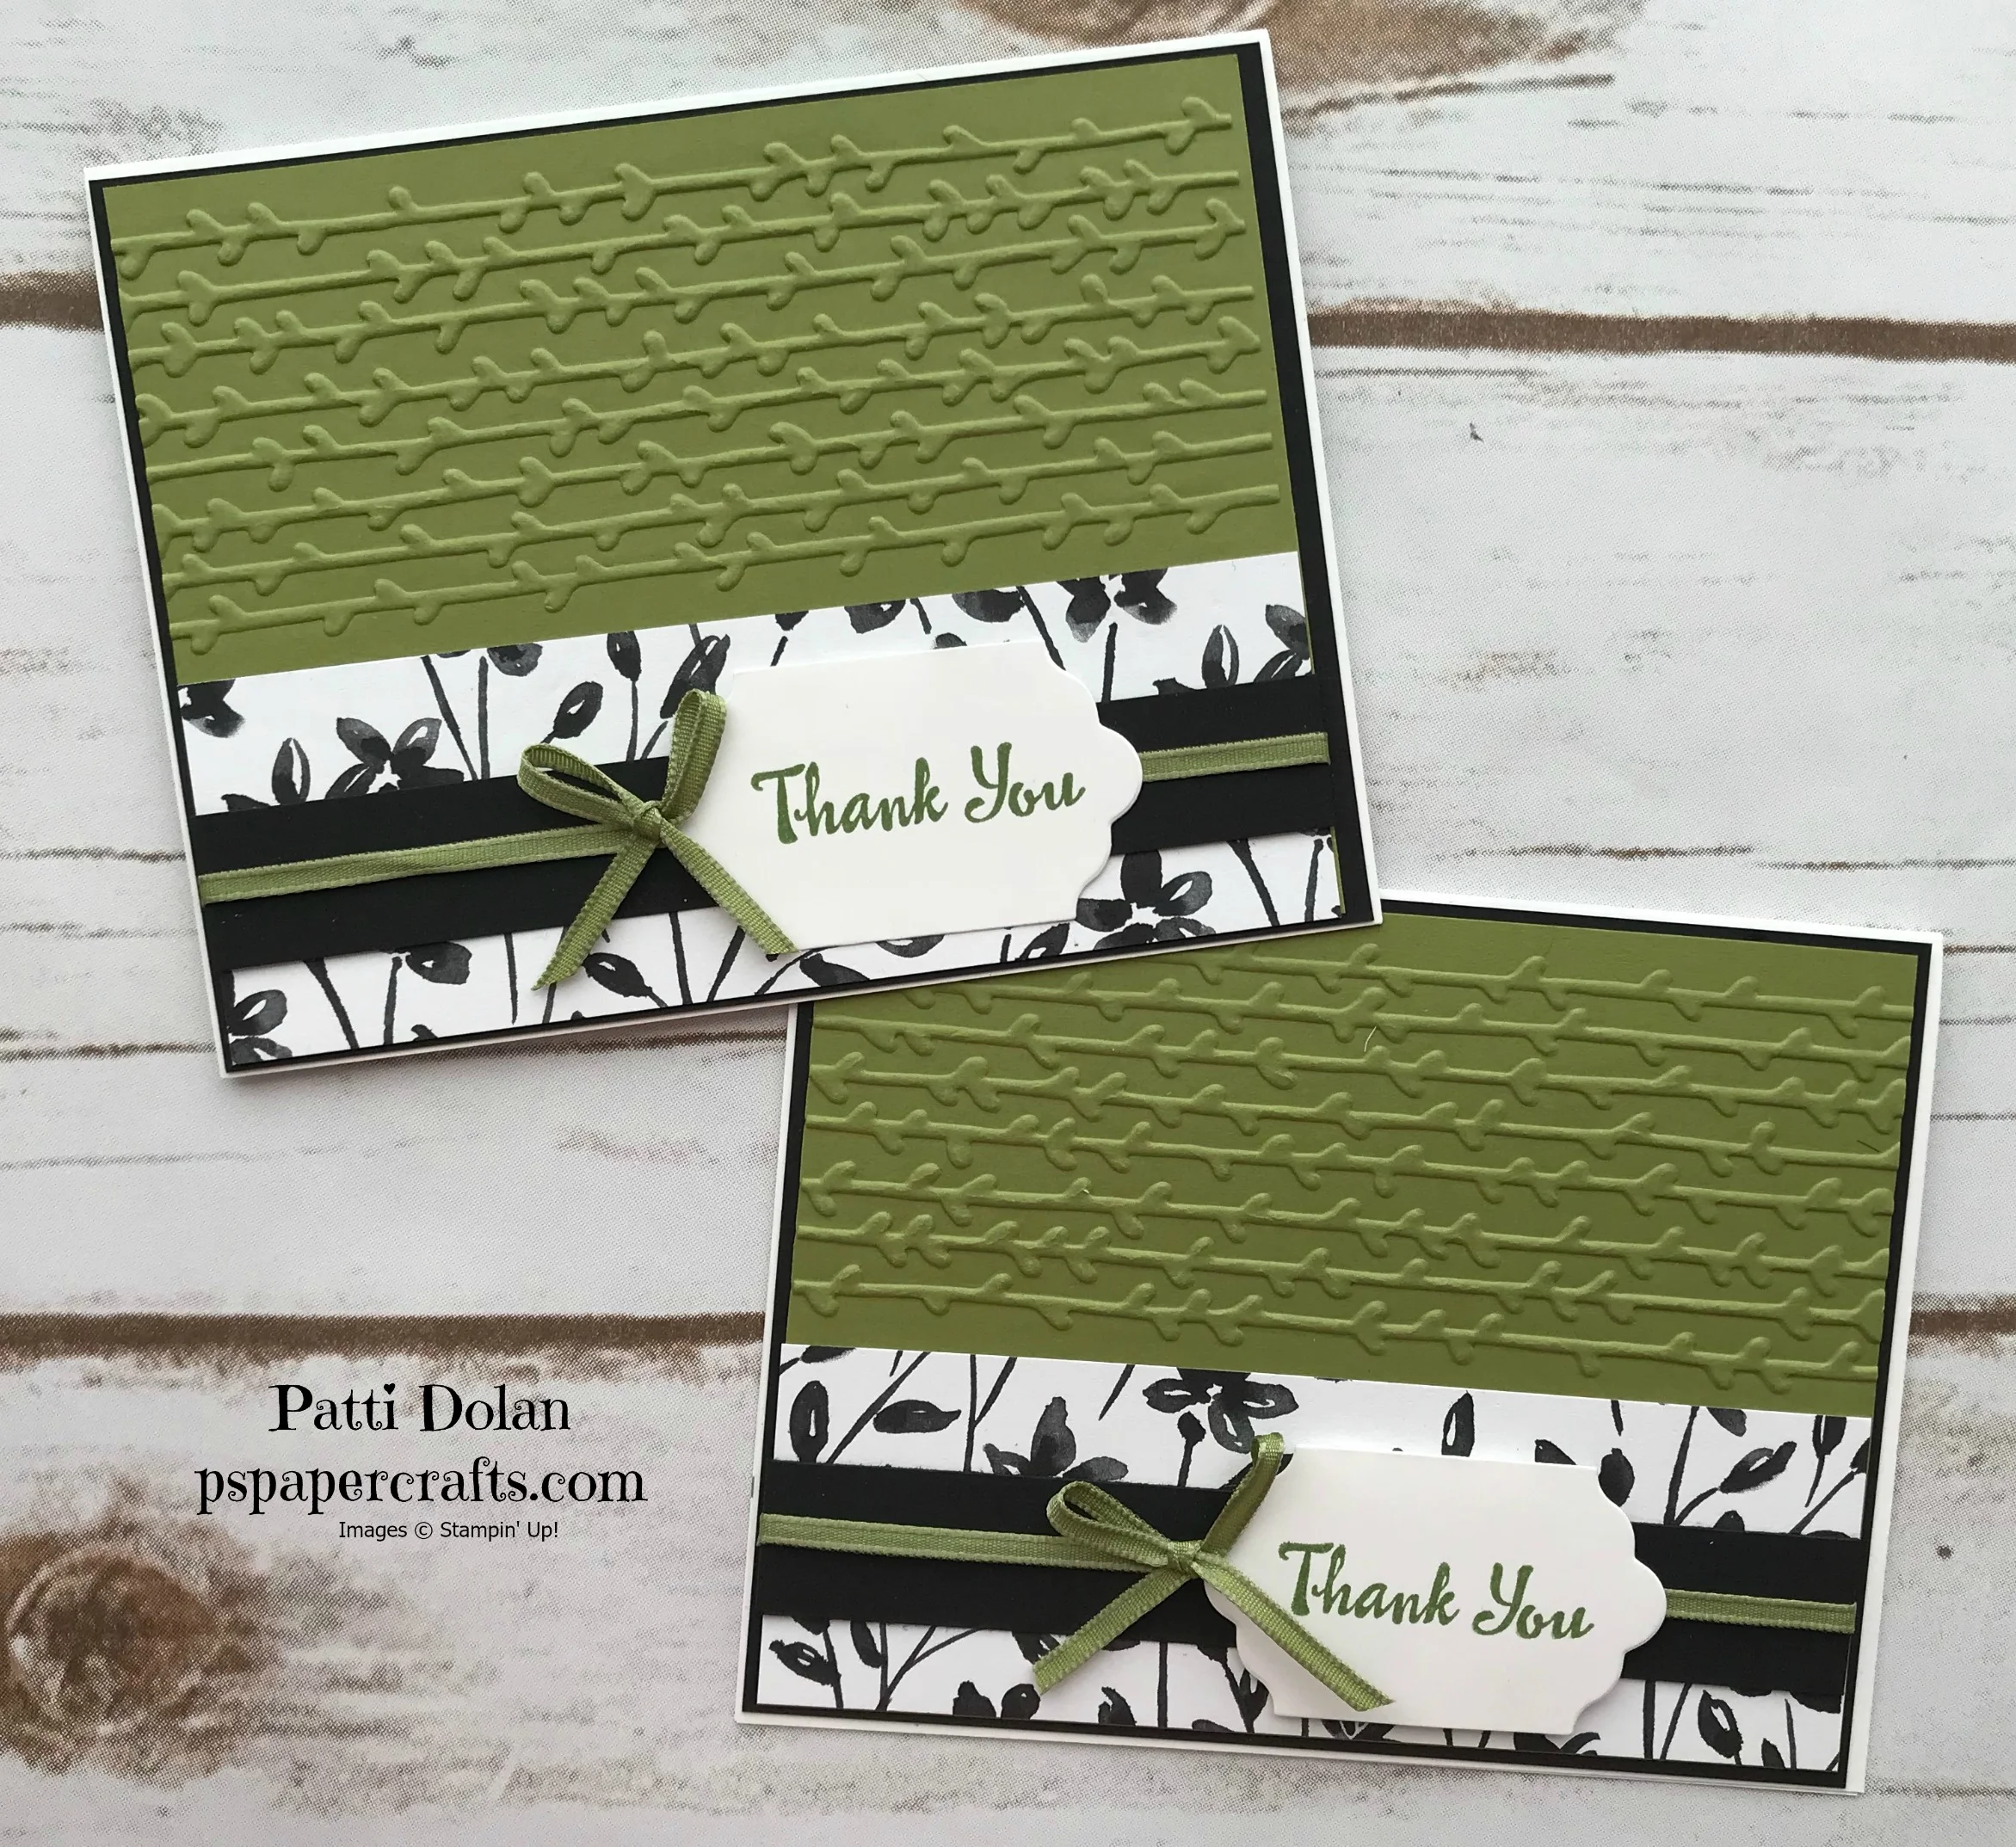
This suite has coordinating Stamps and Thinlits, Designer Series Paper, a set of 2 Embossing Folders and some pretty Embellishments. Did I tell you how much I love the black and white Designer Series Paper???

I used one of the embossing folders in the set with Old Olive Cardstock to create the top of the card and the Petal Passion Designer Series Paper for the bottom portion. The sentiment was stamped and cut out with the Lots of Labels Framelits and I added some Old Olive Sheer Ribbon to pull it all together.
Watch the video below to see how to make this card and see an overview of some of the products I used.
Most of the products I used are from the 2018 Occasions Catalog. You can start ordering from it on January 3 so start making your wish list. Its also Sale-A-Bration time so for every $50 you spend, you get free product from the Sale-A-Bration brochure. Let me know if you need a catalog and I'll send one out to you
Christmas Gift Bags - Week 12 of 12 Weeks of Christmas!
We are finally here, our 12th week of Christmas!!! I'm thinking that you've completed all your cards so I wanted to give you some ideas for Christmas packaging. I used the Gift Bag Punch Board to make these and it was really easy to do. Aren't they cute? You can make different sizes and change up the paper for different occasions.

In the video I'll show you how to make the middle one using the Merry Little Christmas Designer Series Paper. The other two bags were made with the Year of Cheer Designer Series Paper.
Here are some other gift packaging ideas. You can put small items like jewelry, chocolate or gift cards in these.

You can look at my blog post for the dimensions and steps to make these gift card holders. They are in Real Red and Garden Green Cardstock and were embossed with the Quilt Top Textured Impressions Embossing Folder and then the Stitched Felt embellishments were added to finish them off.

I used the mini pizza boxes, Be Merry Designer Series Paper and Pretty Pines to create these cute gift boxes.

If you want any of the products I've demonstrated today, just click on the Order Now or Shop Now button and it will bring you to my Online Store. Please use the current Host Code when you go to checkout your order. You can also click directly on an item to order.
Beautiful Snowflake Christmas Card - Week 11 of 12 Weeks of Christmas!
We're already at week 11 of our 12 Weeks of Christmas series, can you believe it? Christmas is right around the corner!!! Today I have an elegant card featuring the Winter Wonder Embossing folder. What I love about this is the size of the snowflake....it really is the focal point of the card and you don't need to add much more.

Embossing on Vellum Cardstock adds white edges on the snowflake. I strategically heat embossed some stars and added some Rhinestones to allow me to add glue to the vellum without it being visible.

The stars and Sentiments are from the Star of Light Stamp Set. Check out the inside of the card to see the beautiful image of the stars.

You can see how I made this card on the video below. Give me a thumbs up if you like it!!!
You can shop for any of the products I used by clicking on the image or by going to my online store by clicking Shop Now on the right or Order Now at the top of this page.
Free shipping on all Stampin’ Up! orders - Monday, December 11!!!
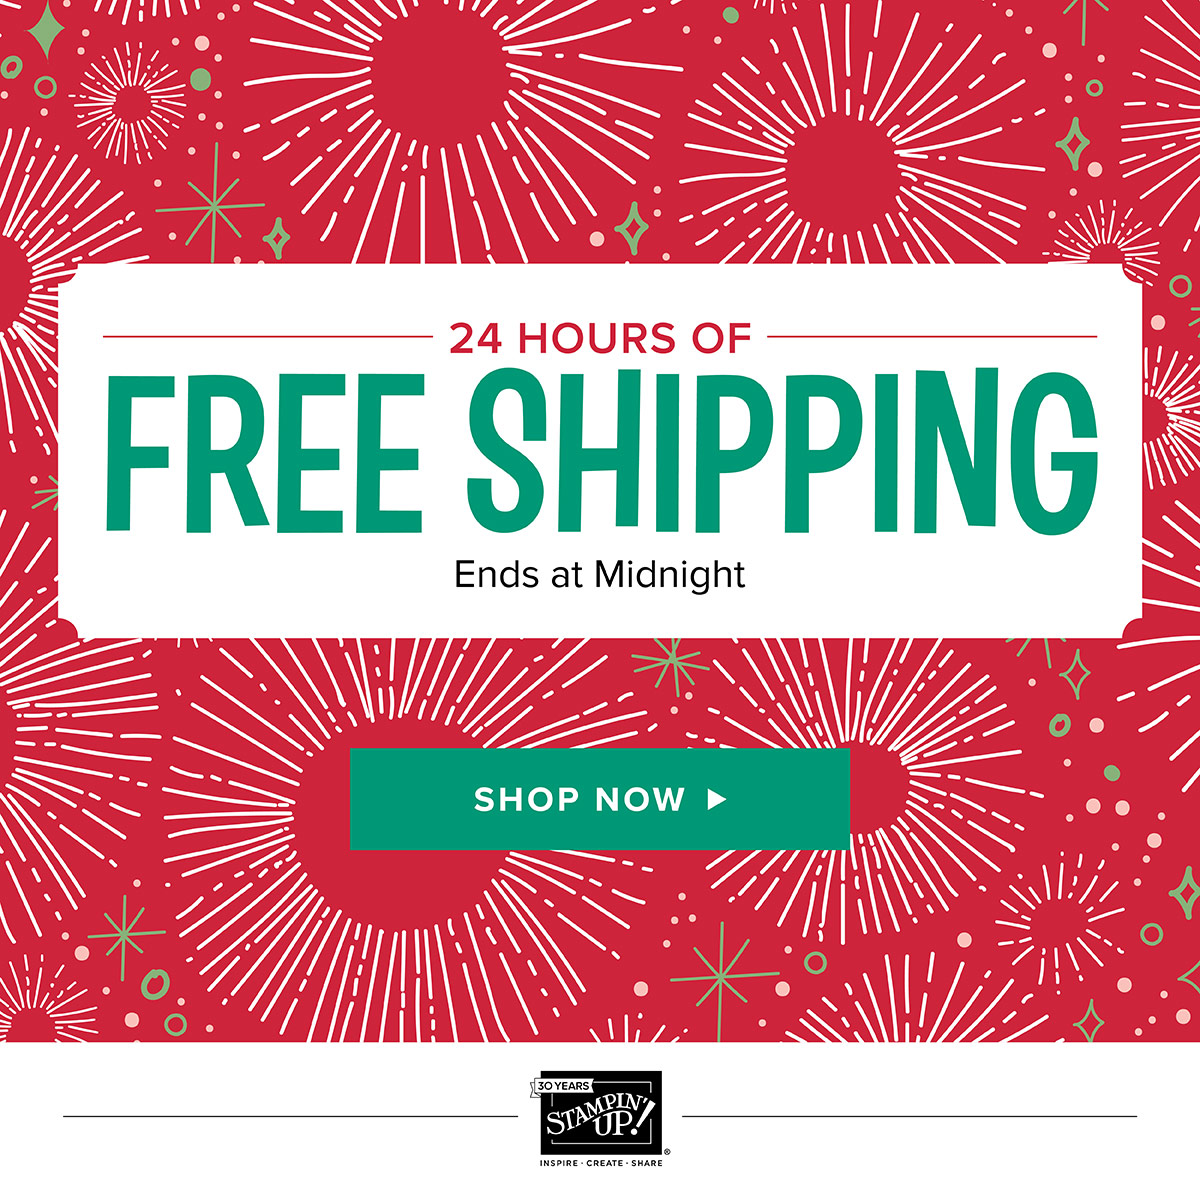
Guess What? Stampin' Up! is offering another day of Free Shipping. Free shipping runs from 12:00 AM, December 11 to 11:59 PM (MT). Don't miss it!!!
Just to go my online store to shop. You can get there by clicking on the Shop Now Button on the right hand side or Order Now button at the top of my blog.
Watercolor Christmas Project Kit - Week 10 of 12 Weeks of Christmas!
Today I have something a little different. Did you get ALL your Christmas cards done? If you are like me, you may have a bunch done but not enough for all the people you want to send cards to. Or, you've been putting it off, Christmas is just a few weeks away and you have so much to do!!!! Well, here's a great kit that you can get, at a discount since its on sale.

The kit has everything already prepared to make 20 cards; you don't even have to think or design. You just need to stamp the sentiments and put them together. There's a coordinating stamp set (also discounted) or you can use stamps you already have. You will need some strong adhesive like Fast Fuse for the sequin rope and a Fine-Tip Glue Pen for the individual sequins.

I had some friends come over and we put them together and had fun doing it. Its pretty easy and you can send handmade cards to those on your list. You can use sentiments that you have and change up the front and the inside sentiments.
Here's the video with some tips.
You can shop for any of the products I used by clicking on the image or by going to my online store by clicking Shop Now on the right or Order Now at the top of this page.
Be sure you check out the other discounted items and the retiring items at my online store. They are available while supplies last.
Christmas Card Gift Card Holder - Week 9 of 12 Weeks of Christmas!
For Week 9, I wanted to share a fun fold gift card holder with you. I CASEd (Copy Everything And Share) this from Dawn Griffith who CASEd it from Laura Barto. I changed it up a bit and made it into a gift card holder. I love having different types of gift card holders for the holidays.

It's pretty cool how it opens. There's an arm that opens and then the card is a top-fold and inside is a place for your gift card. You'll have to watch the video to see it in action.

I made one with a Garden Green base and Cherry Cobbler Designer Series Paper (DSP).

This one has a Cherry Cobbler base with Garden Green DSP. The cup has some whipped creme and a straw.

Take a look at the video below and then I have the sizes and dimensions for all the pieces and layers listed.
Sizes & Dimensions:
Card base - 4 1/4 x 5 1/2
DSP Layer - 3 1/2 x 5 1/2
Whisper White Top Fold Card Layer - 3 x 11 (scored at 5 1/2)
On Inside at 2 3/4 from bottom, cut slit across leaving 1/4 at each side.Arm - 1 x 5 1/2 (scored at 4 1/4)
DSP Layer for Arm 3/4 x 4
DSP Layer for Top Fold Card - 1 x 3
You can shop for any of the products I used by clicking on the image or by going to my online store by clicking Shop Now on the right or Order Now at the top of this page.
Deck The Halls - Week 8 of 12 Weeks of Christmas!!!
Can you believe we're at Week 8 already, just 4 more weeks until Christmas! Today's card uses the Carols of Christmas Bundle. Deck The Halls....FALALALALA LALALALA!!!!

This is a very cheery card and I added a little bling to it with the ornaments cut from Silver Glimmer Paper and the Silver Tinsel with a bow. The green layer is from the Be Merry Designer Series Paper pack. There are lots of other choices in that paper pack.

Its a pretty clean and simple card and so easy to make. You can mass produce this kind of card if you send a lot of cards.
Take a look at the video to see how I made it. I ran into a few snags but when paper crafting, you can always fix or cover up and nobody will know :)
Here's the dimensions of the layers for this card:
- Card Base - Real Red 5 1/2 x 8 1/2 (scored at 4 1/4)
- DSP Layer - 5 1/4 x 4
- Real Red Banner - 1 1/2 x 4 3/4
- Whisper White for Sentiment - 3 x 2 1/4
- Inside Whisper White Layer - 5 1/4 x 4
You can shop for any of the products I used by clicking on the image or by going to my online store by clicking Shop Now on the right or Order Now at the top of this page.
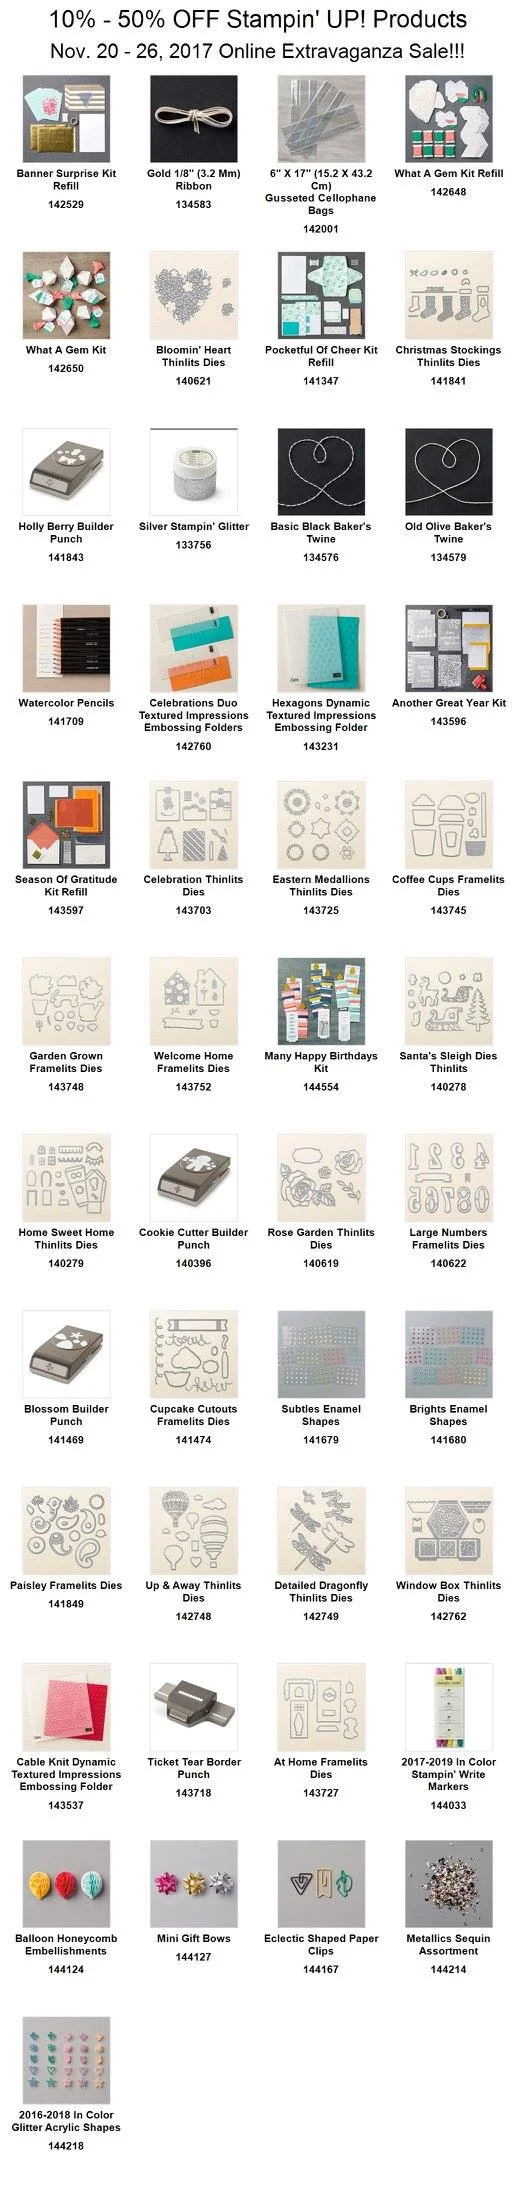
ONLINE EXTRAVAGANZA!

Don't Miss the Online Extravaganza!!!!
We’re entering the “most wonderful time of the year,” and not just because of the holidays. For us, it’s because Online Extravaganza is starting soon! During this promotion, we will have exclusive deals and sales available for limited times.
There are 3 parts to this extravaganza:
Monday, November 20th only - 24 hour sale: 20% off a select group of stamp sets (see below).
November 20th - 26th: 10% to 50% off select items (see below).
November 27th: Flash Sale! Stampin' Up! hasn't told us what will be on sale but I will share with you as soon as I find out.
Part 1: 24 Hour Sale! -BEGINNING NOVEMBER 20, 12:00AM MT

Part 2: Exclusive deals 10% - 50% Off, Monday, Nov. 20 - Sunday, Nov. 26
Part 3: Nov. 27: 24 hour flash sale...stay tuned, I'll let you know as soon as I get the details.
You can shop for any of the products I used by clicking on the image or by going to my online store by clicking Shop Now on the right or Order Now at the top of this page.
My Trip To Utah - Sight-seeing, Stampin' Up! Tour, OnStage Live
Hi everyone, I wanted to fill you in on my week in Utah. I flew out for the annual Stampin' Up! OnStage Convention and added some sight-seeing and a tour of the manufacturing facility.
I met my friend and fellow demonstrator, Melissa Kerman in Salt Lake City on Sunday morning and we headed to Bryce Canyon. We were there for sunset and it was just so amazing.

We stayed in Kanab Sunday night and went on a tour of the Stampin' Up! manufacturing facility on Monday morning. I don't have pictures but we were able to see how they make the rubber stamps and the photopolymer stamps. It was amazing to see this. We also saw the way the card stock is cut. The people working there were so nice.
After the tour, we drove to Zion National Park. From Bryce you are on top, looking down and from Zion, you go to the bottom and look up. Different perspectives, but just as amazing. That bottom picture is of Melissa.

We stayed overnight in Springdale, just outside of Zion Park and the views from our hotel were beautiful. On Tuesday, we drove to Cedar Breaks and drove up to the top of Brian Head Peak, elevation 11,307. I felt like we were on top of the world.

We stayed in Cedar City and then headed back to Salt Lake City for OnStage. The convention was Thursday, Friday and Saturday. Below are some pictures of my team at the convention, lunch and dinner. The last picture is with Brandy Cox, one of the million dollar demonstrators. There were a lot of top demonstrators there and it was so nice to talk with them.

I can't show pictures of all the goodies we saw but you will be seeing them soon. We were able to see the new Occasions Catalog along with Sale-A-Bration. We played with new stamps and saw demonstrations on the amazing new STAMPARATUS (see my prior blog post on this new tool).
I had a wonderful time and met in person so many fabulous women. My team and leaders are the best and we had some really sweet time together. I will definitely do this again next year.
Glittery Snowflake Card - Week 7 of 12 Weeks of Christmas!
If you like snowflakes and glitter, you will love this card. I think I will have glitter on me for a while after making these cards. I used the Snowflake Sentiments Bundle.

It took a little time and patience to get these delicate snowflakes cut out but it was definitely worth it. The Big Shot Die Brush really helped get all those tiny pieces out.

I used the Thick Whisper White Cardstock to make sure it was sturdy and Heat Embossed the sentiments from the Bundle with the Silver Stampin' Emboss Powder. It is shiny and glittery, so pretty!
You can shop for any of the products I used by clicking on the image or by going to my online store by clicking Shop Now on the right or Order Now at the top of this page.
STAMPARATUS!!!
Reserve the STAMPARATUS, You Won't Want To Miss This
You are going to love this new tool that Stampin' Up! announced at their OnStage Convention last week. I attended and was blown away by this tool. Its called STAMPARATUS and its has some really great features.

You can see this in action in the video below which features 5 things you NEED to know!
Why do YOU need one? You’ll fall in love with stamping all over again when you learn everything you can do with it!
Make multiples with ease
Consistently stamp crisp, clean images
If you want a darker impression, apply more ink and restamp—no need to start over
Make fewer mistakes, saving time and money
Easily create 2-step, 3-step, and 4-step stamped images using reversible plates
Develop new and specialized stamping techniques with adjustable stamping plates and precision placement
I need product details!
Compatible with Stampin’ Up!’s red rubber and photopolymer stamp
Foam mat to use with photopolymer stamps
Rulers and gridlines for quick measuring
2 open sides so you can stamp on larger paper
2 reversible plates: a total of 4 surfaces to work with
2 magnets to hold the paper in place
Magnet storage areas
Retail Price–$49.00 USD/$65.00 CAD
These are the reservation windows. Let me know if you want to reserve one during these windows and I'll help you reserve one. You'll need your credit card to do this and your Credit card will not be charged until the Stamparatus ships from the Stampin' Up! facility.

Simple Christmas Wreath Card - Week 6 of 12 Weeks of Christmas!
Isn't it great when you can use a stamp to create something a little different than what it was meant for? Today I used the flower from the Painted Harvest Stamp Set to make a Christmas Wreath. I just love this set!!!

I stamped the flower in Garden Green straight on and then twisted it a little and stamped again. This gives some texture to the wreath. The dots were stamped in Real Red to add some berries. The wood layer is a piece of the Wood Textures DSP which was embossed with the Pinewood Planks Embossing Folder. A simple bow with the Linen Thread adds just the right finishing touch.

Here's the video showing how I made this card. Take a look.
You can shop for any of the products I used by clicking on the image or by going to my online store by clicking Shop Now on the right or Order Now at the top of this page.
Fun Cookie Cutter Christmas Tags - Week 5 of 12 Weeks of Christmas!
I have a fun project today. We're in week 5 of the 12 weeks of Christmas and I pulled out the Cookie Cutter Christmas set to make some gift tags. This is in the annual catalog and was all the rage last year. The stamp set has a coordinated punch so its so easy to make these tags. Which do you like best?

We start off with this sweet eskimo in Marina Mist. I used the Brick Wall Embossing folder to make the igloo. It was easy to cut a circle from the embossed cardstock with the layering circles framelits.

The gingerbread man looks so yummy!!! After trying different shades of brown, I settled on Soft Suede. The builder punch has some pieces to use to dress up your images and I cut the bow-tie in a piece of Red Glitter Paper. He sparkles with the tie, the layer and the Mini-Tinsel Trim.

Have yourself a Beary Merry Christmas says it all! Isn't he so cute!!!! He was stamped in Crumbcake Ink and the Sentiment and Scalloped Layer are in Cherry Cobbler. Those make such a nice Christmas color combo.

Last but not least is Rudolph. You turn the punch upside-down to punch him out. I punched an extra on a scrap of paper, cut out his nose and then traced it on the back of the Glitter Paper to get his shiny, red nose.

Watch the quick video below to get some details on how I made each of these.
You can shop for any of the products I used by clicking on the image or by going to my online store by clicking Shop Now on the right or Order Now at the top of this page.
Christmas Quilt Card - Week 4 of 12 Weeks of Christmas!
Today's card features the Christmas Quilt Suite from the Holiday Catalog. Isn't it beautiful! All of the items really coordinate so easily to make a beautiful project. You can use different papers and embellishments to make a project for any occasion.
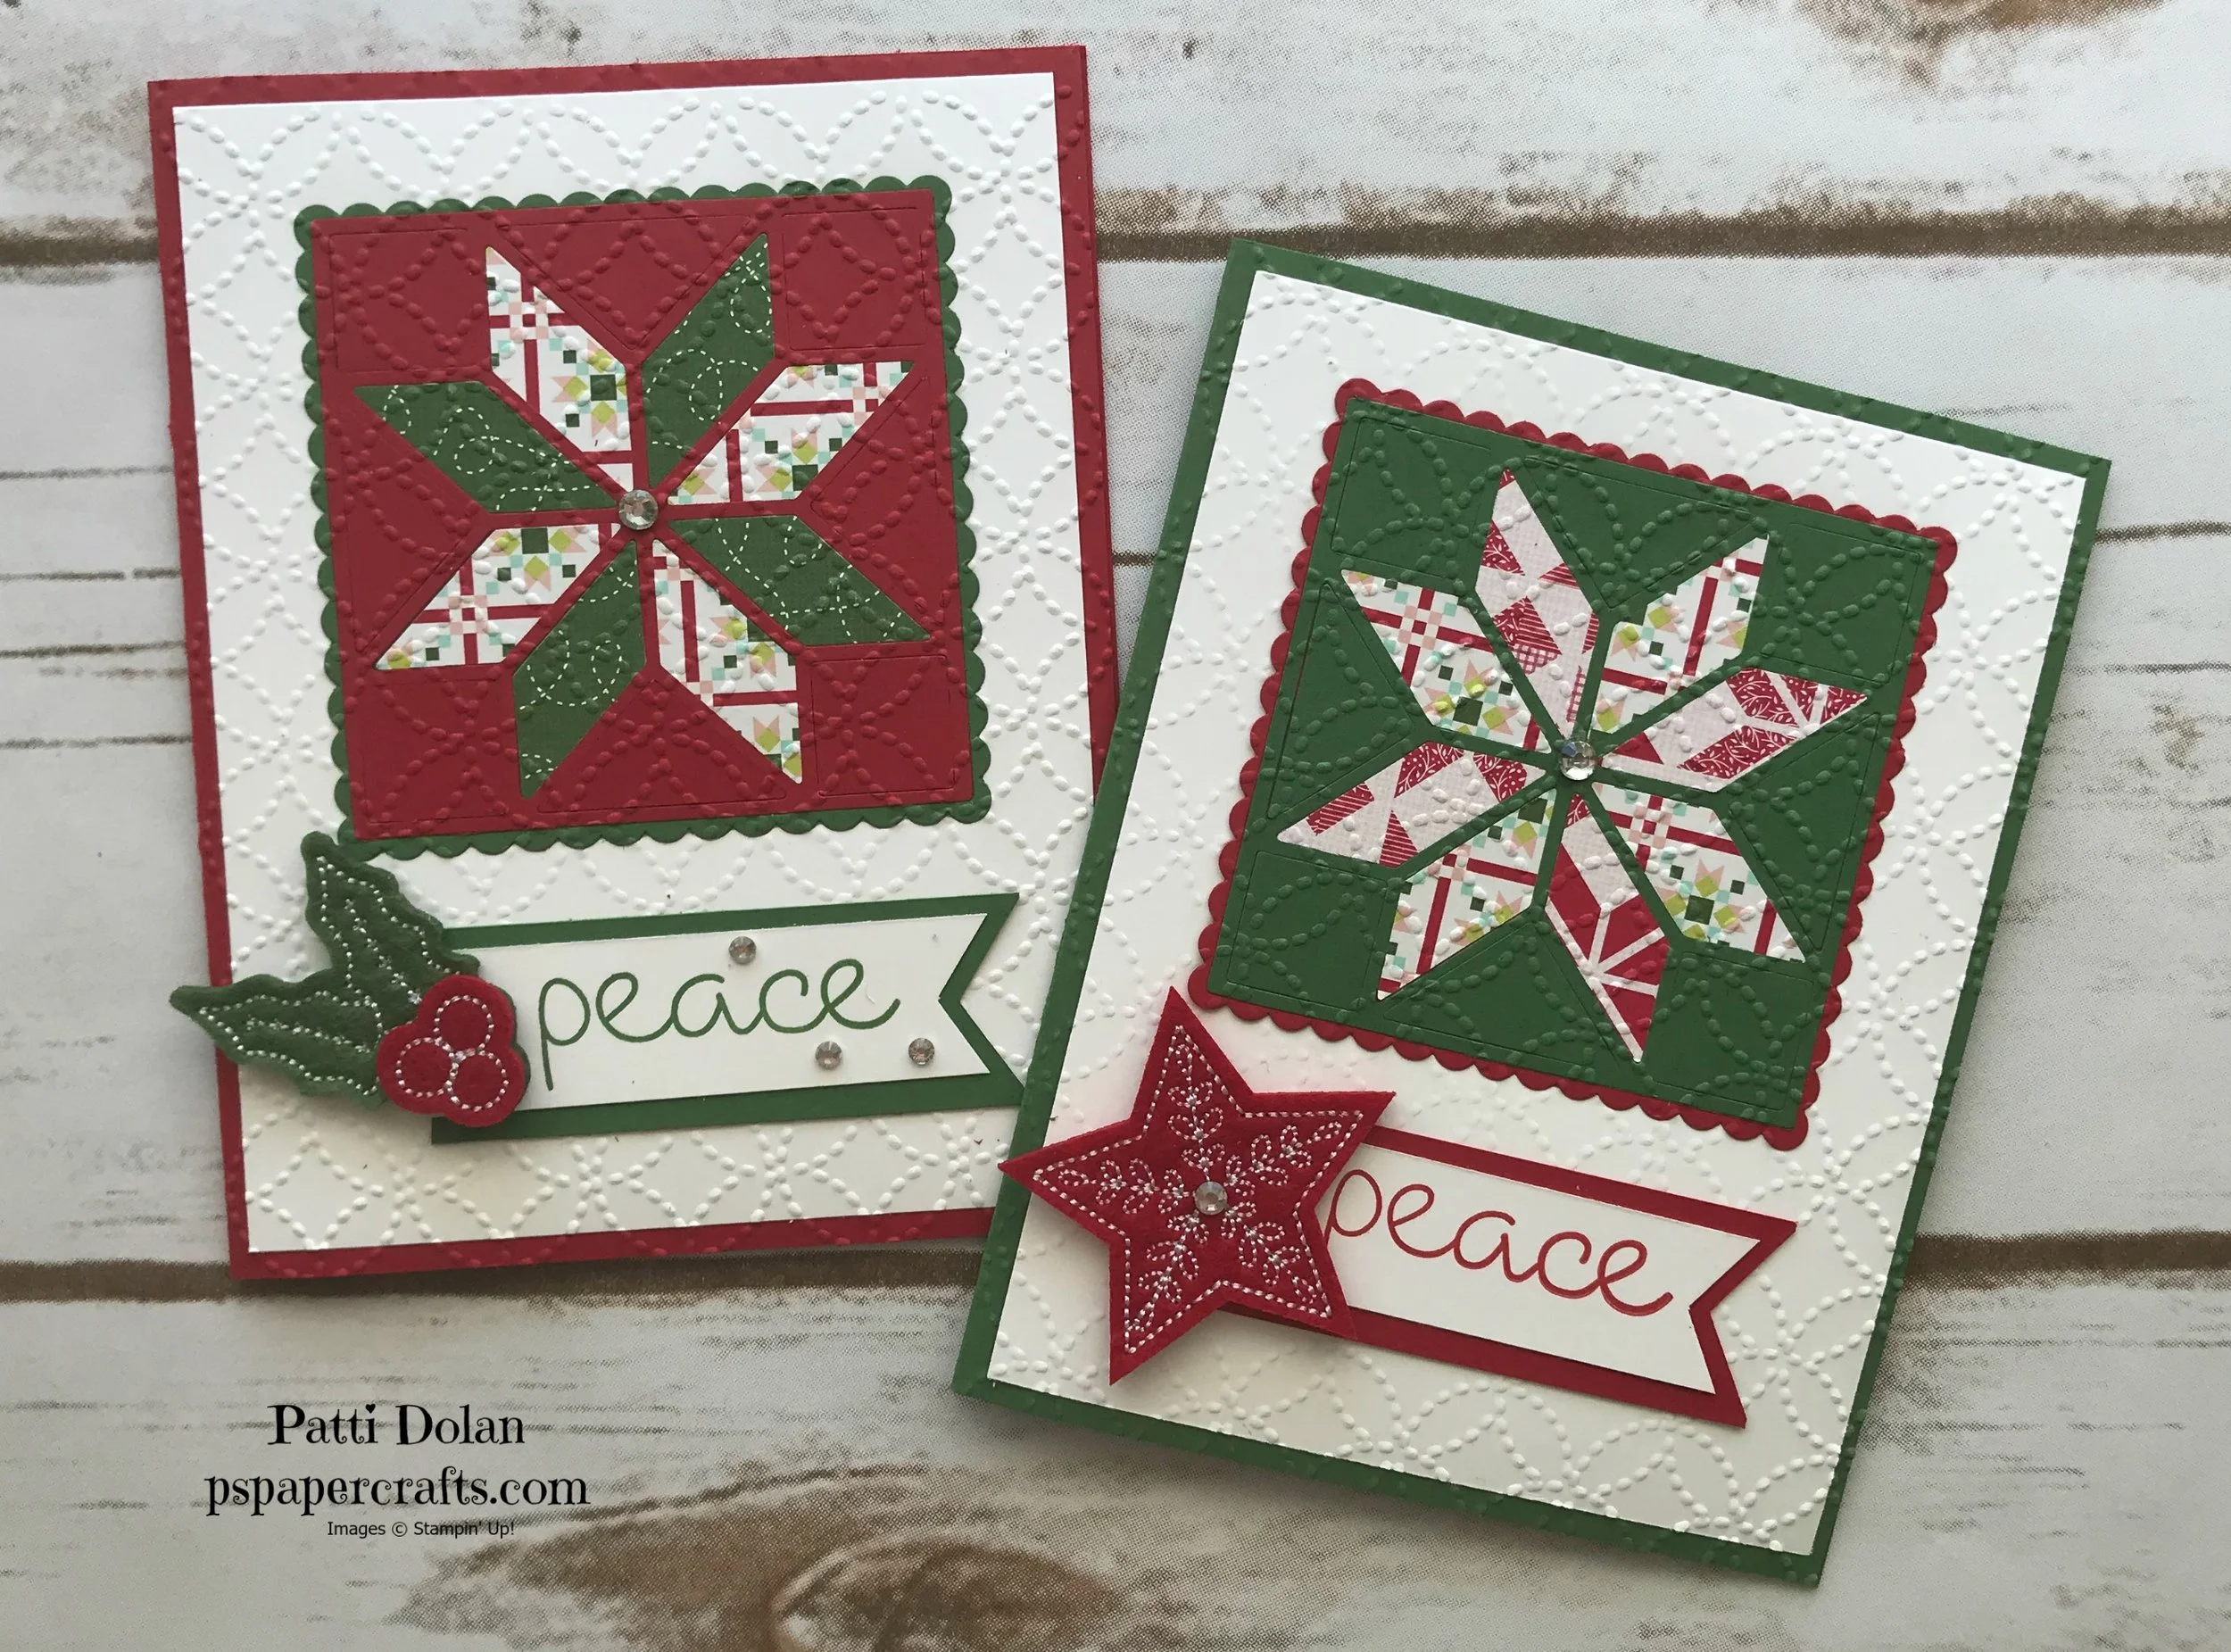
I used the Quilted Christmas Designer Series Paper which coordinates perfectly with Real Red and Garden Green Cardstock. The Stitched Felt Embellishments add a beautiful final touch to the card.
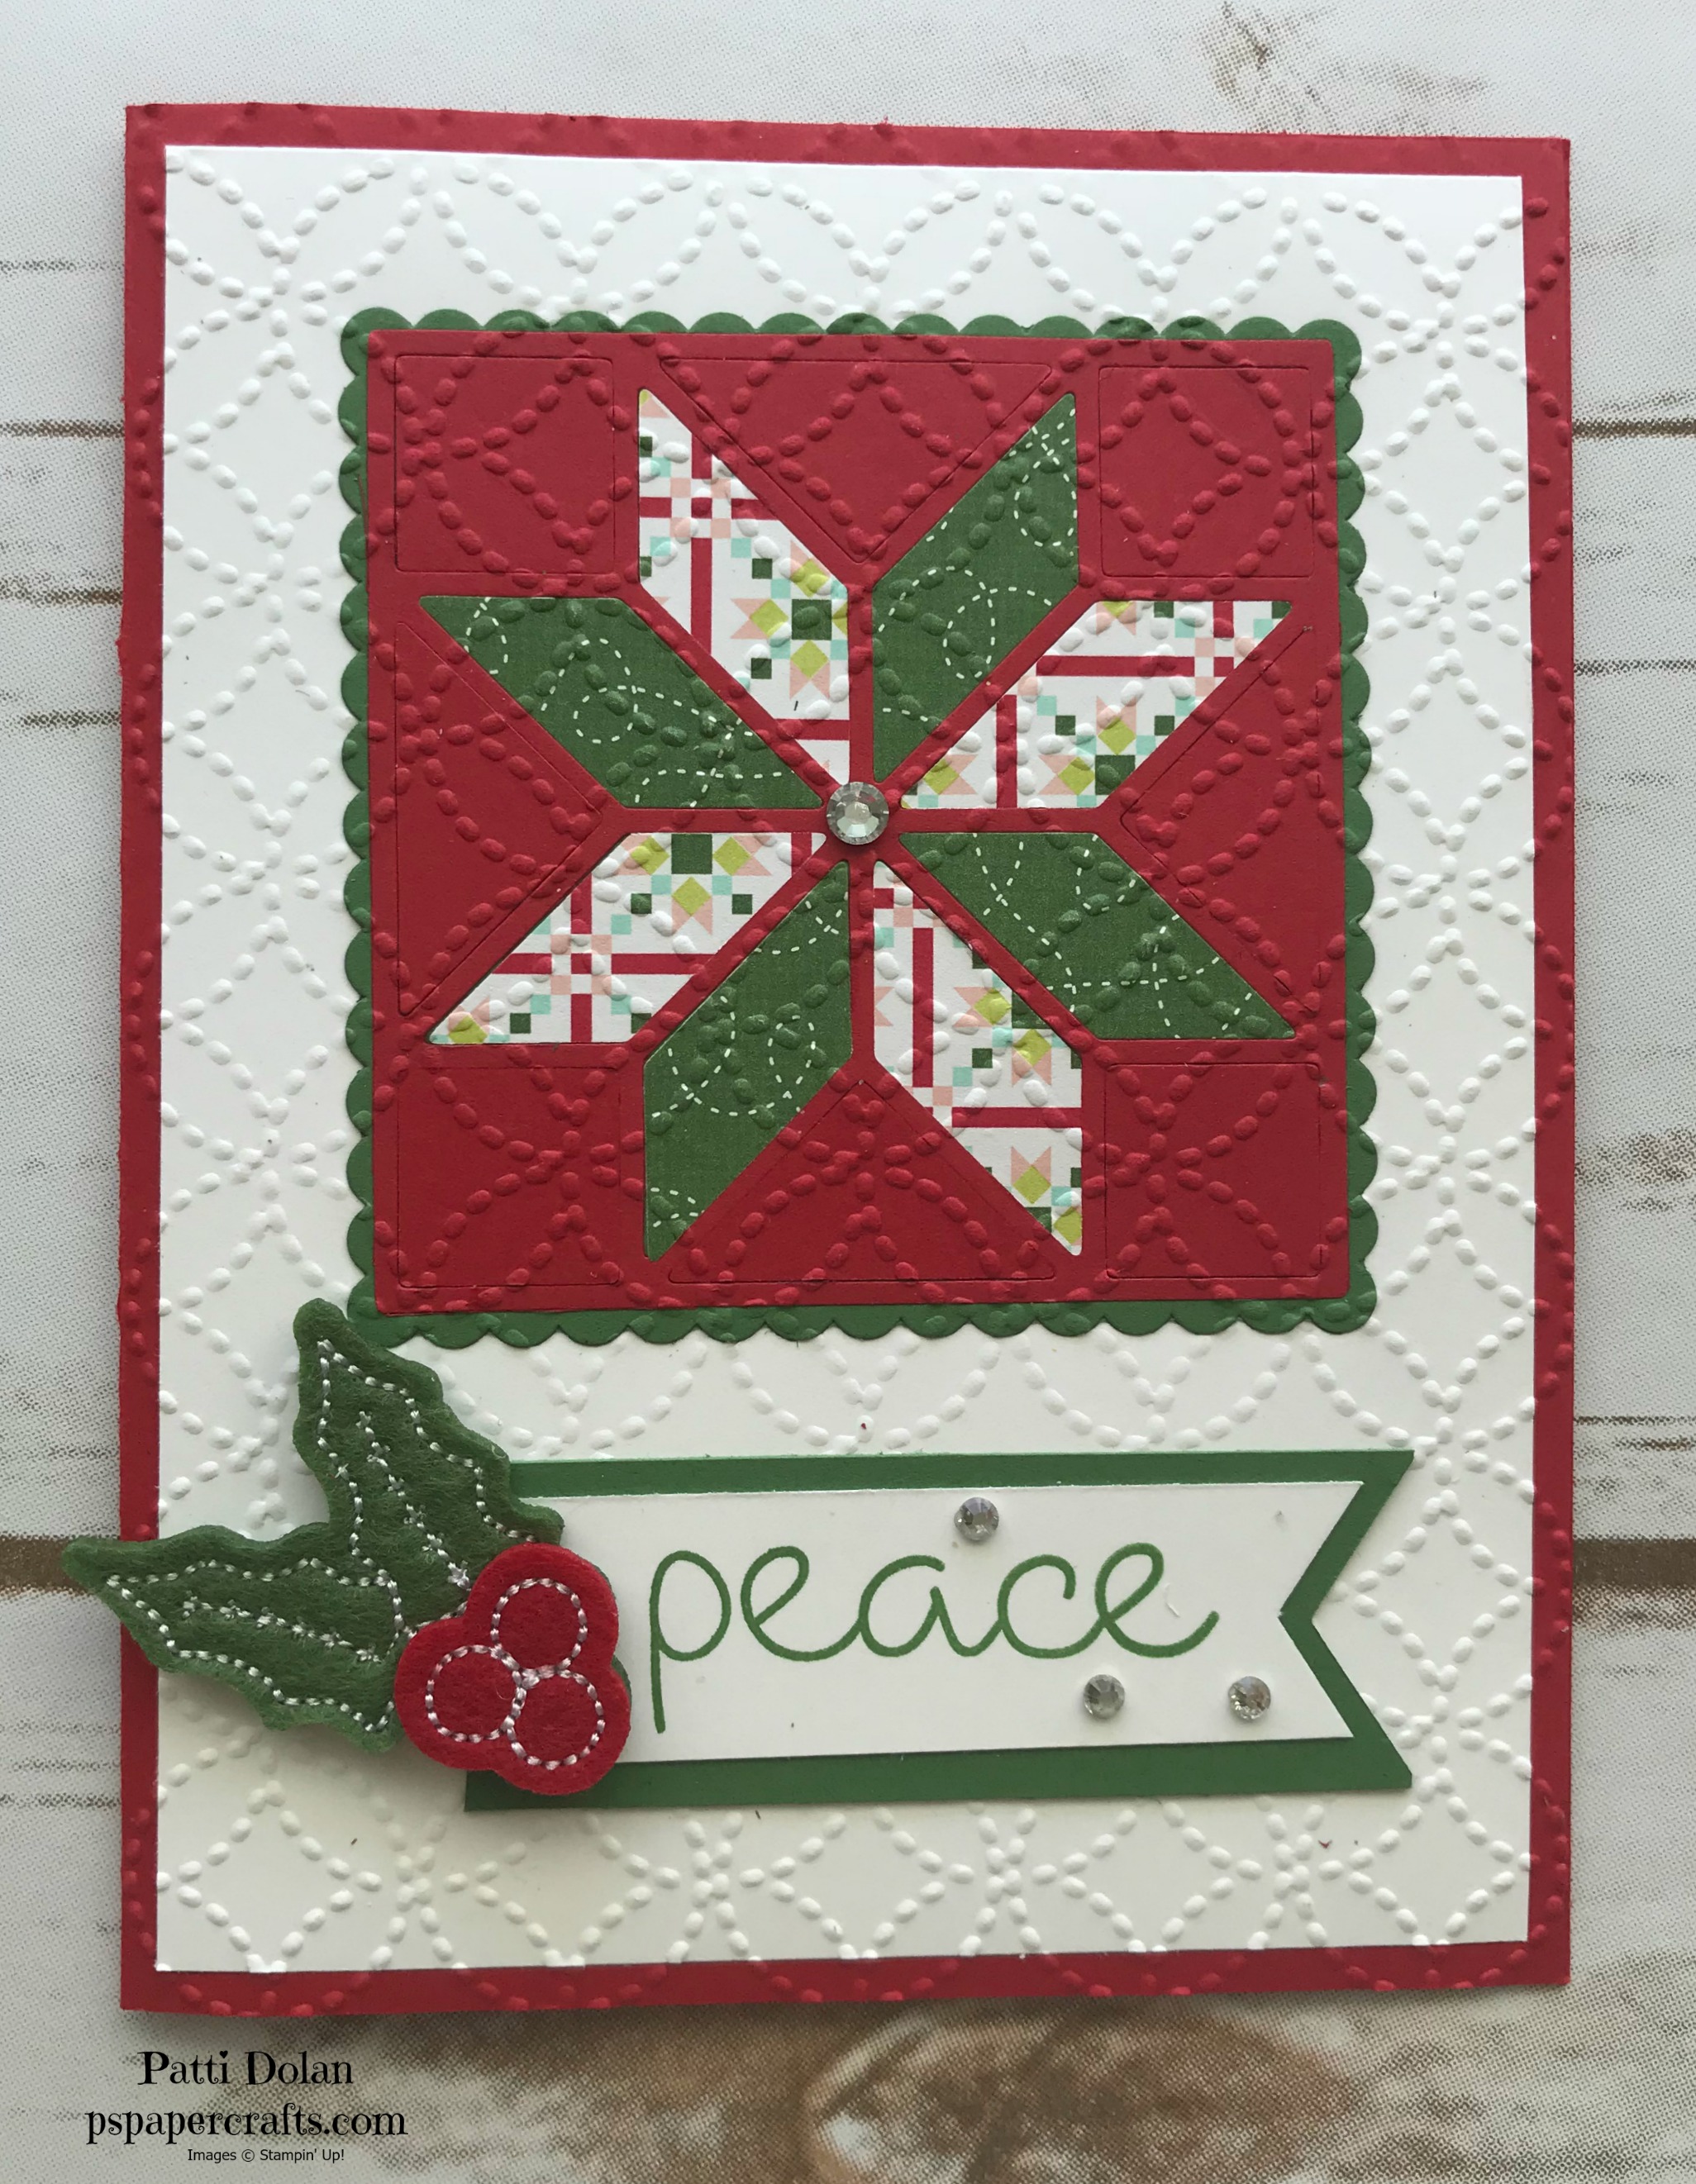
This card has the Real Red base and Garden Green sentiment with the holly embellishment.

I used a Garden Green card base and the Real Red sentiment with the Star embellishment.
Here's the video showing the steps to make these cards.
You can shop for any of the products I used by clicking on the image or by going to my online store by clicking Shop Now on the right or Order Now at the top of this page.
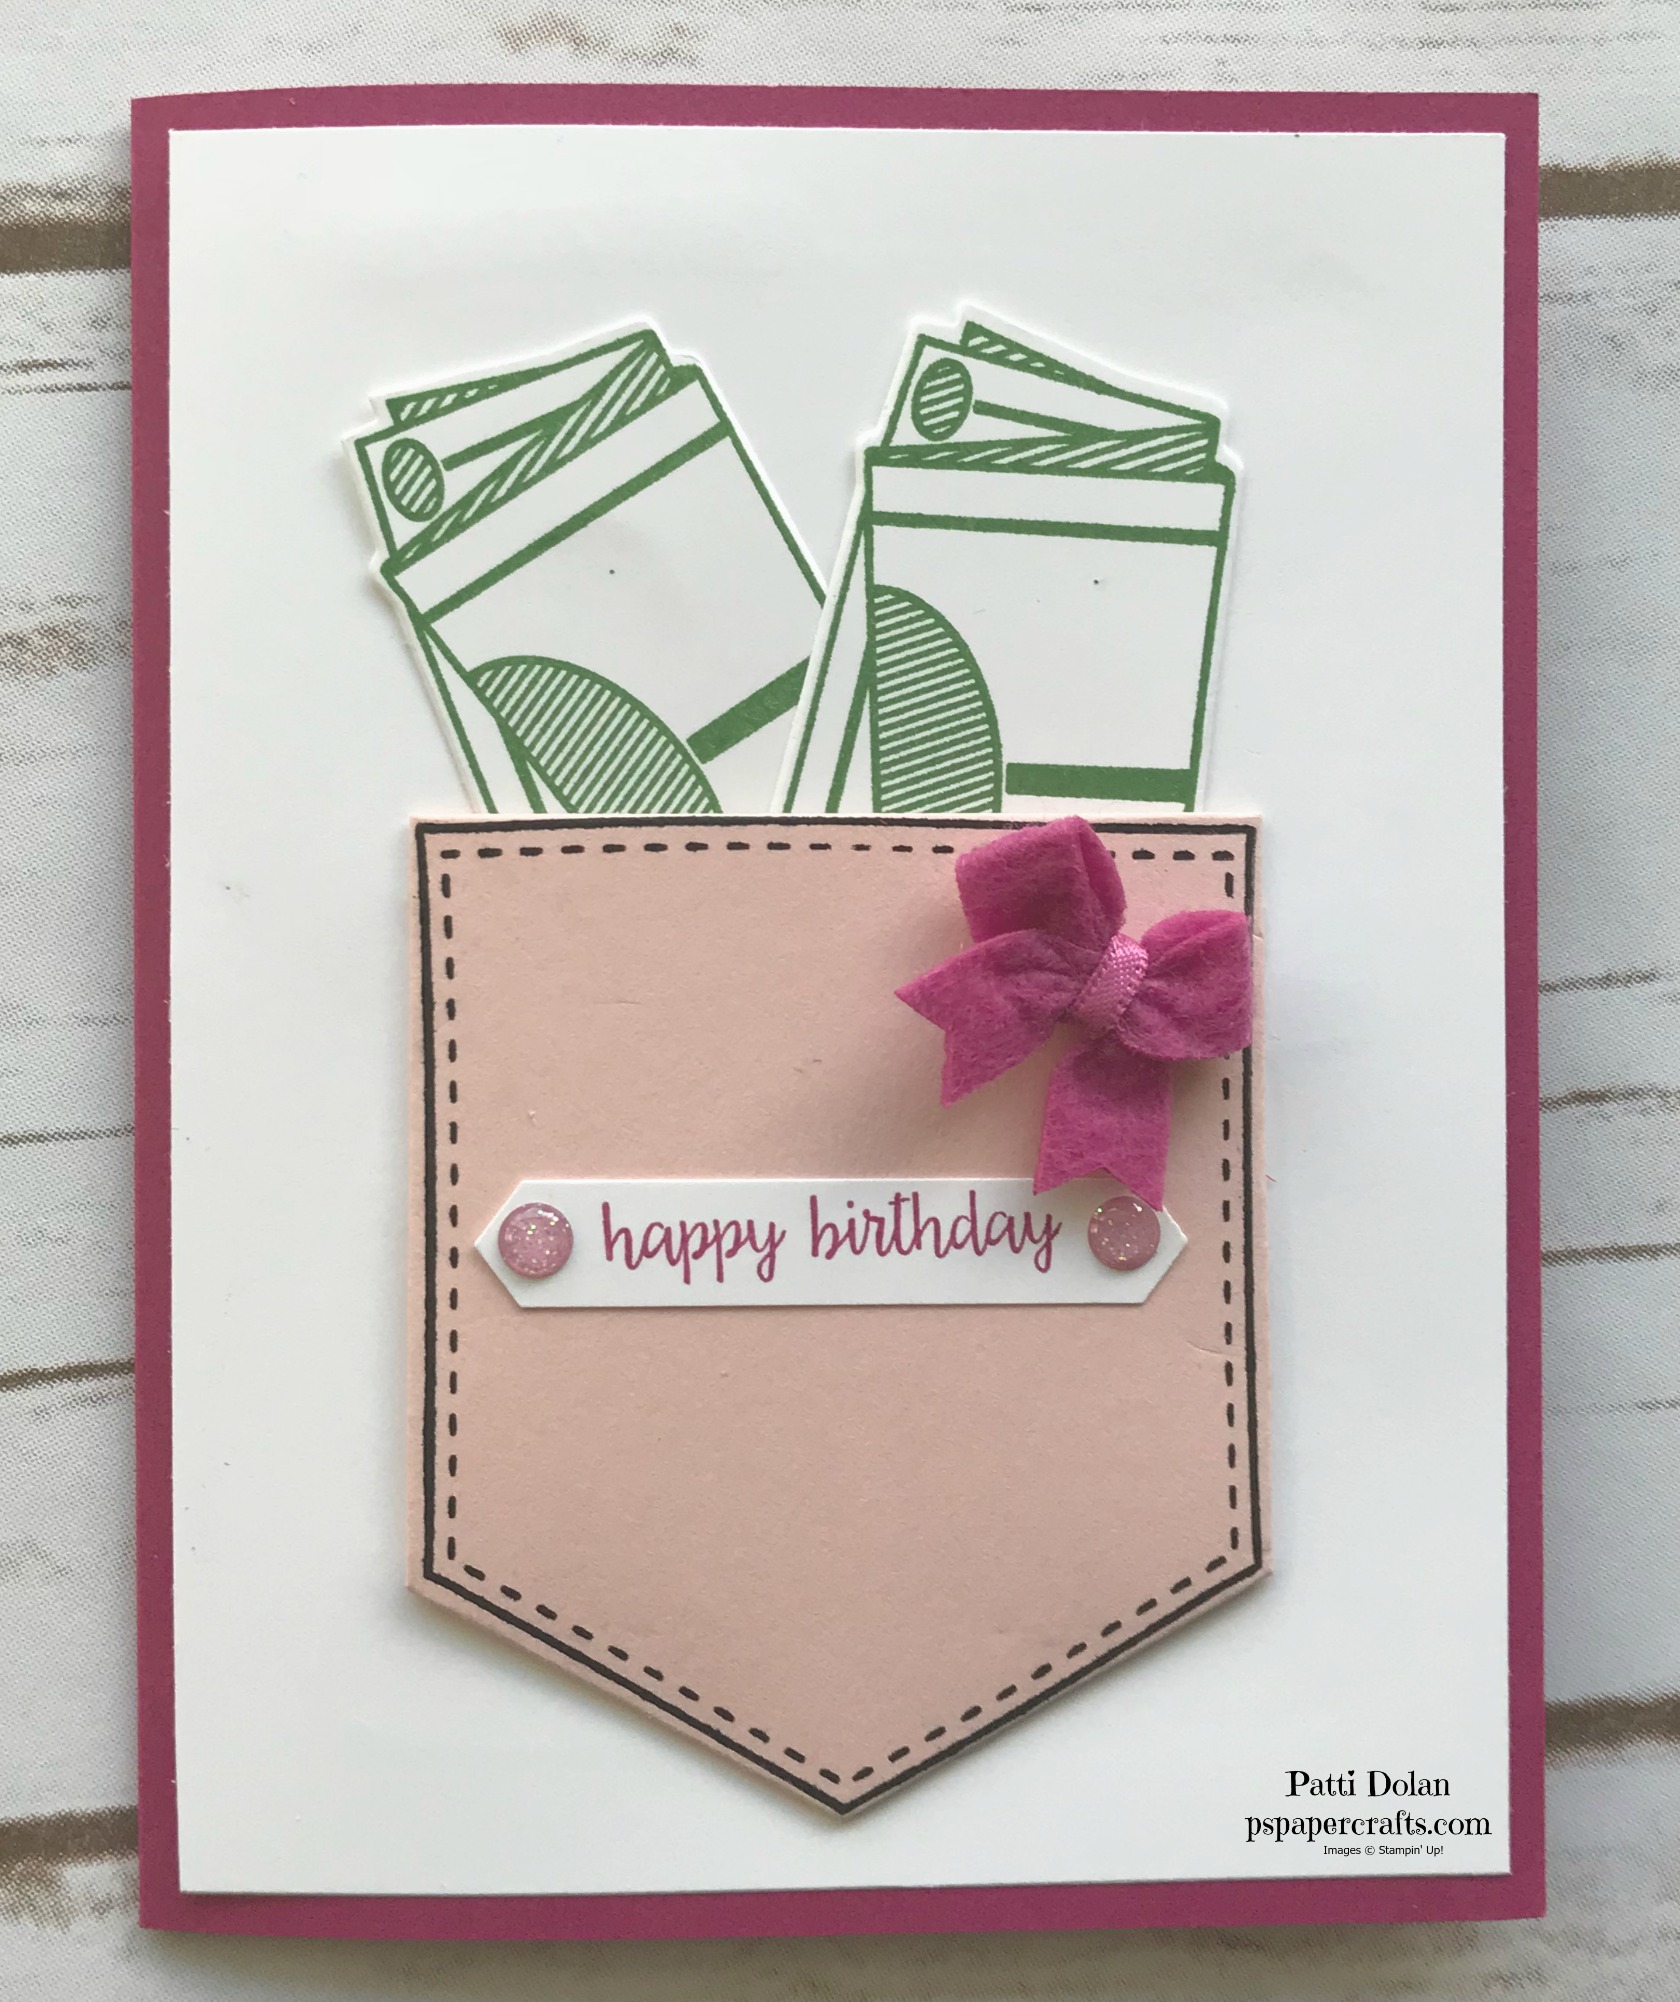
Great Idea - Birthday Card with Gift Card Holder Inside!!!
Today I have a great project. Its a Birthday Card with a Gift Card Holder inside. I used the Pocketful of Sunshine Bundle to make the pocket on the outside, but wait....I put one on the inside so you can slip money or a gift card.
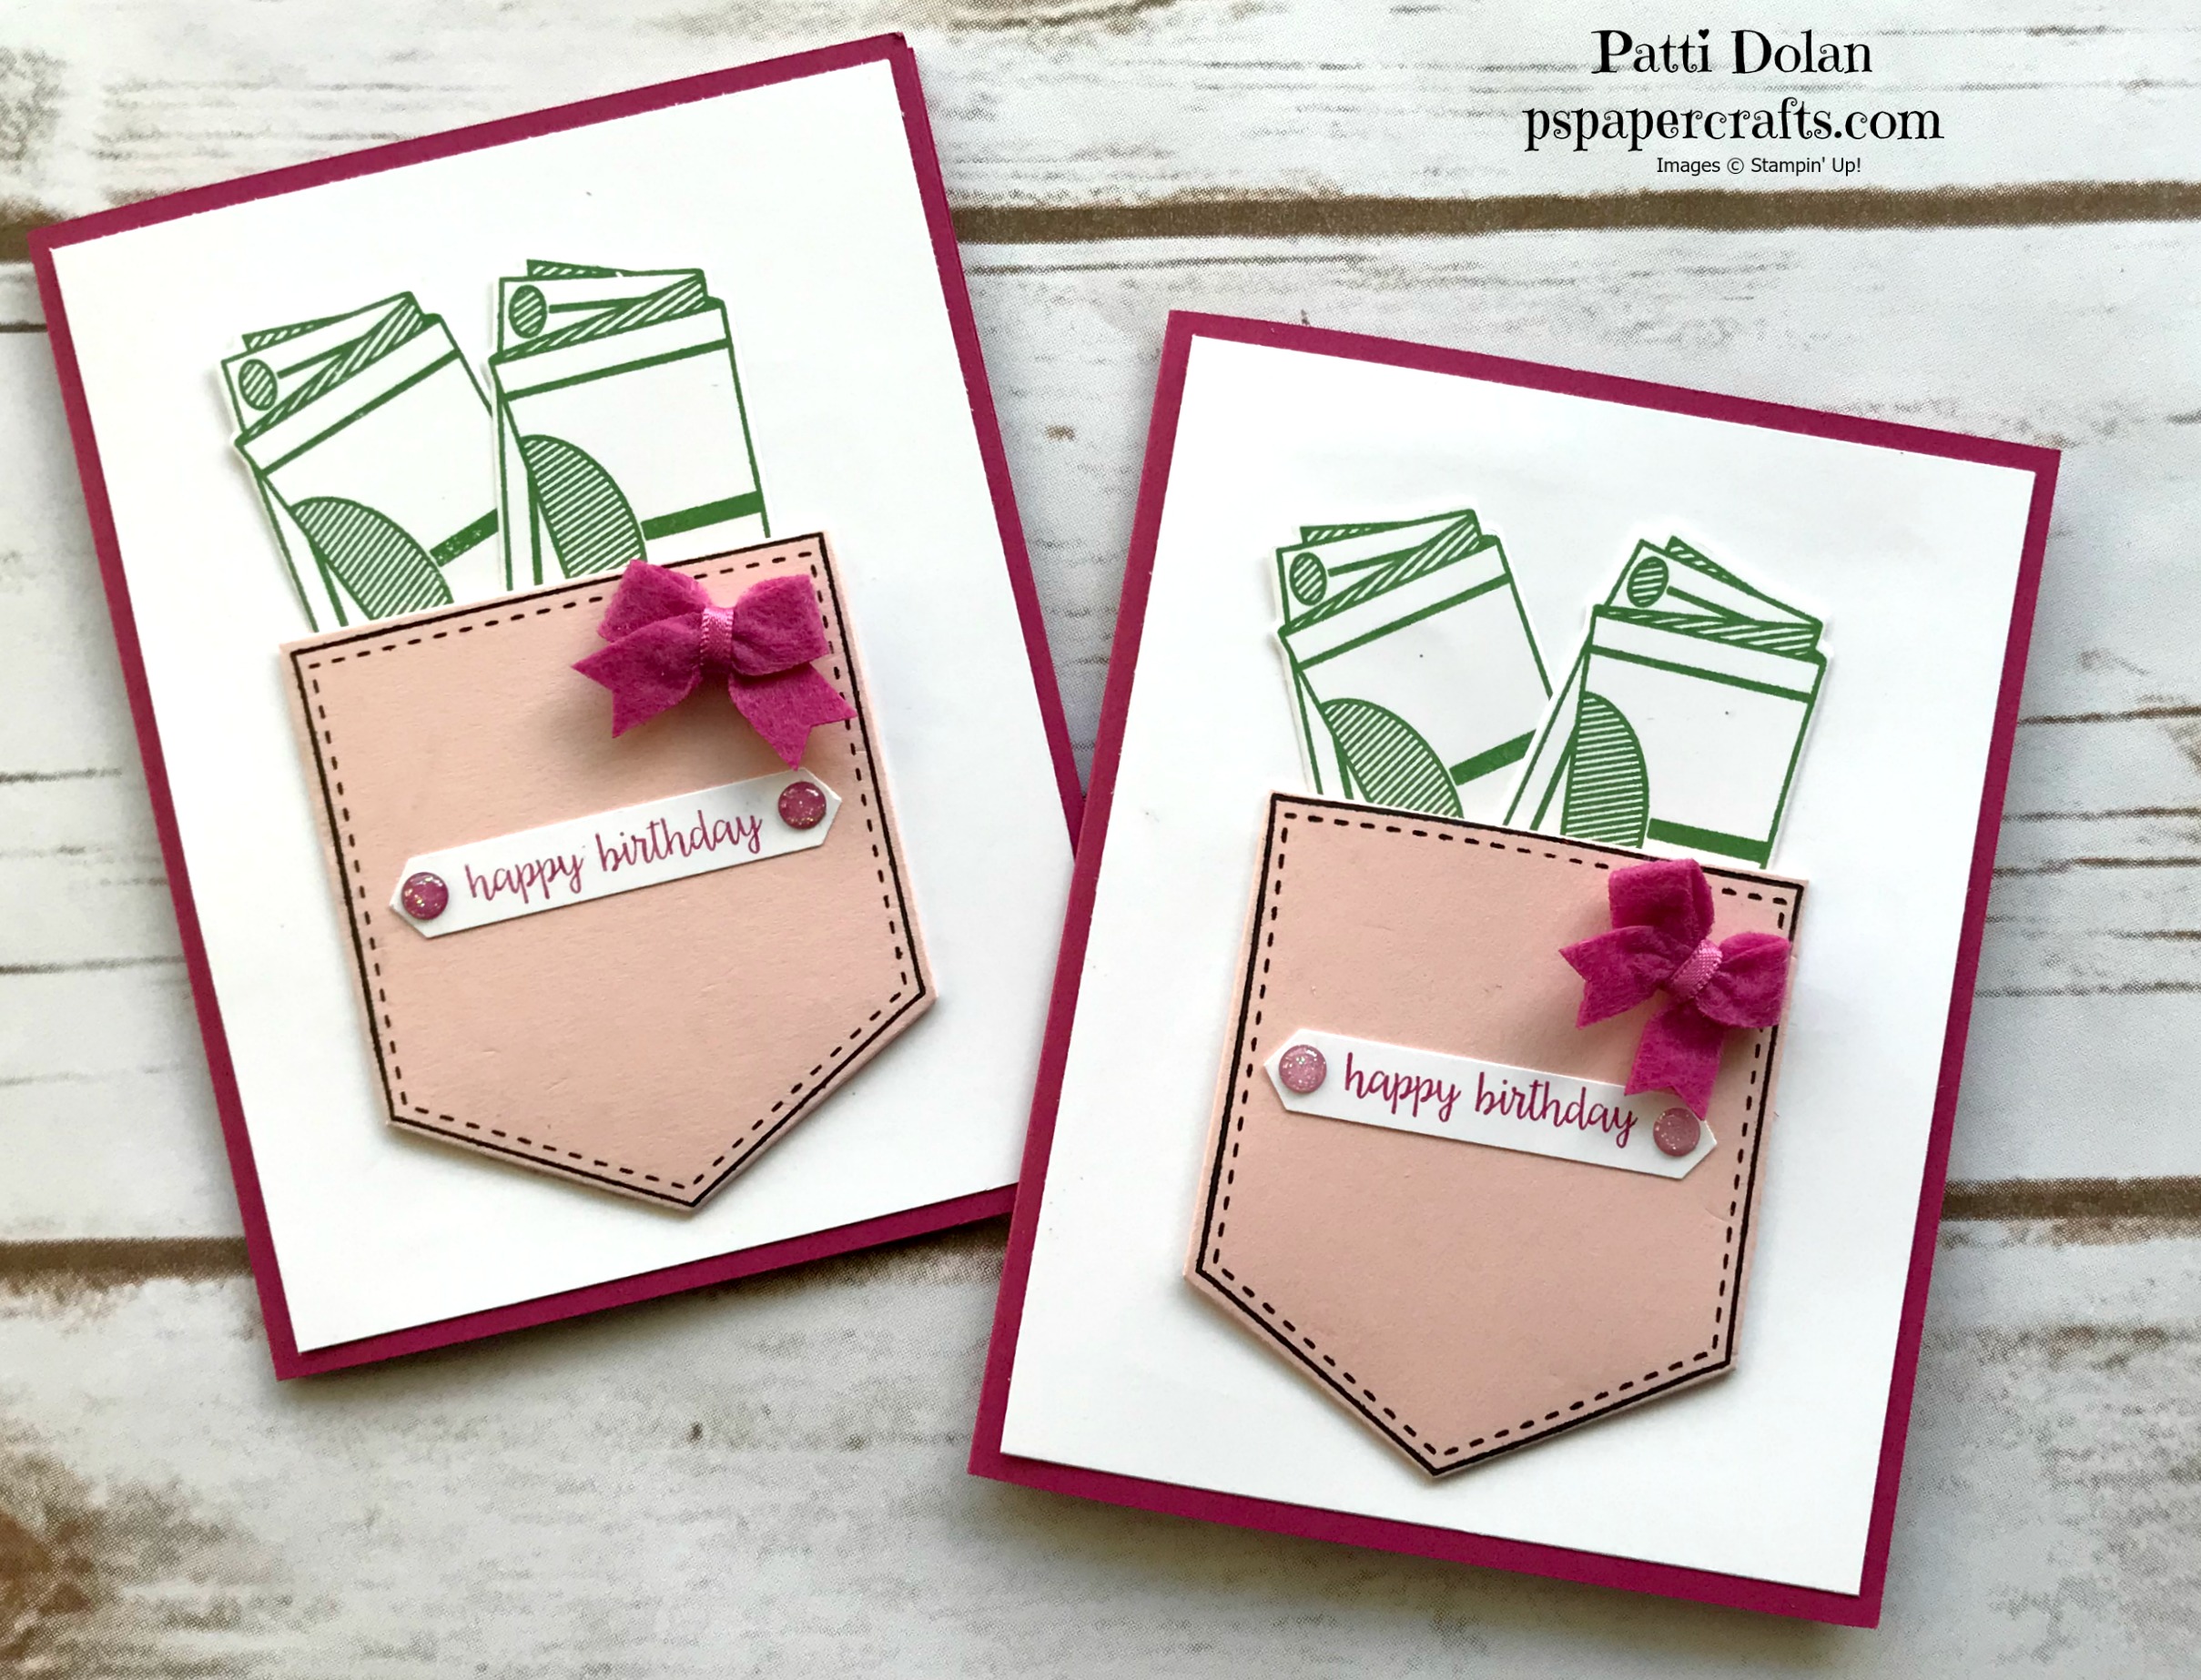
The Pocketful of Sunshine Bundle has some great stamps to use to add stitching to your pocket and stamp images for the money. The matching framelits that lets you easily cut them out.
Here's the inside of the card. I slipped a gift card in the pocket. I used the Happy Birthday Gorgeous stamp for the sentiments.

Take a look at my video to see how I made this card.
You can shop for any of the products I used by clicking on the image or by going to my online store by clicking Shop Now on the right or Order Now at the top of this page.