Gorgeous Drapery Fold Card

The Drapery Fold Card is so easy to make and the result is just beautiful. I used the Sale-a-bration Favored Flowers Designer Series Paper to make these cards.


Watch the video to see how to make this style card. I have a project Sheet below the video that you can print out with the measurements and instructions.


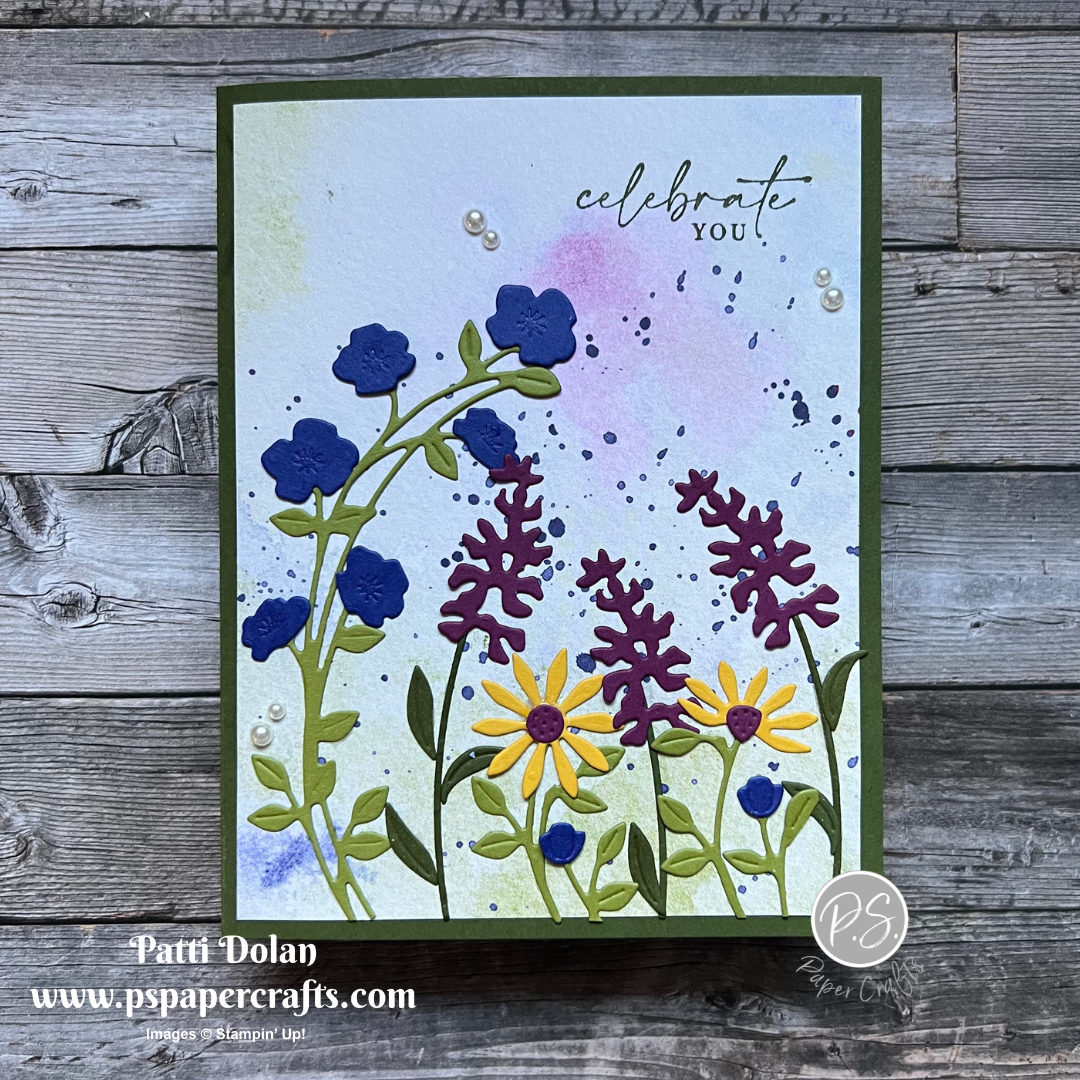
One of my favorite colors is Blackberry Bliss so this card is my favorite. I used Fresh Freesia Ribbon and a Fresh Freesia Opaque Adhesive-Backed Gem. The sentiment is from the Pansy Patch Stamp Set.


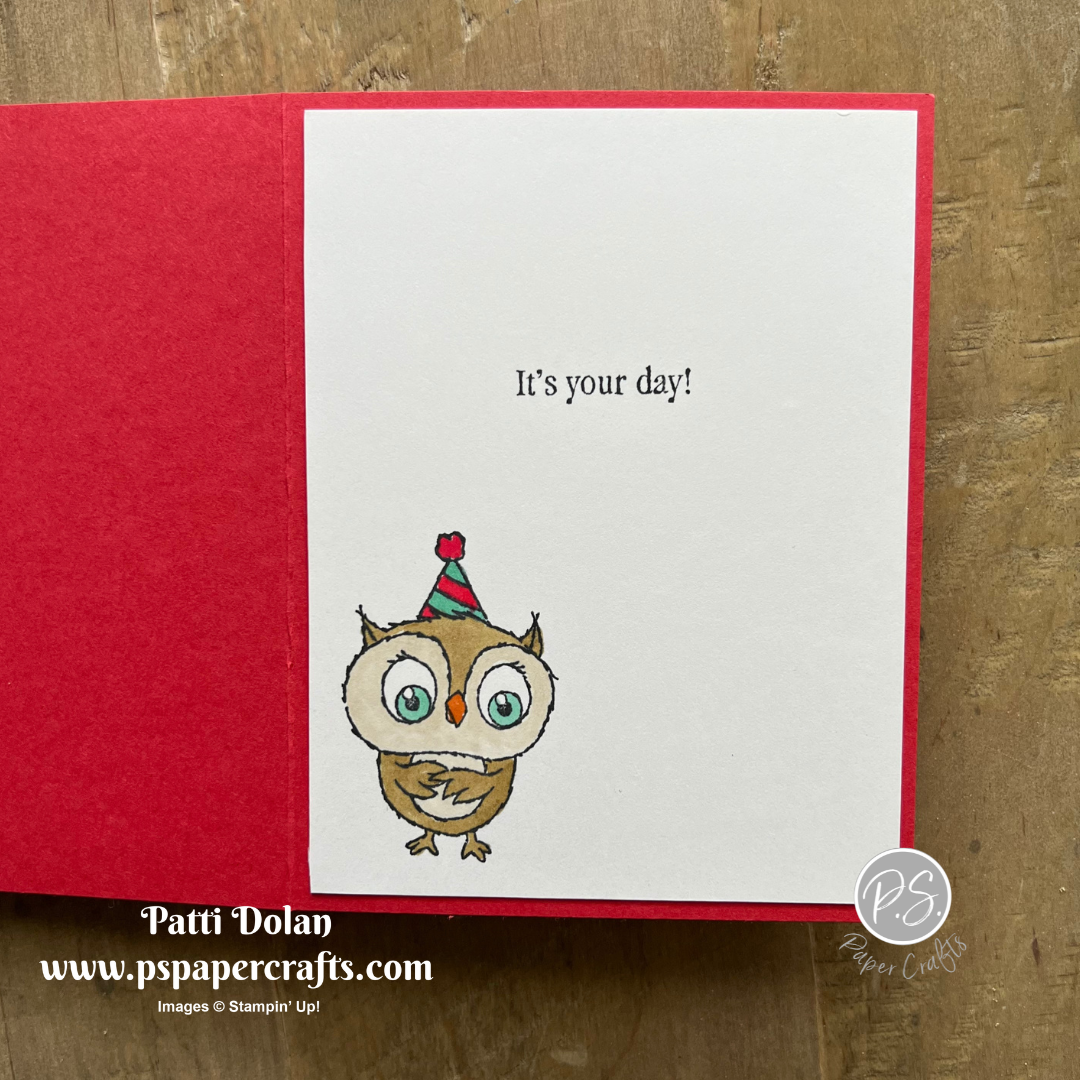
I wasn’t sure what to do with the leftover piece of the patterned paper and decided to add it to the inside.


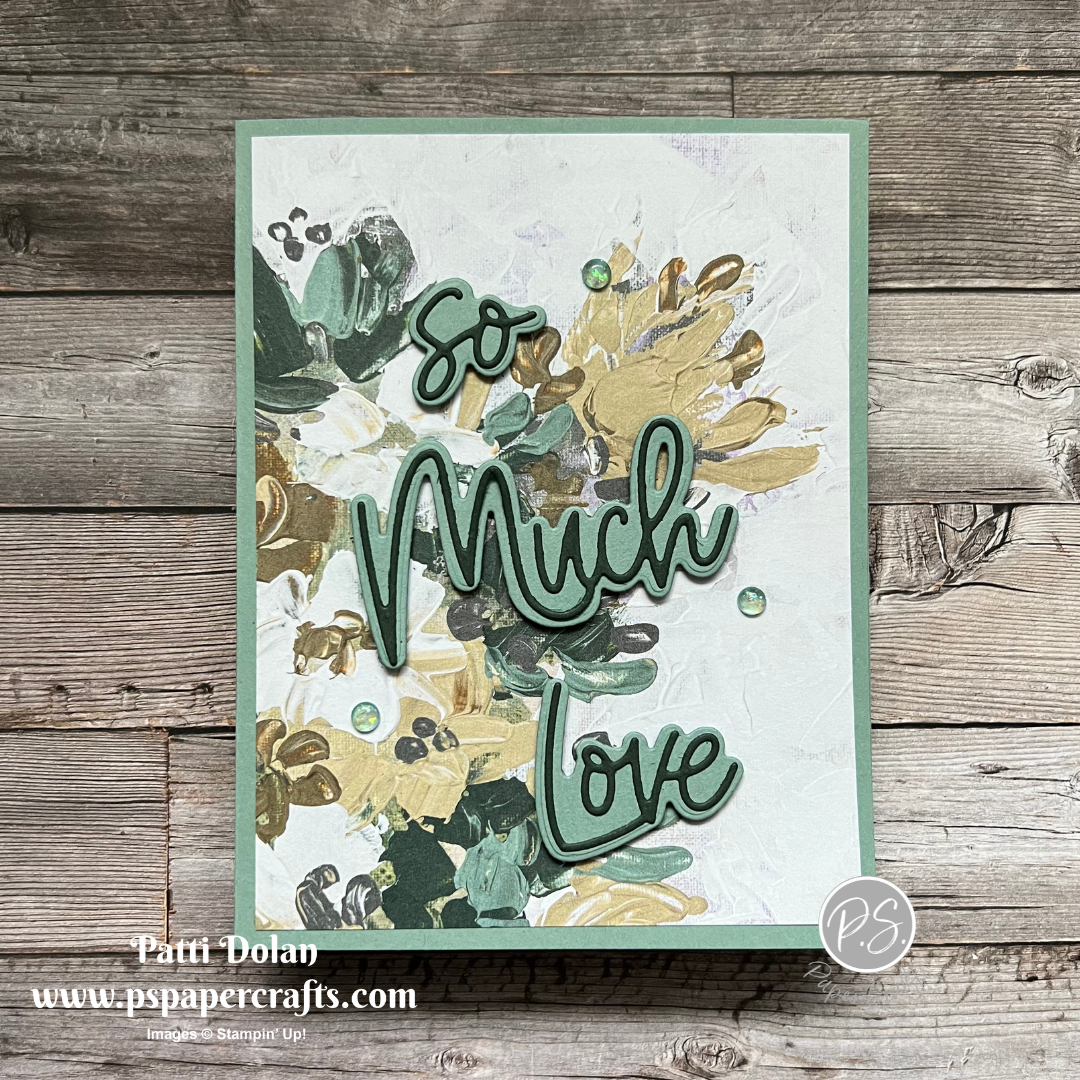
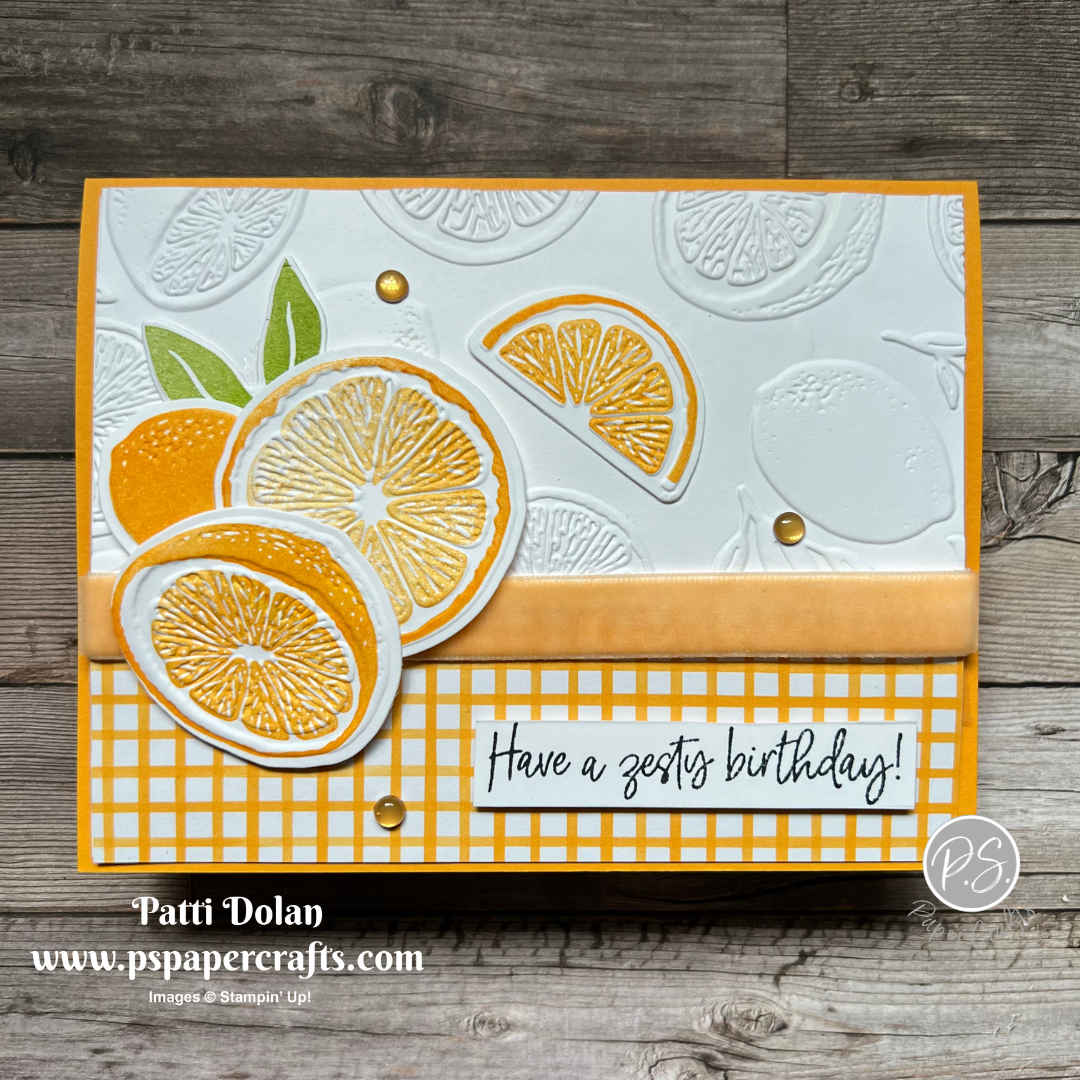
This card has a Calypso Coral Card Base and Pale Papaya Ribbon. I added a white Opaque Adhesive-Backed Gem.


I forgot to add the ribbon to the folded layer before I adhered it to the card so I wrapped it all the way around.


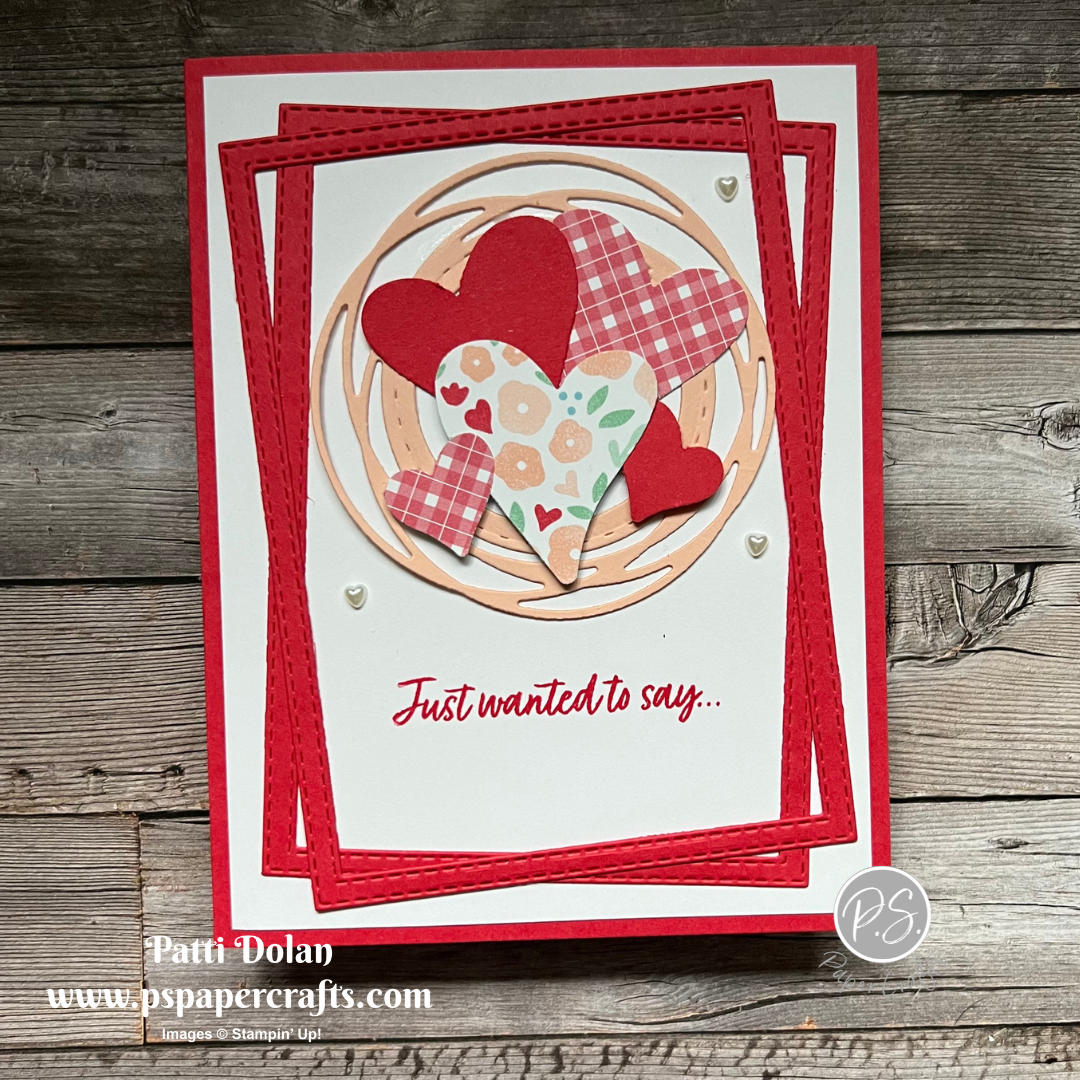
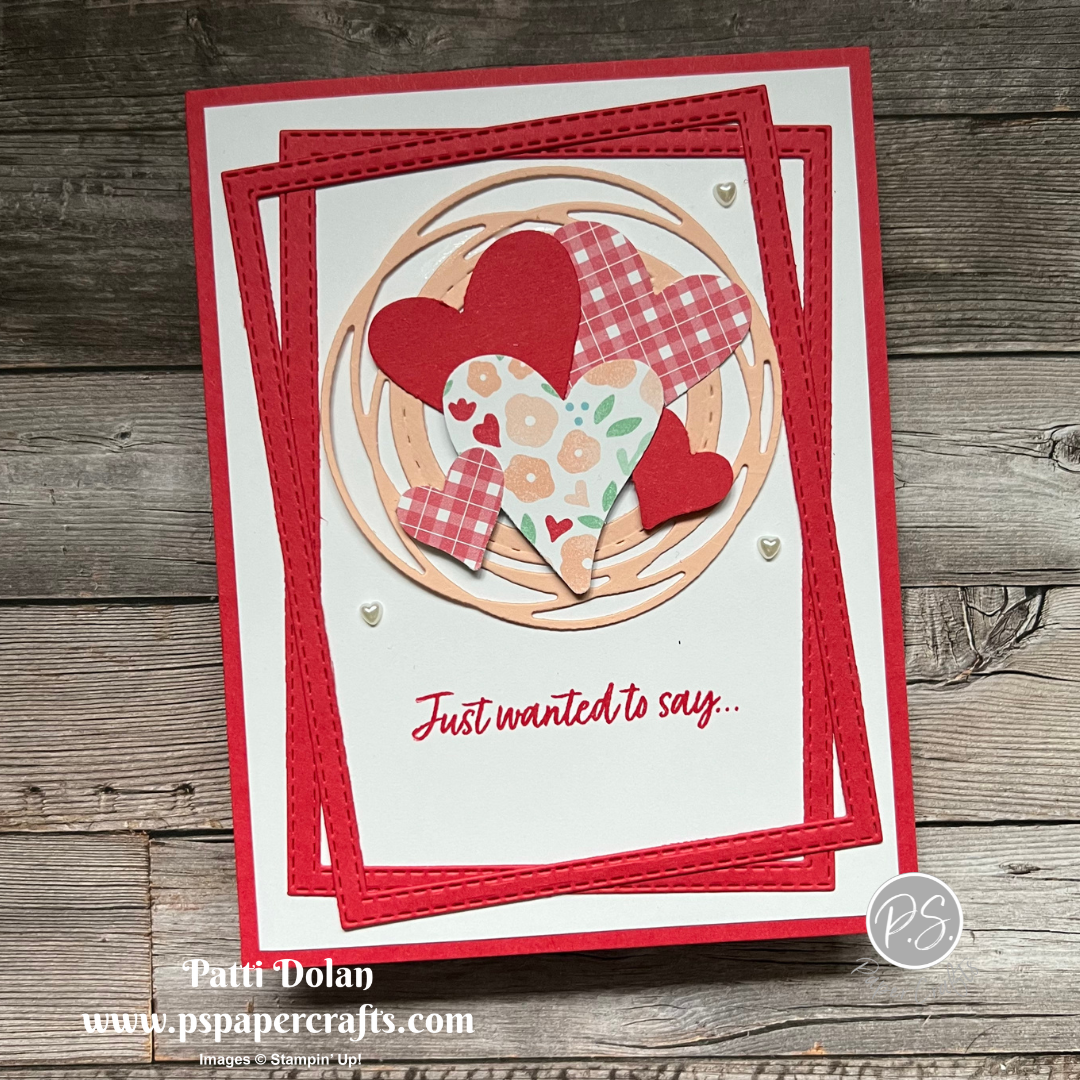
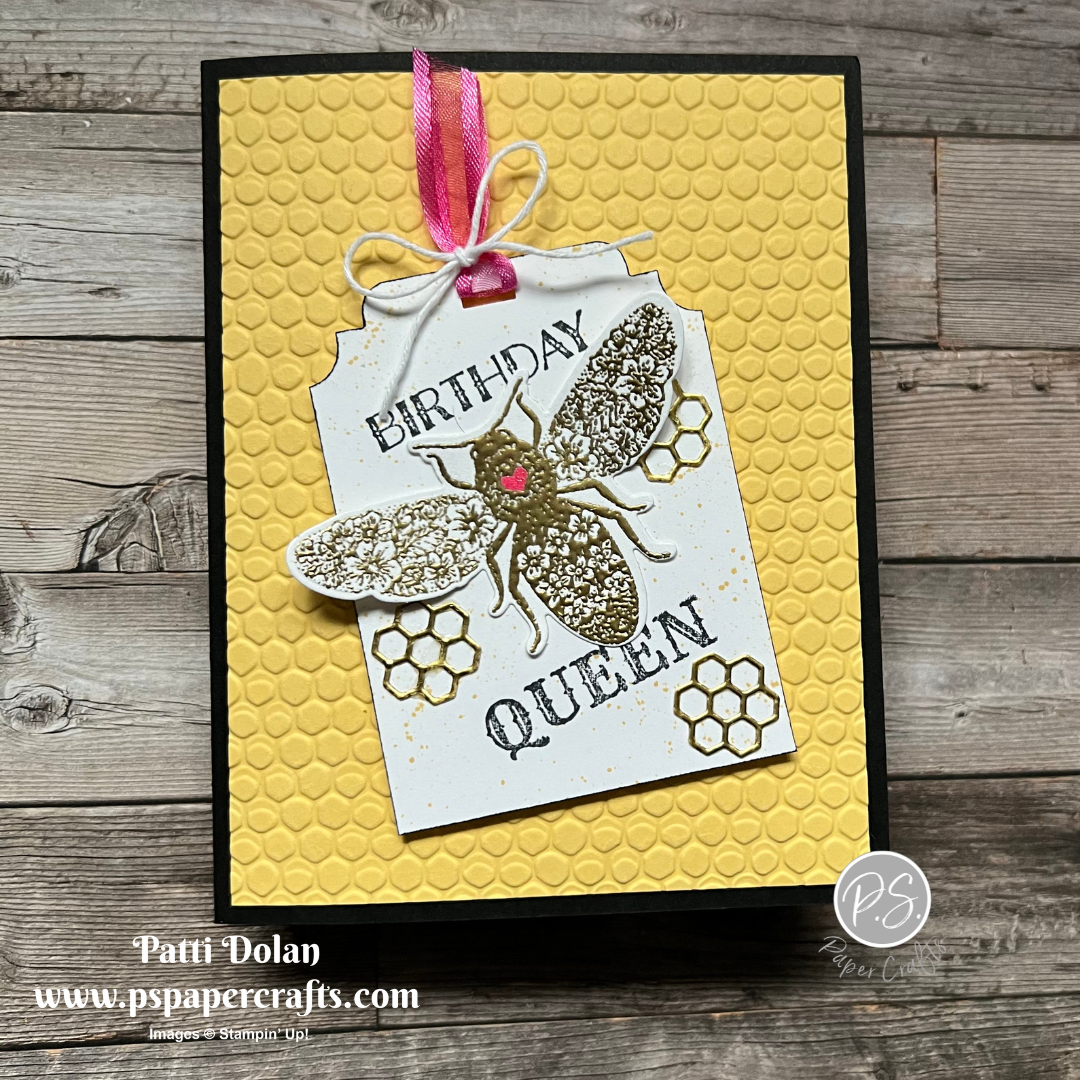
I made this card using the Country Floral Lane Designer Series Paper, Country Bouquet Stamp Set, Real Red & Burlap Ribbon and a Heart Pearl to finish it off.


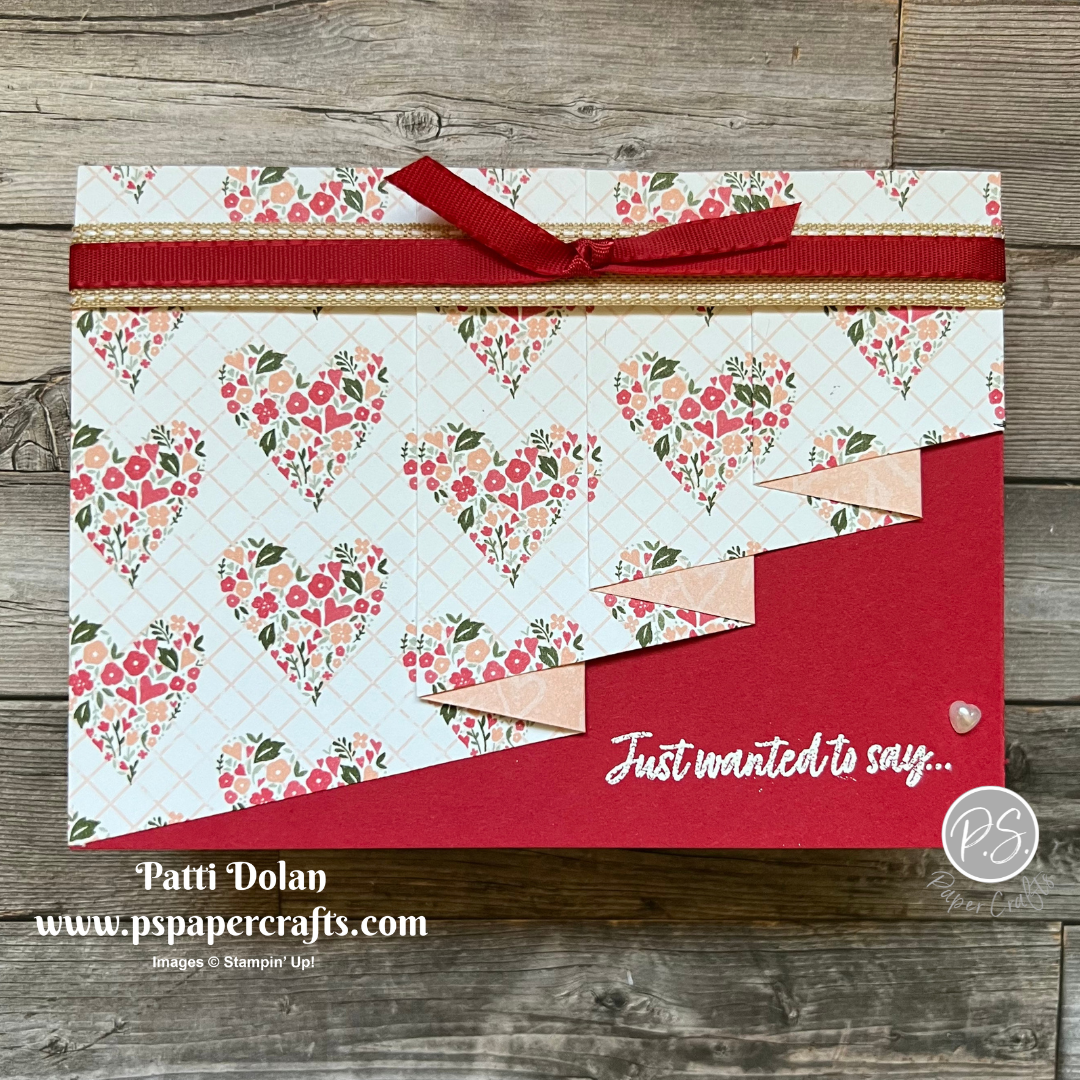
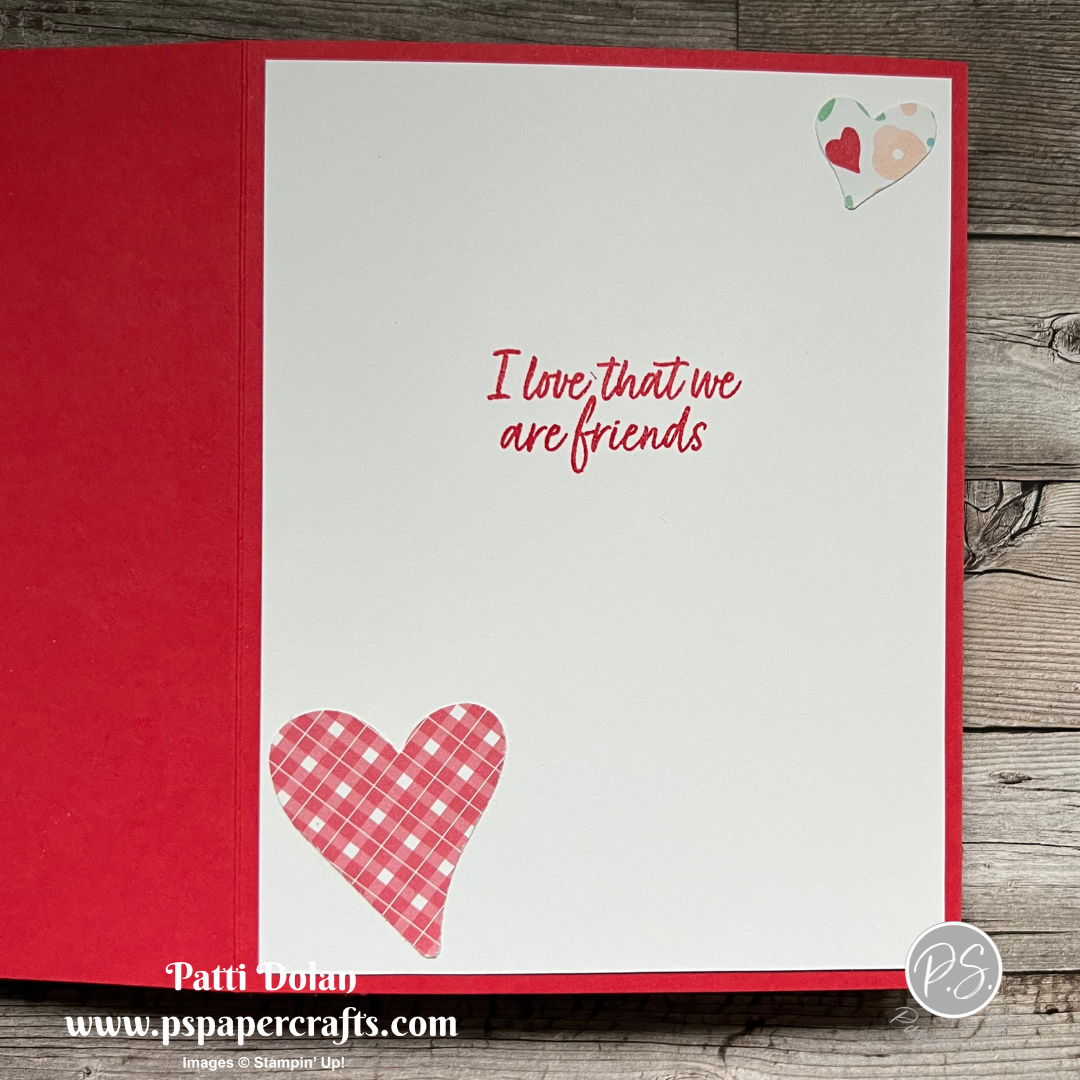
I stamped the sentiment with some hearts on the inside layer with Real Red Ink.


Supply List

You can click on the item to purchase it from my Online Store.

Dainty Delight Celebrate You Card

Isn’t this card so pretty! I used the Dainty Delight Bundle and Dainty Flowers Designer Series Paper to make it.


The Dainty Flowers Designer Series Paper is free with a $50(US) product purchase during Sale-a-bration. The floral prints are so pretty but I’m drawn to the other side with the watercolor wash look and the pastel patterns.


Tips & Instructions

  • Mossy Meadow Card Base - 5 1/2 x 8 1/2, score at 4 1/4

  • Dainty Flowers Designer Series Paper - 5 1/4 x 4, adhere to card base.

  • Stamp sentiment with Mossy Meadow Ink.

  • Cut floral pieces using the Dainty Delight Dies. I cut the large greenery piece from Old Olive, the stems and leaves from Mossy Meadow, the flowers from Starry Sky, Crushed Curry and Rich Razzleberry.

  • Adhere the pieces to build your flower garden. I used tiny bits of Liquid Glue to do this and started from the left with the largest piece. I also cut a second large greenery piece to smaller pieces to get additional stems.

  • Add some Pearls.


I love that the patterned paper has all the splatters on it.


On the inside layer stamp sentiment and floral image with Mossy Meadow Ink. The sentiment is from the Shaded Summer Stamp Set.


Supply List

You can click on the item to purchase it from my Online Store.

Sketch Challenge - Fancy Flora Sympathy Card

I’m so excited to be asked to be part of the Splitcoast Card Sketch Team. Each week for the next 6 months I’ll create a card based on sketch and post it in my Splitcoastampers Gallery.

Here’s my first card. I used products from the Fancy Flora Suite. The floral image was cut from a piece Fancy Flora Designer Series Paper using the Two-Tone Flora Dies.


Here’s the sketch. You can find all the cards made for this sketch challenge by searching the gallery for SC943. You can also make a card and load it into the gallery using the SC943 tag.


Tips & Instructions

  • Orchid Oasis Card Base - 5 1/2 x 8 1/2, score at 4 1/4, round the top corner.

  • Basic White Layer - 5 1/4 x 4, round the top corner.

  • Cut piece of Fancy Flora Designer Series Paper using the second from smallest Layering Circle Die. Cut the circle with the Two-Tone Flora large floral die. Move it around to get the pattern you like.

  • Create the rim with Fresh Freesia Cardstock using the largest and 3rd from largest Layering Circle Dies. Adhere rim to floral circle.

  • Create a small banner by cutting a piece of the Fancy Flora Designer Series Paper to 3/4” and punch one end with Banners Pick A Punch. Lay under the circle and cut off (at an angle) what shows through the floral piece. Adhere small banner and circle.

  • Cut strip of Orchid Oasis at 3/4” and punch one end with Banners Pick A Punch.

  • Stamp sentiment with Versamark Ink and heat emboss with White Embossing Powder. Adhere to layer.

  • Adhere layer to the card using Foam Adhesive pieces or Dimensionals.


I love the variation of colors that you get from the Fancy Flora Designer Series Paper.


On the inside layer stamp some of the greenery with Soft Succulent Ink and stamp a second and third time without re-inking. Round the top corner.


Supply List

You can click on the item to purchase it from my Online Store.

Fancy Flora Wedding Card

This wedding card is so simple and elegant. The background is just a piece of Basic White that I cut with the Two-Tone Flora Die and layered over a piece of Fancy Flora Designer Series Paper.


The Two-Tone Flora Dies have the large die that I used for this card. There are also dies that cut the images from the coordinating stamp set.


This is the pattern that I used from the Fancy Flora Designer Series Paper. I love all the texture in the patterns; it looks like you can feel the paint.


Tips & Instructions

  • Night Of Navy Card Base - 5 1/2 x 8 1/2, score at 4 1/4

  • Fancy Flora Designer Series Paper - 5 1/2 x 4 1/4

  • Basic White Layer - 5 1/2 x 4 1/4, cut using the lard Two-Tone Flora Die and adhere to the Designer Series Paper.

  • Cut scrap of Night Of Navy using the largest tag die from the Something Fancy Dies.

  • Stamp sentiment with Night Of Navy Ink on scrap of Basic White and cut using the smaller tag Die. Adhere to Night Of Navy tag and adhere to card with Dimensionals.

  • Tie bow with Night Of Navy Bordered Ribbon and adhere with Glue Dot.

  • Add some Solid Faceted Gems.


I think this would be so pretty to give to a couple for their wedding.


On the inside layer I stamped the sentiment with Night Of Navy Ink and some of the greenery with Evening Evergreen Ink.


Supply List

You can click on the item to purchase it from my Online Store.

Sketch Saturday - Seaside Bay

For this week’s sketch challenge I used the Seaside Bay Bundle and coordinating By The Sea Designer Series Paper. The paper has such beautiful patterns.


The sketch I used is from the weekly Atlantic Hearts Sketch Challenge.


Tips & Instructions

  • Night Of Navy Card Base - 5 1/2 x 8 1/2, score at 4 1/4

  • By The Bay Designer Series Paper Layer - 5 1/4 x 4, adhere to card base.

  • Cut circle from Night Of Navy using the largest circle from the Layering Circles Dies.

  • Cut circle from By The Bay Designer Series Paper using 2nd to largest Layering Circles Dies. Adhere to the Night Of Navy Circle and adhere to card.

  • Stamp and cut images from the Seaside Bay Bundle. I cut the grassy pieces from Mint Macaron, stamped and cut the bird (the image is a group of 3) using Soft Suede Ink and stamped and cut 2 of the shells using Calypso Coral Ink. The other shells were cut from the Designer Series Paper. The two small shells were cut from a piece of Gold Foil.

  • Arrange pieces on the circle and adhere. I used Dimensionals to pop up the bird and some shells.

  • Stamp sentiment on 1/4” strip of Basic White with Calypso Coral Ink. The sentiment is from the Sentimental Park Stamp Set. Adhere to card with Dimensionals.

  • Add some Night Of Navy Adhesive-Backed Milky Dots.


The birds and seashells in this stamp set create soft images that give you a calm, tranquil feeling. There are dies that coordinate the images.


On the inside layer I stamped the seashells with sand along the bottom with Soft Suede Ink. I added more sand to fill it in. I stamped the sentiment with Calypso Coral Ink.


Supply List

You can click on the item to purchase it from my Online Store.

Free Standing Pop Up Cards

These Free Standing Pop Up Cards were so easy to make and I think they would be fun to receive. I used the Beautifully Happy Stamp Set for the floral image. It’s a Free Sale-a-bration product with a qualifying order.


Watch the video to see how to make this fun fold and then click on the Project Sheet below to get the measurements and instructions.


For this card I used Blackberry Bliss and Crushed Curry Cardstock. I used Old Olive for the leaves, Crushed Curry for the flowers and Blackberry Bliss for the berries.


For this card I used Crushed Curry and Calypso Coral Cardstock. I used Old Olive for the leaves, Calypso Coral for the flowers and Crushed Curry for the berries.


Supply List

You can click on the item to purchase it from my Online Store.

Fun Day At The Farm Birthday Card!

This is such a fun card and I love the sentiment, From all of us! I used the Day At The Farm Designer Series Paper along with the On The Farm Bundle.


The Day At The Farm Designer Series Paper is a Sale-a-bration product that you can get for free with a $50 (USD) purchase. If you don’t care for the farm animals, the other side has some great patterns.


Tips & Instructions

  • Balmy Blue Card Base - 5 1/2 x 8 1/2, score at 4 1/4

  • Basic White Layer - 5 3/8 x 4 1/8, adhere to card base.

  • Day At The Farm Designer Series Paper - 5 1/4 x 4, adhere to card.

  • Balmy Blue Square - 3 1/4 x 3 1/4

  • Basic White Square - 3 1/8 x 3 1/8

  • Day At The Farm Designer Series Paper Square - 3 x 3

  • Adhere square layers together and then adhere to card with pieces of a Foam Adhesive Sheet.

  • Stamp sentiment on scrap of Balmy Blue with Versamark Ink and emboss with White Embossing Powder. Punch using the Label Me Fancy Punch. Adhere with piece of a Foam Adhesive Sheet.

  • Tie bow with Soft Suede Baker’s Twine and add to label with a Glue Dot.

  • Add some Elegant Faceted Gems.


On the inside layer stamp sentiment with Balmy Blue Ink. The sentiment is from the Shaded Summer Stamp Set.

Stamp some clouds across the top with Balmy Blue that you stamp off first to get a lighter shade.

Stamp the grassy hills with Pear Pizzazz Ink and cut the windmill from a Basic Black scrap and adhere to card.


Supply List

You can click on the item to purchase it from my Online Store.

Love For You meets Fancy Flora

I made this card using the Love For You Dies and Fancy Flora Designer Series Paper. The colors in the paper are soft and muted which is a different feel for a Valentine’s Day card.


The Love For You Bundle has the big, bold sentiments that you can stamp and cut or just cut the two layers like I did. There are lots of sentiments that coordinate so nicely.


Tips & Instructions

  • Soft Succulent Card Base - 5 1/2 x 8 1/2, score at 4 1/4

  • Fancy Flora Designer Series Paper - 5 1/4 x 4 (Pay attention to how you are cutting so you get the design that you want. I cut a little off both sides to get the 4” measurement because I wanted some of the white in the layer.) Adhere to card base.

  • Cut the background for the sentiment from Soft Succulent Cardstock.

  • Adhere an Adhesive Sheet to the back of an Evening Evergreen scrap and cut the thinner sentiments. Remove the release paper from the adhesive and adhere the thin sentiments to the Soft Succulent background sentiments.

  • Adhere the sentiments to the card using Dimensionals.

  • Add some Soft Succulent Opal Rounds.


This paper is so pretty, you can see the brush strokes on the floral image.


On the inside layer stamp the sentiment and some flowers with Soft Succulent Ink. Stamp the centers of the flowers with Daffodil Delight Ink. Stamp some leaves with Evening Evergreen Ink.


Supply List

You can click on the item to purchase it from my Online Store.

Thanks A Bunch!

This card is so fun, I love the Thanks A Bunch Stamp Set. I paired it with a piece of Dandy Designs Designer Series Paper. The sentiment is perfect for the bunch of carrots!


The Thanks A Bunch Stamp Set is a Sale-a-bration product that you can get for Free with a qualifying purchase. It has some cute sentiments and two-step stamping carrot images.


The Dandy Designs Designer Series Paper is also a Sale-a-bration product that you can get for Free with a qualifying purchase. This paper pack is amazing; it has 48 sheets of 12 x 12 double-sided patterned paper. This is one of my favorite Sale-a-bration products.


Tips & Instructions

  • Thick Basic White Card Base - 5 1/2 x 8 1/2, score at 4 1/4

  • Dandy Designs Designer Series Paper - cut with the largest Rectangle Stitched Dies and adhere to the card base.

  • Basic White Cardstock - cut using the 4th from largest Rectangle Stitched Dies.

  • Stamp the carrots on the white layer with Pumpkin Pie Ink. I stamped 3 of the detailed carrot image with Pumpkin Pie Ink and then 3 of the full carrot with Pumpkin Pie Ink but stamped off first to get a lighter shade. I added 2 more of the full carrots that I stamped off first between the carrots just to fill them in and make it a full bunch.

  • Stamp the tops, both the long and the short ones with Granny Apple Green Ink. Make sure you don’t ink up the stem on the longer tops.

  • Adhere the layer to the card base.

  • Stamp sentiment on 1/2” strip of Basic White Cardstock with Granny Apple Green Ink and punch one end with the Banners Pick A Punch. Adhere to card with Dimensionals.

  • Color 3 Iridescent Rhinestones with a Dark Granny Apple Green Stampin’ Blends Marker and add to the white layer.


The two-step carrot stamp looks so realistic with all the little notches.


On the inside layer stamp the sentiment with Granny Apple Green Ink. Stamp the small bunch with Pumpkin Pie Ink (stamping off first) and the small top with Granny Apple Green Ink. Add a 3/4” strip of the Designer Series Paper to the bottom.


Supply List

You can click on the item to purchase it from my Online Store.

Sketch Saturday - Country Bouquet

Here’s the card I made for this week’s sketch challenge using the Country Bouquet Bundle from Stampin’ Up! I going to send this to a close friend who has had some loss and I thought it would brighten her day to know she is loved.


The sketch is from the weekly Atlantic Hearts Sketch Challenge and this was a challenge for me. I really had to think about this one and go through my dies to find what I wanted to use.


Tips & Instructions

  • Sweet Sorbet Card Base - 5 1/2 x 8 1/2, score at 4 1/4

  • Basic White Layer - 5 1/4 x 4, adhere to the card base.

  • Sweet Sorbet Rectangles - cut 2 rectangles using the 2nd and 3rd from largest Rectangle Stitched Dies. Lay the smaller rectangle inside the larger one and make sure its centered and run it through your die cutting machine. Repeat this to get the two rectangle frames. (Tip: save the inside pieces for another project.)

  • Cut the wreath from Petal Pink Cardstock using the Painted Labels Dies. Cut center out using the 3rd from smallest Layering Circle Dies.

  • Punch hearts using the Country Bouquet Punch. I punched hearts from the Country Floral Lane and Country Gingham Designer Series Paper and from Sweet Sorbet Cardstock.

  • Arrange rectangles and wreath on the white layer to determine placement for sentiment. Stamp sentiment with Sweet Sorbet Ink.

  • Adhere the rectangles, wreath and hearts. I popped up some of the hearts with Dimensionals.

  • Add some Heart Pearls.


On the inside layer stamp sentiment with Sweet Sorbet Ink and add some hearts that you punched out from the Country Floral Lane Designer Series Paper using the Country Bouquet Punch.


Supply List

You can click on the item to purchase it from my Online Store.

Simple Suite Stampers Tutorial - Country Floral Lane

I made this card for this month’s Simple Suite Stampers Tutorial. We featured the Country Floral Lane this month. I love the Designer Series Paper in this suite.


Watch the video to see how to make this card and to hear about the Simple Suite Stampers Tutorial Bundle.


Every month I collaborate with 11 other Stampin’ Up! Demonstrators to create a pdf bundle with 12 projects including pictures, measurements and instructions. This month we featured the Country Floral Lane Suite of products.

You can get this pdf tutorial bundle for FREE with an order from my Online Store or you can purchase the bundle by clicking the Tutorials Button at the top of this post.


I love that you can punch the hearts out directly from the Designer Series Paper using the Country Bouquet Punch. I added some Pastel Adhesive-Backed Sequins and Real Red Ribbon to dress up the card.


On the inside layer I added a strip of the Designer Series Paper and stamped just the large heart.


Supply List

You can click on the item to purchase it from my Online Store.

Beautifully Happy Black & White Card

I love a black and white card! The Beautifully Happy Stamp Set along with the Perfectly Penciled Designer Series Paper are a perfect match for this card.


The Beautifully Happy Stamp Set is a Sale-a-bration product that you can get for free with a qualifying purchase. This set has beautiful hollyhocks with two-step stamping where you can stamp the outline and then the filler images.


Tips & Instructions

  • Basic Black Card Base - 5 1/2 x 8 1/2, score at 4 1/4

  • Basic White Layer - 5 1/4 x 4, adhere to card base.

  • Perfectly Penciled Designer Series Paper - 5 1/8 x 3 7/8, adhere to card.

  • Basic Black - cut using the 3rd from largest Rectangle Stitched Dies.

  • Basic White - cut using the 4th from largest Rectangle Stitched Dies.

  • Stamp the floral image and bee with Black Memento Ink.

  • Adhere the white layer to the black layer and adhere to the card.

  • Stamp sentiment with Black Memento Ink on a 1/2’ strip of Basic White. Cut banner on one end of the strip and adhere the strip using Dimensionals.

  • Add some black Classic Matt Dots.


On the inside layer stamp the sentiment and floral images using Black Memento Ink.


Supply List

You can click on the item to purchase it from my Online Store.

Fun & Easy Saying Thanks Cards

Stampin’ Up! has some fun kits and the newest one is amazing. It’s called the Saying Thanks Kit. Look how bright and cheerful these cards are.


Watch the video to see how to make three cards. Everything you need is in the kit (except paper snips).


Make nine bright, colorful cards in no time to say thank you, recognize friends, and share your gratitude with a bright watercolor wash that won’t go unnoticed! Each kit comes with printed die-cut sentiments in Dutch, English, French, and German.


The envelopes have a pretty water-color flap. I love the big, bold font on the thank you sentiment.


The fun splatter on this card is so fun.


This card features die-cut elements you can use for peek-through cards.


I added an inside layer and stamped it with the Forever Fern Stamp Set. You can stamp a sentiment or just leave it blank.


To purchase this kit, click on the picture below. You don’t need the stamp set and ink pads unless you want to add an inside layer.

Sketch Saturday - Adorable Owls

I can’t get enough of this cute owl from the Adorable Owls Stamp Set. I decided to use if in this week’s sketch challenge.


The sketch is from the weekly Atlantic Hearts Sketch Challenge.


Tips & Instructions

  • Night Of Navy Card Base - 5 1/2 x 8 1/2, score at 4 1/4.

  • Basic White Layer - 4 3/4 x 3 1/2, adhere to card base.

  • Balmy Blue Textured Shimmer Paper - 4 1/2 x 3 1/4, emboss using the Into The Clouds Embossing Folder. Adhere to card.

  • Cut circle from Basic White scrap using the 3rd from largest Stylish Shapes Dies. Lightly blend some Daffodil Delight Ink using a Blending Brush.

  • Stamp the owl image using Black Memento Ink.

  • Color the owl with Stampin’ Blends. I used Light and Dark Crumb Cake for the owl, Light Night Of Navy for the bow-tie, Light Balmy Blue for the eyes and Light Calypso Coral for the beak and feet.

  • Stamp sentiment on 1/2 strip of Basic White with Basic Black Ink. Banner one end using the Banners Pick A Punch.

  • Banner one end of a 3/4 strip of Night Of Navy.

  • Arrange and adhere the banners and circle to card. I used Dimensionals for the circle.

  • Add some Night Of Navy Solid Faceted Gems.


Cut Basic White to 5 1/4 x 4 for inside layer. Stamp sentiment and owl with Black Memento Ink. The sentiment is from the Something Fancy Bundle. Color the owl like the one on the card front and color the hat with Light Night Of Navy and Dark Balmy Blue Stampin’ Blends.


Supply List

You can click on the item to purchase it from my Online Store.

Slide & Lock Fun Fold Card

This is such a fun card to make. It’s called a Slide & Lock Fun Fold and it’s so easy to make but so cool.


Watch the video to see how to make these cards. I used the Share A Milkshake Bundle to make them. Aren’t they cute? Click the button below the video to get a Project Sheet with the measurements and instructions.


This one is made using Mint Macaron and the Country Gingham Designer Series Paper. The ice cream is Sweet Sorbet. I stamped and then stamped a second time to get the different shades for each scoop.


Here’s the inside. I love the sentiment, it’s such a whimsical font.


For this one I used Coastal Cabana and the Dandy Designs Designer Series Paper. The ice cream is stamped with Fresh Freesia Ink.


The inside would brighten anyone’s birthday!


Supply List

You can click on the item to purchase it from my Online Store.

Simple Sympathy Card using Decorative Borders

I made this simple Sympathy Card using the Decorative Borders Stamp Set. It’s always good to have sympathy cards on hand.


This stamp set has such pretty, delicate images to use for borders or accents to a card.


Tips & Instructions

  • Thick Basic White Card Base - 5 1/2 x 8 1/2, score at 4 1/4 (you can use any color).

  • Dainty Flowers Designer Series Paper - 5 1/2 x 4 1/4, adhere to the card base. Note: This paper is a FREE Sale-a-bration product with a $50US purchase.

  • Basic White Layer - 4 3/4 x 3 1/2

  • Stamp the floral image at the top and bottom corners of the white layer using Black Memento Ink. Color with Stampin’ Blends. I used Light Old Olive, Dark Flirty Flamingo and Light Starry Sky.
    TIP - Use the Stamparatus to help line up and get good coverage on the floral images.

  • Stamp the sentiment with Black Memento Ink. The sentiment is from the Something Fancy Stamp Set.

  • Adhere layer to the card.

  • Add a Brushed Brass Butterfly.


On the inside stamp the floral image with Black Memento Ink and color with Stampin’ Blends. I used the same colors that I used on the card front.


Supply List

You can click on the item to purchase it from my Online Store.

Hoot Hoot - Adorable Owls Card

Isn’t this card so cute. I made it with the Adorable Owls Stamp Set. It’s framed with the Fabulous Frames Dies which sets it off from the fun Rainy Or Sunshine Designer Series Paper.


The images in this set are so adorable. It’s a FREE Sale-a-bration product with a $50(US) purchase.


Tips & Instructions

  • Sweet Sorbet Card Base - 5 1/2 x 8 1/2, score at 4 1/4

  • Basic White Layer - 5 1/4 x 4, adhere to card base.

  • Rain Or Shine Designer Series Paper - 5 x 3 3/4, adhere to card.

  • Cut piece of Sweet Sorbet & Basic White using the Fabulous Frames Dies. You will need the white rectangle and the Sweet Sorbet frame for the card. Save the other pieces for another card.

  • Stamp the sentiment and owl with Black Memento Ink.

  • Color the owl with Stampin’ Blends. I used Light Crumb Cake, Light Soft Suede, Dark Pool Party and Dark Pumpkin Pie.

  • Adhere the stamped image to card and then pop up the frame using Dimensionals.

  • Add some gold Iridescent Pastel Gems.


On the inside stamp the sentiment and owl with Black Memento Ink. Color the owl with Stampin’ Blends like the one on the card front. I used Sweet Sorbet and Pool Party for the birthday hat.


Supply List

You can click on the item to purchase it from my Online Store.

Sketch Saturday - Dainty Delight

Here’s my card for this week’s sketch challenge. I used the Dandy Designs Designer Series Paper along with the Dainty Delight Dies. I love this color combination!


The sketch I used is from the weekly Atlantic Hearts Sketch Challenge. I love doing their challenges. You should try it.


Tips & Instructions

  • Balmy Blue Card Base - 5 1/2 x 8 1/2, score at 4 1/4

  • Basic White Layer - 5 1/4 x 4, adhere to card base.

  • Cut 2 banners from the Dandy Designs Designer Series Paper. These two patterns are from the same sheet just different sides. Cut one at 4 3/4 x 2 and the other at 4 x 1 1/2. Cut a banner at the bottom of each. You can adjust the length by cutting off at the top if you want them shorter.

  • Cut 3rd from larges circle from the Stylish Shapes Dies from Basic White.

  • Cut large greenery piece from Coastal Cabana and cut down to 3 pieces. Cut 2 floral pieces from Basic White.

  • Cut Balmy Blue to a 1 1/4 x 1 1/4 square. Stamp sentiment with Versamark Ink and Heat Emboss with White Embossing Powder. The sentiment is from the Paradise Palms Stamp Set. I looked through my stamp sets to find a sentiment to fit into the square.

  • Arrange and adhere all the pieces to card as shown. I put Dimensionals behind the circle.

  • Add an Iridescent Pearl to the sentiment square.


I love how crisp and clean the card is.


On the inside layer I added a 5 1/4 x 3/4 strip of the Designer Series Paper and stamped the sentiment with Balmy Blue Ink. The sentiment is from the Dainty Delight Stamp Set.


Supply List

You can click on the item to purchase it from my Online Store.

Sweet Citrus Birthday Cards

Aren’t these cards so fun and fresh! I used the Sweet Citrus Bundle to create them. You can change up the colors to make oranges, grapefruits, lemons or limes.


Watch the video to see how you can cut and emboss the citrus with one pass through your Stampin’ Cut & Emboss Machine. I’ll walk you through how to use these products to make these cards.


The Sweet Citrus Bundle is three products in one—a stamp set, a 3D embossing folder, and dies! You can use these items separately for a clean, modern look. Or use them together to create dimensional images.


Tips & Instructions

  • Petal Pink Card Base - 5 1/2 x 8 1/2, score at 4 1/4

  • Basic White Layer - 5 1/4 x 4

  • Basic White - 5 1/4 x 3, emboss using the Sweet Citrus Embossing Folder

  • Dandy Designs Sale-a-bration Designer Series Paper - 5 1/4 x 2

  • Adhere the Designer Series Paper and the embossed layer to the white layer. Wrap piece of Frayed Ribbon around the seam and adhere to the back. Adhere layers to card base.

  • Stamp the citrus rinds with So Saffron Ink and the fruit with Petal Pink Ink on Basic White Cardstock. I used the Stamparatus to help with placement.

  • Place dies and stamped images into the Embossing Folder lining up the images and dies with the images on the folder and run through your Stampin’ Cut & Emboss Machine.

  • Stamp leaves with Granny Apple Green Ink on Basic White scrap and cut with coordinating die.

  • Arrange and adhere the fruit and leaves. Adhere to card using Dimensionals.

  • Stamp sentiment on 1/2” strip of Basic White with Black Memento Ink and adhere to card with Dimensional.

  • Add some Petal Pink Adhesive-Backed Milky Dots.


On the inside layer stamp the sentiment with Black Memento Ink. Stamp two sets of flowers with Petal Pink Ink and the centers with So Saffron Ink.


I made this card using Mango Melody Cardstock and Ink. I stamped the rinds for the oranges twice to get a darker shade and the fruit just once. The patterned paper is from the Rain Or Shine Designer Series Paper and the ribbon is Pale Papaya Faux Velvet Trim. Add some Mango Melody Milky Dots.


The inside layer is the same for this card only I stamped the flowers and the centers with Mango Melody Ink.


Supply List

You can click on the item to purchase it from my Online Store.

Birthday Card for the Queen Bee

Here’s a perfect card for the Queen Bee in your life! I used the Queen Bee Bundle along with the Hive 3D Embossing Folder. The bee image is so pretty with the floral design in it.


There are some great images in this bundle. You can purchase the stamp set and dies separately or combine them as a bundle to save 10%


Tips & Instructions

  • Basic Black Card Base - 5 1/2 x 8 1/2, score at 4 1/4

  • So Saffron Layer - 5 1/4 x 4, emboss with the Hive 3D Embossing Folder and adhere to card base.

  • Basic White Layer - 3 1/2 x 2 1/2, punch top corners using the Very Best Trio Punch. Using a Basic Black marker go along the edge of the tag to give it a small, black border. Punch slit at the top of the tag for the ribbon.

  • Splatter some ink on the tag using a So Saffron Stampin’ Blends Marker (or Stampin’ Write Marker).

  • Stamp the bee image on scrap of Basic White with Versamark Ink and heat emboss with Gold Embossing Powder. Cut with coordinating die. Color the heart with a Dark Polished Pink Stampin’ Write Marker. Add some Wink Of Stella to the heart.

  • Stamp the sentiment on the tag with Black Memento Ink leaving room for the bee. Adhere bee to tag using adhesive only on the bee’s body.

  • Cut 3 hive pieces from a Gold Foil Sheet and adhere to the tag.

  • Feed piece of Polished Pink Open Weave Ribbon through the slit at the top of the tag and tie a piece of white Bakers Twine around it.

  • Adhere the tag to the card with Dimensionals.


The ink splatter is very light but adds a nice touch to the tag.


On the inside layer stamp the sentiment with Basic Black Ink. Cut the crown from a Gold Foil Sheet and adhere to top of sentiment. Stamp the floral image with Old Olive Ink and stamp a small bee with Black Memento Ink. Color the flower with a Dark Polished Pink Stampin’ Blends Marker. Add some Wink Of Stella to the flower and the wings.


Supply List

You can click on the item to purchase it from my Online Store.