Fancy Flora Thank You Card

The Fancy Flora Designer Series Paper has such gorgeous patterns. It looks like it has lots of texture; I just love it. This is one of my new favorites from the upcoming Mini Catalog.


I stamped the flower and leaves with the Two-Tone Flora Stamp Set and cut them out with the coordinating dies. These stamps are two-step where you can stamp the detail and filler to create a pretty flower. I used the same ink, stamping the detail and then stamping the background but stamping off first to get a lighter shade.


The Something Fancy Bundle has wonderful sentiments and some really great label dies.


Tips & Instructions

  • Night Of Navy Card Base - 5 1/2 x 8 1/2, score at 4 1/4

  • Fancy Flora Designer Series Paper - 5 1/4 x 4

  • Wrap piece of Night Of Navy Bordered Ribbon around the Designer Series Paper Layer and adhere to back. Adhere layer to card base.

  • On scrap of Basic White Cardstock stamp flower and greenery. I stamped the flower with Calypso Coral Ink, stamping the detailed image first, directly and then stamping the background filler image but stamping off on scrap paper first to get a lighter shade. Stamp leaves and branch with Evening Evergreen Ink. Cut with coordinating dies.

  • Stamp sentiment with Night Of Navy Ink on Basic White Cardstock and cut with the hexagon shape label die.

  • Adhere the flower and sentiment with Dimensionals.

  • Adhere the greenery to card behind the flower.

  • Add some Night Of Navy Adhesive-Backed Milky Dots.


On the inside layer stamp flower with Night Of Navy Ink and the leaves with Evening Evergreen Ink.


The new Fancy Flora Suite of products will be available for purchase starting January 5, 2023.

Below are the products I used from the current catalog.

Painter's Tape Technique

This is such a cool technique that I found on the internet. It’s called the Painter’s Tape Technique. You just tear off pieces of Painter’s Tape, press it in your ink pad and then press on your cardstock. It creates a really fun background.


Watch the video to see how easy this technique is. Change up the colors to get different looks.


Tips & Instructions

  • Polished Pink Card Base - 5 1/2 x 8 1/2, score at 4 1.4

  • Basic White Layer - 5 x 3 3/4

  • Tear strips of Painter’s Tape and press into your ink pads, then onto your cardstock. I used Polished Pink, Fresh Freesia and Soft Succulent for this card. The Painter’s Tape I used is 1” wide.

  • Stamp the floral image with Versamark Ink and heat emboss with Black Embossing Powder. The image and sentiment are from the Dainty Delight Stamp Set from the new Mini Catalog.

  • Stamp sentiment with Versamark Ink on a 3/4 strip of Basic White and heat emboss with Black Embossing Powder. Punch both ends with the Banners Pick A Punch.

  • Add a Soft Succulent Opal Round.


For this card I used Sweet Sorbet for the card base and the inks are Sweet Sorbet, Tahitian Tide and Parakeet Party. I added a Sweet Sorbet Matte Decorative Dot.


The Dainty Delight Stamp Set has some beautiful, delicate images and pretty sentiments. This will be available when the new Mini Catalog launches on January 5, 2023.


On the inside layer stamp the floral image with Black Memento Ink.


The new products (Dainty Delight Stamp Set) will be available for purchase starting January 5, 2023.

Below are the products I used from the current catalog.

Favored Flowers Triple Layer Birthday Card

I love making these Triple Layer cards and usually stamp the images but when I saw this gorgeous Favored Flowers Designer Series Paper, I knew I wanted to used it for this card.


This Designer Series Paper has such beautiful floral images and is a Sale-a-bration product that you can earn for free with at $50USD order starting in January, 2023.


Tips & Instructions

  • Basic Black Card Base - 5 1/2 x 8 1/2, score at 4 1 4

  • Cut a 5 x 4 piece of Designer Series Paper

  • Using the Rectangle Stitched Dies cut the layers. I used the 2nd, 4th and 6th from largest rectangles, laid them on the the Designer Series Paper and taped them down using Post-It Tape to make sure they didn’t move.


  • You’ll end up with 3 pieces. Make sure to keep them facing the right way so the pattern is correct.


  • Cut 2 pieces of Basic Black Cardstock. I measured the rectangles and then cut the cardstock 3/16th of an inch larger. One piece measures 4 1/8 x 2 13/16 and the other is 3 5/16 x 2.

  • Adhere the floral pieces to the black pieces to create this triple layer design adhering the last layer to the card base.

  • Stamp sentiment with Black Memento Ink on a 1/2 strip of Basic White Cardstock. The sentiment is from the new Sentimental Park Stamp Set. Punch one end using the Banners Pick a Punch and adhere sentiment to the card.

  • Tie a bow with Linen Thread and adhere using a Glue Dot.

  • Add some Iridescent Pearls.


On the inside layer stamp sentiment with Black Memento Ink and add a 3/4 strip of Designer Series Paper to the bottom.


The new products (Favored Flowers Designer Series Paper and Sentimental Park Stamp Set) will be available for purchase starting January 5, 2023.

Below are the products I used from the current catalog.

Simple Suite Stampers Tutorial - Abigail Rose

I made this beautiful card for the monthly Simple Suite Stampers Tutorial Bundle. We featured the Abigail Rose Suite of Products.


I work with other Stampin’ Up! Demonstrators each month to create a Tutorial Bundle with pictures, measurements and instructions to make 12 projects.


You can get this month’s for free when you make a purchase from my Online Store during the month of December or you can click the button below to purchase any of my Tutorials.

The Abigail Rose Designer Series Paper is one of my favorites from the Annual Catalog. The colors and patterns are so pretty.


You can use this card design with any patterned paper. I like having a floral at the top and a strip or subtle pattern on the bottom.


The inside layer is simple and coordinates so well with the card front.


Supply List

You can click on the item to purchase it from my Online Store.

Sketch Saturday - Fitting Florets

Here’s my card for this week’s Sketch Challenge. It looks like a Christmas present! I used the Fitting Florets Designer Series Paper and some White Frayed Ribbon.


The sketch is from the weekly Atlantic Hearts Sketch Challenge. I love doing their sketch challenges.


Tips & Techniques

  • Thick Basic White Card Base - 5 1/2 x 8 1/2, score at 4 1/4

  • Fitting Florets Designer Series Paper Layer - 5 1/4 x 4

  • Wrap pieces of White Frayed Ribbon around the layer and adhere to the back. I used 2 separate pieces for this.

  • Adhere layer to card base.

  • Punch piece of Evening Evergreen Cardstock using the Essentials Tag Punch.

  • Stamp sentiment with Evening Evergreen Ink on a 1 1/4 x 1 piece of Basic White Cardstock with Evening Evergreen Ink. I inked the words in the sentiment separately to break them into two lines. I started with Christmas, cleaned the stamp and then inked and stamped Merry.

  • Adhere sentiment to the tag. Adhere tag to card.

  • Tie bow with White Frayed Ribbon and adhere using Dimensionals.

  • Add a Evening Evergreen Opal Rounds.


I love how this turned out. It is bulky for the mail so I may use this with a hand-delivered gift.


On the inside layer stamp sentiment with Evening Evergreen Ink. Add a 3/4 strip of Designer Series Paper.


Supply List

You can click on the item to purchase it from my Online Store.

Dainty Flowers Thank You Card

I’m starting to dig into my box of new product from the upcoming Mini Catalog and made this card using the Dainty Flowers Designer Series Paper and Dainty Delight Stamp Set.


The Dainty Flowers Designer Series Paper is so pretty. It has a handmade watercolor look to it. This is a Sale-a-bration product that is free with a qualifying product order.


The Dainty Delight Stamp Set has beautiful images and I love the font for the sentiments. There’s a die set that coordinates with it. I can’t wait for you to be able to order these products! They are available starting January 5, 2023.


Tips & Instructions

  • Thick Basic White Card Base - 5 1/2 x 8 1/2, score at 4 1/4

  • Dainty Flowers Designer Series Paper

    • Cut Starry Sky piece at 5 1/2 x 4 1/4

    • Cut the piece with wreath of flowers. I just cut to the size I thought looked good, no real measurement.

  • Wrap Linen Thread around the Starry Sky patterned paper 3 times and adhere to the back. Adhere layer to card base.

  • Adhere the piece with the wreath to the card. I used 2 pieces of Foam Adhesive or you can use Dimensionals.

  • Tie bow with Linen Thread and adhere using a Glue Dot.

  • Add some Starry Sky Matte Decorative Dots.


On the inside layer stamp the greenery multiple times with Old Olive Ink.


The new products (Dainty Flowers Designer Series Paper and Dainty Delight Stamp Set) will be available for purchase starting January 5, 2023.

Below are the products I used from the current catalog.

New Product - Queen Bee Birthday Card

I received my pre-order from the Mini Catalog from Stampin’ Up! and for some reason the first bundle I wanted to use was the Queen Bee Bundle. I love that bee!


Here’s what the bundle looks like. It will be available with the spring Mini Catalog Launch on January 5, 2023. The images in this set are so beautiful.


Tips & Instructions

  • Basic Black Card Base - 5 1/2 x 8 1/2, score at 4 1/4

  • Basic White Layer - 5 1/4 x 4, adhere the card base.

  • Regency Park Designer Series Paper - 5 x 3 3/4, adhere to card.

  • Stamp large bee on Basic White using Versamark Ink and heat emboss with Black Embossing Powder. Cut with coordinating die.

  • Cut the small heart from Sweet Sorbet Glimmer Paper and adhere to bee.

  • Cut label from Basic Black scrap using the die from the Queen Bee Dies.

  • Stamp sentiment on Basic White with Black Memento Ink (or emboss with Black Embossing Powder). Cut down so it will fit on the background label. Adhere to label.

  • Adhere the bee and label to card using Dimensionals.

  • Add white Matte Dots to label.


I’m so happy with how this turned out. The black bee against the Mango Melody Designer Series Paper really looks good. I’m not sure if you can see how pretty the bee is embossed.


On the inside layer stamp the sentiment and bee with Black Memento Ink and the greenery with Old Olive Ink. The stamps are from the Lighting The Way Stamp Set.


The new products (Queen Bee Bundle, Regency Park Designer Series Paper and Lighting The Way Stamp Set will be available for purchase starting January 5, 2023.

Below are the products I used from the current catalog.

Sketch Saturday - Peace To You

Here’s my card for this week’s sketch challenge using the Peace To You Stamp Set and the Sun Prints Designer Series Paper.


The sketch is from the Atlantic Hearts Sketch Challenge. This was an easy one for me.


I really love this stamp set which is sadly on the Retiring List. The images are beautiful and so are the sentiments. I stamped the Nativity scene and cut it with a Layering Circle Die. The circle was a little bigger than the image so I colored the edges with a Stampin’ Write Marker.


Tips & Instructions

  • Thick Basic White Card Base -5 1/2 x 8 1/2, score at 4 1/4

  • Sun Prints Designer Series Paper Layer - 5 1/4 x 4, adhere to card base.

  • Sun Prints Designer Series Paper Strip - 4 x 1, adhere to card.

  • Basic White - cut using the 3rd from largest scalloped Layering Circles Die.

  • Stamp Nativity scene on Basic White with Night Of Navy Ink and cut using the 4th from largest Layering Circles Die. There will be small white areas on each side that you can color with a Night Of Navy Stampin’ Write Marker.

  • Adhere the stamped circle to the scalloped circle. Adhere to card using Dimensionals.

  • Stamp sentiment on Basic White strip with Night Of Navy Ink. Cut apart and adhere to stamped image.


For the inside layer adhere a 5 1/4 x 4 piece of the Sun Prints Designer Series Paper. Stamp sentiment with Night Of Navy Ink on a piece of 5 x 3 3/4 Basic White and adhere to the inside.


Supply List

You can click on the item to purchase it from my Online Store.

Splendid Thoughts Sending Hugs Card

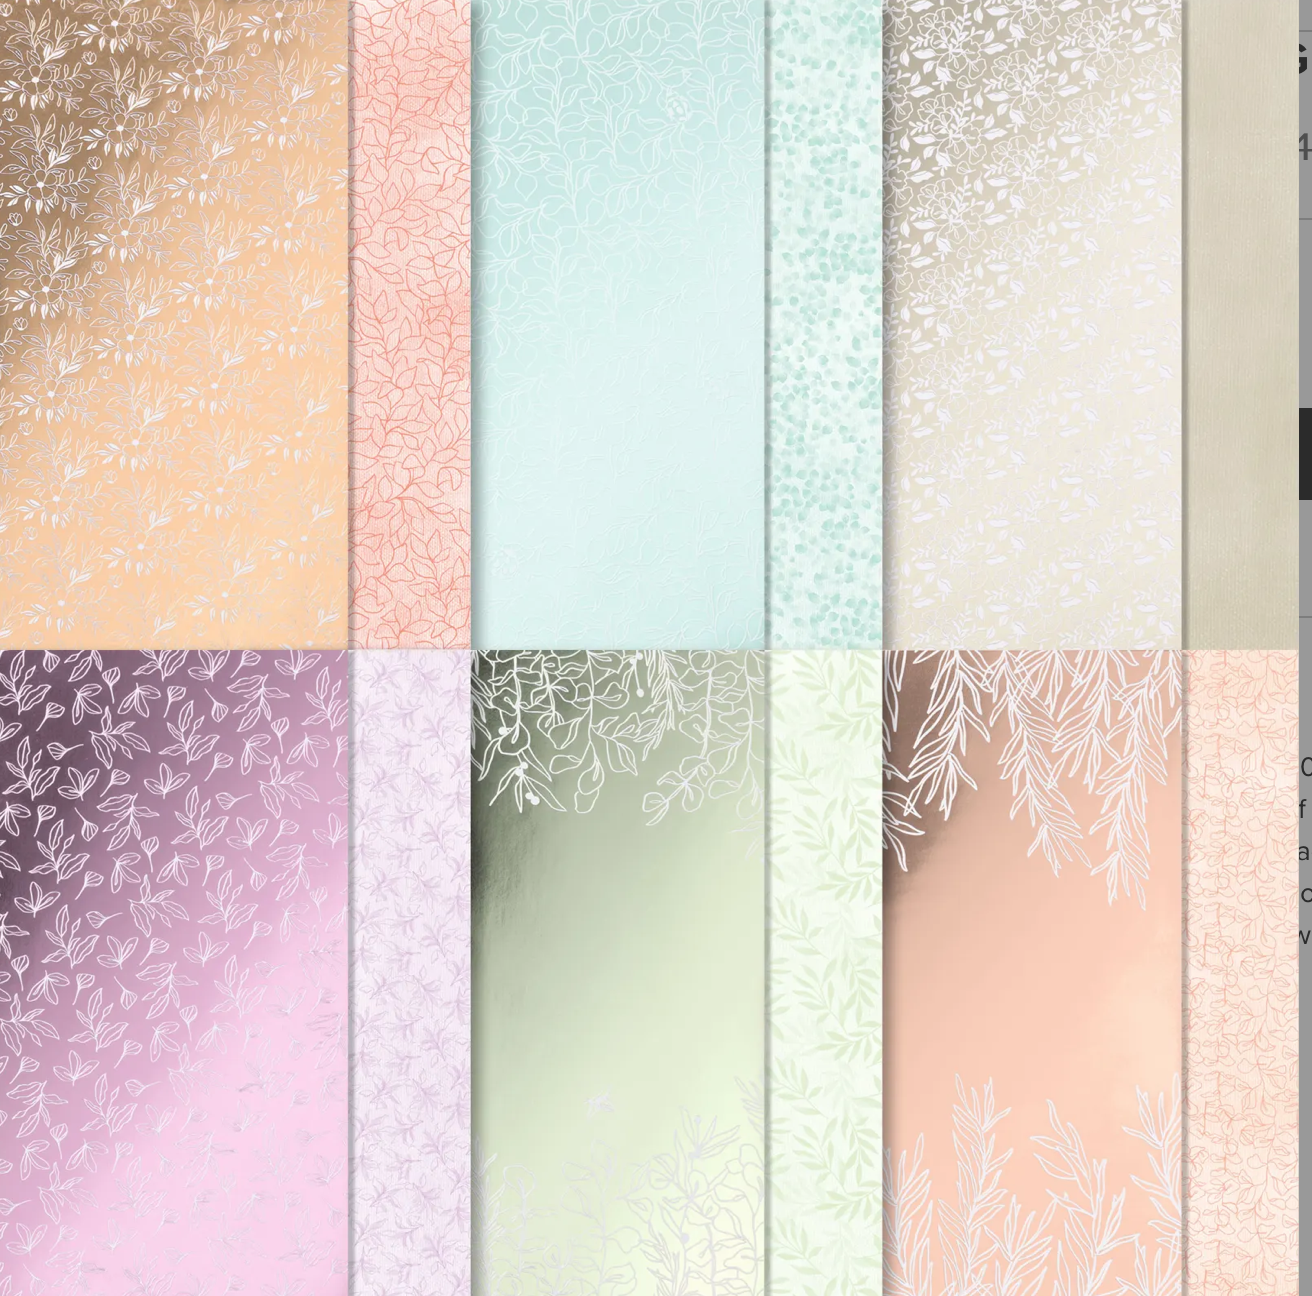
I made this pretty Sending Hugs Card using products from the Splendid Day Suite of products. This is a great card to send to someone who is sick or going through hard times. It’s hard to tell from the picture but the Designer Series Paper is actually silver foil with white flowers.


The Splendid Day Specialty Designer Series Paper is beautiful and is on the Last Chance List. You can get it for only $6(USD) while supplies last. One side of each sheet is foil with white printed accents. 


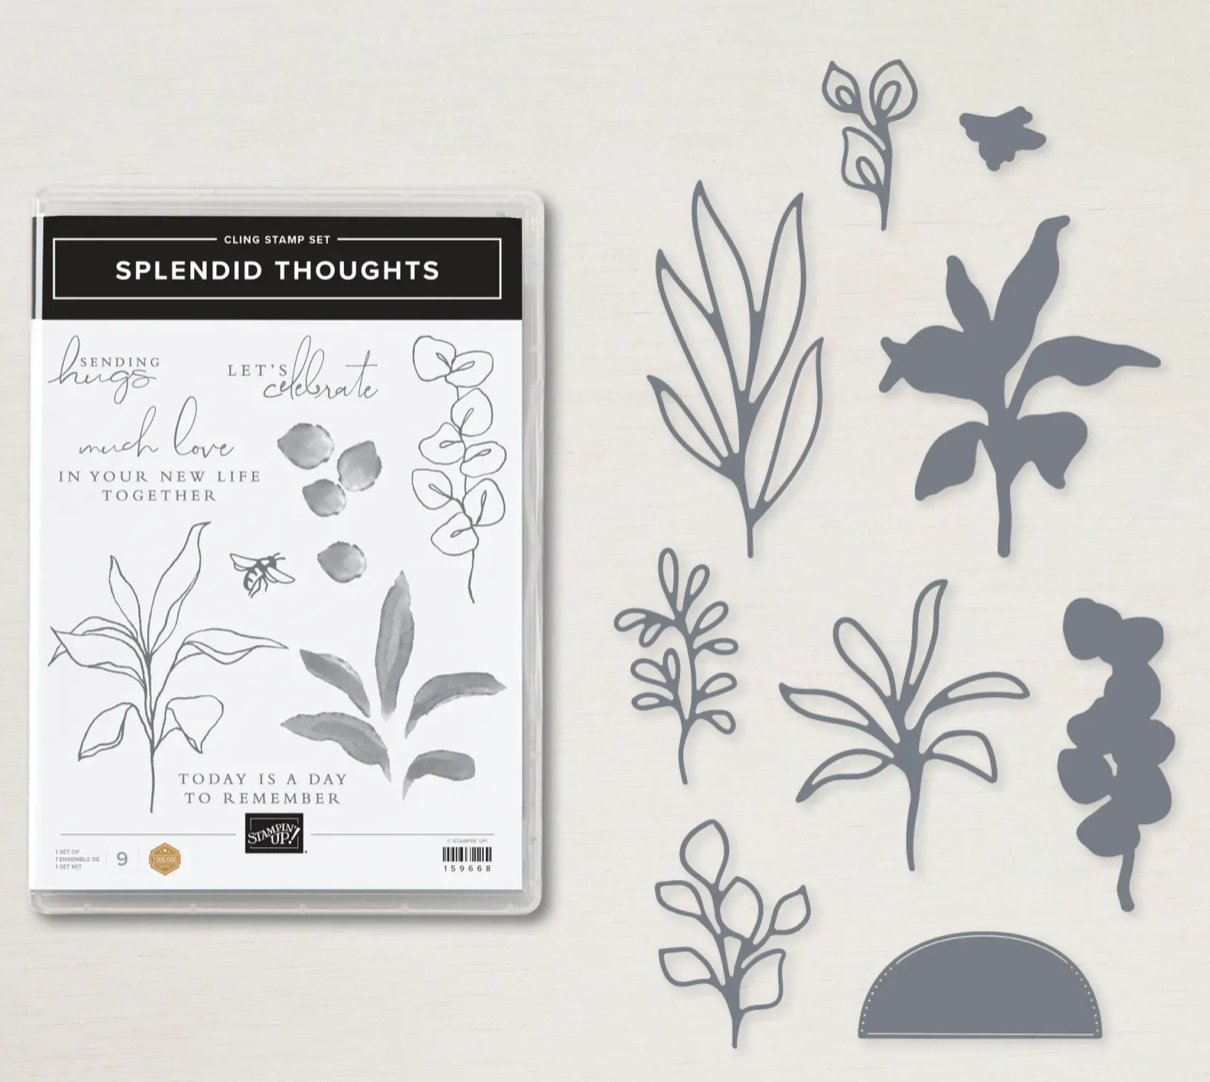
The Splendid Thoughts Bundle has gorgeous images and sentiments and beautiful greenery dies. This bundle would be great for elegant wedding or anniversary cards.


Tips & Instructions

  • Fresh Freesia Card Base - 5 1/2 x 8 1/2, score at 4 1/4

  • Basic White Layer - 5 1/4 x 4

  • Splendid Day Designer Series Paper Layer - 5 x 3 3/4, adhere to white layer. Wrap piece of Fresh Freesia Open Weave Ribbon around and adhere to the back of the layers. Adhere layers to card base.

  • Cut 2nd from largest circle from Vellum Cardstock using the Stylish Shapes Dies.

  • Cut greenery pieces from Soft Sea Foam Cardstock (I cut 1 large and to small branches).

  • Cut greenery piece from Fresh Freesia Cardstock

  • Stamp greenery image with Black Memento Ink on scrap of Basic White. Color using Fresh Freesia Stampin’ Blends and cut with coordinating die.

  • Stamp sentiment with Black Memento Ink on scrap of Basic White and cut using the half circle die.

  • Adhere the greenery pieces to the vellum circle. Adhere the sentiment piece using Dimensionals. Adhere to card.

  • Tie bow and adhere using a Glue Dot.


Here’s a closeup view to give you a better look at the greenery pieces I used.


On the inside layer stamp the greenery image with Black Memento Ink and color using Fresh Freesia Stampin Blends.


Supply List

You can click on the item to purchase it from my Online Store.

Warm Welcome Card

I made this sweet card using the Warm Welcome Bundle from Stampin’ Up! The background is a piece of Designer Series Paper that was embossed using the Timber 3D Embossing folder. I just love that little kitty sitting by the door!


This bundle has great images and dies. You can have the door opened or closed. There are numbers that you can used to personalize the door. Save 10% when you purchase this as a bundle.


Tips & Instructions

  • Thick Basic White card base - 4 1/4 x 11, score at 5 1/2 (top folding)

  • Sun Prints Designer Series Paper layer - 4 3/4 x 3 1/2, emboss using the Timber 3D Embossing Folder and adhere to the card base.

  • Stamp open door with Black Memento Ink on Basic White Cardstock and color with Dark and Light Granny Apple Green Stampin’ Blends. Use the Color Lifter on the light color to remove some of the color and lighten it up. Cut using the coordinating die.

  • Cut door inside piece with die and stamp sentiment with Black Memento Ink. Stamp small heart with Sweet Sorbet Ink. Adhere to door.

  • Adhere door to the embossed layer.

  • Stamp kitten with Black Memento Ink. Color with Light Pumpkin Pie Stampin’ Blends Marker. Use the fine tip to add some stripes to the kitten. Cut with coordinating die and adhere kitten using Dimensionals.

  • Tie a bow with a piece of Real Red Ribbon and adhere to card with a Glue Dot.


Here’s a closeup, you can see the texture on the embossed layer.


On the inside layer stamp the sentiment and image with Black Memento Ink. Color the image using Stampin’ Blends. I used Light Pumpkin Pie and Light Granny Apple Green for the mugs, Light Pumpkin Pie for the tea bag, Light and Dark Sweet Sorbet and Starry Sky for the sleeves. The hands were colored with Light Stampin’ Blends Marker.


Supply List

You can click on the item to purchase it from my Online Store.

Sketch Saturday - Celebrate Sunflowers

I really had to think about this week’s Sketch Challenge and I decided to dig into my stash and pull out my Sunflower Dies.


The sketch is from the weekly Atlantic Hearts Sketch Challenge and it was a real challenge for me but I’m happy with how it turned out.


Tips & Instructions

  • Blackberry Bliss Card Base - 5 1/2 x 8 1/2, score at 4 1/4

  • Blackberry Bliss Cardstock - cut large sunflowers outline using the Sunflower Dies.

  • Mossy Meadow Cardstock - cut 2 detailed leaves and 2 sprigs using the Sunflower Dies.

  • Hues Of Happiness Designer Series Paper - cut large sunflower from the yellow part of the paper and 2 large leaves from the green part using the Sunflower Dies. This is the sheet of paper that I used. I love the variation in color!


  • Adhere the detailed sunflower and detailed leaves over the background pieces that were cut from the patterned paper.

  • Adhere sunflower and leaves to 5 1/4 x 4 piece of Basic White Cardstock letting it hang over the right edge. Cut off what is hanging over and adhere layer to card.

  • Stamp sentiment from the Shades Of Summer Stamp Set on 1” strip of Basic White with Blackberry Bliss Ink and cut to size. Adhere to card using Dimensionals.

  • Add some Iridescent Pearls.


On the inside layer stamp sentiment with Blackberry Bliss Ink. Stamp small sunflower with Black Memento Ink and color with Stampin’ Blends. Color the center of the flower with Dark Daffodil Delight and the petals with Light Daffodil Delight. Color the leaves with Dark Granny Apple Green.


Supply List

You can click on the item to purchase it from my Online Store.

Mini Slimline Christmas Card

Have you ever made a Mini Slimline card? They are so easy and a perfect size to create a snowy scene. The card base is Starry Sky Cardstock what was embossed using the Wintry 3D Embossing Folder. I love a dark blue with white for wintry cards.


Watch the video to see how to make this card. I share the measurements on the video but don’t worry about writing them down, I’ll have them listed below in this Blog.


The Snowman Magic Bundle will be retiring at the end of the month and the dies are on sale for a great price. This is a fun set to have for winter and Christmas cards.


Tips & Instructions

  • Starry Sky Card Base - 6 x 7, score at 3 1/2

  • Emboss the front of the card base using the snowflake Wintry 3D Embossing Folder.

  • Basic White - 6 x about 2, fussy cut to create the snow layer.

  • Stamp the sentiment on the snow layer with Starry Sky Ink. Adhere to card front using adhesive only at the bottom and sides.

  • On scrap of Basic White stamp 2 snowmen with faces and buttons, man’s hat and rabbit with Black Memento and ladies hat and man’s bowtie with Sweet Sorbet Ink.

  • Color the carrot noses with Dark Pumpkin Pie, the man’s hat with Dark Sweet Sorbet and the rabbit with Dark Crumb Cake and Dark Petal Pink Stampin’ Blends.

  • Cut the stamped images with coordinating dies. Cut 4 trees from Shaded Spruce Cardstock and 2 sets of arms with either Early Espresso or Soft Suede Cardstock.

  • Assemble snowmen and adhere all the pieces to the card as shown.

  • Add some Iridescent Pearls.


On the inside layer stamp sentiment with either Sweet Sorbet or Starry Sky Ink and the trees with Shaded Spruce Ink.


Supply List

You can click on the item to purchase it from my Online Store.

Whimsical, Magical Christmas Card

I made this fun, simple Christmas Card using the Whimsical Woodland 3D Embossing Folder and Snowman Magic Stamp Set. Whimsical and Magical is a great combination!


Some of these projects are on the Last Chance Retiring List from the Mini Catalog. There are lots of good deals going on. This Embossing Folder is only $4.00 and the Wonderful Snowflakes are just $2.40. Hurry though because they are only available while supplies last.


Tips & Instructions

  • Basic White Card Base - 4 1/4 x 11, score at 5 1/2 (top folding)

  • Shaded Spruce Layer - 5 1/4 x 4, emboss using the Whimsical Woodland 3D Embossing Folder. Wrap piece of Real Red Ribbon around and adhere to the back of the layer. Adhere layer to card base.

  • Stamp sentiment on a scrap of Basic White using Real Red Ink and punch using the Decorative Circle Punch.

  • Adhere snowflake to card, just putting liquid glue on the center. Adhere the sentiment label with Dimensionals.

  • Tie bow and adhere to card using a Glue Dot.

  • Add some Iridescent Rhinestone Basic Jewels.


On the inside layer stamp sentiment with Real Red Ink. Stamp the trees with Shaded Spruce Ink.


Supply List

You can click on the item to purchase it from my Online Store.

Big Sale Starts Today

The July–December 2022 Mini Catalog will be retiring soon!  That means it's time for a sale!!!  Starting today, December 1, save up to 60% on retiring products. 


Want more savings??? The Clearance Rack has been updated as well!

What are you waiting for? Start shopping! After all, this selection of Last Chance Products is only available while supplies last.

Spend $50 in product and I'll send you my December Ordering Special, a package of Solid Faceted Gems.


Sketch Saturday - Framed & Festive

Here’s my card for this week’s sketch challenge. I used the Christmas Season Stamp Set for the greenery and the Framed & Festive Stamp Set for the sentiment. The sentiments in this set are big and bold and great for Christmas cards.


The sketch is from the weekly Atlantic Hearts Sketch Challenge and this week it’s a slim line card!


Tips & Instructions

  • Cherry Cobbler Card Base - 8 1/2 x 7, score at 3 1/2 (on the 7” side)

  • Sahara Sand Layer - 8 1/4 x 3 1/4, adhere to card base.

  • Shaded Spruce pieces - 2 pieces 3 1/4 x about 4, tear the top and bottom of each piece. You can use a 3 1/4 x about 6 and tear in half on an angle. Emboss the pieces with the Wintry 3D Embossing Folder and adhere to top and bottom of the Sahara Sand layer.

  • Stamp two sets of holly leaves and 2 pine branches with Pear Pizzazz Ink and 2 sets of berries with Cherry Cobbler Ink on Basic White scraps. Cut with coordinating Seasonal Labels Dies. Add some Wink Of Stella to give them some glitter.

  • Stamp sentiment on scrap of Basic White with Cherry Cobbler Ink and cut with the Seasonal Labels Die.

  • Cut off one of the berries on each image to just have 3 berries. Adhere the holly and berries to top and bottom of the card.

  • Adhere the sentiment label using Dimensionals and adhere the two pine branches behind it.

  • Add some Festive Pearls to the sentiment label.


On the inside layer stamp sentiment with Cherry Cobbler. Stamp the pine branches with Pear Pizzazz Ink stamping off to get a lighter shade on some of the branches.


Supply List

You can click on the item to purchase it from my Online Store.

A Sea of Thanks!

I used the A Fish & A Wish Bundle to make this fun Thank You card. The sentiment is so cute!


The background layer is from the Hues Of Happiness Designer Series Pack. I always look through my patterned paper to find blues for the ocean or sky and this pack had just what I was looking for.


Tips& Instructions

  • Night Of Navy Card Base - 5 1/2 x 8 1/2, score at 4 1/4

  • Basic White Layer - 5 1/4 x 4, adhere to card base.

  • Hues Of Happiness Designer Series Paper Layer - 5 x 3 3/4

  • Stamp the sea plants with Old Olive Ink along the bottom of the designer series layer and adhere to card.

  • Stamp 5 fish with Calypso Coral Ink on strip of Basic White and punch with coordinating Fish Builder Punch. Adhere to card using Dimensionals on just the middle one.

  • Stamp sentiment with Night Of Navy Ink on a 1/2 strip of Basic White and punch both ends using the Banners Build A Punch. Adhere to card using Dimensionals.

  • Add some white Adhesive Backed Seasonal Sequins.


On the inside layer stamp the sea plants with Old Olive Ink, the waves with Night Of Navy Ink and the fish with Calypso Coral Ink.


Supply List

You can click on the item to purchase it from my Online Store.

Note: the A Fish & A Wish Punch and the Hues Of Happiness products are currently unavailable but will be soon so you can put them on your Christmas Wish List.

Simple Suite Stampers Tutorial - Boughs Of Holly

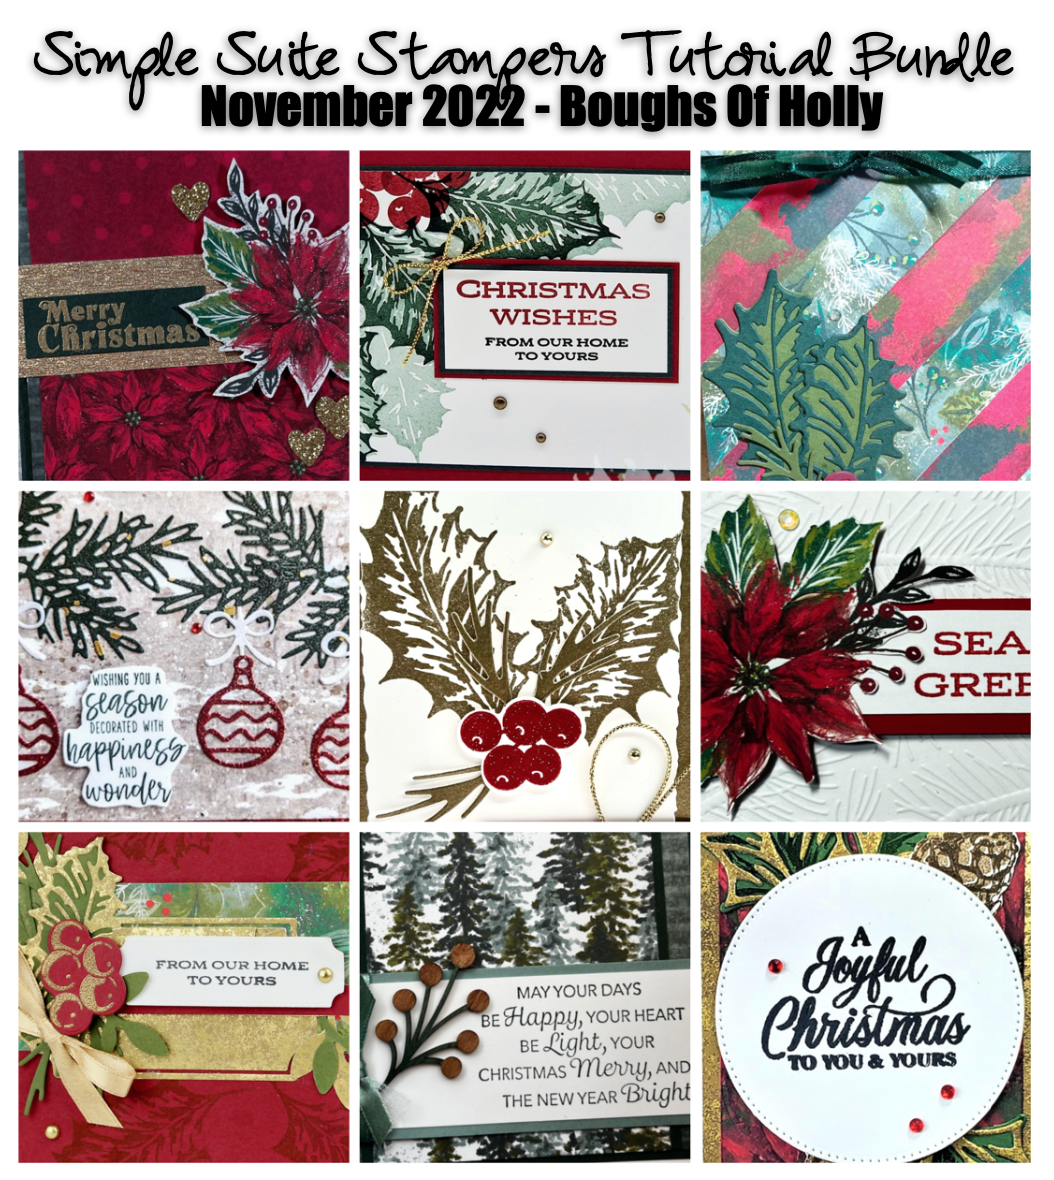
Here’s my card for this month’s Simple Suite Stampers Tutorial Bundle. We’re featuring the Boughs Of Holly Suite.


Watch the video to see how to make this card and to learn more about this Tutorial Bundle.


Each month I collaborate with 11 other Stampin’ Up! Demonstrators to create a Tutorial Bundle full of great projects. There are 12 beautiful projects with pictures, measurements and instructions that you can get for FREE when you place an order from my Online Store. You can also purchase this tutorial by clicking the TUTORIALS Button at the top of this site.


I used the Designer Series Paper and Bundle in the suite to create this card. There’s a touch of gold on the leaves and some small Red Rhinestones to add a little sparkle.


On the inside I stamped the sentiment and added a strip of the patterned paper.


Supply List

You can click on the item to purchase it from my Online Store.

Stampin' Up! Seasonal Sale!

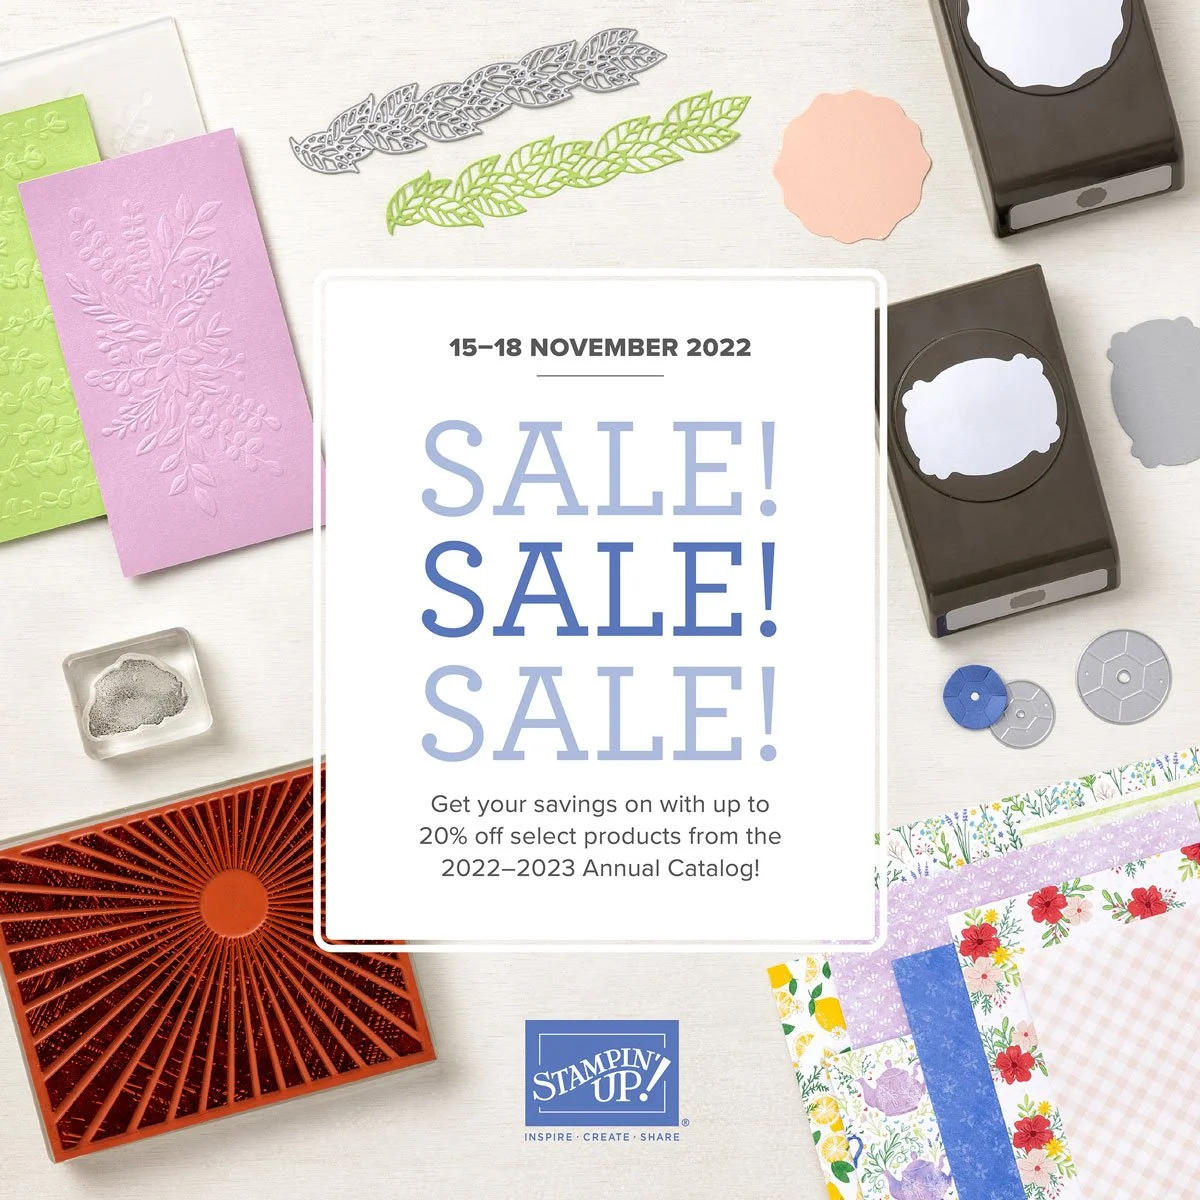
The Stampin' Up! Seasonal Sale is on its way!  During this event, you can expect to save 10%, 15%, and 20% on select products.


Create more by spending less during the Seasonal Sale! Between November  15 and 18, 2022, select products from the 2022–2023 Annual Catalog will be on sale with the following discounts:

  • 10% off all punches

  • 15% of all stamps (Host stamp sets are not included in this sale)

  • 20% off all dies

  • 20% off all embossing folders

  • 20% off all non-specialty Designer Series Paper

With the season of giving upon us, this is a great opportunity to buy gifts for your fellow crafting enthusiasts, or to stock up on supplies for all your upcoming handmade projects. Remember, this sale is for four days only! Don’t miss out!

Sketch Saturday - Celebrate With Tags

I made this cute Christmas Card using the Celebrate With Tags Bundle for this week’s sketch challenge.


The sketch is from the weekly Atlantic Hearts Sketch Challenge. There’s quite a lot of layers for this challenge and I had fun making my card.


Tips & Instructions

  • Pacific Point Card Base - 5 1/2 x 8 1/2, score at 4 1/4

  • Balmy Blue Layer - 5 1/4 x 4, adhere to card base.

  • Basic White Layer - 5 x 3 3/4, adhere to card.

  • Storybook Gnomes Designer Series Paper - 2 pieces, 2 different patterns 3 7/8 x 2 1/2

  • Snowflake Specialty Vellum - cut using the 2nd from largest circle from the Stylish Shapes Dies.

  • Pacific Point Strip - 3/8, banner one end.

  • Snowflake Specialty Vellum - 1/2, banner one end.

  • Stamp 2 mittens on Basic White with Pacific Point Ink and cut with coordinating dies.

  • Stamp sentiment on scrap of Pacific Point with Versamark Ink and heat emboss with White Embossing Powder. Cut with coordinating die.

  • Assemble pieces on the card as shown. I used Dimensionals for one mitten and the left side of the sentiment label.

  • Add some Iridescent Pearls to the card. I used small one for the center of the snowflakes on the mittens and the larger ones on the card.


On the inside layer stamp sentiment and mittens with Pacific Point Ink.


Supply List

You can click on the item to purchase it from my Online Store.

Snow Crystal Christmas Card

The Snow Crystal Stamp is big and beautiful and you don’t need to add much to it to create a wintry holiday card.


Watch the video to see how to emboss this large image using the Stamparatus.


The card base is Thick Basic White and I used a 5 x 3 3/4 Night Of Navy Layer on this one. The sentiment is from the Joyful Flurry Stamp set. Add a Rhinestone to the center of the snowflake as a finishing touch.


I stamped the inside sentiment with Night Of Navy Ink. Stamp some small snowflakes with Night Of Navy Ink stamping off first to get a lighter shade.


This card has a Starry Sky layer and the sentiment is from the Brightest Glow Stamp Set.


I stamped the sentiment and snowflakes with Starry Sky Ink on the inside layer.


Supply List

You can click on the item to purchase it from my Online Store.