Sketch Saturday - Framed & Festive

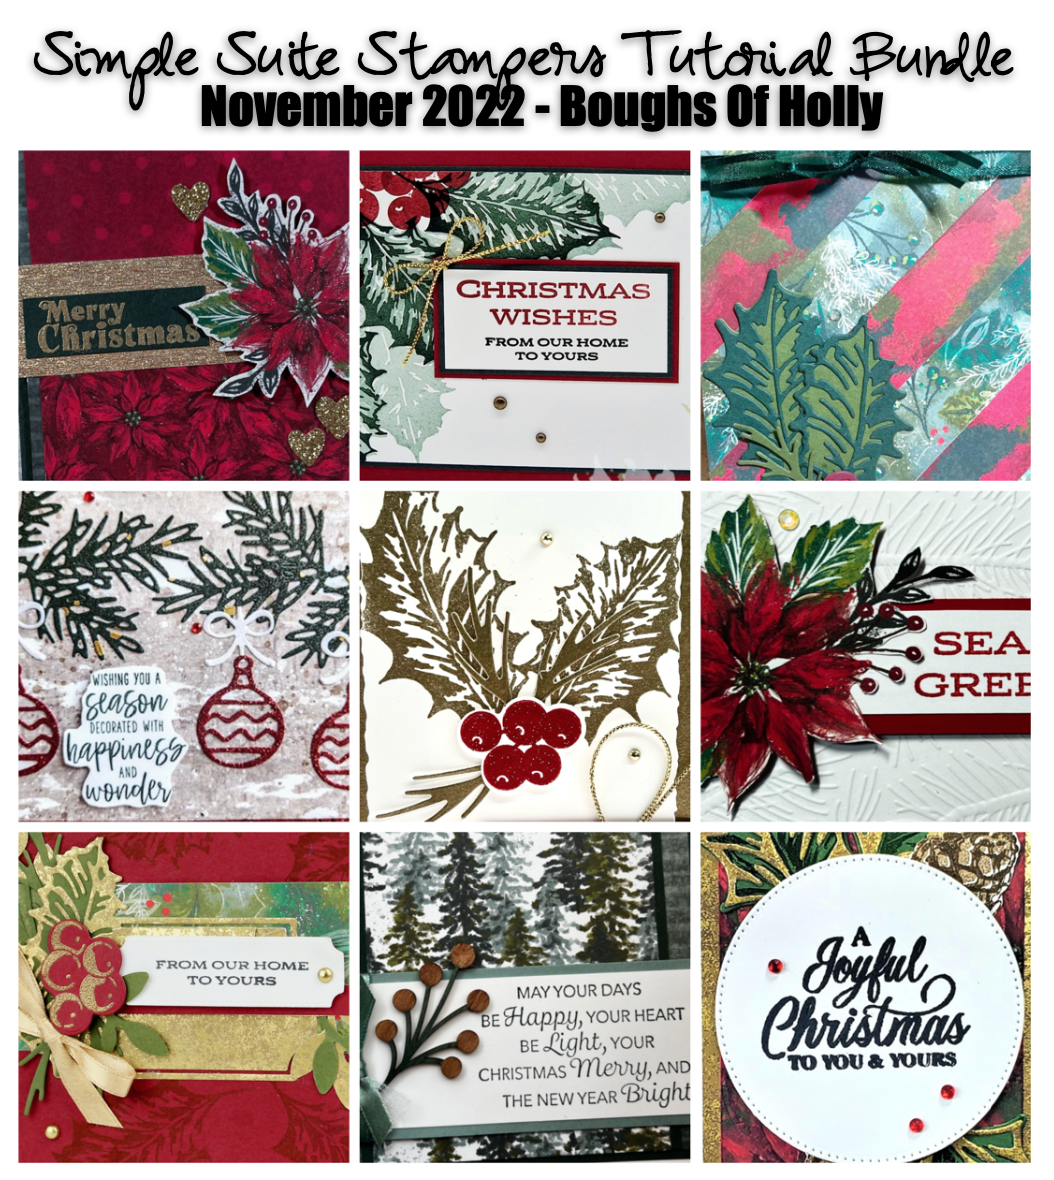
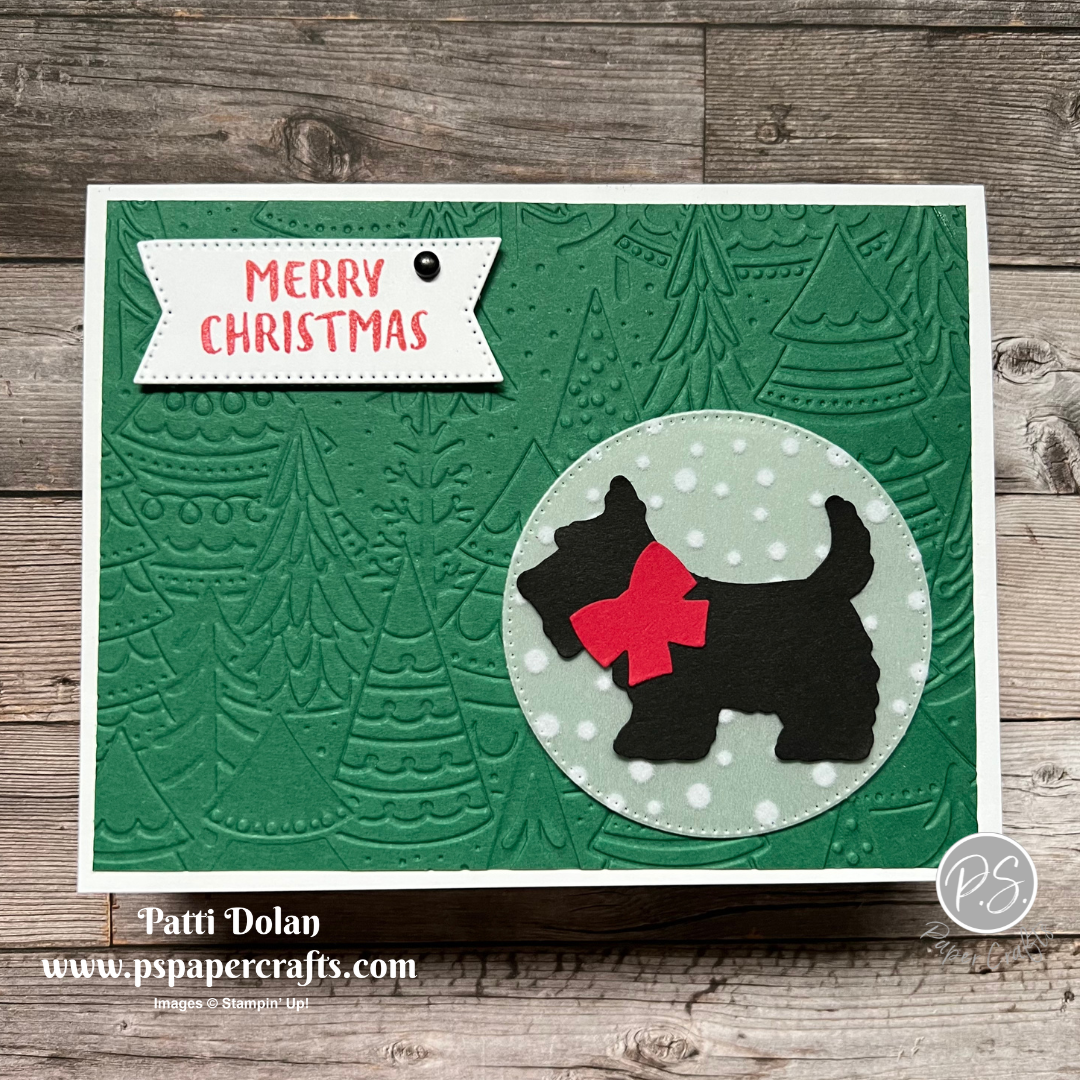
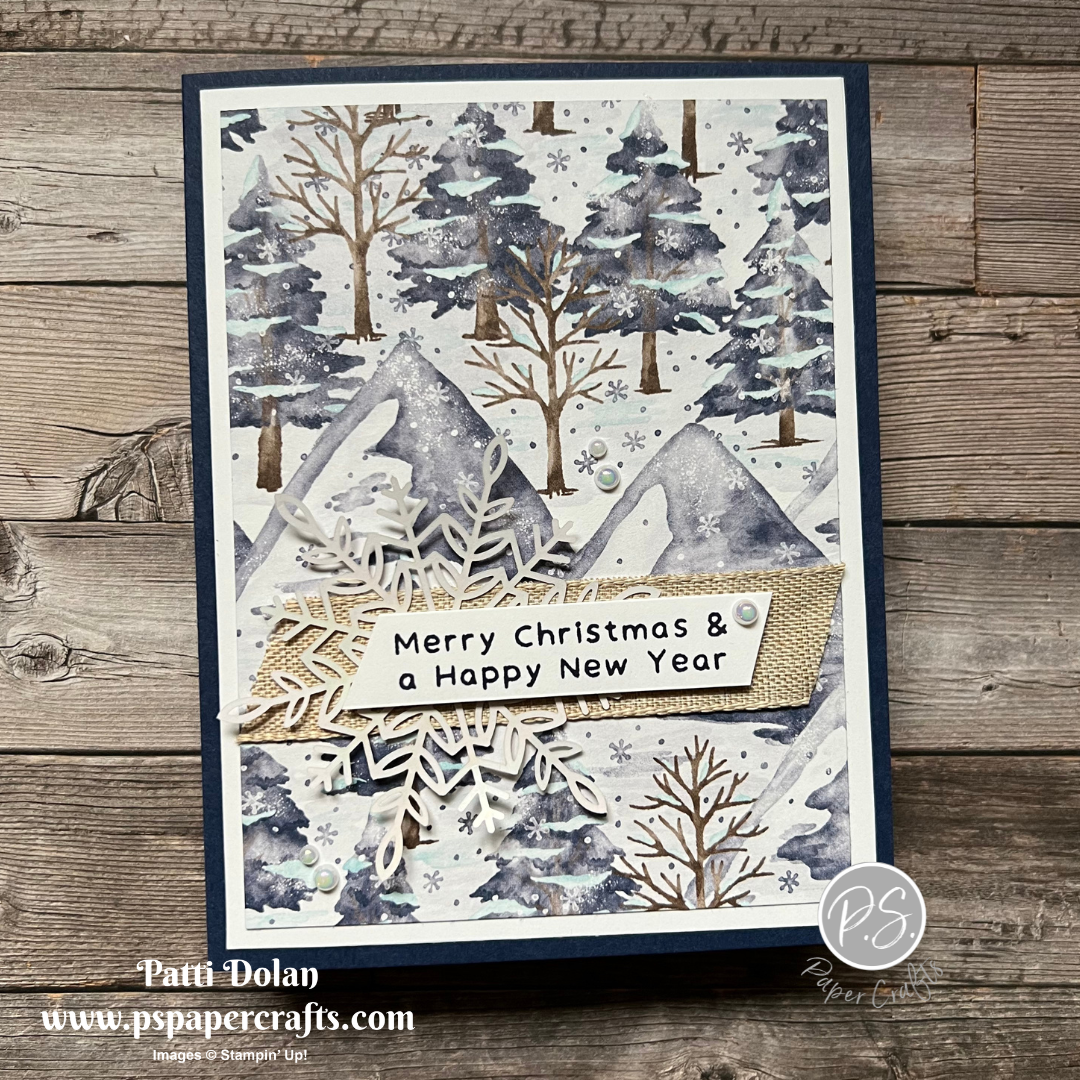
Here’s my card for this week’s sketch challenge. I used the Christmas Season Stamp Set for the greenery and the Framed & Festive Stamp Set for the sentiment. The sentiments in this set are big and bold and great for Christmas cards.


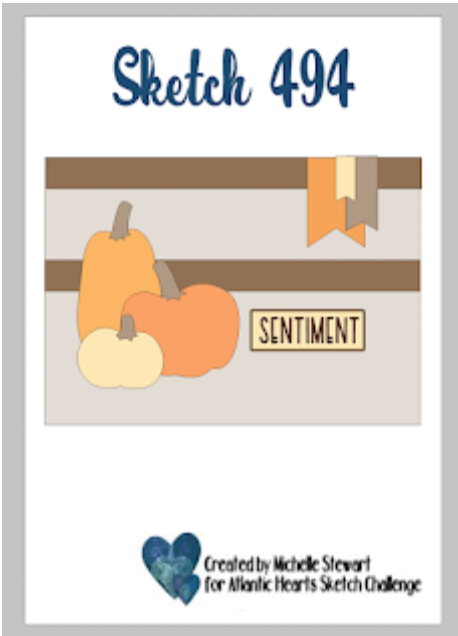
The sketch is from the weekly Atlantic Hearts Sketch Challenge and this week it’s a slim line card!


Tips & Instructions

  • Cherry Cobbler Card Base - 8 1/2 x 7, score at 3 1/2 (on the 7” side)

  • Sahara Sand Layer - 8 1/4 x 3 1/4, adhere to card base.

  • Shaded Spruce pieces - 2 pieces 3 1/4 x about 4, tear the top and bottom of each piece. You can use a 3 1/4 x about 6 and tear in half on an angle. Emboss the pieces with the Wintry 3D Embossing Folder and adhere to top and bottom of the Sahara Sand layer.

  • Stamp two sets of holly leaves and 2 pine branches with Pear Pizzazz Ink and 2 sets of berries with Cherry Cobbler Ink on Basic White scraps. Cut with coordinating Seasonal Labels Dies. Add some Wink Of Stella to give them some glitter.

  • Stamp sentiment on scrap of Basic White with Cherry Cobbler Ink and cut with the Seasonal Labels Die.

  • Cut off one of the berries on each image to just have 3 berries. Adhere the holly and berries to top and bottom of the card.

  • Adhere the sentiment label using Dimensionals and adhere the two pine branches behind it.

  • Add some Festive Pearls to the sentiment label.


On the inside layer stamp sentiment with Cherry Cobbler. Stamp the pine branches with Pear Pizzazz Ink stamping off to get a lighter shade on some of the branches.


Supply List

You can click on the item to purchase it from my Online Store.

A Sea of Thanks!

I used the A Fish & A Wish Bundle to make this fun Thank You card. The sentiment is so cute!


The background layer is from the Hues Of Happiness Designer Series Pack. I always look through my patterned paper to find blues for the ocean or sky and this pack had just what I was looking for.


Tips& Instructions

  • Night Of Navy Card Base - 5 1/2 x 8 1/2, score at 4 1/4

  • Basic White Layer - 5 1/4 x 4, adhere to card base.

  • Hues Of Happiness Designer Series Paper Layer - 5 x 3 3/4

  • Stamp the sea plants with Old Olive Ink along the bottom of the designer series layer and adhere to card.

  • Stamp 5 fish with Calypso Coral Ink on strip of Basic White and punch with coordinating Fish Builder Punch. Adhere to card using Dimensionals on just the middle one.

  • Stamp sentiment with Night Of Navy Ink on a 1/2 strip of Basic White and punch both ends using the Banners Build A Punch. Adhere to card using Dimensionals.

  • Add some white Adhesive Backed Seasonal Sequins.


On the inside layer stamp the sea plants with Old Olive Ink, the waves with Night Of Navy Ink and the fish with Calypso Coral Ink.


Supply List

You can click on the item to purchase it from my Online Store.

Note: the A Fish & A Wish Punch and the Hues Of Happiness products are currently unavailable but will be soon so you can put them on your Christmas Wish List.

Simple Suite Stampers Tutorial - Boughs Of Holly

Here’s my card for this month’s Simple Suite Stampers Tutorial Bundle. We’re featuring the Boughs Of Holly Suite.


Watch the video to see how to make this card and to learn more about this Tutorial Bundle.


Each month I collaborate with 11 other Stampin’ Up! Demonstrators to create a Tutorial Bundle full of great projects. There are 12 beautiful projects with pictures, measurements and instructions that you can get for FREE when you place an order from my Online Store. You can also purchase this tutorial by clicking the TUTORIALS Button at the top of this site.


I used the Designer Series Paper and Bundle in the suite to create this card. There’s a touch of gold on the leaves and some small Red Rhinestones to add a little sparkle.


On the inside I stamped the sentiment and added a strip of the patterned paper.


Supply List

You can click on the item to purchase it from my Online Store.

Stampin' Up! Seasonal Sale!

The Stampin' Up! Seasonal Sale is on its way!  During this event, you can expect to save 10%, 15%, and 20% on select products.


Create more by spending less during the Seasonal Sale! Between November  15 and 18, 2022, select products from the 2022–2023 Annual Catalog will be on sale with the following discounts:

  • 10% off all punches

  • 15% of all stamps (Host stamp sets are not included in this sale)

  • 20% off all dies

  • 20% off all embossing folders

  • 20% off all non-specialty Designer Series Paper

With the season of giving upon us, this is a great opportunity to buy gifts for your fellow crafting enthusiasts, or to stock up on supplies for all your upcoming handmade projects. Remember, this sale is for four days only! Don’t miss out!

Sketch Saturday - Celebrate With Tags

I made this cute Christmas Card using the Celebrate With Tags Bundle for this week’s sketch challenge.


The sketch is from the weekly Atlantic Hearts Sketch Challenge. There’s quite a lot of layers for this challenge and I had fun making my card.


Tips & Instructions

  • Pacific Point Card Base - 5 1/2 x 8 1/2, score at 4 1/4

  • Balmy Blue Layer - 5 1/4 x 4, adhere to card base.

  • Basic White Layer - 5 x 3 3/4, adhere to card.

  • Storybook Gnomes Designer Series Paper - 2 pieces, 2 different patterns 3 7/8 x 2 1/2

  • Snowflake Specialty Vellum - cut using the 2nd from largest circle from the Stylish Shapes Dies.

  • Pacific Point Strip - 3/8, banner one end.

  • Snowflake Specialty Vellum - 1/2, banner one end.

  • Stamp 2 mittens on Basic White with Pacific Point Ink and cut with coordinating dies.

  • Stamp sentiment on scrap of Pacific Point with Versamark Ink and heat emboss with White Embossing Powder. Cut with coordinating die.

  • Assemble pieces on the card as shown. I used Dimensionals for one mitten and the left side of the sentiment label.

  • Add some Iridescent Pearls to the card. I used small one for the center of the snowflakes on the mittens and the larger ones on the card.


On the inside layer stamp sentiment and mittens with Pacific Point Ink.


Supply List

You can click on the item to purchase it from my Online Store.

Snow Crystal Christmas Card

The Snow Crystal Stamp is big and beautiful and you don’t need to add much to it to create a wintry holiday card.


Watch the video to see how to emboss this large image using the Stamparatus.


The card base is Thick Basic White and I used a 5 x 3 3/4 Night Of Navy Layer on this one. The sentiment is from the Joyful Flurry Stamp set. Add a Rhinestone to the center of the snowflake as a finishing touch.


I stamped the inside sentiment with Night Of Navy Ink. Stamp some small snowflakes with Night Of Navy Ink stamping off first to get a lighter shade.


This card has a Starry Sky layer and the sentiment is from the Brightest Glow Stamp Set.


I stamped the sentiment and snowflakes with Starry Sky Ink on the inside layer.


Supply List

You can click on the item to purchase it from my Online Store.

Pretty Fitting Florets Christmas Card

I’m so excited to show you a new collection of products that is available for purchase starting today. It’s called the Fitting Florets Collection and it is beautiful.

I made this card using the Fitting Florets Designer Series Paper. The sentiment is from the Framed & Festive Stamp Set.


Watch this video to get a good overview of the new products. I love them, they are definitely my style.


Tips & Instructions for today’s card

  • Evening Evergreen Card Base - 5 1/2 x 8 1/2, score at 4 1/4

  • Soft Succulent Layer - 5 1/4 x 4

  • Fitting Florets Designer Series Paper - 5 x 3 3/4, adhere to Soft Succulent Layer.

  • Wrap Soft Succulent Open Weave Ribbon around layers and adhere to card base.

  • Stamp sentiment on Basic White Cardstock using Versamark Ink and heat emboss with Gold Embossing Powder. Punch using the Decorative Circle Punch and adhere using Dimensionals.

  • Tie bow with ribbon and adhere with a Glue Dot.

  • Punch two branches from a piece of Gold Foil Sheet and two from a piece of Vellum Cardstock. Adhere to card behind the label.

  • Add a Gold Adhesive-Backed Swirl to the label.


On the inside stamp sentiment with Versamark Ink and heat emboss with Gold Embossing Powder. Adhere a 4 x 3/4 piece of Designer Series Paper.


I’m featuring the Fitting Florets products in my November Card Class. These are the cards that you’ll get kits for if you purchase the class.


Supply List

You can click on the item to purchase it from my Online Store.

November Card Class - Fitting Florets

This month’s Card Class features the new Fitting Florets Collection.

Here’s a sneak peak of the projects you’ll make. You'll receive kits to make 8 cards, 4 designs, 2 of each.


Email patti@pspapercrafts.com to sign up!!!

Deadline November 8, 2022

Here's what you get:

  • 8 card kits, including layers, envelopes and die cuts

  • Product goody bag of over $25 (you'll use to make the cards)

  • PDF & videos with complete measurements & instructions

Class Fee Options:

  • November Card Class To Go - $40

  • Add on the Framed Florets Stamp Set - $63.00

  • Add on the Framed Florets Bundle (includes stamp set & dies) - $94

    I didn't use the Framed & Festive Stamp Set on these cards but you can add it on as well as it coordinates with the dies. This Stamp Set is $23 so just add that to one of the options if you want. It's great for Christmas Cards.


Other Info:

  • Email me and I will send you a PayPal Invoice.

  • Payment due by November 8, 2022.

  • I will pick up the shipping and tax for any Add-Ons.

  • You will require stamps, ink and adhesive to complete the cards.

  • If there is a product availability issue, I may have to substitute products or there may be a delay in getting the kits to you.


Invite a friend and I will include a free gift with your kits.

Note: Some of the products are available only while supplies last and if they become unavailable, I will try to substitute. The Designer Series Paper is no longer available, I will not be able to provide the kits for the class.

Email patti@pspapercrafts.com to sign up!!!
Deadline November 8, 2022

Sketch Saturday - Hello Harvest

I love cards with wreaths so when I saw this week’s sketch I was so happy. I’m making this card for my Mom. We lived next door to each other for year’s and I recently moved away. I do miss her!


The sketch is from this week’s Atlantic Hearts Sketch Challenge. They do such a great job with these challenges.


Tips & Instructions

  • Blackberry Bliss Card Base - 5 1/2 x 8 1/2, score at 4 1/4

  • Sahara Sand Layer - 5 1/4 x 4, adhere to card base.

  • Very Vanilla Strip - 4 x 1, emboss using the Stripes 3D Embossing Folder and adhere to card.

  • Blackberry Bliss Layer - 4 1/4 x 2 3/4

  • Very Vanilla Layer - 4 x 2 1/2, adhere to Blackberry Bliss Layer and adhere to card.

  • Sahara Sand Cardstock - cut wreath using the Painted Labels Dies.

  • Very Vanilla Cardstock - cut 3rd from largest circle using the Stylish Shapes Dies.

  • Stamp sentiment with Blackberry Bliss Ink on the circle and adhere to wreath.

  • Adhere wreath to card using Dimensionals.

  • Punch 3 sprigs from the green pattern of the Rustic Harvest Designer Series Paper using the Bough Punch. Adhere behind the wreath.

  • Punch 2 small flowers from the Crushed Curry pattern and 2 large & 1 small flower from Blackberry Bliss Cardstock using the Flowers & Leaves Punch. Punch some small leaves from Pear Pizzazz Cardstock.

  • Arrange and adhere the flowers and leaves around the wreath.

  • Add some Opal Rounds to the center of the flowers.


The colors are perfect for a fall look and punching images from patterned paper adds interest to the card.


On the inside layer stamp the leaf using Blackberry Bliss Ink and stamp a second and third time without re-inking to get different shades.


Supply List

You can click on the item to purchase it from my Online Store.

YouTube Replay - Scottie Card Class

I made these cute cards using the Christmas Scottie Bundle on my YouTube Live. Get the kit and pdf instructions with a qualifying order.


Watch the replay to see all 3 cards. This bundle has the cutest images and sentiments with a coordinating Scottie Dog Punch.


Here’s how it works:

  • Place a $35 order (before shipping & tax) and I'll send you 6 card kits (3 designs 2 of each) with instructions for free as a thank you.

  • Orders of $50 or more order will get you the kits, instructions and a pack of Classic Matte Dots.

  • Orders must be placed from my Online Store by November 2, 2022 and you must use Host Code 3YBQTQEE

    Note:
    If you place an order of $150 or more, don't use the Host Code, enjoy the Stampin' Rewards but let me know if you want the kits and free embellishments.


Supply List

You can click on the item to purchase it from my Online Store.

Cute Cheerful Basket Card

Isn’t this card sweet with those shiny, green apples? I made it using the Cheerful Basket Stamp Set. In my instructions, I have a tip to get those apples to look like they are in the basket.


The basket can hold apples, hearts, craft supplies or a cute kitty.


Tips & Instructions

  • Soft Suede Card Base - 5 1/2 x 8 1/2, score at 4 1/4

  • Basic White Cardstock - cut using the largest rectangle from the Scalloped Contours Dies.

  • Sahara Sand Cardstock - cut using the 2nd largest rectangle from the Scalloped Contours Dies.

  • Stamp basket and apples with Black Memento Ink on the Sahara Sand rectangle.

    TIP: To make the apples look like they are in the basket, cover the top of the basket with Post-It Tape or a Post-It Note, stamp the apples. When you remove the tape or note, you’ll see that the apples look like they are inside the basket. See pictures below.


  • Stamp sentiment with Black Memento Ink.

  • Color basket and apples with Stampin’ Blends. I used Dark & Light Crumb Cake for the basket. The apples were colored with Dark Parakeet Party and the leaves with Dark Old Olive. Add some Wink Of Stella to the apples.

  • Adhere the stamped layer to the white layer and adhere to card base using a piece of Foam Adhesive Sheet cut to size. You can use Dimensionals instead.


On the inside stamp that cute little kitty with Black Memento Ink. Color it with Dark & Light Stampin’ Blends. Add a touch of green to the eyes using the Dark Parakeet Party Stampin’ Blend.


Supply List

You can click on the item to purchase it from my Online Store.

Stampin' Up! Starter Kit Promotion

We're in the final week of the Stampin' Up! Starter Kit Promotion where you can get $56 USD of free product! 

How does that work, you ask?  You pay $99 and shop for $155 in Stampin' Up! product.  This can be anything that is currently available from the Annual Catalog, Mini Catalog or Clearance Rack.  You get free shipping on this order as well.  After this order you will enjoy a 20% discount on future orders. 


For me, the best thing is that you become part of an amazing crafting community. You would become a member of my team, the P.S. Paper Crew and a member of a large community of demonstrators.

Yes, you become a demonstrator but don't let that scare you. You don't have to run a business, host parties, have a blog, etc. You can if you want to but the large majority of demonstrators are what we call hobbyists. They love our products and want the discount.

So although I love the products and the discount, the best part is the sharing, caring and friendships I've made along the way.

This promotion ends October 31, 2022 so if you want to learn more or have any questions, please email me and we can set up a time to talk. I can even help you place your Starter Kit order.


Sketch Saturday - Cottage Wreaths

Here’s my card for this week’s sketch challenge. I used the Cottage Wreaths Bundle and the Glimmer Specialty Paper, so sparkly!


The sketch is from the weekly Atlantic Hearts Sketch Challenge.


Tips & Instructions

  • Evening Evergreen Card Base - 5 1/2 x 8 1/2, score at 4 1/4

  • Gold Glimmer Specialty Paper - 5 1/4 x 4, adhere to card base

    Tip - cut the middle out to save it for another project. I used the Rectangle Stitched Dies.


  • Basic White Cardstock - 5 x 3 3/4, emboss using the Wintry 3D Embossing Folder. You’ll have to run it through your Embossing Machine twice to get the full layer embossed. Adhere to card.

  • Cut wreaths using the Country Wreaths Dies. I cut the background wreath from Soft Succulent and the smaller wreath from Evening Evergreen Glimmer Specialty Paper. Adhere together and adhere to card.

  • Cut bow from Gold Glimmer Specialty Paper using the Country Wreaths Dies and adhere to wreath.

  • Stamp sentiment on 1/2” strip of Basic White Cardstock with Evening Evergreen Ink. Punch one end with the Banners Pick A Punch and adhere to card.

  • Add some Festive Pearls.


Here’s a close up. I love that pine embossed layer and all that shimmery gold.


On the inside layer stamp sentiment and trees with Evening Evergreen Ink. I used the Peaceful Deer Stamp Set.


Supply List

You can click on the item to purchase it from my Online Store.

Rustic Christmas Card using Storybook Gnomes Designer Series Paper

Here’s the card I made for this month’s Simple Suite Stampers Tutorial Bundle. We featured the Storybook Gnomes Suite.


Each month I work with Stampin’ Up! Demonstrators to create a tutorial bundle that I send to customers who purchase from my Online Store. The tutorial has 12 projects with pictures, measurements and instructions.

You can also purchase the tutorial right here on my website. Just click the Tutorials Button at the top banner.


This is my favorite pattern from the Storybook Gnomes Designer Series Paper. There are lots of great ideas in the tutorial, some with gnomes but I wanted to do something a little different.


Here’s the inside layer, pretty simple but I like those trees.


Supply List for my card

You can click on the item to purchase it from my Online Store.

October 2022 Paper Pumpkin Cards

This month’s Paper Pumpkin has the cutest Christmas Cards. It’s called HoHoHo which is just perfect for these cards.


Watch the video to see all that you get in the kit and how to make these cards. You get the supplies to make 9 cards, 3 designs, 3 of each.


I love the background layer for this card. The Merry is so bright and cheery, isn’t it?


The sky on this one is beautiful in Bermuda Bay with Santa and the reindeer flying across it.


I think this is my favorite. I love the Cherry Cobbler stripes at the top and bottom with that pretty cutout piece in the center. You can keep the Santa in the middle or replace it with an “O”.


You’ll make 9 cards that all have beautiful matching envelopes.


You can subscribe to Paper Pumpkin and have it delivered to your door monthly.

You can also purchase pre-paid subscriptions by going to my Online Store and choosing Paper Pumpkin.

Four Fun and Cheesy Cards

Before I tell you about these four cards, I want to let you know that Stampin’ Up! has refreshed their Clearance Rack. You can save up to 60% on some items. Don’t miss out, they are only available while supplies last.


Now to the cards! The sentiments in the A Little Cheesy Stamp Set are definitely cheesy but so fun, I had to use them all!

What do you think? Are any of them perfect for a friend you know?


Instructions - Card 1

  • Basic Black Card Base - 5 1/4 x 4, score at 4 1/4

  • Festive Foils Specialty Paper - 5 1/4 x 4, adhere to card base.

  • Stamp two wine glasses with Black Memento Ink on scrap of Basic White. Color the wine with a Dark Blackberry Stampin’ Blends Marker. Add Wink Of Stella to the entire wine glass and wine. Fussy cut.

  • Basic White Layer - 4 x 3, stamp sentiment with Black Memento Ink. Adhere the wine glasses and adhere layer to card using Foam Adhesive Sheet cut to size (or Dimensionals).

  • Add a gold Brushed Metallic Dot.


I added a 4 x 3/4 strip of the Festive Foils Specialty Paper to the inside layer.


Instructions - Card 2

  • Sweet Sorbet Card Base - 5 1/2 x 8 1/2, score at 4 1/4

  • In Color Designer Series Paper - 5 1/4 x 4, adhere to card base.

  • Cut rectangle from Basic White Cardstock using the Rectangle Stitched Dies. Stamp sentiment with Sweet Sorbet Ink and bowl of pudding with Black Memento Ink.

  • Color the bowl with Light & Dark Sweet Sorbet, spoon with Light Smoky Slate and pudding with Light Petal Pink Stampin’ Blends Markers. Add some Wink Of Stella to the pudding.

  • Color piece of White Crinkled Seam Binding Ribbon with a Dark Sweet Sorbet Stampin’ Blends Marker. Tie Bow and adhere using a Glue Dot.

  • Adhere the rectangle to card using a piece of Foam Adhesive Sheet cut to size (or Dimensionals).


On the inside layer adhere a 5 1/4 x 3/4 strip of Designer Series Paper.


Instructions - Card 3

  • Basic Black Card Base - 5 1/2 x 8 1/2, score at 4 1/4

  • So Saffron Cardstock - 5 1/4 x 4

  • Basic White Cardstock - 5 x 3 3/4, cut using the Dots & Spots Die

  • Stamp cheese on piece of Basic White Cardstock with Black Memento Ink. Color with Light & Dark Stampin’ Blends Markers. Cut using the Stylish Shapes Dies.

  • Adhere stamped square to 2x2 So Saffron square. Adhere using Foam Adhesive Sheet cut to size (or Dimensionals).

  • Stamp sentiment with Black Memento Ink on Basic White Cardstock and cut using the Stylish Shapes Dies. Adhere using Foam Adhesive Sheet cut to size (or Dimensionals).


On the inside layer adhere a 4 x 1 strip of So Saffron Cardstock that was cut using the Dots & Spots Dies.


Instructions - Card 4

  • Early Espresso Cardstock - 5 1/2 x 8 1/2, score at 4 1/4

  • Basic White Cardstock - 5 1/4 x 4, adhere to card base.

  • Sahara Sand Cardstock - 5 x 3 3/4, stamp cookies randomly using Early Espresso Ink and adhere to card.

  • Basic White Cardstock - 4 x 2 1/4, stamp sentiment with Early Espresso Ink. Stamp cookies with Early Espresso Ink, stamping off first to get a lighter shade. Adhere to card using Foam Adhesive Sheet cut to size (or Dimensionals).


On inside layer, stamp cookie with Early Espresso Ink.


Supply List

You can click on the item to purchase it from my Online Store.

Sketch Saturday - Joyful Flurry

Here’s my card for this week’s sketch challenge. I used the Joyful Flurry Bundle to make the snowflakes.


The sketch is from the weekly Atlantic Hearts Sketch Challenge.


Tips & Instructions

  • Starry Sky Card Base - 5 1/2 x 8 1/2, score at 4 1/4

  • Basic White Layer - 5 1/4 x 4, adhere to card base.

  • Starry Sky Glimmer Paper - 2 strips 5 1/4 x 1/2, adhere to top and middle of white layer.

  • Stamp snowflakes with Versamark Ink and heat emboss with White Embossing Powder. Stamp the largest on Pacific Point the medium on Starry Sky and the smallest on Balmy Blue Cardstock. Cut using the coordinating dies.

  • Adhere snowflakes to card. I used Dimensionals on the medium and small one.

  • Stamp sentiment with Starry Sky Ink on scrap of Basic White and cut with small label die from the Frosted Flurry Dies. Adhere to card using Dimensionals.

  • Cut 3 strips of cardstock for banner - Pacific Point at 3/4”, Starry Sky at 1/2” and Balmy Blue at 3/8” Using the Banners Pick A Punch, punch each strip and adhere to the card, trim off top if needed.

  • Add an Iridescent Rhinestone to the center of each snowflake.


On the inside layer stamp sentiment and 3 small snowflakes with Starry Sky Ink.


Supply List

You can click on the item to purchase it from my Online Store.

Three Autumn Cards using the Baby Wipe Technique

The Baby Wipe Technique is so fun and I usually use it this time of year to create beautiful Fall cards.


In today’s video, I’ll show you how to make 3 different cards using one baby wipe. Click the Project Sheet Button below each to get a pdf with pictures, measurements and instructions.


For the first card I used the Cottage Wreaths Stamp Set to create a colorful Autumn hello card. The background layer was embossed using the Brick & Mortar 3D Embossing Folder.


This card is so beautiful! I used the Soft Seedlings Stamp Set which is one of my favorites from the Mini Catalog.


This last card was a new technique I saw a few people do on Instagram. I just wiped the inked up baby wipe across a piece of cardstock.


Supply List

You can click on the item to purchase it from my Online Store.

Supply List for Card 1

Supply List for Card 2

Supply List for Card 3

Pretty Thank You Card using the Aspen Tree Dies

Here’s one more card using the leaves from the Aspen Tree Dies. I had these leftover pieces from the card that I made last week and decided to change it up a little and make it a Thank You Card.


I am loving the leaves from the Aspen Tree Dies. They cut and emboss in one shot and are beautiful, especially when used to cut our Brushed Metallic Cardstock.


Tips & Instructions

  • Early Espresso Card Base - 5 1/2 x 8 1/2, score at 4 1/4

  • Copper Foil Cardstock - 5 1/4 x 4, cut 3 leaves (1 large and 2 small) from the center using the Aspen Tree Dies. Adhere layer to card base. Save one of the small copper leaves for inside layer.

  • Very Vanilla Cardstock - 5 x 3 3/4, use a Stampin’ Blends Marker to splatter ink on the layer. Adhere layer to card.

  • Gold Foil Cardstock - cut small leaf using the Aspen Tree Dies.

  • Adhere leaves to card.

  • Stamp sentiment on Very Vanilla scrap using Early Espresso Ink. Punch using the Label Me Fancy Punch.

  • Punch piece of Early Espresso Cardstock using the Label Me Lovely Punch. Trim off the top edge and bottom edge and adhere stamped label to it. Adhere to card using Dimensionals.

  • Tie bow with a piece of Linen Thread and adhere with a Glue Dot.

  • Add a Brushed Metallic Dot.


On the inside layer, adhere one of the copper leaves that you cut from the front layer.


Supply List

You can click on the item to purchase it from my Online Store.

Cute & Quick Christmas Card

This card is so cute with that happy snowman and the embossed background! It was simple to make.


The Whimsical Woodland 3D Embossing Folder is so fun. It makes a perfect background for this card.


Tips & Instructions

  • Thick Basic White Card Base - 5 1/2 x 8 1/2, score at 4 1/4

  • Garden Green Layer - 5 1/4 x 4, emboss using the Whimsical Woodland 3D Embossing Folder.

  • Wrap piece of Real Red Ribbon around the embossed layer and adhere to the back. Adhere layer to card base.

  • Stamp sentiment (from Brightest Glow Stamp Set) with Garden Green Ink on Basic White Cardstock and cut with the large label die from coordinating the Labels Aglow Dies.

  • Stamp snowman with its face and buttons on Basic White Cardstock with Black Memento Ink and cut with the coordinating Snowman Dies.

  • Stamp hat and scarf with Real Red Ink and cut with coordinating dies.

  • Cut arms from Early Espresso Cardstock.

  • Assemble snowman and color nose with Dark Pumpkin Pie Stampin’ Blends Marker. Adhere to sentiment label.

  • Adhere label with snowman on card using Dimensionals.

  • Tie bow and adhere with Glue dot.

  • Add a green Adhesive-Backed Seasonal Sequin.


On the inside layer stamp sentiment with Real Red Ink and trees with Garden Green Ink.


Supply List

You can click on the item to purchase it from my Online Store.