Sketch Saturday - Leaves Of Holly

I made this card for the weekly sketch challenge and I love how it turned out. Isn’t it pretty?


The sketch is from the Atlantic Hearts Weekly Sketch Challenge.


Tips & Instructions

  • Evening Evergreen Card Base - 5 1/2 x 8 1/2, score at 4 1/4

  • Sahara Sand Layer - 5 1/4 x 4, adhere to card base.

  • Gold Foil 4 x 3/4, emboss using the Wintry 3D Embossing Folder and adhere to card.

  • Cut all the greenery pieces:

    • Die Cut 1 large holly leaf and 2 smaller leaves using the Holly Berry Dies - background from Gold Foil and detailed piece from Evening Evergreen.

    • Punch 2 sprigs from Copper Foil using the Bough Punch.

    • Die Cut about 4 sprigs from Soft Succulent Cardstock using the Holly Berry Dies.

    • Color 3 Textural Elements with Light Soft Suede and Dark Cherry Cobbler Stampin’ Blends Markers.

    • Stamp sentiment on Basic White Cardstock with Evening Evergreen Ink and cut using the 2nd from largest circle from the Stylish Shapes Dies.

    • Adhere all the greenery pieces to card.

    • Adhere sentiment label with Dimensionals.

    • Add some Brushed Metallic Gold Dots.


Here’s a closeup, lots of gold!


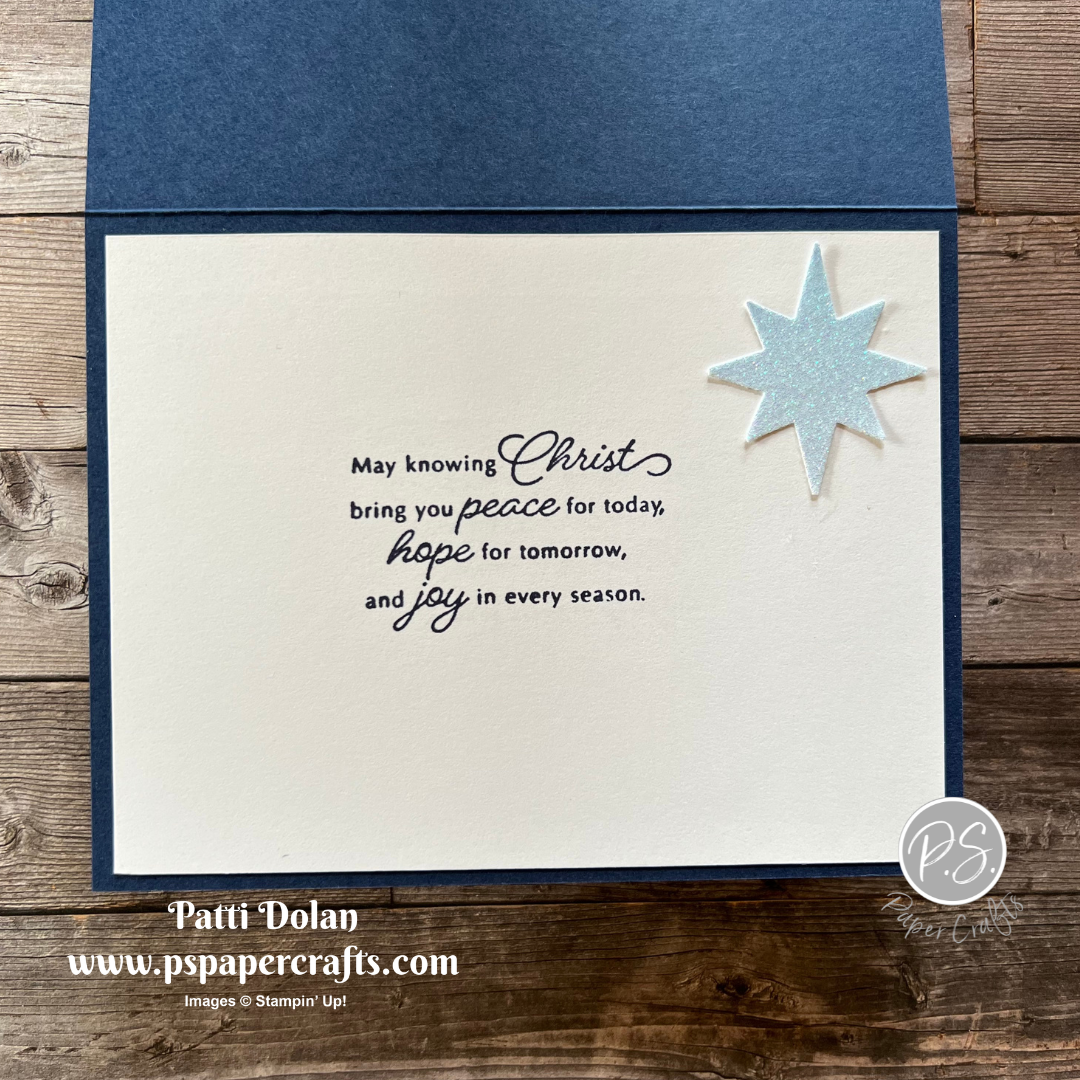
On the inside layer stamp sentiment (from the Brightest Glow Stamp Set) and the branches (from the Christmas Season Stamp Set) with Evening Evergreen Ink.


Supply List

You can click on the item to purchase it from my Online Store.

Masculine Birthday Card using Aspen Tree Dies

I love the beautiful leaves on this card. The were cut from our Brushed Metallic Cardstock using the Aspen Trees Dies. They cut and emboss in one shot.


Watch the video to see how to make this card and then click on the Project Sheet to get a pdf with pictures, measurements and instructions.


The background layer was splattered with some ink to add some interest to the card.


The Brushed Metallic Dot and Natural Ribbon add the finishing touches to this card.


The inside has one more leaf to tie it to the card front.


Supply List

You can click on the item to purchase it from my Online Store.

Beautiful Amazing Thanks Card

Here’s a quick card I made to demonstrate layering dies on my weekly Tips & Techniques email. This was easy to do and the “thanks” just jumps right off the card!

When you subscribe to my email list, you’ll get a weekly tip, technique or product review, just click the top banner of this blog to subscribe.


The Hues Of Happiness Designer Series Paper is so pretty, I love the patterns with the colorful flowers.


Tips & Instructions

  • Gorgeous Grape Card Base - 5 1/2 x 8 1/2, score at 4 1/4

  • Basic White Layer - 5 1/4 x 4, adhere to card base

  • Hues Of Happiness Designer Series Paper - 5 x 3 3/4, adhere to card

  • Gorgeous Grape Strip - 4 1/4 x 1 1/4, adhere to card

  • Cut “thanks” 3 times from Basic White Cardstock using the Amazing Thanks Dies. Adhere them together. I used Liquid Glue to help maneuver them into place. Adhere to card.

  • Add some Pastel Pearls.


I’m not sure if the picture does it justice here but the “thanks” is thick and makes a statement on this card.


Stamp the sentiment on the inside layer with Gorgeous Grape Ink. Add a 4 x 1 strip of the designer series paper.


Supply List

You can click on the item to purchase it from my Online Store.

October Card Class To Go!

Join me for my October Card Class To Go featuring the Abigail Rose Suite of Products!  The Designer Series Paper in this Suite is so pretty. 

Here’s a sneak peak of the projects you’ll make.


Email patti@pspapercrafts.com to sign up!!!
Deadline October 12, 2022


Here's what you get:

  • 8 card kits, including envelopes and die cuts

  • Product goody bag of over $25 (you'll use to make the cards)

  • PDF & videos with complete measurements & instructions

Class Fee Options:

  • October Card Class To Go - $40

  • Add on the Cottage Rose Stamp Set - $65.00

  • Add on the Cottage Rose Bundle (includes stamp set & dies) - $93
    (Note- I didn't use the dies for these cards)

Other Info:

  • Email me and I will send you a PayPal Invoice.

  • Payment due by October 12, 2022.

  • I will pick up the shipping and tax for any Add-Ons.

  • You will require stamps, ink and adhesive to complete the cards.

  • If there is a product availability issue, I may have to substitute products or there may be a delay in getting the kits to you.


Invite a friend and I will include a free gift with your kits.

Email patti@pspapercrafts.com to sign up!!!
Deadline October 12, 2022


Stampin' Up! announced free shipping on October 4, 2022 for orders of $75 USD or more. Get your shopping list ready!


Patti’s October Ordering Special is on.

Place a $50 product order from my Online Store and I will send you a package of Simply Elegant Trim as a thank you. The silver and gold trim will be great for Christmas projects.


Sketch Saturday - Nothing Better Than

Here’s a fun card I made using the Nothing Better Than Stamp Set and Love You More Than Dies for this week’s sketch challenge.


The sketch is from the weekly Atlantic Hearts Sketch Challenge. I love doing their challenges and seeing what everyone makes. You should play along, it’s fun!


Tips & Instructions

  • Early Espresso Card Base - 5 1/2 x 8 1/2, score at 4 1/4

  • Crushed Curry Layer - 5 x 3 3/4

  • Celebrate Everything Designer Series Paper - 4 7/8 x 3 5/8, adhere to Crushed Curry Layer and adhere to card base.

  • Early Espresso Strip - 5 x 3/4, adhere to card.

  • Celebrate Everything Designer Series Paper Strip - 4 3/8 x 1/2, punch one end using the Banners Pick A Punch. Adhere to card.

  • Cut tag from Basic White Cardstock using the Celebrations Tags Dies. I only cut one side of the tag die so it doesn’t fold.

  • Stamp the sentiments with Early Espresso Ink.

  • Stamp coffee cup with Crushed Curry Ink and cut using the coordinating die.

  • Lay cup on tag to determine placement for the steam and stamp steam with Early Espresso Ink.

  • Adhere cup to tag and then and adhere tag to card using Dimensionals.

  • Tie bow with ribbon and adhere to top of tag using a Glue Dot.

  • Add 3 Brushed Metallic Dots.


On the inside layer stamp sentiment with Early Espresso Ink and the cup with Crushed Curry Ink. Add some steam with Early Espresso Ink.


Supply List

You can click on the item to purchase it from my Online Store.

Elegant Birthday Card using Painted Posies 3D Embossing Folder

I made this card for a sweet friend’s birthday. It was so easy to make and the Painted Posies 3D Embossing Folder gives it such an elegant look.


Tips & Instructions

  • Blackberry Bliss Card Base - 5 1/2 x 8 1/2, score at 4 1/4

  • Basic White Layer - 5 1/4 x 4, emboss using the Painted Posies 3D Embossing Folder and adhere to card base.

  • Stamp sentiment on 3/4 strip of Basic White Cardstock with Blackberry Bliss Ink and punch each end using the Banners Pick A Punch.

  • Punch both ends of a 1” strip of Blackberry Bliss Cardstock so it is a little bit larger than the white strip and adhere. Adhere to card using Dimensionals.

  • Add some Brushed Brass Butterflies.


On the inside layer stamp the sentiment with Blackberry Bliss Ink. Stamp the floral image with Blackberry Bliss Ink but stamp off first to get a lighter shade.


Supply List

You can click on the item to purchase it from my Online Store.

Hope & Peace Christmas Card

I made this simple Christmas Card by cutting out the embossed layer and adhering it to a Night Of Navy Card Base. I love the contrast of the white and navy.


I used the Charming Landscapes 3D Embossing Folder to emboss the layer. There are two great folders in the pack; a mountain scene and a town scene.


Tips & Instructions

  • Night Of Navy Card Base - 5 1/2 x 8 1/2, score at 4 1/4

  • Basic White Cardstock - 5 1/2 x 4 , emboss using the town scene and then fussy cut. I cut off the candy canes. Adhere to card base.

  • Stamp the Hope & Peace sentiment on a 1/2 strip of Basic White with Night Of Navy Ink. I colored just the words Hope & Peace on the stamp using a Night Of Navy Stampin’ Write Marker. You can also use Post-It Note or Tape to cover the other words and use an ink pad instead.

  • Punch both ends of the sentiment strip using the Banners Pick A Punch and adhere with Dimensionals.

  • Punch some stars from the light end of the Tahitian Tide Glimmer Paper using the Starlit Punch and adhere to card. I used a cut up piece of Dimensional for the large star. Adhere the small stars with Liquid Glue. I used the putty end of the Take Your Pick Tool to help pick them up.


On the inside layer stamp sentiment with Night Of Navy Ink. Punch the largest star from Glimmer Paper using the Starlit Punch and adhere to top corner.


Supply List

You can click on the item to purchase it from my Online Store.

Hello, World!

Soft Seedlings - So Grateful Card

Autumn is my favorite time of year and of course, the beautiful leaves are a big part of it. I used the Soft Seedlings Stamp Set to make this card.


Watch the video to see how to create the fall colors on the leaf using ink, daubers and markers. It’s soft and so realistic.


The images and sentiments in this stamp set are so simple but so beautiful.


Click the Button below to get a Project Sheet with pictures, measurements and instructions that you can print or save so you can make this card yourself.


The inside is simple and I may add a sentiment once I figure out who I’m sending it to.


Supply List

You can click on the item to purchase it from my Online Store.

Cute All Bundled Up Christmas Card

This moose is so fun, isn’t it? He just makes me smile. It’s from the All Bundled Up Stamp Set. I colored it with Stampin’ Blends and then fussy cut it.


All the critters in this stamp set are so cute. Look at that raccoon! The sentiments go right along with these cool creatures!


Tips & Instructions

  • Night Of Navy Card Base - 5 1/2 x 8 1/2, score at 4 1/4

  • Storybook Gnomes Designer Series Paper - 5 1/4 x 4, adhere to card base.

  • Stamp moose on Basic White Cardstock using Black Memento In. Color using Stampin’ Blends. I used Crumb Cake, Pool Party and Soft Suede.

  • Fussy cut the snow hill from Basic White Cardstock that is 4” wide. Emboss using the Splatter Embossing Folder and adhere to the bottom of the card.

  • Fussy Cut moose and adhere to card using Dimensionals.

  • Stamp sentiment on 1/2” strip of Basic White using Night Of Navy Ink. Punch each end using the Banners Pick A Punch (or cut using scissors). Adhere to card using Dimensionals.

  • Add some Iridescent Pearls.


On the inside layer stamp sentiment with Night Of Navy Ink. Stamp bird and raccoon with Black Memento Ink and color using Stampin’ Blends. I used Pool Party for the bird and Crumb Cake & Parakeet Party for the raccoon.


Supply List

You can click on the item to purchase it from my Online Store.

Sketch Saturday - Happier Than Happy

Here’s the card I made for this week’s sketch challenge. I used the treetop as the circle in the sketch.


The sketch is from the weekly Atlantic Hearts Sketch Challenge. This was a fun one to do.


Tips & Instructions

  • Sahara Sand Card Base - 5 1/2 x 8 1/2, score at 4 1/4

  • Soft Suede Strip - 5 1/2 x 3/4, emboss using the Stripes 3D Embossing Folder.

  • Calypso Coral Strip - 5 1/2 x 1/2, emboss using the Stripes 3D Embossing Folder.

  • Adhere strips to card base.

  • Fussy cut the tree and owl from the Happy Forest Friends Designer Series Paper.

  • Basic White Layer - 4 x 2 3/4, stamp sentiment with Calypso Coral Ink and stamp ground image multiple times with Soft Suede Ink. I stamped direct and stamped a second time without re-inking.

  • Adhere the owl to the tree and the tree to the white layer.

  • Soft Suede Layer - 4 1/8 x 2 7/8, adhere behind stamped layer.and adhere to card using Foam Adhesive Sheet (cut to size) or Dimensionals.

  • Add some Amber Gems.


On the inside layer stamp tree stump with Soft Suede Ink. Stamp owl with Soft Suede Ink but stamp off first to get a lighter shade. Stamp butterfly with Calypso Coral Ink.


Supply List

You can click on the item to purchase it from my Online Store.

September Paper Pumpkin Alternatives

I made these cute cards to coordinate with the treat boxes from this month’s Paper Pumpkin Kit. They fit perfectly in our 3x3 envelopes and came out so cute!


Watch the video to see how to make the box and then use pieces and the stamp set from the kit to make the coordinating cards.


If you’re not familiar with Paper Pumpkin, let me tell you about it. It’s a subscription where you receive an exclusive kit by mail each month that includes designed projects, precut pieces, a stamp set, and ink. You can subscribe monthly or purchase pre-paid subscriptions. When you prepay you can get a discount and earn perks like Stampin’ Rewards. Choose from 1-, 3-, 6- and 12-month subscriptions.

Here’s a sample of what’s included in a kit.


Card 1 Instructions

  • Basic Black Card Base - 6 x 3, score at 3

  • Basic White Layer - 2 5/8 x 2 5/8

  • Cut plaid belly band to 2 1/2 x 2 1/2 (cut piece between the score lines, you’ll get 2 pieces from one belly band)

  • Pumpkin Pie Strip - 2 5/8 x 1/2

  • Adhere layers and strip to card base.

  • Stamp sentiment with Black Memento Ink on the circle label from the kit and adhere to the card with Dimensionals.

  • Add some stars.

  • Basic White Inside Layer - 2 3/4 x 2 3/4, stamp with ghost and sentiment.

  • Decorate envelope with ghost and spider.


Card 2 Instructions

  • Pumpkin Pie or Crushed Curry Card Base - 6 x 3, score at 3

  • Fresh Freesia Layer - 2 3/4 x 2 3/4

  • Basic White Layer - 2 1/2 x 2 1/2, splatter black ink using the Dark Black Stampin’ Blends Marker.

  • Stamp spider web and spider with Black Memento Ink.

  • Crushed Curry Strip - 2 3/4 x 1/2, punch banner at each end using the Banners Pick A Punch.

  • Adhere layers and banner strip to card base.

  • Basic White Label - 1 1/2 x 1, stamp sentiment with Black Memento Ink and adhere with Dimensionals.

  • Basic White Inside Layer - 2 3/4 x 2 3/4, stamp with spiders and sentiment.

  • Decorate envelope with spider web and spider.


Card 3 Instructions

  • Basic White Card Base - 6 x 3, score at 3

  • Basic Black Layer - 2 3/4 x 2 3/4

  • Cut Fresh Freesia belly band to 2 1/2 x 2 1/2 (cut piece between the score lines, you’ll get 2 pieces from one belly band). Save the 2 1/2 x 1/2 leftover strip. You can also use Fresh Freesia Cardstock.

  • Stamp bats on Fresh Freesia piece with Orchid Oasis Ink.

  • Pumpkin Pie Strip - 2 1/4 x 1, stamp bats with Black Memento Ink.

  • Adhere layers and strip to card base.

  • Stamp sentiment with Orchid Oasis Ink on the leftover Fresh Freesia Strip and adhere with Dimensionals.

  • Add a small star to the sentiment.

  • Basic White Inside Layer - 2 3/4 x 2 3/4, stamp with bats and sentiment.

  • Decorate envelope with bats.


Supply List

You can click on the item to purchase it from my Online Store.

Coming October 5 - My 12 Weeks Of Christmas, exclusive to my email subscribers. Don’t miss out, subscribe today and you will get 12 weeks of fun projects for Christmas.

Fond Of Autumn Card

My friend Hannah lent me the Fond Of Autumn Bundle and I was so happy to use it. I always want everything in the catalog but can’t buy it all so it’s good to have friends who craft.


I love the large floral image stamp in the stamp set. I didn’t realize the one of the dies cuts the image into separate pieces and the other die cuts the entire image as one piece. I cut with the separate pieces but it was easy to put it together when I glued it to the layer.


Tips & Instructions

  • Cherry Cobbler Card Base - 5 1/2 x 8 1/2, score at 4 1/4

  • Crumb Cake Layer - 5 1/4 x 4

  • Basic White Layer - 5 x 3 3/4, use a Light Crumb Cake Stampin’ Blends Marker to splatter ink on the layer.

  • Stamp sentiment with Cherry Cobbler Ink.

  • On scrap of Basic White stamp image with Black Memento Ink. Color with Stampin’ Blends Markers. I used Crumb Cake, Soft Suede, Old Olive, So Saffron, Cherry Cobbler and Calypso Coral.

  • Cut image with coordinating die. Use the one full die, I accidentally used the one that cuts it into multiple pieces and I had to piece the images together and adhere to white layer.

  • Adhere layers to card base.

  • Add some Amber Gems.


On the inside stamp the leaves, acorn and flower with Black Memento Ink and color with Stampin’ Blends.


Supply List

You can click on the item to purchase it from my Online Store.

Sketch Saturday - Friends Are Like Seashells

Here’s the card I made for this week’s sketch challenge. I almost forgot about these products. The embossing folder is so cool!


The sketch I used is from the Atlantic Hearts Sketch Challenge. I love doing their sketch challenges.


The images in the stamp set coordinate with the Seashells Embossing Folder and Dies. There are some great sentiments to use for special friendships.


Tips & Instructions

  • Thick Very Vanilla Card Base - 5 1/2 x 8 1/2, score at 4 1/4

  • Balmy Blue Layer - 5 1/4 x 4, emboss using the Seashells 3D Embossing Folder and adhere to card base.

  • Cut a square from a piece of Sahara Sand Cardstock using 2nd from largest square die from the Stylish Shapes Dies.

  • Cut square from a piece of Very Vanilla Cardstock using the 3rd from largest square die. Stamp sentiment with Crumb Cake Ink. Adhere to Sahara Sand Square and then attach to embossed layer using Dimensionals.

  • Using Crumb Cake Ink stamp starfish on scrap of So Saffron Cardstock and sand dollar on a scrap of Sahara Sand Ink. Stamp small shell with So Saffron Cardstock on a scrap of Very Vanilla Cardstock. Cut with coordinating Seaside Seashells Dies. Adhere to squares.


On the inside layer stamp sentiment and seashells with Crumb Cake Ink.


Supply List

You can click on the item to purchase it from my Online Store.

Autumn Hello Card using the Hello Harvest Bundle

I made this card for our monthly Simple Suite Stampers Tutorial Bundle. We featured the Rustic Harvest Suite.


I’ll show you how to emboss the background layer and cut this beautiful pumpkin from a Copper Foil Sheet. It really came out so pretty.


You can get this Tutorial Bundle for free when you purchase from my Online Store during the month of September. You can also purchase it directly from this site, just click on the Tutorial Button at the top.

The bundle includes pictures, measurements and instructions for 12 projects featuring the Rustic Harvest Suite.


I love all the embossing on this card. It really adds so much texture.


The leaf stamp in this set is my favorite. I stamped the leaves with Mossy Meadow Ink, stamping direct and then stamping a second time without reinking.


Supply List

You can click on the item to purchase it from my Online Store.

Sparkling Spruced Up Christmas Cards

These cards are so sparkly and pretty. The pictures don’t do them justice. I used the Spruced Up Bundle and the Glimmer Specialty Paper.


The dies in this bundle are so cool. They cut out the outline and the inside separately. I made 2 cards so I could use both pieces to create these glimmery ornaments.


This Glimmer Specialty Paper is just gorgeous. You get two 12x12 sheets of each color (Evening Evergreen, Very Vanilla and Gold).


The first card is pretty plain but the glimmer paper is enough to make it beautiful. I cut the ornaments out twice, once with the Evening Evergreen and the second time with the Very Vanilla.

Tips & Instructions:

  • Cherry Cobbler Card Base - 5 1/2 x 8 1/2, score at 4 1/4

  • Basic White Layer - 5 1/4 x 4

  • Cut the ornaments from the Evening Evergreen and Very Vanilla Glimmer Specialty Paper. We will use the green border and the vanilla inside.

  • Lay the ornaments out on the white layer to determine placement. Using a Evening Evergreen Marker draw lines for the strings for the ornaments. I used a Stampin’ Write Marker.

  • Adhere the borders and then the insides to the layer.

  • Stamp sentiment on 1 3/4 x 1 piece of Basic White with Cherry Cobbler Ink.

  • Adhere sentiment label to 2 x 1 1/4 piece of green glimmer paper and adhere to white layer.

  • Adhere layer to card base.

  • Add a Festive Pearl to the sentiment.


On the inside layer stamp sentiment with Cherry Cobbler Ink. Cut the present from the Evening Evergreen Glimmer Paper and adhere to layer.


I jazzed this card up a little bit by using the lights as the string for the ornaments and added some stars and pearls to them.

Tips & Instructions:

  • Evening Evergreen Card Base - 5 /2 x 8 1/2, score at 4 1/4

  • Sahara Sand Layer - 5 1/4 x 4

  • Cut string of lights from the Evening Evergreen Glimmer Specialty Paper.

  • Cut stars from the Very Vanilla Glimmer Specialty Paper.

  • Lay out your ornaments to determine placement.

  • Cut off a little bit of the string of lights and adhere both pieces to hang the two ornaments.

  • Adhere the vanilla outlines and the green insides of the ornaments.

  • Adhere the stars to the ornaments.

  • Add some Iridescent Pearls to the larger ornament.

  • Stamp sentiment with Evening Evergreen Ink to a 1/2 strip of Basic White Cardstock.

  • Adhere stamped sentiment to 9/16 strip of the green glimmer paper (that’s one tick after the 1/2 mark) Adhere to Sahara Sand Layer.

  • Adhere layer to card base.


On the inside layer stamp sentiment and tree with Evening Evergreen Ink. Stamp present with Sahara Sand Ink. Oops, I left off the sentiment….pick whatever one you want.


Supply List

You can click on the item to purchase it from my Online Store.

Sketch Saturday - Cottage Rose

I love a black and white card so when I saw this week’s challenge I decided to use the Perfectly Penciled Designer Series Paper.


Here’s the sketch from the Atlantic Hearts Sketch Challenge. I used the sketch but mine is completely different, lacking the bright, bold colors!


Tips & Instructions

  • Basic Black Card Base - 5 1/2 x 8 1/2, score at 4 1/4

  • Basic White Layer - 5 3/8 x 4 1/8

  • Cut 6 pieces of the Designer Series Paper at 2 x 1 3/4. I used 2 different patterns. Lay them on the white layer leaving a border around the outside and adhere them.

  • Basic Black - 2 5/8 x 2 5/8

  • Basic White - 2 1/2 x 2 1/2, stamp sentiment in top corner with Black Memento Ink. I used Post-It Tape to cover the Birthday, inked the Happy part, took off the Post-It Tape and stamped it. Clean the stamp and then repeat only cover the Happy part.

  • Stamp the large floral image with Black Memento Ink and cut with coordinating Die. Color the flower with Soft Pastels using Sponge Daubers. I used Poppy Parade for the flower and Mossy Meadow for the leaves and then added a little Night of Navy to the small flowers using a cotton swab.

  • Adhere the white square to the black square. Adhere flower to white square.

  • Adhere square to the card using Dimensionals.

  • Add some Iridescent Pearls.


Before I added the color, I snapped a picture to show how it looks with only black and white. Which do you like better?


On the inside stamp sentiment and one of the trio of flowers with Black Memento Ink. Color the flower with Soft Pastels if desired. Add a 3/4 x 4 strip of the Designer Series Paper to the bottom.


Supply List

You can click on the item to purchase it from my Online Store.

Beautiful Peekaboo Christmas Card

I’m so happy with how this card came out. It’s a Peekaboo Card and I used the Peace To You Stamp Set.


Watch the video to see how to cut the peekaboo circle and to emboss the full layer with the Wintry 3D Embossing Folder


Click the button below to get a project sheet with measurements and instructions.

The Peace To You Stamp Set has beautiful images and sentiments.


This beautiful church scene with the snow is so pretty peeking through the card front.


On the inside you’ll see the full scene.


Supply List

You can click on the item to purchase it from my Online Store.

Beautiful Silent Night Christmas Card

I made this beautiful Christmas Card using the Peace To You Stamp Set. The Starry Sky Ink was perfect for stamping this image.


I love the images and sentiments in this stamp set. I used the Stamparatus so I could stamp the image multiple times to get good coverage.


Tips & Instructions

  • Thick Basic White Card Base - 5 1/2 x 8 1/2, score at 4 1/4

  • Starry Sky Cardstock - cut using the Fabulous Frames Dies (for the frame)

  • Starry Sky Glimmer Paper - cut using the Fabulous Frams Dies (for the inside piece)

  • Stamp image on Basic White Cardstock with Starry Sky Ink.

  • Color image with Stampin’ Blends. I used Dark Daffodil Delight for the star and added some Wink Of Stella. For the skin I used Ivory. I used Dark Balmy Blue for Mary’s veil, Dark Mossy Meadow for Joseph’s head piece Light Crumb Cake for his clothes. The staff was colored with Dark Crumb Cake.

  • Fussy Cut the image.

  • Adhere Glimmer Paper to card base and then adhere stamped image to it. When you adhere the stamped image make sure it hangs a little below the Glimmer Paper so the bottom edge is covered by the frame to give it a clean look.

  • Adhere the frame around the Glimmer Paper.

  • Stamp sentiment with Starry Sky Ink on a 1/2” strip of Basic White and punch each end using the Banners Pick A Punch. Adhere with Dimensionals.


The Glimmer Paper really extends the starry sky look!


On the inside layer stamp the sentiment with Starry Sky Ink. Punch a star from Daffodil Delight Cardstock using the Starlit Punch and add some Wink Of Stella. Adhere it to the inside layer.


Supply List

You can click on the item to purchase it from my Online Store.

Christmas Stamp A Stack

Are you ready to start making your Christmas Cards?  This month I'm doing a Christmas Card Stamp A Stack.  The kits will include supplies to make 16 beautiful Christmas cards, 4 designs, 4 of each.   

I used the Lights Aglow Specialty Designers Series Paper which has gorgeous patterns with gold accents.  

Here’s a sneak peak of the cards you’ll make.


Email patti@pspapercrafts.com to sign up!!!
Deadline September 10, 2022


Here's what you get:

  • 16 card kits, including envelopes, sentiment labels and die cuts

  • Product goody bag of over $30 (you'll use to make the cards)

  • PDF & videos with complete measurements & instructions

Class Fee Options:

  • September Card Class To Go - $50

  • Add on the Brightest Glow Stamp Set (used for sentiments) - $75.00

  • Add on the Brightest Glow Bundle (Stamp Set & Dies) - $102.00

Other Info:

  • Email me and I will send you a PayPal Invoice.

  • Payment due by September 10, 2022.

  • I will pick up the shipping and tax for any Add-Ons.

  • You will require stamps, ink and adhesive to complete the cards.

  • If there is a product availability issue, I may have to substitute products or there may be a delay in getting the kits to you.


Invite a friend and I will include a free gift with your kits.


Email patti@pspapercrafts.com to sign up!!!
Deadline September 10, 2022

Sketch Saturday - Spruced Up

Here’s the card I made for this week’s sketch challenge using the Spruced Up Bundle and Sweetest Christmas Designer Series Paper.


The sketch is from the weekly Atlantic Hearts Sketch Challenge. I love doing their sketch challenges.


The Spruced Up Bundle has fun images and I love that the dies cut the outline of the image separately so you have a thin outline and then a full inside. I used the tree dies and cut the trees from the Sweetest Christmas Designer Series Paper.


Tips & Instructions

  • Real Red Card Base - 5 1/2 x 7 1/2, score at 3 1/4

  • Sweetest Christmas Designer Series Paper - 5 1/4 x 3, adhere to front flap.

  • Cut 2 trees from the Christmas Designer Series Paper.

  • Garden Green - 4 x 3

  • Basic White - 3 7/8 x 2 7/8, adhere to green layer.

  • Adhere the trees to the white layer. I used Dimensionals for the larger tree and Liquid Glue on the smaller tree.

  • Adhere layer with trees to card making sure to put adhesive only on the left side. You don’t want it to stick on the right side to the inside layer.

  • Stamp sentiment with Real Red Ink on a 1/2” strip of Basic White and banner each end. I used the Banner Pick A Punch.

  • Banner each end of a 5/8” strip of Garden Green Cardstock and adhere behind the sentiment. Add to card using Dimensionals.

  • Add some Rhinestones.


On the inside layer stamp tree with Garden Green Ink. Stamp sentiment with Real Red Ink.


Supply List

You can click on the item to purchase it from my Online Store.