Beautiful Fall Card using the Aspen Tree Dies

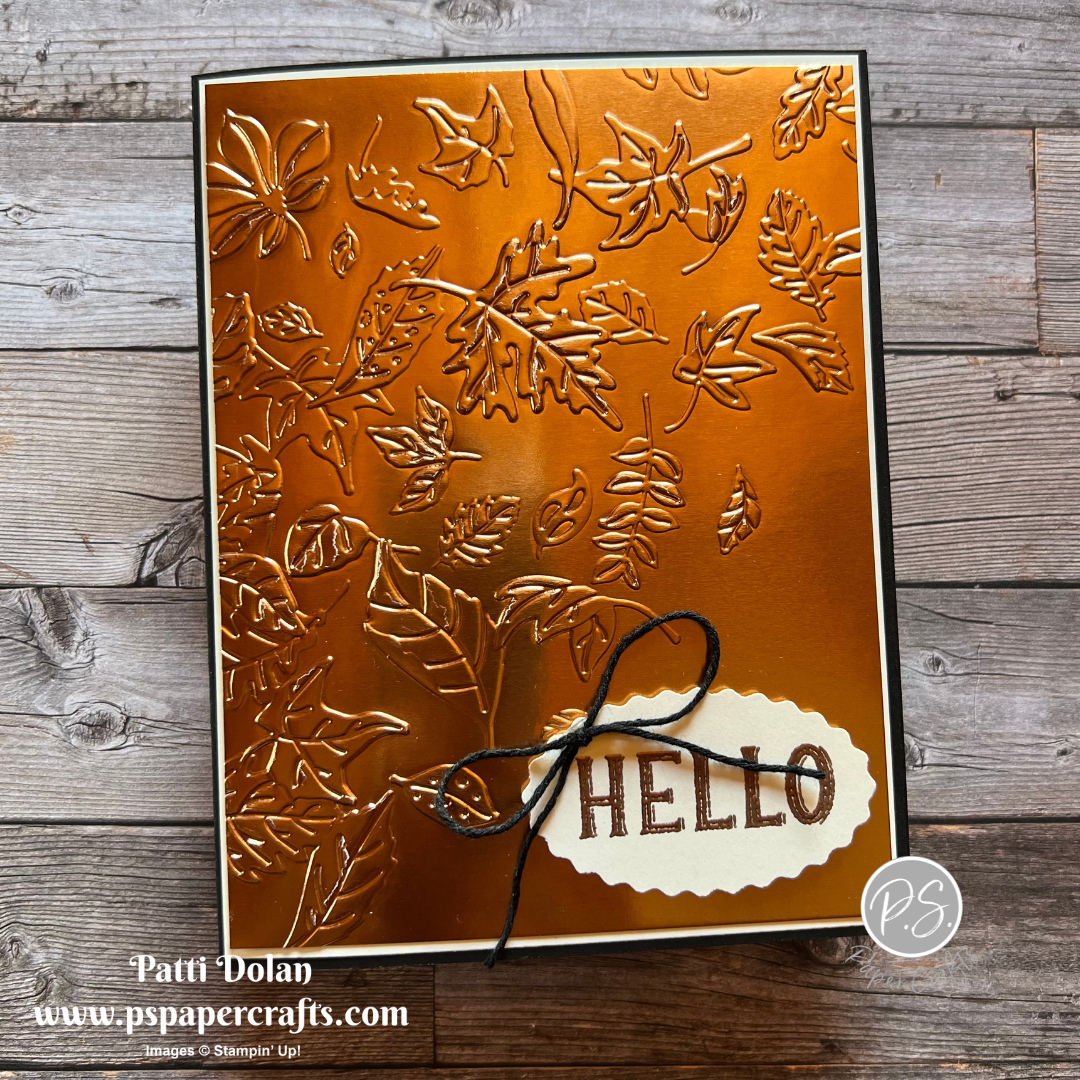
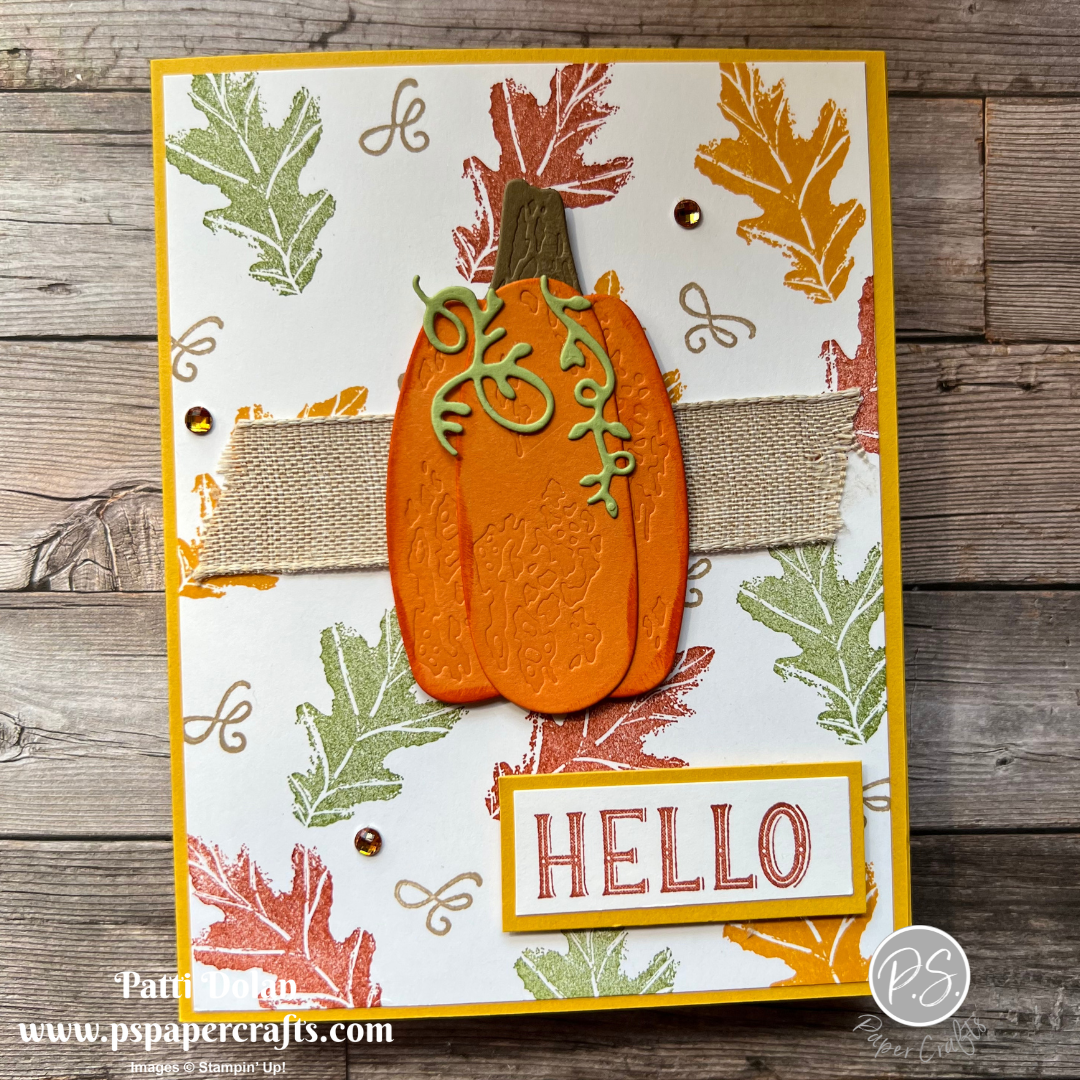
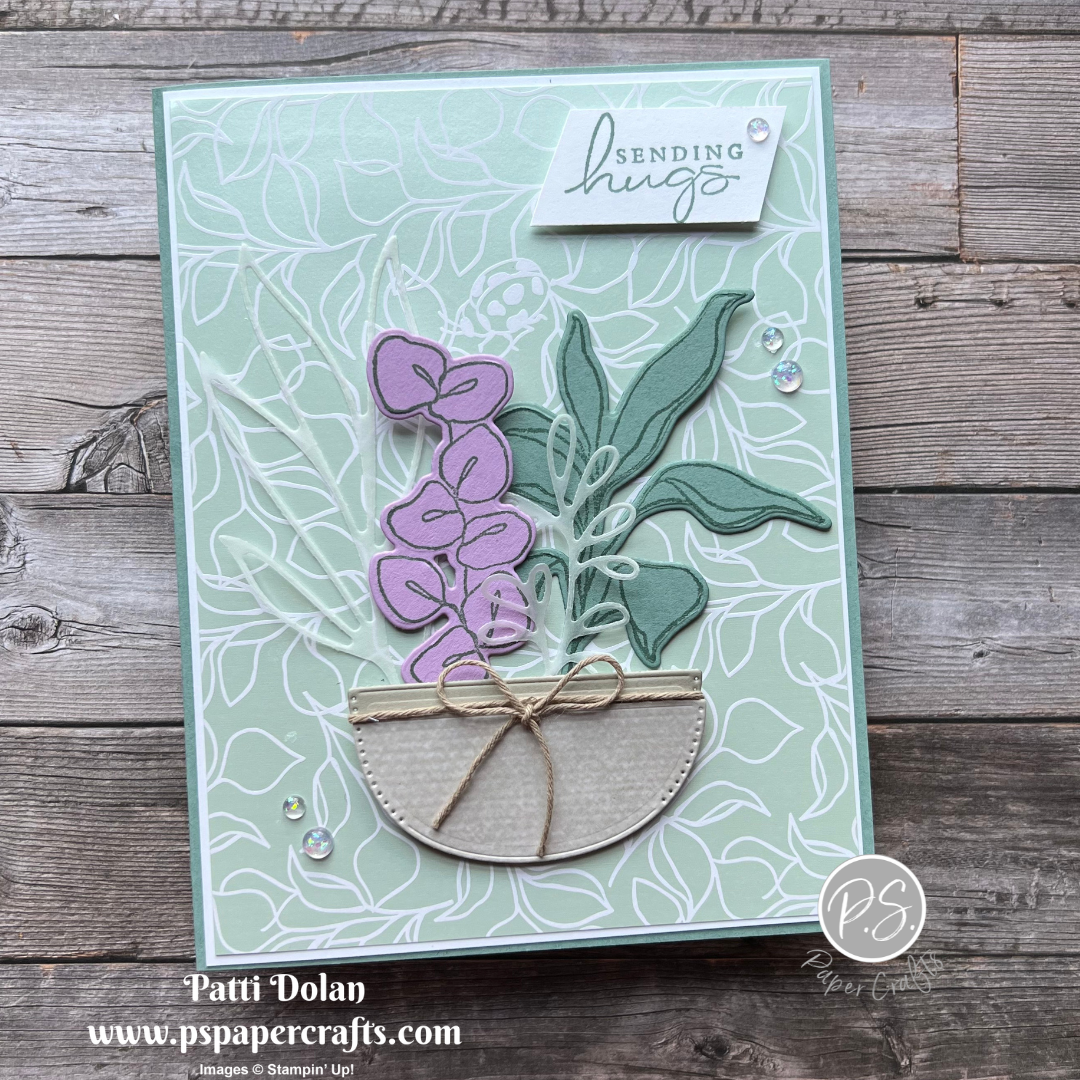
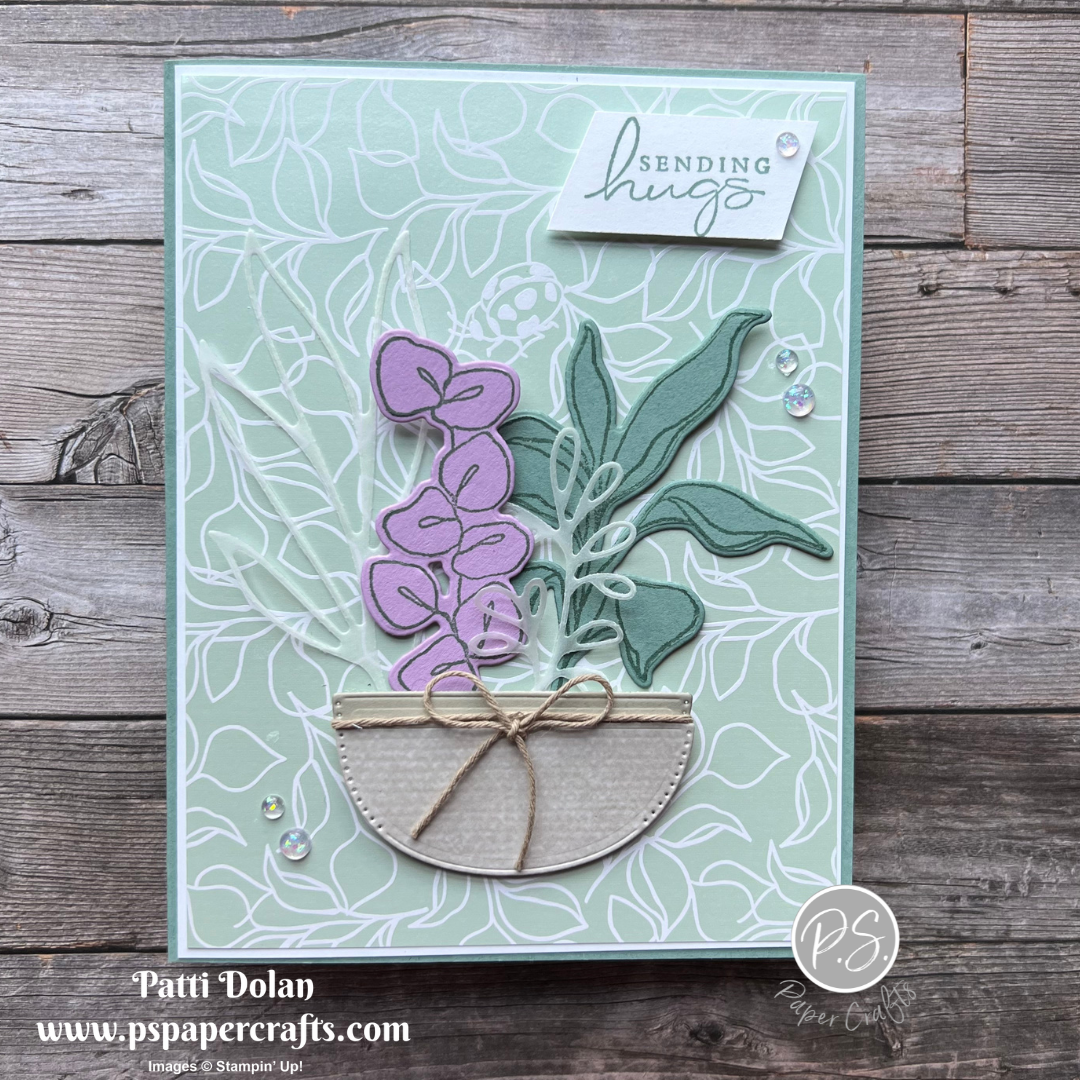
I wasn’t sure about the Aspen Tree Dies but decided to get them when they were added to the Sale-a-bration products and I’m so glad I got them. The background layer with the trees and the beautiful leaves were cut with these dies.


This large die creates a great background layer. I lightly sponged them using one of our Sponge Daubers. The dies for the leaves emboss and cut and they are beautiful!


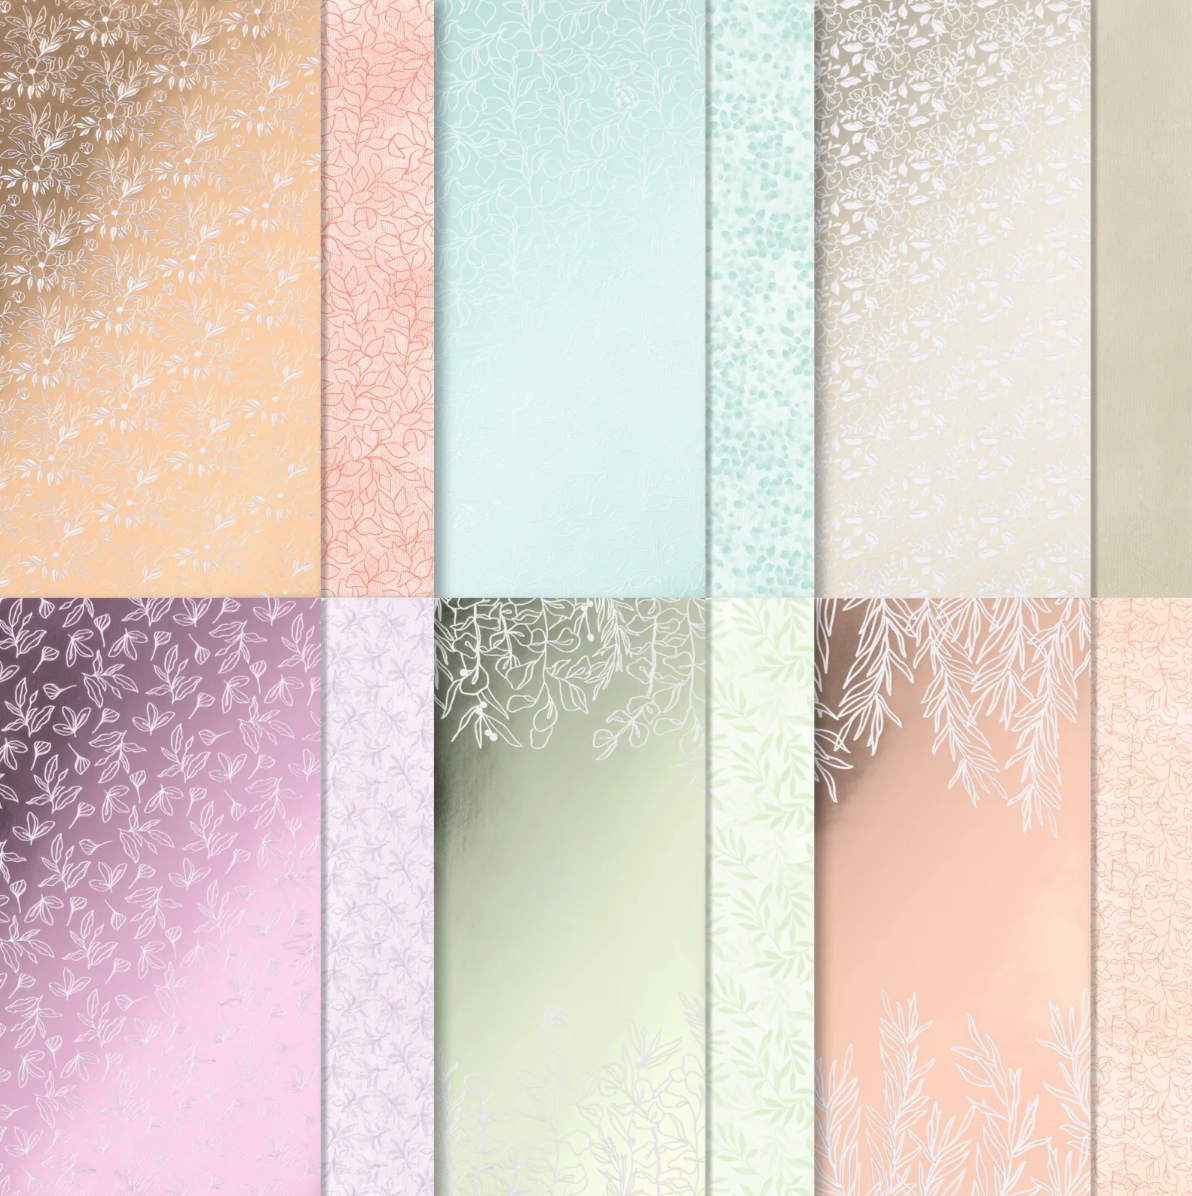
The leaves were cut from the Brushstroke Specialty Paper. It has gorgeous textured patterns and it works so well with the leaf dies.


Tips & Instructions

  • Crumb Cake Card Base - 4 1/4 x 11, score at 5 1/2 (top folding)

  • Very Vanilla Cardstock - 2 pieces cut at 5 1/4 x 4

  • Place the large tree die in the center of one of the Very Vanilla piece and cut with your Stampin’ Cut & Emboss Machine.

  • Lightly sponge some Crumb Cake Ink on the trees with a Sponge Dauber. Blot it on a piece of scrap before adding to the piece to keep it light.

  • Adhere the sponged layer to the other Very Vanilla Layer using Dimensionals. I used the regular and mini Dimensionals to get a good sturdy layer.

  • Adhere the layers to the card base.

  • Brushstroke Specialty Paper - cut one large and 2 small leaves from the Soft Succulent paper.

  • Stamp sentiment with Soft Succulent Ink and cut with the coordinating Rustic Pumpkin Dies.

  • Adhere the leaves and sentiment to layer.


I love how the sponging gives the card a soft look and the embossed leaves cut from the Brushstroke Specialty Paper are just gorgeous.


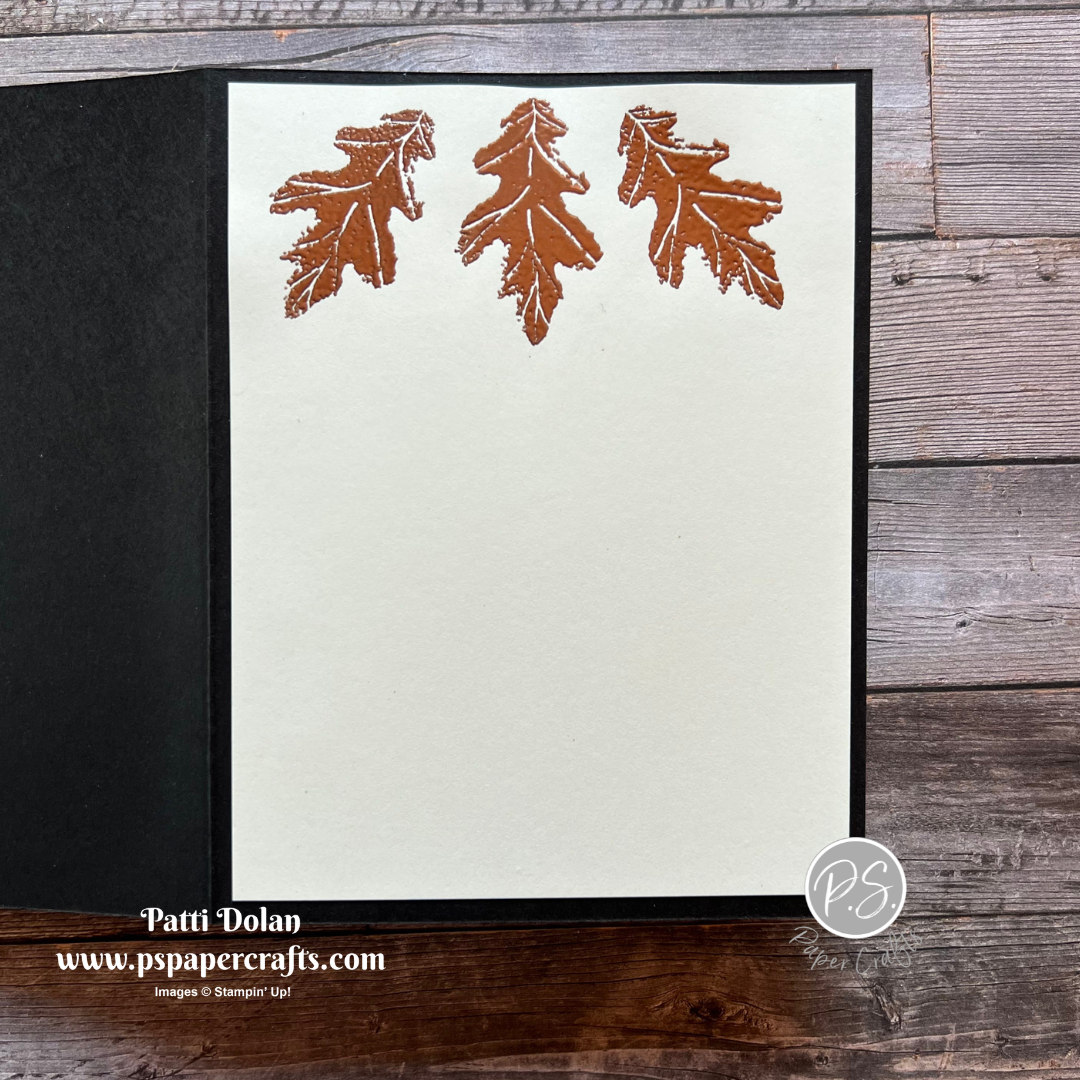
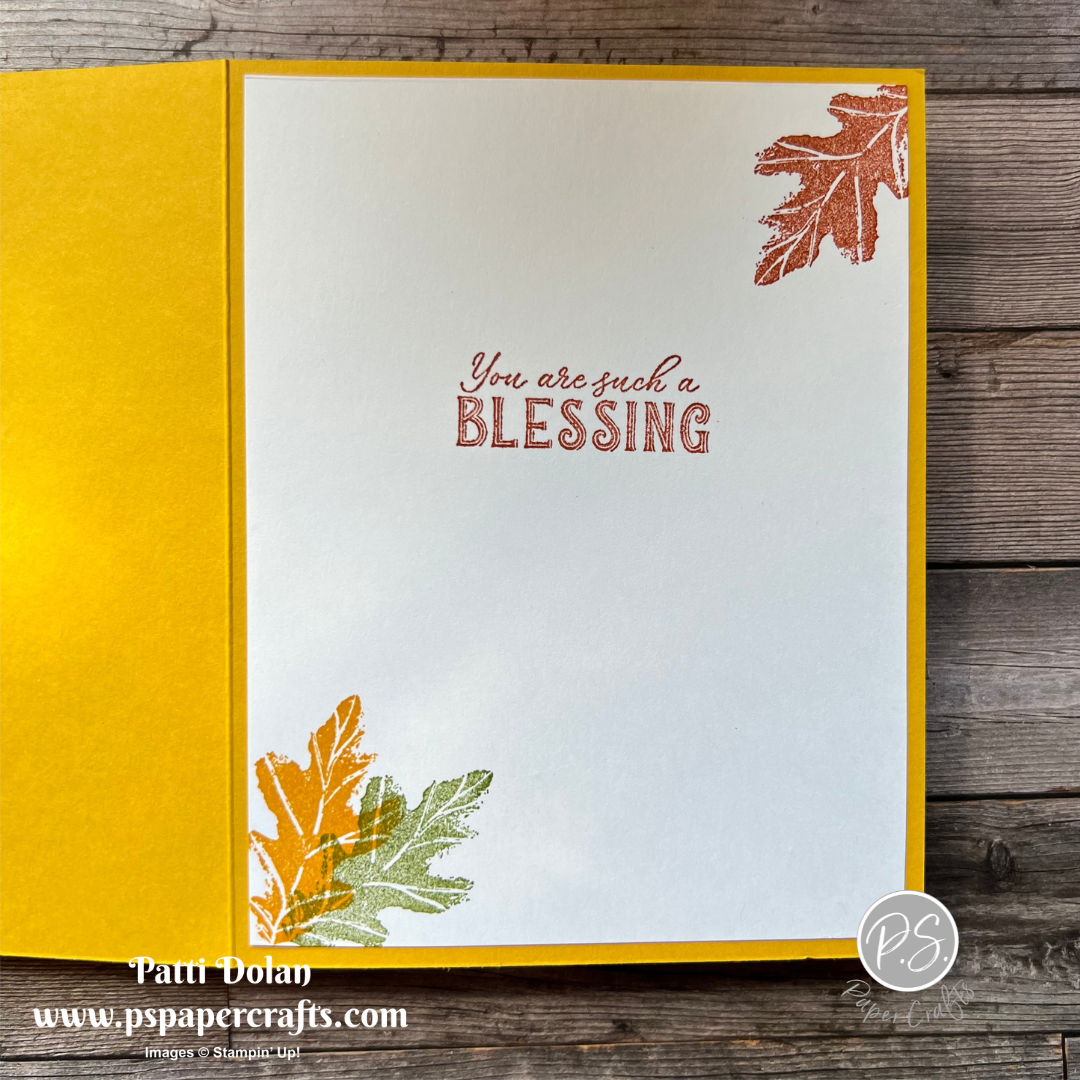
On the inside layer stamp the sentiment with Soft Succulent Ink. The sentiment is from the Very Best Occasions Stamp Set. Cut 2 more small leaves and adhere them to the top and bottom corners.


Supply List

You can click on the item to purchase it from my Online Store.

5 Quick & Easy Cards using Rings Of Love Designer Series Paper

I made these simple cards using the Rings Of Love Designer Series Paper. This is a free Sale-a-bration Product with a $50 product order but hurry, this ends August 31, 2022!


I’ll make each of the 5 cards in the video. There are 2 basic designs but each is a little different. Click the Project Sheets to download the full instructions.

This is one of my favorites in the bunch. I love the pretty medallions and the soft Mint Macaron color!


This is a simple Christmas Card that can be duplicated easily to make a bunch of cards.


The floral pattern on this card is so pretty and the pop of Poppy Parade makes me happy!


I love the birds on this card. They are so sweet with the yellow and blue.


This is my favorite card in the group. Those Textural Elements add just the right touch.


Supply List for Medallion Birthday Card

Supply List for Christmas Card

Supply List for Thinking Of You Card

Supply List for Bird Birthday Card

Supply List for Thank You Card

Sketch Saturday - Paradise Palms

I made this card for this week’s sketch challenge and also for a challenge to use 3 In Colors. I figured knock out two challenges with one card.


This is the sketch I followed from the weekly Atlantic Hearts Sketch Challenge. My card for last week’s challenge was selected as one of the top 3, so exciting!


Tips & Instructions

  • Sweet Sorbet Card Base - 5 1/2 x 8 1/2, score at 4 1/4

  • Basic White Layer - 5 x 3, blend Daffodil Delight, Mango Melody and Sweet Sorbet Ink using Blending Brushes.

  • Tahitian Tide Layer - 4 1/4 x 3, cut using the 2nd from largest circle from the Stylish Shapes Dies.

  • Color palm trees stamp with Parakeet Party and Soft Suede Stampin’ Write Markers and stamp on scrap of Basic White Cardstock. Cut using the coordinating Palm Dies.

  • Lay pieces on card base to determine placement and adhere.

  • Stamp sentiment on scrap of Basic White Cardstock with Sweet Sorbet Ink and cut with the banner die from the Stylish Shapes Dies and adhere with Dimensionals.

  • Add some Parakeet Party Matte Decorative Dots.


On the inside layer stamp sentiment with Sweet Sorbet Ink. Stamp palm tree trunk with Soft Suede Ink and palm tree top with Parakeet Party Ink.


Supply List

You can click on the item to purchase it from my Online Store.

Beautifully Embossed Copper Foil Hello Card

This beautiful Fall Card was so easy to make. I embossed a piece of Copper Foil with the Leaf Fall 3D Embossing Folder and love how it turned out.


You can try this technique with Gold Foil as well and heat emboss with Gold Embossing Powder.


Isn’t this Embossing Folder great? The leaves will be free falling across your project.


Tips & Instructions

  • Basic Black Card Base - 5 1/2 x 8 1/2, score at 4 1/4

  • Very Vanilla Layer - 5 3/8 x 4 1/8

  • Copper Foil Sheet - 5 1/4 x 4, emboss using the Leaf Fall 3D Embossing Folder.

  • Adhere layers to card base.

  • Stamp the sentiment on a scrap of Very Vanilla Cardstock and heat emboss with Copper Embossing Powder. Punch using the Double Oval Punch.

  • Adhere sentiment to card using Dimensionals.

  • Tie bow with Black Baker’s Twine and adhere using a Glue Dot.


On the inside layer stamp 3 leaves with Versamark Ink and heat emboss with Copper Embossing Powder. I did the middle leaf first, heat embossed it and then stamped the other two. This helped me to line them up.


Supply List

You can click on the item to purchase it from my Online Store.

Wonderful World Postage Stamp Flowers

I made this pretty Thank You Card by simply punching out the flowers from the Wonderful World Designer Series Paper using the Rectangular Postage Stamp Punch. So simple, but beautiful!


This is one of the sheets from the Wonderful World Designer Series Paper and I love all these flowers. There’s plenty of room to punch out each flower. You can easily make a bunch of these cards.


Did I mention that the Wonderful World Bundle is a free Sale-a-bration product when you spend $100 in product. The papers are beautiful and so are the images in the stamp set.


Tips & Instructions

  • Thick Basic White Card Base - 5 1/2 x 8 1/2, score at 4 1/4

  • Starry Sky Layer - 5 x 3 3/4

  • Punch 3 flowers using the Rectangular Postage Stamp Punch and adhere to Starry Sky layer.

  • Stamp sentiment with with Starry Sky Ink on 1/2” strip of Basic White Cardstock. Punch each end with the Banners Pick A Punch and adhere to layer.

  • Adhere layer to card using Adhesive Foam Sheet.

  • Add some Iridescent Pearls.


For the inside layer I colored the stamp using Stampin’ Write Markers and stamped it on a white layer. I used Orchid Oasis for the flower and Evening Evergreen for the stems and leaves.


Supply List

You can click on the item to purchase it from my Online Store.

Sketch Saturday - Snowman Magic

I’m so happy with with how my card turned out for this week’s sketch challenge. It’s so fun!


The sketch is from the weekly Atlantic Hearts Sketch Challenge and when I first saw it, I had to think about what sentiment I would want to use; that’s how I got started on the card.

The sentiment is from the Penguin Place Stamp Set and I thought I would use the penguin on the card but then decided to go with the cool snowman!


Tips & Instructions

  • Basic Black Card Base - 5 1/2 x 8 1/2, score at 4 1/4

  • Coastal Cabana Layer - 5 1/4 x 4, adhere to the card.

  • Basic White Layer - 5 1/8 x 3 7/8, emboss using the Wintry 3D Embossing Folder. I had to run it through my machine twice to get the full layer embossed. Adhere to card.

  • Snowflake Specialty Vellum - 4 x 3 1/4, cut off top corners to make tag. I did this on scrap paper first and then used it as a template. Punch slit at top of tag for ribbon. I used the Label Me Fancy Punch.

  • Stamp snowman with buttons, face, glasses and hat with Black Memento Ink on scrap of Basic White Cardstock. Color brim with Coastal Cabana Stampin’ Write Marker and nose with Pumpkin Pie Stampin’ Blends Marker.

  • Cut snowman and hat with coordinating dies. Cut arms from Early Espresso Cardstock. Assemble snowman.

  • Stamp sentiment with Versamark Ink on 1/2” strip of Basic Black Cardstock. I stamped each part of the sentiment separately leaving space between. Cover the part you don’t want with Post-It Tape, ink it with Versamark and then remove the tape and stamp. Heat emboss with White Embossing Powder. Cut each piece at an angle.

  • Cut 3 snowflakes from Coastal Cabana Cardstock.

  • Lay pieces on tag to determine placement and adhere each piece.

  • Feed piece of Glittered Organdy Ribbon through top of tag and tie a bow with a piece of twine.

  • Adhere to tag to the card putting your adhesive behind the pieces so it doesn’t show through.


There lots of texture on this card with the embossed layer and the snowy look of the vellum.


On the inside layer stamp the sentiment with Black Memento Ink. I stamped some trees with Shaded Spruce Ink and then added the snowman without the sunglasses this time.


Supply List

You can click on the item to purchase it from my Online Store.

Simple Suite Stampers Monthly Tutorial - Happy Forest Friends

Here’s the card I made for this month’s Simple Suite Stampers Tutorial Bundle. We featured the Happy Forest Friends Suite.


Watch the video to see how I made this card and hear more about the Tutorial Bundle.


The tutorial bundle is a pdf file containing 12 beautiful projects with pictures, measurements and instructions for each one. You can get it for free when you make a purchase of any amount from my Online Store or you can purchase it by clicking the Tutorials Button at the top of this Blog.


This suite of products has such cute images and beautiful Designer Series Paper.


I used the Layering Diorama Dies to create this fun layer so it looks like you’re looking into the forest to see the cute bear.


Supply List

You can click on the item to purchase it from my Online Store.

Fun Tie Dye Hippest Hippos Birthday Card

I made this card for my granddaughter’s 5th birthday. She’s a tie dye girl who loves purple and pink and I think she’ll like the cute hippo!


The Hippest Hippos Stamp set is one of the free products you can get during Sale-a-bration. Another Sale-a-bration product is the coordinating Hippo Dies. Each of these are free with a $50 purchase. Spend $100 and you can get both for free. It’s such a cute set.


Tips & Instructions

  • Gorgeous Grape Card Base - 5 1/2 x 8 1/2, score at 4 1/4

  • Basic White Layer - 5 1/4 x 4

  • Basic White Layer - 5 1/8 x 3 7/8, stamp using the Spiral Dye Stamp. I used the Stamparatus since the stamp is so large. Color stamp with Flirty Flamingo and Gorgeous Grape Stampin’ Write Markers. Spray stamp with Stampin’ Spritz a few times, then stamp on the white layer.


  • Adhere layers to card base.

  • Stamp hippo on scrap of Basic White with Black Memento Ink. Color with Stampin’ Blends. I used Light Petal Pink for the face and belly, Light Smoky Slate for the rest of the hippo and light Flirty Flamingo for the ballet slippers and nails. Cut using the coordinating Hippo Die.

  • Stamp sentiment on scrap of Basic White and cut using the Stylish Shapes Dies, keeping the stamped part to the right side. Cut off left edge.

  • Cut Vellum circle using the 2nd from largest stitched circle from the Stylish Shapes Dies.

  • Cut 3 flowers from Gorgeous Grape using the flower die from the Hippos Dies.

  • Adhere the sentiment behind the hippo and adhere the hippo and sentiment to vellum circle using Dimensionals.

  • Adhere 3 flowers to vellum circle.

  • Adhere the focal piece to card making sure you put your adhesive (I used Liquid Glue) behind the pieces so it doesn’t show through and adhere to card.

  • Add some Iridescent Pearls to flower centers and around the card.


On the inside layer stamp the sentiments with Gorgeous Grape Ink. I used the sentiments from A Grand Kid and Hippest Hippos Stamp Set. Stamp hippo with Black Memento Ink and color with Stampin’ Blends. I colored the hippo the same as I did on the front using Dark Flirty Flamingo on the flower and Light Parakeet Party on the leaf.


Supply List

You can click on the item to purchase it from my Online Store.

Sketch Saturday - Season's Greetings

I made this card for this week’s Sketch Challenge. I used lots of products but wanted to get it just right. You can make this substituting what you have on hand.


The sketch is from the weekly Atlantic Hearts Sketch Challenge. I love doing their challenges, it really stretches my creativity.


Tips & Instructions

  • Evening Evergreen Card Base - 5 1/2 x 8 1/2, score at 4 1/4

  • Boughs Of Holly Designer Series Paper - 5 1/4 x 4 (you can use two 5 1/4 x 1 strips if you want to save on paper) Adhere to card base.

  • Soft Succulent Cardstock - 5 1/4 x 2, adhere to center of card.

  • Basic White Cardstock - 5 1/4 x 1 3/4, emboss using the Pine Bough Embossing Folder from the Wintry 3D Embossing Folders. Adhere over the Soft Succulent Layer.

  • Punch a piece of Soft Succulent Cardstock using the Essential Tag Punch.

  • Stamp sentiment (from Penguin Place Stamp Set) with Evening Evergreen Ink on a 1 1/4 x 1 1/4 square of Basic White Cardstock. I chose this sentiment because it fit nicely on the tag. Adhere to tag and then adhere to card with Dimensionals.

  • Cut bow (from Country Wreaths Dies) from a scrap of Gold Foil Sheet and adhere to top of tag.

  • Cut 2 small branches from Evening Evergreen Cardstock and 1 small branch from Soft Succulent Cardstock using the Holly Berry Dies. Adhere to sentiment label.

  • Add some Brushed Metallic Adhesive Backed Dots.


On the inside layer stamp the sentiment and some holly leaves with Evening Evergreen Ink.


Supply List

You can click on the item to purchase it from my Online Store.

Pretty Thinking Of You using the Wonderful World Products

I love the beautiful floral patterns in the Wonderful World Designer Series Paper and this one really spoke to me. I wanted to make a card that highlighted this paper.


Watch the video to see how to create this fancy border with the different layers using the Basic Border Dies.


Click on the button below to get a Project Sheet with pictures, measurements and instructions to make this card.

The Wonderful World Bundle includes a beautiful stamp set and this gorgeous pack of Designer Series Paper and it’s FREE with a $100 product order during Sale-a-abration. Just head over to my online store, place a $100 order and add this on as your free product.


The colors on this paper are so pretty. I used Starry Sky for the card base and ribbon; a perfect match. The sentiments are from the Very Best Occasions Stamp Set.


The Basic Border Dies have a delicate stitched look.


When you open the card, you’ll have a continuation of the zig zag border.


Supply List

You can click on the item to purchase it from my Online Store.

Quick & Easy Card using Rings Of Love Designer Series Paper

Isn’t this card pretty? I love these cute birds on the Designer Series Paper. There wasn’t much more to do than add a label, some trim and a few gems to create a beautiful card.


The Rings Of Love Designer Series Paper has some great patterns for all seasons and it’s FREE during Sale-a-bration with a $50 order. You can head over to my Online Store, place a product order of $50 and add this as your free product.

The sentiment I used is from the Very Best Occasions Stamp Set.


Tips & Instructions

  • Night Of Navy Card Base - 5 1/2 x 8 1/2, score at 4 1/4

  • Rings Of Love Designer Series Paper - 4 x 5 1/4

  • Stamp sentiment on scrap of Basic White Cardstock with Night Of Navy Ink and cut using the Stylish Shapes Dies.

  • Cut the narrow, longer label from Night Of Navy Cardstock using the Stylish Shapes Dies and adhere behind the sentiment label.

  • Adhere Gold Simply Elegant Trim to card. I looped it around my fingers and then taped it to the card. Adhere the sentiment label over the trim using Dimensionals.

  • Add some Gold Brushed Metallic Adhesive Backed Dots.


On the inside layer stamp sentiment with Night Of Navy Ink. Stamp some leaves with Parakeet Party Ink, stamping off first to get a lighter shade. I used leaves from the Wonderful World Stamp Set but you can use whatever leaf stamp you have on hand.


Supply List

You can click on the item to purchase it from my Online Store.

Hello Harvest Card

I love the leaf stamp from the Hello Harvest Stamp Set. It stamps so beautifully. I used Pear Pizzazz, Crushed Curry and Cajun Craze to create a great Fall card.


Watch the video to see how to create your own background layer with the stamps and cut and assemble the pumpkin. The dies cut and emboss the pumpkin pieces, so cool.


Click the button to get a Project Sheet for this project with pictures, measurements and instructions.

The Hello Harvest Stamp Set an Dies can be bundled together to save 10%.


I used a piece of Natural Finish Ribbon to offset the pumpkin from the background layer. Some Amber Gems finish off the card nicely.


The sentiment on this inside is perfect to let someone know how you feel about them.


Supply List

You can click on the item to purchase it from my Online Store.

Rustic Harvest You Are Missed Card

I made this quick card for my Mom to let her know how much I miss her. I lived next door to her and just moved away and I do miss her.


I love using our Designer Series Paper to make a quick card. The pattern I chose practically makes the card for you. The colors in the Rustic Harvest Designer Series Papers are so beautiful and perfect for the Fall.


Tips & Instructions

  • Merry Merlot Card Base - 5 1/2 x 8 1/2, score at 4 1/4

  • Basic White Cardstock - cut using the largest Rectangle Stitched Dies and adhere to card base.

  • Rustic Harvest Designer Series Paper - cut using the second from largest Rectangle Stitched Dies and adhere to card.

  • 3/4” strip of Basic White - stamp sentiment with Crushed Curry Ink and punch both ends using the Banners Pick A Punch.

  • 1/2” strip of Merry Merlot - punch both ends using the Banners Pick A Punch and adhere behind the stamped label. Adhere to card using Dimensionals.

  • Add a Mossy Meadow Solid Faceted Gem.


On the inside layer stamp leaves across the top and bottom stamping direct and then a second time without re-inking.


Supply List

You can click on the item to purchase it from my Online Store.

Sketch Saturday - Hope & Peace

I made my first Christmas card of the season for today’s Sketch Challenge. I fussy cut the candy canes from the Sweetest Christmas Designer Series Paper.


The sketch I used is from the weekly Atlantic Hearts Sketch Challenge.


The Sweetest Christmas Designer Series Paper has great striped patterns.


I love the sentiments in the Hope & Peace Stamp Set.


Tips & Instructions

  • Garden Green Card Base - 5 1/2 x 8 1/2, score at 4 1/4

  • Sweetest Christmas Designer Series Paper - 5 1/2 x 4 1/4, adhere to card front.

  • Garden Green Cardstock - 5 1/2 x 3 1/2. Adhere a 5 1/2 x 1/4 strip of Basic White Cardstock behind the green layer leaving a very small border showing. Adhere layer to card base.

  • Fussy cut 2 candy canes from the Designer Series Paper making sure they are going in opposite directions. Criss cross them and adhere to card.

  • Stamp sentiment on scrap of Basic White Cardstock with Real Red Ink and punch using the Lasting Label Punch. Adhere to the card with Dimensionals.

  • Tie bow with Real Red Ribbon and adhere with a Glue Dot.

  • Add some Real Red Rhinestones below the sentiment.


This is such a festive card with all those stripes!


On the inside layer stamp the sentiment with Real Red Ink and add a 3/4 strip of Designer Series Paper to the bottom.


Supply List

You can click on the item to purchase it from my Online Store.

Pretty Wonderful World Birthday Card

I was so happy to see the Wonderful World Bundle is back in stock. Its one of the Sale-a-bration products you can earn for free and the paper is just beautiful.


This is what the bundle looks like. If you spend $100 in Stampin’ Up! Product, you can get it for free. Just click the Shop Here Button to get to my Online Store. Select $100 in product and then add this as your Free Sale-a-bration item.


Tips & Instructions

  • Mossy Meadow Card Base - 4 1/4 x 11, score at 5 1/2 (top folding)

  • Basic White Layer - 5 1/4 x 4, emboss using the Stitchery Greenery Die. Adhere to card base.

  • Mossy Meadow Cardstock

    • 4 3/8 x 2 3/8

    • 3 1/4 x 1 1/4

  • Wonderful World Designer Series Paper

    • Floral pattern - 4 1/4 x 2 1/4

    • Leaf pattern - 3 x 1

  • Adhere Designer Series Paper to Mossy Meadow layers and adhere the smaller piece behind the larger one.

  • Wrap White Baker’s Twine around twice and adhere to the back. Adhere layers to card.

  • Stamp sentiment on scrap of Basic White Cardstock and punch with Dual Oval Punch.

  • Punch scalloped layer from Mossy Meadow Cardstock and adhere behind the sentiment layer. Adhere to card with Dimensionals.

  • Tie bow with Baker’s Twine and adhere using a Glue Dot.

  • Add some Iridescent Pearls.


I love how pretty and feminine this turned out.


On the inside layer stamp sentiment with Mossy Meadow Ink. Color the flower stamp with Mossy Meadow and Flirty Flamingo Stampin’ Write Markers (Note: do not color your stamps with Stampin’ Blends). Breathe on the stamp and stamp on the inside layer.


Supply List

You can click on the item to purchase it from my Online Store.

Fun Whale Done Shaker Card

I made this fun Shaker Card for my grandson’s birthday. He loves animals, sea creatures, all things nature so I think he will like this card.


Watch the video to see how to make this card. I used the Effervescent Elements for the shaker pieces but you can use sequins or whatever you want.


Click the button below to get a project sheet with pictures, measurements and instructions to create this card.

Here’s a closeup. Those little Effervescent Elements and the Glimmer Paper add some fun to this card.


The sentiment on the inside is so cute. I added a sea turtle and some fish to finish it off.


Supply List

You can click on the item to purchase it from my Online Store.

Splendid Thoughts - Sending Hugs Card

I made this beautiful card using the Splendid Day Suite Collection. The products in this suite are so delicate and pretty.


Isn’t this paper gorgeous! One side of each sheet is foil with white printed accents.


I love greenery and these images and dies work together so nicely to create wonderful projects. The half circle can be used for a pot, like the one I made for the card. The sentiments have an elegant font.


Tips & Instructions

  • Soft Succulent Card Base - 5 1/2 x 8 1/2, score at 4 1/4

  • Basic White Layer - 5 3/8 x 4 1/8, adhere to card.

  • Splendid Day Designer Series Paper - 5 1/4 x 4, adhere to card.

  • Cut two half circles, one from the Designer Series Paper and one from Sahara Sand Cardstock. Adhere together offsetting so the Sahara Sand piece creates at top lip for the pot. Adhere Baker’s Twine around the top and add bow using a Glue Doe.

  • Stamp greenery image with Soft Succulent Ink on Fresh Freesia Cardstock and cut with coordinating die.

  • Stamp greenery image with Soft Succulent Ink on Soft Succulent Cardstock and cut with coordinating die.

  • Cut greenery from Vellum.

  • Arrange the greenery pieces and adhere. I determined where the pot would be and then ran some Seal+ on the card where the pot would cover it and adhered the greenery pieces to it.

  • Adhere pot over the greenery using Dimensionals.

  • Stamp sentiment on 3/4” strip of Basic White Cardstock with Soft Succulent Ink and cut each end at an angle. Adhere to card using Dimensionals.

  • Add some Fresh Freesia Opal Rounds.


Here’s a closeup of the card. I worked the greenery around the sweet ladybug on the paper. The vellum adds some elegance to the card along with the Opal Rounds.


On the inside stamp some greenery with Soft Succulent Ink.


Supply List

You can click on the item to purchase it from my Online Store.

August Card Class To Go

Join me for my August Card Class To Go featuring the Awash In Beauty Suite of Products!  These products are very feminine and I love the way these cards turned out. 

Here’s a sneak peak of the projects you’ll make.

Email patti@pspapercrafts.com to sign up.

Deadline August 10, 2022

Here's what you get:

  • 8 card kits, including envelopes, embossed layers and die cuts

  • Product goody bag of over $25 (you'll use to make the cards)

  • PDF & videos with complete measurements & instructions

Class Fee Options:

  • August Card Class To Go - $42

  • Add on the Very Best Occasions Stamp Set (used for sentiments) - $67.00
    (pick one $50 Sale-a-bration product)

  • Add on True Beauty Bundle (includes stamp set & dies) - $101.25
    (pick two $50 or one $100 Sale-a-bration product)

Other Info:

  • Email me and I will send you a PayPal Invoice.

  • Payment due by August 10, 2022.

  • I will pick up the shipping and tax for any Add-Ons.

  • You will require stamps, ink and adhesive to complete the cards.

  • If there is a product availability issue, I may have to substitute products or there may be a delay in getting the kits to you.


Invite a friend and I will include a free gift with your kits.

Email patti@pspapercrafts.com to sign up.

Deadline August 10, 2022

The Best Remedy Kit

Today I used one of our new kits, The Best Remedy Kit to create these adorable cards that can be sent to lift someone’s spirits. I’m in the middle of a move and I don’t have access to my craft supplies so a kit was perfect to use.


Watch the video to see all that you get in this kit and how simple these cards are to make. You get all you need in the kit to make 9 cards with coordinating envelopes.


The first card has this cute little bird with a fun sentiment. The dark blue layer is embossed. Don’t you just love those slippers!


I love a striped background and the pink and yellow layers break it up nicely. The adorable mouse is eating ice cream. Ice cream is the best remedy, don’t you think?


Lastly is the cutest one. Look at the sweet skunk layered on the gingham card. You get adhesive backed sequins and flowers to add some bling.


You can purchase this kit or select one of our other kits right here on my Online Store by clicking the button below.

Here’s what you get in the kit. It even has a clear block and Starry Sky Ink Spot. The cute little critters punch out and look at those envelopes.


This stamp set is definitely a keeper. I love the sentiments.


As promised in the video, below are pictures of my craft room before the move. I hope the new people make good use of it. The area between the shelving in the first picture is a murphy bed and really worked out so well.


Here’s what it looks like now, empty. My daughter, who works from home has claimed my craft room for her office until the move.


Supply List

You can click on the item to purchase it from my Online Store.

Lovely In Linen Birthday Card - July Simple Suite Stampers Tutorial

I made this pretty Birthday Card for this month’s Simple Suite Stampers Tutorial which features the Lovely In Linen Suite.


The floral patterns in the Designer Series Paper are so bright and fun. I used all of the products in the suite; the stamps and punch for the label and the Quatrefoil Tile Embossing Folder to emboss the green strip.


Each month I collaborate with other Stampin’ Up! Demonstrators to create a Tutorial Bundle with 12 amazing projects. We call ourselves the Simple Suite Stampers.

The Tutorial Bundle includes pictures, measurements and instructions and you can get it for free with a purchase from my online store you you can purchase it right here by clicking the button below.


Tips & Instructions

  • Thick Basic White Card Base - 5 1/2 x 8 1/2, score at 4 1/4

  • Lovely In Linen Designer Series Paper (floral pattern) - 5 1/4 x 2 1/4, adhere to top of card front leaving white border.

  • Lovely In Linen Designer Series Paper (green pattern) - 5 1/4 x 1 3/4, adhere to bottom of card front leaving white border.

  • Evening Evergreen Strip - 5 1/4 x 3/4, emboss using the Quatrefoil Tile Embossing Folder and adhere over seam.

  • Using the Lasting Label Punch, punch labels from Basic White and Evening Evergreen Cardstock.

  • Stamp sentiment on the white label with Evening Evergreen Ink and stamp floral images on each corner with Sweet Sorbet Ink.

  • Cut the green label in half lengthwise and adhere each piece behind the white label, spreading them apart to create a border around the white label.

  • Adhere label to card using Dimensionals.

  • Add 2 small Iridescent Pearls to flower centers.

  • Tie bow with Whisper White Crinkled Seam Binding Ribbon and adhere to card using Glue Dot.


Supply List

You can click on the item to purchase it from my Online Store.