Bridge Fun Fold Cards

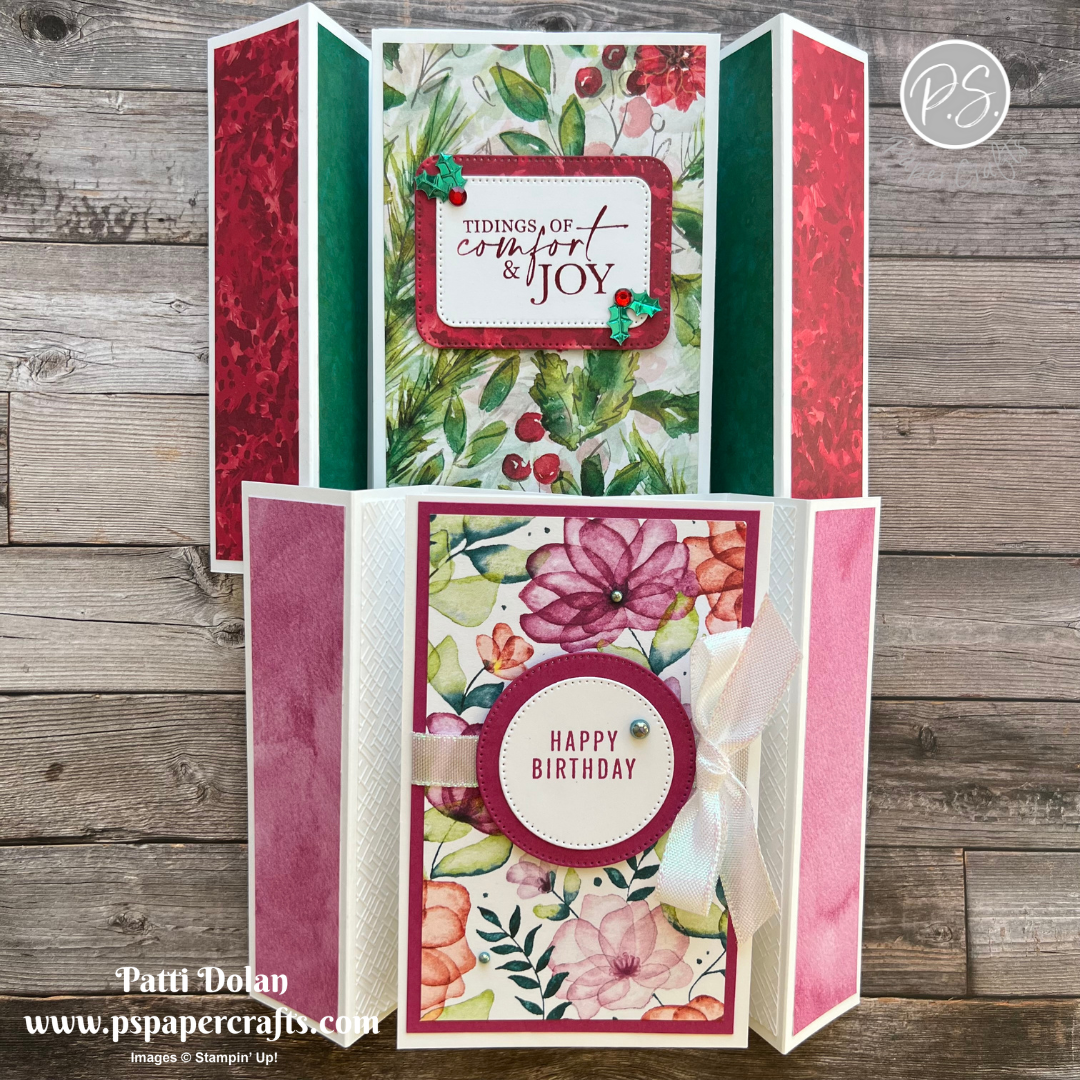
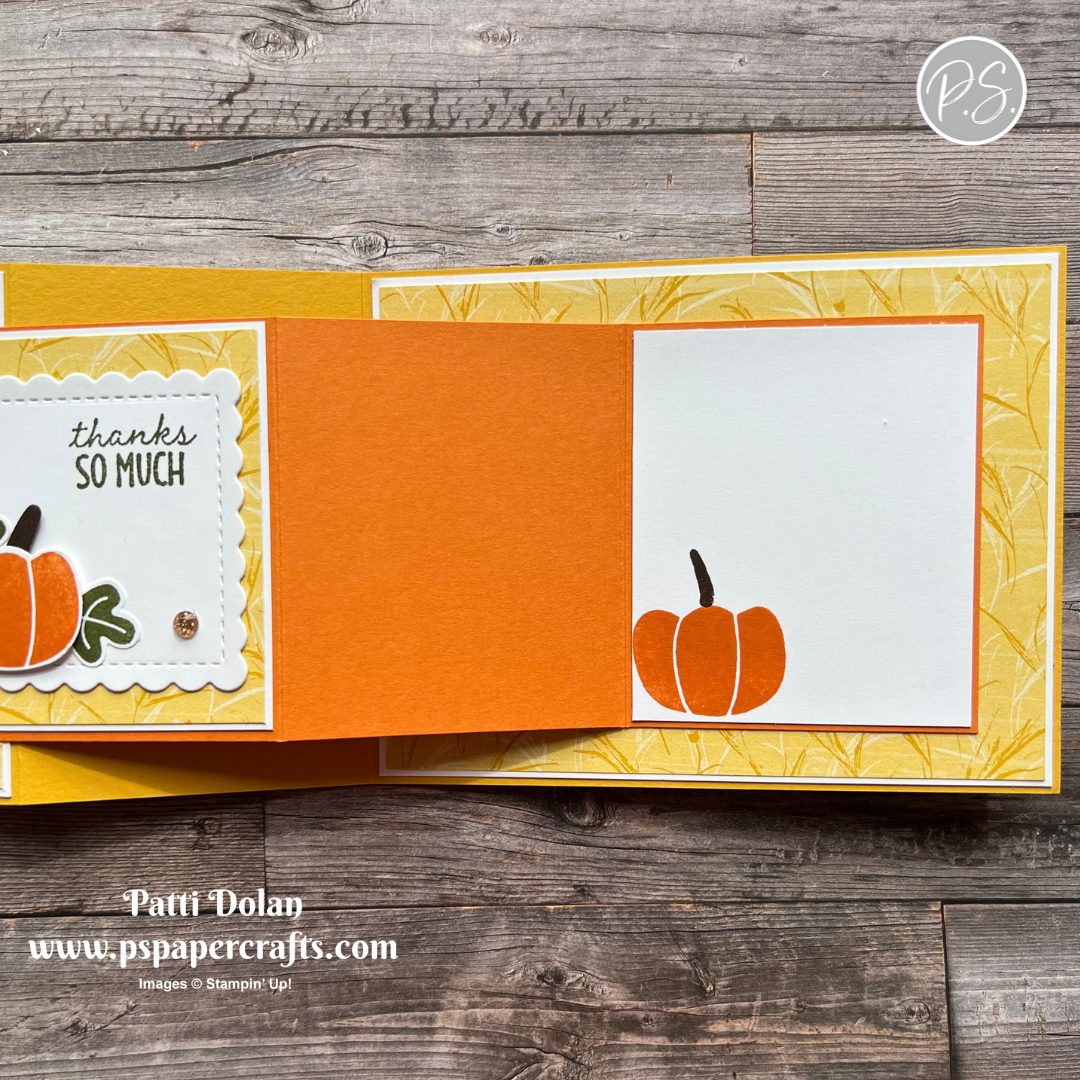
These Bridge Fold Cards are so fun and easy to make. They are a great way to use scraps of patterned paper. The Nativity scene can be used as a decoration and the Birthday card is perfect to sit on someone’s shelf to brighten their day.


Watch the video to see how to make this fun fold and then click the Project Sheet Button to get a printable pdf with measurements, pictures and instructions.


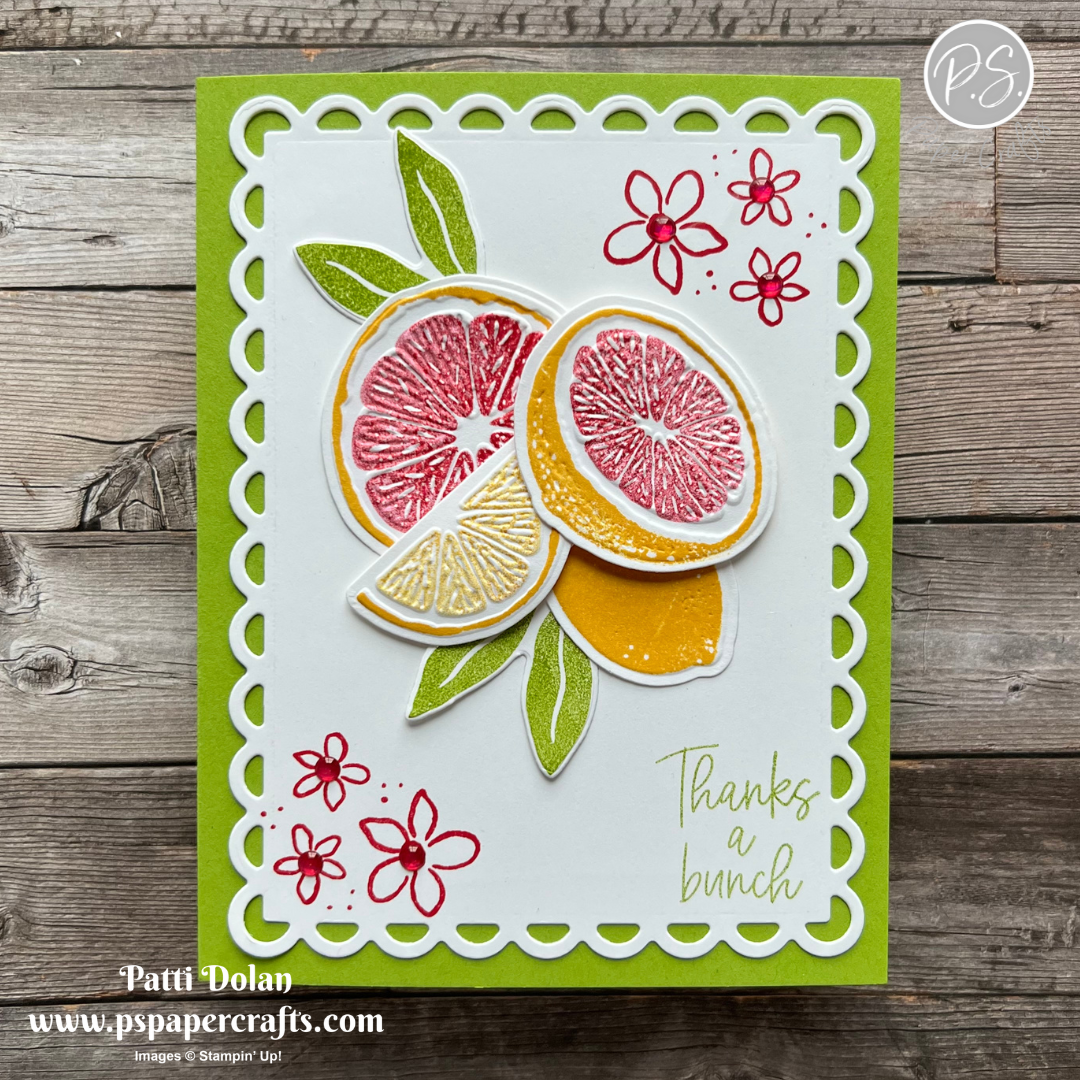
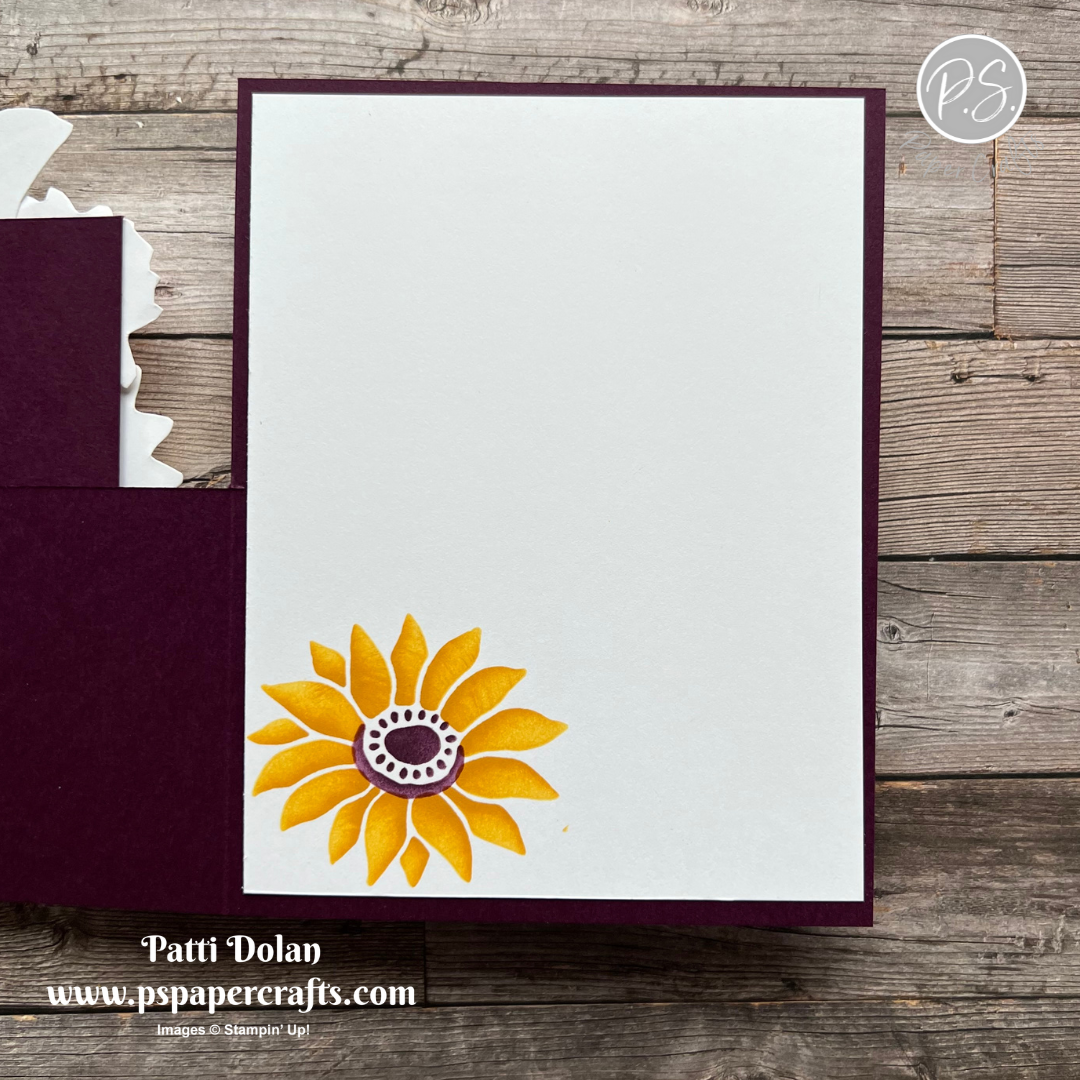
This card was made using the Garden Walk Designer Series Paper and Modern Garden Stamp Set. I added some greenery that I punched using the Bough Punch.


I love how this turned out. The O Holy Night Designer Series Paper is so pretty and I love the Night Divine Dies with the Nativity scene and animals.


Supply List

You can click on the item to purchase it from my Online Store.

With Gratitude using Earthen Textures Products

This pretty Gratitude Card is perfect for this time of year as we start thinking about Thanksgiving and who we’re grateful for. I used The Earthen Textures Bundle and Earthen Elegance Designer Series Paper to make the card.


The colors I used are from my Inspiration Calendar - Soft Sea Foam, Moody Mauve and Crumb Cake.


Tips & Instructions

  • Crumb Cake Card Base - 5 1/2 x 8 1/2, score at 4 1/4

  • Basic White Layer - 5 1/8 x 3 7/8

  • Earthen Elegance Designer Series Paper Layer - 5 x 3 3/4, adhere to white layer and adhere to card base.

  • Cut the second from largest scalloped rectangle from Moody Mauve using the Scalloped Contours Dies.

  • Basic White layer 3 7/8 x 2 5/8, adhere to the scalloped rectangle and adhere to the card.

  • Stamp vase with Crumb Cake Ink on Crumb Cake and cut with coordinating die.

  • Cut 2 Soft Sea Foam greenery pieces.

  • Stamp the wheat branches with Crumb Cake on Basic White and cut with coordinating die.

  • Adhere the greenery pieces behind the vase and adhere vase to the card.

  • Stamp sentiment with Moody Mauve on 1/4 strip of Basic White and snip the ends at an angle.

  • Tie a bow with Moody Mauve Jute and adhere with a Mini Glue Dot.

  • Add some Crumb Cake Speckled Dots.


On the inside layer (5 1/4 x 4) stamp sentiment with Moody Mauve Ink. Stamp pot with Crumb Cake. Stamp the greenery pieces with Soft Sea Foam Ink. (Tip - cover the pot with a Post-It Note to protect the vase from the Soft Sea Foam Ink.)


Supply List

You can click on the item to purchase it from my Online Store.

Sketch Challenge - Night Divine

Boy this week’s Splitcoaststampers Sketch Challenge was a little different. The sketch is a shaped card that we fussy cut! I love the Oh Holy Night Designer Paper and thought it would work well for this design.


Here’s the sketch I used. You have to be sure that you keep the top edge folded so it stays as a card base that opens. You can click on the sketch to see the other projects posted for this sketch.


Tips & instructions

  • Fold an 8 1/2 x 11 piece of scrap paper in half and then in half again.

  • Cut a half heart, making sure the top keeps the fold. Make sure it will fit into your envelope. I made mine to fit in an A2 size envelope and had to cut it down a few times to get that size.

  • Open the heart to see your template. It should look like this with the top part folded. 


  • Trace the template onto a piece of O Holy Night Designer Series Paper and cut along the trace lines..

  • Night of Navy Card Base - 5 1/2 x 11, score at 5 1/2. Trace the heart template on the card base and cut along the trace lines. Make sure the top keeps some folded area.

  • Adhere the Designer Series Paper heart to the front of the card base making sure it lines up before you adhere it. You may have to trim it a little bit.

  • Cut Nativity scene from Basic Black using the Night Divine Dies and adhere to the card front with Dimensionals.

  • Stamp sentiment with Night Of Navy Ink on scrap of Basic White and fussy cut around it. You can leave it a a strip if you want. Adhere to card front with Dimensionals.

  • Add a gold star to the card front.


Cut the heart template down a little to get a smaller heart, trace it on a piece of Basic White and stamp the sentiment with Night Of Navy Ink. Adhere to the card inside.


Supply List

You can click on the item to purchase it from my Online Store.

Fun Halloween Card using Pick Of The Patch

This card is so fun! I started out with the Christmas Classic Dies and was planning on making a Christmas Card. Then I thought, let me cut out the greenery with black cardstock and make a Halloween Card!


Tips & Instructions

  • Basic Black Card Base - 5 1/2 x 8 1/2, score at 4 1/4

  • Basic White Layer - 5 1/4 x 4, adhere to card base.

  • Cut the greenery piece from Basic Black Cardstock using the Christmas Classics Dies.
    Tip - Cut upside down so the blade is facing up. This is helpful with intricate dies. I use one plate for cutting and one as a top place so I just flip the sandwich over then I cut intricate dies.

  • Cut the square that fits inside the floral piece from a piece of Basic White using the dies and adhere to the greenery piece.

  • Stamp the sentiment with Black Memento Ink at the very top right corner. Try to go as high as you can because it’s a tight fit with the pumpkin.

  • Stamp the pumpkin on a scrap of Basic White with Pumpkin Pie Ink and punch using the coordinating punch.

  • Stamp some leaves with Granny Apple Green Ink and punch with the coordinating punch.

  • Punch a stem from Basic Black Cardstock and adhere to the pumpkin.

  • Adhere the pumpkin to the white layer with Dimensionals and then adhere the leaves behind it.

  • Stamp the bird with Black Memento Ink on a scrap of Basic White and fussy cut. Adhere to the layer with Dimensionals.

  • Adhere layer to card base.

  • Tie bow with a piece of Black & White Gingham Ribbon and adhere with a Glue Dot.

  • Add some Black Sparkle Gems.


The Black & White Gingham Ribbon really pulls the card together.


On the inside layer (5 1/4 x 4) stamp the sentiment with Black Memento Ink and stamp the pumpkin with Pumpkin Pie Ink. Add a stem with Black Memento Ink and some vines and leaves with Granny Apple Green Ink.

Tip: Just ink the top part of the stem to get a shorter stem if you want.


Supply List

You can click on the item to purchase it from my Online Store.

Sketch Saturday - Seasonal Branches

This is the card I made for this week’s Atlantic Hearts Sketch Challenge. I love a black and white card with just a touch of color.


Here’s this week’s sketch that I used. It’s simple and a great way to use up some scraps.


Tips & Instructions

  • Basic Black Card Base - 5 1/2 x 8 1/2, score at 4 1/4

  • Basic White Layer - 5 1/4 x 4, splatter ink around the card using a Basic Black Stampin’ Write Marker. Flick marker end against the cap to splatter the ink.

  • Zoo Crew Designer Series Paper - 4 strips cut at 4 1/2 x 3/4, punch both ends of each strip with the Happy Labels Pick A Punch. Adhere to the white layer.

  • Stamp sentiment with Black Memento Ink on a 1/2 strip of Basic White. Punch one end with the Banners Pick A Punch or fussy cut with paper snips to create a banner.

  • Banner one end of a 3/8 strip of Basic Black. Adhere to to the white strip and cut to size. Adhere to card with Dimensionals.

  • Wrap piece of Basic Black Baker’s Twine around the white layer as shown in the picture. Adhere to the back of the layer and adhere layer to card base.

  • Stamp bird with Black Memento Ink and color with Light Calypso Coral and Light Smoky Slate Stampin’ Blends. Cut with coordinating die. Adhere to card with Dimensionals where the Bakers Twine criss crosses.


On the inside layer (5 1/4 x 4)stamp sentiment, branch and bird with Black Memento Ink. Stamp the ends of the branch image a couple of times. Color the bird with Light Calypso Coral and Light Smoky Slate Stampin’ Blends.


Supply List

You can click on the item to purchase it from my Online Store.

Flying Finch Fun Fold Cards

I found this Flying Finch Fun Fold design from Susan Campfield. They are so fun to make and you can change the patterned paper and sentiment for any occasion.


Watch the video to see step-by-step instructions to make this fun fold card and then click the button below to get a printable pdf with the measurements and instructions.


This card was made using the beautiful Delightful Floral Designer Series Paper and Translucent Floral Stamp Set. I love this paper!!!


The Christmas Card was made using the Joy Of Christmas Designer Series Paper and Christmas Classics Stamp Set.


Supply List

You can click on the item to purchase it from my Online Store.

Trucking Along - Special Delivery

I made this fun card using 3 different stamp sets and they work so well together. The Trucking Along Stamp Set didn’t have pumpkins so I stamped the smallest from the Pick Of The Patch Stamp Set. The trees are from the Forever Forest Stamp Set.


The colors I used are from the Color Combo from my Inspiration Calendar - Pumpkin Pie, Mossy Meadow and Pecan Pie. Don’t they just say Autumn!

You can get my Inspiration Calendar each month when you subscribe to my Email List.


The truck in this stamp set reminds me of the truck we saw at the farm last year when we went pumpkin picking.


Tips & Instructions

  • Pecan Pie Card Base - 5 1/2 x 8 1/2, score at 4 1/4

  • Basic White Layer - 5 1/4 x 4

  • Stamp trees from the Forever Forest Stamp Set with Mossy Meadow Ink. Lift and stamp a second time without re-inking.

  • Stamp the grass along the bottom with Mossy Meadow, lifing and stamping a second time without re-inking as you go across, alternating the darker and lighter shades at the top and bottom. The grass is from the Trucking Along Stamp Set.

  • Stamp some clouds with Azure Afternoon Ink across the top.

  • Stamp the truck with Black Memento Ink and color it with a Light Pecan Pie Stampin’ Blends Marker. Color the tire with a Black Stampin’ Write Marker or Stampin’ Blends Marker and the center of the wheel with a Light Smoky Slate Stampin’ Blends Marker. Punch the truck with the coordinating punch. Stamp the Farm Fresh sentiment on the truck with Black Memento Ink.

  • Stamp the smallest pumpkin from the Pick Of The Patch Stamp Set on Basic White and fussy cut it.

  • Lay the truck and pumpkin on the layer to determine where to stamp the pumpkin stem. Stamp it with Pecan Pie Ink and adhere the pumpkin. Adhere the truck with Dimensionals.

  • Stamp sentiment with Pumpkin Pie Ink on scrap of Basic White and punch with the Double Oval Punch.

  • Punch the scalloped oval with the punch from a scrap of Pumpkin Pie and adhere to the stamped oval. Adhere to card with Dimensionals.

  • Add some Sparkle Gems to the sentiment label.

  • Adhere layer to card base.


On the inside layer (5 1/4 x 4) stamp the trees and grass the same way you stamped it on the card front. Stamp two pumpkins and with Pumpkin Pie Ink and stems with Pecan Pie Ink. (Tip - just ink up the top part of the stem to get a shorter stem.)


Supply List

You can click on the item to purchase it from my Online Store.

Sketch Challenge - Autumn Leaves

Here’s another card using the All About Autumn products. I love the Designer Series Paper. It will be back in stock the week of October 23rd. I made this card for this week’s Splitcoaststampers Sketch Challenge.


Here’s the sketch I used. You can see all the cards made for this week’s challenge by clicking on the sketch.


Tips & Instructions

  • Copper Clay Card Base - 5 1/2 x 8 1/2, score at 4 1/4

  • Very Vanilla Layer - 5 1/4 x 4

  • All About Autumn Designer Series Paper Layer - 5 1/8 x 3 7/8, adhere to Very Vanilla Layer. Wrap piece of Natural Wavy Trim around the layers and adhere to the back. Adhere layer to card base.

  • Use the Autumn Leaves Dies to cut a large leaf from Crushed Curry and the veins from the Oxidized Copper Specialty Paper. Adhere the veins to the leaf and adhere leaf to card.

  • Cut 2 leaves from the Oxidized Copper Specialty Paper and 2 maple leaf from Cajun Craze. Adhere the leaves over the large leaf.

  • Stamp sentiment on scrap of Very Vanilla with Versamark Ink and heat emboss using Copper Embossing Powder. Cut using the label from the dies. Adhere to card with Dimensionals.

  • Add a copper sequin to the sentiment label.


On the inside layer (Very Vanilla 5 1/4 x 4) adhere leaves cut from Crushed Curry and Cajun Craze.


Supply List

You can click on the item to purchase it from my Online Store.

Simple Suite Stampers Tutorial - All About Autumn

The All About Autumn Designer Series Paper is so beautiful and it keeps selling out! It was just back in stock and gone again but expected to be back the week of October 23. Get it when it’s back in stock, you will love it!

I made this card for our monthly Simple Suite Stampers Tutorial Bundle where we featured the All About Autumn Suite!


Each month I participate with a group of Stampin’ Up! Demonstrators to create a tutorial bundle featuring a suite of products. It’s filled with 12 projects with pictures, measurements and instructions


When you place an order of $35 or more from my Online Store in October, I’ll send you this tutorial bundle for free or you can purchase it at my website by clicking the Tutorials Button at the top of this page or click the button below.

To make this card I cut the Designer Series Paper into strips and some leaves were cut from the Oxidized Copper Specialty Paper. So pretty!


On the inside layer I added another leave and strip of the paper.


Supply List

You can click on the item to purchase it from my Online Store.

Sketch Saturday - Beautiful Balloons

I made this clean and simple birthday card for this week’s sketch challenge using the Beautiful Balloons Bundle. The colors I used are Azure Afternoon, Bubble Bath and Lemon Lolly!


The sketch is from the weekly Atlantic Hearts Sketch Challenge


Tips & Instructions

  • Azure Afternoon Card Base - 5 1/2 x 8 1/2, score at 4 1/4

  • Lemon Lolly - 5 x 3 3/4

  • Basic White - 4 7/8 x 3 5/8, stamp sentiment at top corner with Azure Afternoon Ink.

  • Stamp the medium and small balloons on Basic White with Azure Afternoon, Lemon Lolly and Bubble Bath Inks. Cut with coordinating dies.

  • Arrange the balloons and adhere to the white layer using Dimensionals on some of the smaller balloons.

  • Adhere the Basic White Layer to the Lemon Lolly Layer. Wrap a piece of Azure Afternoon Ribbon around the layers and adhere to the back. Adhere layer to card base. Tie bow and adhere to the bottom balloon with a Glue Dot.


I was going to add some bling or splatter to the card but I like that there’s lots of white on it.


On the inside layer (5 1/2 x 4) stamp some small balloons at the top. I stamped the first one with Azure Afternoon Ink but stamped off on a piece of scrap to get the light color. Next stamp with Lemon Lolly and Bubble Bath Inks.

Add some strings using Black Memento Ink. I only inked part of the string and cleaned the stamp between each balloon.

Stamp the sentiment with Azure Afternoon Ink.


Supply List

You can click on the item to purchase it from my Online Store.

Easy Double Z Fold Cards

Have you ever made a Double Z Fold Card? They are so easy to make once you have all the pieces cut and they stand up so nicely on a table. Great to give someone who likes to display their cards.


Watch the video for step by step instructions and then click on the Project Sheet Button to download a printable instruction sheet.


This card was made using the Modern Garden Stamp Set along with the Garden Walk Designer Series Paper. It’s bright and colorful!


This card was made using the cute Pick Of The Patch Bundle and Inked Botanicals Designer Series Paper. This bundle has a great stamp set with some fun fall images and a punch that coordinates with some of the pumpkins.


Supply List

You can click on the item to purchase it from my Online Store.

Sweet Citrus Thanks A Bunch Card

What comes to mind when you think of pink, yellow and green? I immediately thought of citrus. I made this fun Thank You Card using the Sweet Citrus products for this week’s color combo.


The color combo is from my Inspiration Calendar - Melon Mambo, Daffodil Delight and Granny Apple Green. I stamped off the Melon Mambo to get the lighter shade for the grapefruit.


Tips & Instructions

  • Granny Apple Green Card Base - 5 1/2 x 8 1/2, score at 4 1/4

  • Basic White - 5 1/4 x 4, cut using the Scalloped Contour Dies.

  • Stamp the flower grouping with Melon Mambo Ink at the top and bottom corners.

  • Stamp the sentiment with Granny Apple Green Ink on the bottom corner.

  • Stamp the citrus rinds with Daffodil Delight Ink on Basic White.

  • Add Melon Mambo Ink to the grapefruit fruit and stamp on scrap to get a lighter shade, then stamp on the coordinating rinds.

  • Clean your stamp and ink up just the lemon slice with Daffodil Delight Ink, stamping off first on a scrap and then stamping on the coordinating rind.

  • Cut and emboss the fruit using the Sweet Citrus Hybrid Embossing Folder. Put the die and the stamped image right in the folder lining them up and then run it through your die cutting machine using the 3D Specialty Plate.

  • Stamp 2 sets of leaves with Granny Apple Green Ink and cut with coordinating dies.

  • Arrange the fruit and leaves on the white layer and adhere with Liquid Glue and Dimensionals.

  • Adhere layer to card base.

  • Add some Melon Mambo Glossy Dots to the flower centers.


On the inside layer (5 1/4 x 4) stamp two sets of flowers and flower centers with Melon Mambo Ink.


Supply List

You can click on the item to purchase it from my Online Store.

Sketch Challenge - Hello Ladybug

Here’s my card for this week’s Splitcoaststampers Sketch Challenge. I love this Delightful Floral Designer Series Paper and thought it would make a good background for the ladybug.


This is the sketch that I used. You can see the other projects for this week’s challenge by clicking on the sketch.


Tips & Instructions

  • Pretty Peacock Card Base - 5 1/2 x 8 1/2, score at 4 1/4

  • Delightful Floral Designer Series Paper Layer - 5 1/4 x 4, adhere to card base.

  • Basic White Layer - 4 1/2 x 1 1/4, stamp sentiment with Versamark Ink and emboss using the Basics Embossing Folder

  • Stamp large leaf with Parakeet Party Ink on Basic White and fussy cut.

  • Stamp ladybug body with Black Memento Ink on Basic White and punch with coordinating punch. (Tip - use a stamp positioning tool to stamp multiple times to get a good, solid image.)

  • Stamp wings with Poppy Parade Ink and punch with coordinating punch. Adhere to ladybug body and adhere to the leaf.

  • Cut 2 strips of Pretty Peacock 3 1/2 x 1/2. Stamp sentiment with Versamark Ink and heat emboss with White Embossing Powder.

  • Arrange pieces to figure out placement. Adhere the Pretty Peacock strips, then the white embossed layer and then add the ladybug on the leaf with Dimensionals.


On the inside layer (5 1/4 x 4) stamp ladybug with Black Memento and Poppy Parade Inks. Stamp leaf with Parakeet Party and flowers with Poppy Parade Inks.


Supply List

You can click on the item to purchase it from my Online Store.

Simple Peace and Joy Christmas Card

All you need is a piece of Designer Series Paper and a sentiment to create a simple but pretty Christmas Card. The One Horse Open Sleigh Designer Series Paper has beautiful, peaceful scenes.


Tips & Instructions

  • Misty Moonlight Card Base - 5 1/2 x 8 1/2, score at 4 1/4

  • Basic White Layer - 5 3/8 x 4 1/8, adhere to the card base.

  • One Horse Open Sleigh Designer Series Paper - 5 1/4 x 4, adhere to the card.

  • Basic White Strip - 1/2”, stamp sentiment with Misty Moonlight Ink.
    The stamp I used for the sentiment is from the So Very Merry Stamp Set and it is curved. Since it’s photopolymer, it’s easy to make it straight on the block.

  • . Punch or cut a banner on one end. I used the Banners Pick A Punch.

  • Adhere the sentiment to the card with Dimensionals.


On the inside layer (5 1/4 x 4), stamp the sentiment with Misty Moonlight Ink. Add a 4 x 3/4 strip of Designer Series Paper.


Supply List

You can click on the item to purchase it from my Online Store.

Sketch Saturday - Joy Of Christmas

Here’s my card for this week’s sketch challenge using products from the Joy Of Christmas Suite. It’s simple but pretty!


The sketch is from the Atlantic Hearts Sketch Challenge.


Tips & Instructions

  • Cherry Cobbler Card Base - 5-1/2 x 8-1/2, score at 4-1/4.

  • Basic White Layer - 5-1/4 x 4, emboss using the Snowflake Sky 3D Embossing Folder. Adhere to card base.

  • Cherry Cobbler Strip - 4 x 1-1/2. Stamp sentient with Versamark Ink and heat emboss with White Embossing Powder. Adhere to card. The sentiment is from the Joy Of Noel Stamp Set.

  • Joyful Specialty Designer Series Paper - 4 x 1, adhere to card, covering the Cherry Cobbler strip.

  • Cut greenery piece from a scrap of Shaded Spruce and adhere to card.

  • Color Black & Very Vanilla Ribbon with a Dark Cherry Cobbler Stampin’ Blend, tie a bow and adhere to card with a Mini Glue Dot.

  • Add some white Adhesive-Backed Glitter Sequins.


On the inside layer (5-1/4 x 4) stamp Sentiment with Cherry Cobbler Ink and greenery with Shaded Spruce Ink, stamping a second and third time without re-inking. The stamp set I used for the inside is the Christmas Classics Stamp Set.


Supply List

You can click on the item to purchase it from my Online Store.

Dutch Door Fun Fold Cards using Decorative Masks

These beautiful Dutch Door Fun Fold Cards were made using the Abundant Beauty Decorative Masks. I love how they turned out.


Watch the video to see how to use these masks and how to make this Dutch Door Fun Fold. You can click on the Project Sheet Button to get printable instructions for this design.


This card was made using the Garden Walk Designer Series Paper and Calypso Coral Cardstock. The Inks I used are Calypso Coral, Crushed Curry and Garden Green.


This card was made using the Inked Botanicals Designer Series Paper and Blackberry Bliss Cardstock. The inks I used are Crushed Curry, Blackberry Bliss and Mossy Meadow.


Supply List

You can click on the item to purchase it from my Online Store.

Abundant Beauty Wedding Card

I love using our Decorative Masks and Blending Brushes to create a card. This one was made using the Abundant Beauty Masks. It’s a wedding card and I think it came out so pretty.


The color combo I used is from my Inspiration Calendar - Balmy Blue, Parakeet Party and Highland Heather. I added a pop of Lemon Lolly to the flower centers as well. You can get my Inspiration Calendar each month when you subscribe to my email list.


These masks are so amazing. The sunflower design has 4 different layers to add different colors.


Tips & Instructions

  • Balmy Blue Card Base - 5 1/2 x 8 1/2, score at 4 1/4

  • Basic White Layer - 5 1/4 x 4

  • Using the Abundant Beauty Decorative Masks and Blending Brushes start with the petals for the flowers and add Highland Heather Ink. Next add Parakeet Party Ink using the leaf masks. Add Lemon Lolly Ink using the flower center mask. I didn’t use the flower center plain circles so the white would show through.
    TIP - Make sure you put the notch on the mask in the same position for each mask when you lay them over your cardstock. Use a piece of Washi Tape or Post-It Tape to hold the mask in place while blending the ink on them.

  • Splatter Balmy Blue Ink around the flower and leaves using either a Stampin’ Write Marker or Stampin’ Blends Marker. Flick the marker tip across the marker cap.

  • Adhere layer to card base.

  • Stamp sentiment on 1/2” strip of Basic White with Balmy Blue Ink and punch both ends using the Banners Pick A Punch.

  • Punch both ends of a 5/8” strip of Balmy Blue and adhere behind the sentiment strip. Adhere to card with Dimensionals.


On the inside layer (5 1/4 x 4) stamp sentiment with Balmy Blue Ink. Add a small flower by Blending Highland Heather and Lemon Lolly Ink like you did on the front layer.


Supply List

You can click on the item to purchase it from my Online Store.

Double Gate Fun Fold Cards

Today I made a video demonstrating the Double Gate Fun Fold Card Design. It’s a great way to use up some of your patterned paper scraps. One card was made using the Hello, Irresistible paper and the other withe the O Holy Night paper.


Watch the video to learn how to make these cards and then click the Project Sheet button below to get a printable pdf with the measurements and instructions.


This fun Halloween Card was made using the b-side of the O Holy Night Designer Series Paper along with the Pick Of The Patch Bundle.


This pretty card was made using the Hello, Irresistible Designer Series Paper and Dainty Delight Stamp Set.


Supply List

You can click on the item to purchase it from my Online Store.

Daisy Delight Birthday Card

I love how this card turned out with the soft background that was created with blending brushes and ink. The pretty daisies jump right off the card!


This card features the color combo from my monthly Inspiration Calendar - Azure Afternoon, Daffodil Delight and Pumpkin Pie. You can get my Inspiration Calendar each month when you subscribe to my email list.


Tips & Instructions

  • Thick Basic White Card Base - 5 1/2 x 8 1/2, score at 4 1/4

  • Basic White Layer - 5 1/4 x 4, blend Azure Afternoon Ink using a Blending Brush.

  • Stamp 3 daisies using the Daisy Delight Stamp Set. Stamp the outlines with Pumpkin Pie Ink and stamp the fillers with Daffodil Delight Ink. Stamp the centers with Pumpkin Pie Ink. Cut the daisies using the coordinating dies.

  • Die cut 3 sprigs from Mossy Meadow.

  • Adhere the daisies to the card with Dimensionals and the sprigs behind them with Liquid Glue.

  • Stamp sentiment on scrap of Basic White with Daffodil Delight Ink and cut with the label die in the set. Adhere to card with Dimensionals.

  • Add some Daffodil Delight Glossy Dots.


On the inside layer (5 1/4 x 4) stamp sentiment with Pumpkin Pie Ink and flowers with Daffodil Delight Ink.


Supply List

You can click on the item to purchase it from my Online Store.

Sketch Challenge - Merry & Bright

I made this festive Christmas card for this week’s Splitcoaststampers Sketch Challenge.

The paper is from the Merry Bold & Bright Designer Series Paper which is so fun. The lights and corner were cut from Granny Apple Green Foil Sheets to add some shine to the card. The embossed layer was made with the Christmas Tidings Embossing Folder.


Here’s the sketch I used. I wasn’t sure about those two lines at the top corner and decided the strings of lights would work nicely.


Tips & Instructions

  • Poppy Parade Card Base - 5 1/2 x 8 1/2, score at 4 1/4

  • Merry Bold & Bright Designer Series Paper - 5 1/4 x 4, adhere to card base

  • Basic White Layer - 4 1/4 x 3, emboss using the Christmas Tidings Embossing Folder and adhere to card. Try to position the layer in the folder to get the words you want to use.

  • Granny Apple Green Foil Sheet - 2 x 2, then cut across diagonally and adhere one of the triangles to the bottom corner.

  • Granny Apple Green Foil Sheet - cut string of lights using the Merry & Bright Dies. Trim down to get 2 pieces and adhere to top corner.


On the inside layer (5 1/4 x 4) stamp sentiment with Poppy Parade Ink. Cut another string of lights from a Granny Apple Green Foil Sheet and adhere across the top. Trim off any excess.


Supply List

You can click on the item to purchase it from my Online Store.