Nature's Prints meets Earthen Elegance

I paired the Nature’s Prints Stamp Set and Dies with the Earthen Elegance Designer Series Paper to make this card. These are a wonderful pairing, even the names go together.


This week’s color combination worked so well with these products. This combo is from my June Inspiration Calendar. It’s fun to pick some colors and then create from there.

Tips & Instructions

  • Pecan Pie Card Base - 5 1/2 x 8 1/2, score at 4 1/4

  • Basic White Layer - 5 1/4 x 4

  • Earthen Elegance Designer Series Paper - 5 1/8 x 3 7/8, adhere to white layer.

  • Wrap Crumb Cake Baker’s Twine around the layers 3 times and adhere to the back. Adhere layer to card base.

  • Stamp large greenery image on Basic White with Pretty Peacock Ink and cut with coordinating die.

  • Stamp medium greenery image on Basic White with Crumb Cake Ink two times and cut each with coordinating die.

  • Die cut 2 sprigs from Pecan Pie and 3 small sprigs from Pretty Peacock.

  • Arrange and adhere greenery pieces on card front.

  • Stamp sentiment on scrap of Basic White with Pretty Peacock Ink and cut with label die. Adhere using Dimensionals.

  • Tie bow with 3 strands of Baker’s Twine and adhere with a Glue Dot.

  • Add some Pretty Peacock Adhesive-Backed Tinsel Gems.


On the inside layer stamp large greenery image with Pretty Peacock Ink, stamp a second and third time without re-inking.


Supply List

You can click on the item to purchase it from my Online Store.

Sketch Challenge - Countryside Inn

For this week’s sketch challenge, I decided to use different patterns from the Countryside Inn Designer Series Paper. I just love this paper!


Here’s the sketch from the Splitcoaststampers Sketch Challenge. You can see the other projects for this challenge by clicking the sketch below.


The Countryside Inn Designer Series Paper is so charming with shades of blues and white. It’s inspired by fine china and wallpaper patterns and includes gorgeous florals, woodland animals, nature and ceramic designs. Best of all it’s on sale during the month of June and you can save 15%.


Tips & Instructions

  • Thick Basic White Card Base - 5 1/2 x 8 1/2, score at 4 1/4

  • Basic White Layer - 5 1/4 x 4

  • Countryside Inn Designer Series Paper pieces. Adhere the pieces to the white layer to cover it.

    • 4 x 1 (dark pattern)

    • 4 x 1 1/2 (light pattern

    • 4 x 2 3/4 (dark pattern)

  • Adhere layer to card base.

  • Basic White Small Layer - 4 1/4 x 3 1/4

  • Countryside Inn Designer Series Paper Layer - 4 x 3 (I cut it to include the cute foxes). Adhere to the white layer and adhere to card at an angle using a Foam Sheet or Dimensionals.

  • Stamp sentiment with Night Of Navy Ink on scrap of Basic White and punch with the Double Oval Punch.

  • Punch scrap of Night Of Navy with the scalloped oval and adhere behind the stamped oval. Adhere to card with Foam Sheet or Dimensionals.

  • Add some Adhesive-Backed Sparkle Gems.


Adhere a 5 1/4 x 1 strip of the Designer Series Paper to the inside layer making sure you cut a piece to include the foxes.


Supply List

You can click on the item to purchase it from my Online Store.

Cute Cards from the Zoo Crew Tutorial Bundle

The Zoo Crew Suite Collection has the most fun images! You can stamp and cut with coordinating dies or cut the images from the Designer Series Paper with the dies. We used this suite for this month’s Simple Suite Stampers Tutorial Bundle.


Watch the video to see how to make 2 of the cards from the Tutorial. The Pool Party along with Basic Black are great colors together.


You can get this Tutorial Bundle for FREE when you purchase from my Online Store in June or you can purchase it directly from my website.

Click the picture below to get the the link for my Tutorials.


This first card has a cute koala bear juggling cupcakes; so fun for a kid’s birthday.


The inside has this sweet raccoon with some balloons!


This is one of my favorite animals in the suite. I thought it was an alpaca but when I read the products description I found that it’s actually a knitting llama!


The inside is very simple, just a scalloped border on the bottom and a sentiment.


Supply List

You can click on the item to purchase it from my Online Store.

Pretty Textured Florals Birthday Blooms Card

This Birthday Blooms card has such vibrant, bright colors with beautiful flowers from the Textured Floral Bundle. I love that it’s set against a classic gingham background.


The color combination I used is from my June Inspiration Calendar: Melon Mambo, Lemon Lime Twist and Blueberry Bushel, a perfect combination.

Tips & Instructions

  • Blueberry Bushel Card Base - 5 1/2 x 8 1/2, score at 4 1/4

  • Basic White Layer - 5 1/4 x 4

  • Glorious Gingham Designer Series Paper (Blueberry Bushel) Layer - 5 1/8 x 3 7/8, adhere to the white layer and then adhere to the card base.

  • Basic White - cut using the largest rectangle from the Nested Essentials Dies and stamp sentiment with Blueberry Bushel Ink. Adhere to card with Dimensionals. Tip, put the Dimensionals in the center so you can slide the greenery behind it.

  • Stamp flowers with Melon Mambo Ink on Basic White and cut with coordinating dies.

  • Cut some greenery pieces from Lemon Lime Twist.

  • Adhere the greenery pieces behind the label and adhere the flowers to the label.

  • Add some Lemon Lime Twist Tinsel Gems.


On the inside stamp sentiment with Blueberry Bushel Ink. The sentiment is from the Cheerful Daisies Stamp Set but you can use any birthday sentiment. Stamp the leaves with Lemon Lime Twist and stamp a second time without re-inking.


Supply List

You can click on the item to purchase it from my Online Store.

Sketch Challenge - Sea Turtle

Here’s the card that I made for this week’s Splitcoaststampers Sketch Challenge using the Sea Turtle Stamp Set.


The sketch is pretty simple but I love simple! Click on the picture to see other cards posted for this week’s challenge.


This stamp set has amazing images and it’s a reversible. You can stamp with both sides of the stamp so you can stamp the background in one color and the detailed layer in a different color.


Tips & Instructions

  • Thick Basic White Card Base - 5 1/2 x 8 1/2, score at 4 1/4

  • Azure Afternoon Layer - 5 1/8 x 3 7/8

  • Basic White - 5 x 3 3/4, stamp the bubble image across the entire layer with Azure Afternoon, stamping off each time on a piece of scrap first to get a lighter color. Adhere to Azure Afternoon layer and then adhere to the card base.

  • On a piece of Basic White, ink the back of the large sea turtle with Crumb Cake Ink, stamping off first to get a lighter shade. Ink the front, detailed side of the stamp with Old Olive Ink and stamp over the Crumb Cake Image.

  • Fussy Cut the turtle and adhere to the card using Dimensionals.

  • Stamp sentiment (from the Gorgeously Made Stamp Set) with Old Olive Ink on a 1/2 strip of Basic White. Cut both ends at an angle and adhere to card using Dimensionals.

  • Add 3 white Sparkle Gems.


On the inside layer stamp the bubble image with Azure Afternoon, stamping off first to get a lighter shade. Stamp the small turtle with Crumb Cake and Old Olive (like you did on the front). Stamp 2 star fish with Crumb Cake Ink, inking the back and stamping off and then the front detailed image. Stamp some fish with Azure Afternoon Ink.


Supply List

You can click on the item to purchase it from my Online Store.

Sweetest Cherries Birthday Card

The Sweetest Cherries Stamp set has such fun images to use to make a cheerful, cherry card! There’s a coordinating punch that punches the cherries, stems and leaves.


The sentiments can be arranged to create some fun messages. I love that big “sweet” that you can use in your sentiment.


Tips & Instructions

  • Granny Apple Green Card Base - 5 1/2 x 8 1/2, score at 4 1/4

  • Basic White - cut using the largest die from the Radiating Stitches Dies.

  • Stamp sentiment with Sweet Sorbet Ink.

  • Stamp 3 cherries with Sweet Sorbet Ink on scrap of Basic White and punch with coordinating Cherry Builder Punch.

  • Punch leaves from Granny Apple Green and stamp the veins with Granny Apple Green Ink.

  • Punch stems from Early Espresso.

  • Assemble the cherries and adhere to white layer using Dimensionals on the two top cherries.

  • Adhere layer to card base.

  • Color white Tinsel Gems using a Dark Sweet Sorbet Stampin’ Blends Marker and add to the card.


On the inside layer stamp the sentiments with Granny Apple Green and Sweet Sorbet Inks. Stamp cherry with Sweet Sorbet, stem with Early Espresso Ink and the leaves with Granny Apple Green Ink that you stamped off first. Stamp the veins with Granny Apple Green Ink.


Supply List

You can click on the item to purchase it from my Online Store.

Sketch Saturday - Wonderful Thoughts

This was a fun card to make for the weekly Sketch Challenge. The flowers and leaves were cut from the Around The Bend Dies. You might overlook these flowers and leaves in this die set but they are really beautiful with the embossed details.


The sketch is from the Weekly Atlantic Hearts Sketch Challenge.


Tips & Instructions

  • Old Olive Card Base - 5 1/2 x 8 1/2, score at 4 1/4

  • Basic White Layer - 5 x 3 3/4

  • Cut flowers and flower centers from Berry Burst, Crushed Curry, Lemon Lolly and Crushed Curry. Cut leaves from Granny Apple Green, Lemon Lime Twist and Old Olive.

  • Glue the centers to the flowers, arrange the flowers and leaves and adhere to white layer using Dimensionals on some of the flowers.

  • Stamp sentiment on 1/2” strip of Basic White with Berry Burst Ink. Punch both ends using the Banners Pick A Punch. Adhere to card with Dimensionals.

  • Add some Berry Burst Tinsel Gems.


On the inside layer stamp the sentiment with Berry Burst Ink. Add some flowers and leaves to the bottom corner.


Supply List

You can click on the item to purchase it from my Online Store.

Floating Strips Technique

The Floating Strips Technique is fun and easy to do. One of the cards was made with strips of blue cardstock and the other with strips of Bright & Beautiful Designer Series Paper. Aren’t they pretty!


Watch the video to see how to make these cards and then give it a try. You can use different shapes for the floating strips, circles, ovals, squares, etc.


Tips & Techniques

  • Blueberry Bushel Card Base - 5 1/2 x 8 1/2, score at 4 1/4

  • Basic White Layer - 5 1/4 x 4, emboss using the Exposed Brick 3D Embossing Folder, adhere to the card base.

  • Floating Strips - cut 4 x 1/4 strips of Balmy Blue, Azure Afternoon and Blueberry Bushel (4 of each color).

  • Use a of Window Sheet or the thick piece of acetate that comes in our photopolymer stamp sets. Adhere the strips with Liquid Glue to the sheet, leaving a uniform space between them.

  • Cut the sheet with the largest circle from the Stylish Shapes Dies. Run it through your die-cutting machine multiple times to get it cut through. Cut with Paper Snips if it doesn’t easily come out. Adhere to card with Mini Dimensionals.

  • Cut the greenery piece from Lemon Lime Twist using the Gorgeously Made Dies.

  • Stamp sentiment with Blueberry Bushel Ink on a scrap of Basic White and cut with the Stylish Shapes Dies. Adhere to the card with Dimensionals.

  • Add some Blueberry Bushel Tinsel Gems.


On the inside layer stamp the greenery image with Lemon Lime Twist Ink, stamp as second and third time without re-inking.


This one is a fun birthday card.

  • The strips are from the Bright & Beautiful Designer Series Paper.

  • The balloons were cut from the Beautiful Balloons Dies - Lemon Lime Twist, Azure Afternoon, Berry Burst and Bubble Bath.

  • Draw the strings with a Basic Black Stampin’ Write Marker.

  • Stamp the streamers across the white layer with Lemon Lime Twist, stamping off first.

  • The sentiment was stamped with the Beautiful Balloons Stamp Set with Berry Burst Ink.

  • Add some Berry Burst Tinsel Gems.


Stamp the sentiment with Berry Burst Ink and two balloons with Lemon Lime Twist Ink. Draw the strings with a Basic Black Stampin’ Write Marker.


Supply List

You can click on the item to purchase it from my Online Store.

Inked & Tiled Thank You Card

I love to create my own background with stamps. This card was made using the Inked & Tiled Stamp Set, those leaves stamp beautifully.


My monthly Inspiration Calendar has color combinations that you can challenge yourself with. This card was made using Blackberry Bliss, Pumpkin Pie and Tahitian Tide which really worked well together.


You can get my Inspiration Calendar each month when you subscribe to my email list.

The Inked & Tiled Stamp Set has beautiful images and sentiments.


Tips & Instructions

  • Tahitian Tide Card Base - 4 1/4 x 11, score at 5 1/2 (top folding)

  • Basic White Layer - 5 1/4 x 4

  • Stamp the images on the white layer starting with the largest image first and fill in with the smaller images. I stamped right over the leaves. The leaves were stamped with Tahitian Tide Ink by stamping off on a piece of scrap paper first to get this lighter shade. Stamp one flower with Blackberry Bliss Ink and the other flower with Blackberry Bliss Ink but stamp off first. Stamp the little doodad with Pumpkin Pie Ink.

  • Wrap a piece of Natural Wavy Trim around the layer and adhere to the back. Adhere layer to the card base.

  • Stamp sentiment with Tahitian Tide Ink on a scrap of Basic White and punch with the Double Oval Punch.

  • Punch a scrap of Tahitian Tide with the scalloped oval and adhere behind the stamped oval. Adhere to the card with Dimensionals.

  • Add some Brushed Brass Butterflies.


On the inside layer stamp the leaves with Tahitian Tide Ink, stamping off first. Repeat by stamping a second image but stamping off first.


Supply List

You can click on the item to purchase it from my Online Store.

Sketch Challenge - Brewed For You

Isn’t this a fun card. I made it for my Son-In-Law for his birthday. This is my take on this week’s sketch challenge.


The sketch I used is from the Splitcoaststampers Weekly Sketch Challenge. You can click on the sketch to see the other projects posted for this challenge.


The images are great for those friends who like to enjoy a beer or glass of wine. The sentiments are fun!!!


Tips & Instructions

  • Crushed Curry Card Base - 5 1/2 x 8 1/2, score at 4 1/4

  • Inked Botanicals Designer Series Paper Layer - 5 1/2 x 4 1/4, adhere to card base.

  • Basic White Strip - 5 1/2 x 1/2, emboss using the Geometric Patterns Embossing Folder and adhere to edge of card front.

  • Basic White Circle & Banner - cut using the Stylish Shapes Dies.

  • Stamp 2 glasses on white circle with Smoky Slate Ink. Stamp the inside of one with Crushed Curry Ink and then the other glass with out re-inking. This will give you the dark and light beer look.

  • Stamp two images of foam with Smoky Slate Ink on a scrap of Basic White and cut with coordinating die. Adhere to top of glasses.

  • Add Wink Of Stella to the beer and foam. Adhere the circle to the card with Dimensionals.

  • Stamp sentiment on the banner with Smoky Slate Ink. Adhere banner to card with on Dimensional on the left edge and Liquid Glue on the rest so it sits nicely on the circle.

  • Cut the tag hole reinforcements from a scrap of Crushed Curry and adhere 2 of them to the card front.


On the inside layer stamp the sentiment with Smoky Slate Ink. Stamp the glass and foam with Smoky Slate Ink and the beer with Crushed Curry Ink. Add Wink Of Stella to the beer and foam.


Supply List

You can click on the item to purchase it from my Online Store.

Inked & Tiled Birthday Card

Do you ever look at our catalog to get ideas? I pieced together this card from different samples in the catalog using the Inked Botanicals Suite Collection.


The stamp set in the Inked & Tiled Bundle has beautiful, delicate botanicals with a pressed look. The punches can be used for tags or pieced together to make a fun pattern.


The Inked Botanicals Designer Series Paper is on sale the month of June, 2023. This paper is so pretty and was handcrafted by the Stampin’ Up! artists. It was designed by pressing hand-inked flowers onto the paper giving it a beautiful textured, artistic effect.


Tips & Instructions

  • Calypso Coral Card Base - 5 1/2 x 8 1/2, score at 4 1/4

  • Basic White Layer - 5 1/4 x 4

  • Inked Botanicals Designer Series Paper - 5 x 3 3/4

  • Stamp the flower image with Calypso Coral Ink and the leaves with Lost Lagoon Ink, stamping off first to get a lighter shade.

  • Adhere the stamped layer to the white layer and wrap a piece of ribbon around and adhere it to the back. Adhere to the card base.

  • Stamp sentiment with Calypso Coral Ink on a scrap of Basic White and punch with the Inked & Tiled Punch.

  • Punch a piece of the Lost Lagoon patterned Designer Series Paper and then cut off the top and bottom triangle and cut in halve. Adhere each piece to the back of the sentiment label and adhere to card using Dimensionals.

  • Tie a bow with the ribbon and adhere to card with a Glue Dot.

  • Add some Iridescent Pastel Gems.


On the inside layer stamp sentiment with Calypso Coral Ink. The sentiment is from the Beautiful Balloons Stamp Set. Stamp the leaves with Lost Lagoon, stamping off first to get a lighter shade, stamp again without re-inking.


Supply List

You can click on the item to purchase it from my Online Store.

Let's Make Card Boxes To Hold Your Handmade Cards!

These Card Boxes are perfect to use as a gift for someone special. Fill them with handmade cards; they hold six to eight A2 size cards with envelopes, depending on how may layers are on the cards. Aren’t they pretty!


I got this idea from Angie Juda (ChicnScratch) and demonstrated them at an event I presented at last weekend. I decided to share them with you as well.

Watch the video below to learn how to make them and then click on the Project Sheet Button to download a pdf with pictures and instructions.

This is the card I made on the video using the Delightfully Eclectic Designer Series Paper.


There’s plenty of room to fit a nice variety of cards.


I made these cards using the Fresh As A Daisy Designer Series Paper. The patterns are so pretty.


Supply List

You can click on the item to purchase it from my Online Store.

Beside Me Father's Day Card

As Father's Day approaches, I decided to create a card for my son with a sweet illustration of children fishing with their dad. He just took his daughter and son fishing so when I saw this stamp I knew it would be perfect for him.


The Beside Me Stamp Set has great images of a dad with kids and wonderful sentiments for Father’s Day or other masculine cards.


Tips & Instructions

  • Misty Moonlight Card Base - 5 1/2 x 8 1/2, score at 4 1/4

  • Let’s Go Fishing Designer Series Paper Layer - 5 1/4 x 4, adhere to card base.

  • Basic White, cut using the 4th from largest Deckled Rectangle Dies. Stamp image and sentiment with Black Memento Ink. Color with Stampin’ Blends. I used Light Boho Blue, Light Fresh Freesia, Light Lost Lagoon, Light & Dark Crumb Cake, Light Azure Afternoon, Light & Dark Wild Wheat, Light Pebbled Path and Ivory.

  • Cut Misty Moonlight using the 3rd from largest Deckled Rectangle Dies and adhere behind the stamped rectangle. Adhere to the card using a piece of Foam Sheet (or Dimensionals).

  • Add some black Adhesive-Backed Sparkle Gems.


On the inside layer stamp sentiment with Black Memento Ink and add a 4 x 3/4 strip of Designer Series Paper.


Supply List

You can click on the item to purchase it from my Online Store.

Sketch Challenge - Beautiful Balloons

For this week’s sketch challenge, I made a colorful and cheerful birthday card using the Beautiful Balloons Bundle.


Here’s the sketch from the Splitcoaststampers Sketch Challenge. Click on the sketch to see other projects posted.


Tips & Instructions:

  • Blueberry Bushel Card Base - 5 1/2 x 8 1/2, score at 4 1/4

  • Bright & Beautiful Designer Series Paper - 5 1/4 x 4, adhere to card base.

  • Stamp 2 large, 2 medium and 2 small balloons using Blueberry Bushel, Lemon Lolly and Berry Burst Inks and cut with coordinating dies.

  • Arrange and adhere the balloons using Dimensionals on the 2 smallest balloons.

  • Stamp sentiment with Blueberry Bushel Ink on 3/4 strip of Basic White. Fussy cut around the top of the sentiment. Adhere with Dimensionals.


On the inside layer stamp sentiment with Blueberry Bushel Ink. Stamp 3 balloons (1 medium and 2 small) with Blueberry Bushel, Berry Burst and Lemon Lolly Inks. Stamp strings with Black Memento Ink.


Supply List

You can click on the item to purchase it from my Online Store.

Sketch Saturday - Cheerful Daisies

Here’s the card I made for this week’s sketch challenge. It’s a very clean and simple card but very pretty.


The sketch is from the weekly Atlantic Hearts Sketch Challenge. I love using their sketches.


Tips & Instructions

  • Moody Mauve Card Base - 5 1/2 x 8 1/2, score at 4 1/4

  • Bubble Bath Layer - 5 1/4 x 4, adhere to card base.

  • Basic White Layer - 5 x 3 3/4, emboss using the Cane Weave 3D Embossing Folder.

  • Cut a piece of Fresh As A Daisy Designer Series Paper using the largest circle from the Stylish Shapes Dies. Pick a pattern that you like to highlight in the circle. adhere to the bottom corner of the embossed layer and trim off the overhang. Adhere layer to card.

  • Stamp sentiment on 1/2 strip of Basic White with Moody Mauve Ink and adhere to a 3/8 strip of Moody Mauve and trim off edge at an angle. Adhere to card with Dimensionals.

  • Add 3 Moody Mauve Dots.


The embossed layer and variation of pinks pulls this card together nicely.


On the inside layer stamp the large daisy outline with Moody Mauve Ink and the filler with Moody Mauve but stamp off first to get a lighter shade. Stamp center with Moody Mauve.


Supply List

You can click on the item to purchase it from my Online Store.

Simple Bright & Beautiful Memories & More Cards

These cards were so easy to make; easy peasy! I used the Bright & Beautiful Memories & More Cards and some cardstock to make 6 quick, simple cards.


Watch the video to get some ideas on different combinations you can use to create cards. I made some for birthdays and some for graduation.


The watercolor designs in this pack include balloons, stars, polka dots, rainbows, and more. All designs are created in a happy, cheerful color palette that's sure to please! The card pack also includes four sheets of coordinating stickers to embellish your projects.

  • 50 total cards: 36 small, 14 large

  • Small: 3" x 4" (7.6 x 10.2 cm)

  • Large: 4" x 6" (10.2 x 15.2 cm)

  • 4 sticker sheets: 2 each of 2 designs


Tips & Instructions

  • Card Bases - 5 1/2 x 8 1/2, score at 4 1/4

  • White Layers (if used) 5 1/4 x 4

  • Memories & More 6 x 4 card - cut to 5 x 3 3/4 if using white layer behind or 5 1/4 x 4 if not.

  • Mats for 4 x 3 Memories & More card - 4 1/4 x 3 1/4


I used a Blueberry Bushel card base and mat for 4 x 3 Memories & More card. I added some Misty Moonlight Tinsel Gems.


On the inside layer stamp sentiment with Blueberry Bushel Ink and add the 4 x 1 strip that was leftover.


This card was made with a Berry Burst Card Base and mat. Add some Iridescent Pearls.


On the inside layer stamp sentiment with Berry Burst Ink. Add the 4 x 1 leftover strip and some stars from the sticker sheet.


This card has a Thick Basic White card base and Berry Burst mat. Add the balloon grouping sticker.


On the inside layer stamp the sentiment with Berry Burst Ink and add some balloon stickers. Draw strings with a Basic Black Stampin’ Write Marker.


I used a Thick Basic White card base and a basic white mat for this card. Add some Iridescent Pearls.


On the inside layer add the sticker sentiment and a 4 x 1 strip of a Memories & More card.


I used a Berry Burst card base and Basic White mat for this card. Add the sentiment stickers to the small card piece. Add some Lost Lagoon Tinsel Gems.


On the inside layer add a 4 x 3/4 strip of Berry Burst and add stickers as shown.


This was the easiest card to make. Cut a little bit off each side of the 6 x 4 Memories & More card to make it 5 1/4 x 4. Add some Misty Moonlight Tinsel Gems.


On the inside layer stamp sentiment with Blueberry Bushel Ink and add some star stickers.


Supply List

You can click on the item to purchase it from my Online Store.

Textured Floral Birthday Card

If you love florals like I do, the Textured Floral Bundle is for you. The flower images are beautiful against layer embossed with the Exposed Brick 3D Embossing Folder.


The Textured Floral Bundle has lots of pretty flowers and greenery. Some of the dies will cut out the stamped images and there are some that will cut extra greenery pieces.


Tips & Instructions

  • Blackberry Bliss Card Base - 5 1/2 x 8 1/2, score at 4 1/4

  • Basic White Layer - 5 1/4 x 4, emboss using the Exposed Brick 3D Embossing Folder and adhere to card base.

  • Scraps of Basic White - stamp large flower and two small flowers with Bubble Bath Ink and stamp centers with Blackberry Bliss Ink. Stamp leaves with Lost Lagoon Ink and small flower grouping with Blackberry Bliss Ink. Cut with coordinating dies.

  • Cut two branches from Wild Wheat and one branch from Crushed Curry.

  • Assemble and adhere pieces to card with Liquid Glue. Use Dimensionals for the large flower and leaves.

  • Stamp sentiment with Blackberry Bliss Ink on scrap of Basic White and cut 2nd from smallest rectangle from the Nested Essentials Dies. Adhere to card with Dimensionals.


I love the texture from the embossed layer behind the floral arrangement!


On the inside layer stamp sentiment with Blackberry Bliss Ink and the flowers with Bubble Bath Ink. Stamp the flower centers with Blackberry Bliss Ink.


Supply List

You can click on the item to purchase it from my Online Store.

Sketch Challenge - Little Monkey

This Little Monkey Stamp Set is so cute. I used it for this week’s Splitcoaststampers Sketch Challenge.


This is the sketch for this week’s challenge. You can click on it to see other cards posted for the challenge.


The Gorgeous Garden Dies are amazing! There are 2 large dies that create beautiful backgrounds. I used the one with the leaves for my card.


Tips & Instructions

  • Soft Sea Foam Card Base - 5 1/2 x 8 1/2, score at 4 1/4

  • Garden Green Layer - 5 1/2 x 4 1/4, cut using the leaves die from the Gorgeous Garden Dies and adhere to the card base.

  • Cut 2 circles using the Stylish Shapes Dies from Basic White Cardstock. I used the largest circle and the 3rd from largest circle. Cut two sides of each circle to make them a straight edge.

  • Stamp the monkeys on the circles with Black Tuxedo Ink. Stamp the hanging monkey on a Post-It Note and cut out the tail so you can use it to mask when stamping the branch. Stamp branch with Black Memento Ink.

  • Color the monkeys and branch with Stampin’ Blends. I used Light & Dark Crumb Cake for the monkey and Light Pebbled Path for the branch. The leaves were colored with a Garden Green Stampin’ Write Marker.

  • Adhere the circles to the card with Dimensionals.

  • Stamp sentiment on 3/4 strip of Basic White with Black Memento Ink. Banner each end with the Banner Pick A Punch and adhere using Dimensionals. Be sure you don’t put a Dimensionals on the end that will sit on the circle.


On the inside layer stamp the monkey and sentiment with Black Memento Ink. Mask the monkey and stamp the banana with Black Memento Ink. Color the monkey with Dark & Light Crumb Cake Stampin’ Write Markers and the banana with a Crushed Curry Stampin’ Write Marker.


Supply List

You can click on the item to purchase it from my Online Store.

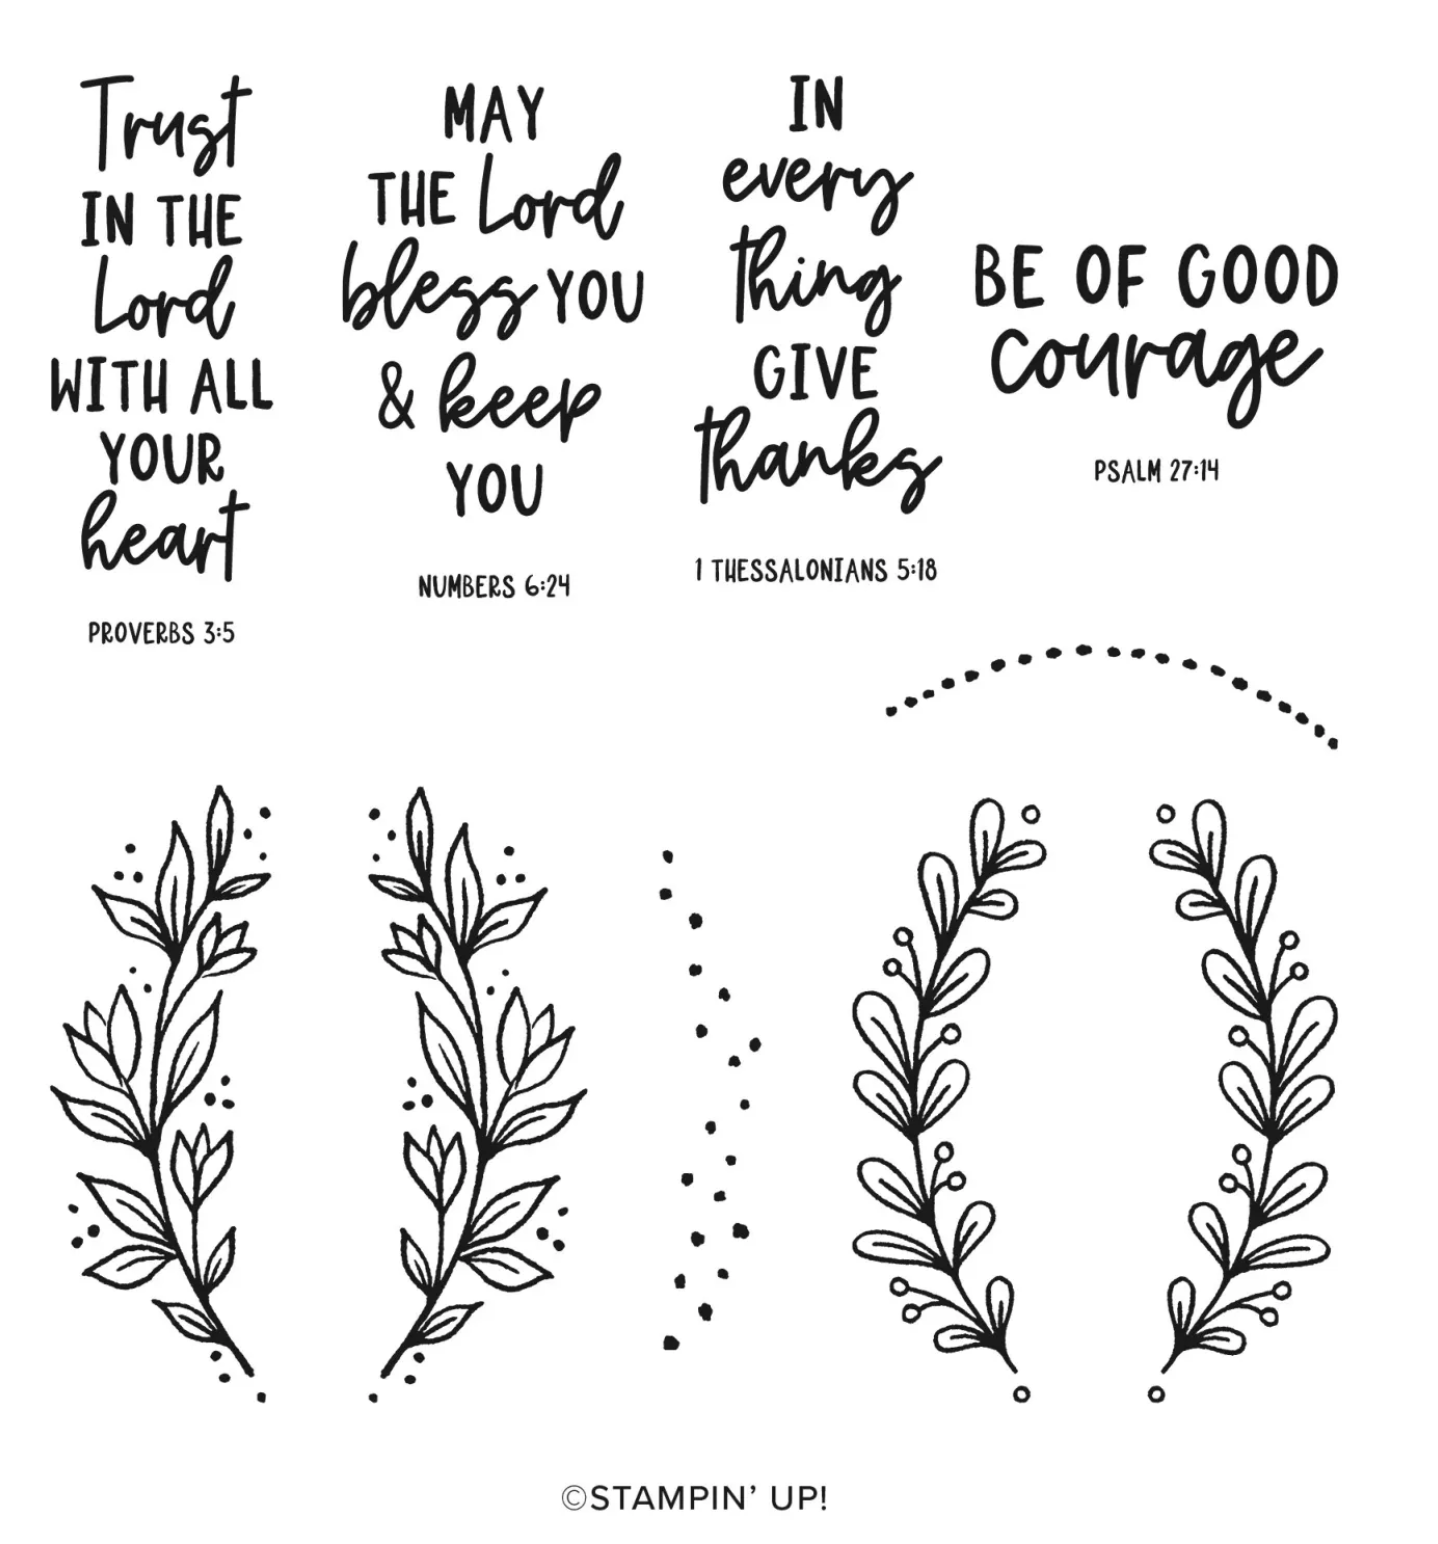
Courage & Faith Cards

I was so happy to see a stamp set with scripture and decided to make these cards for two people of faith who are battling serious illnesses.


The Courage & Faith Stamp Set would be perfect to make bookmarks with. You can stamp the sentiment and then add the greenery on each side.


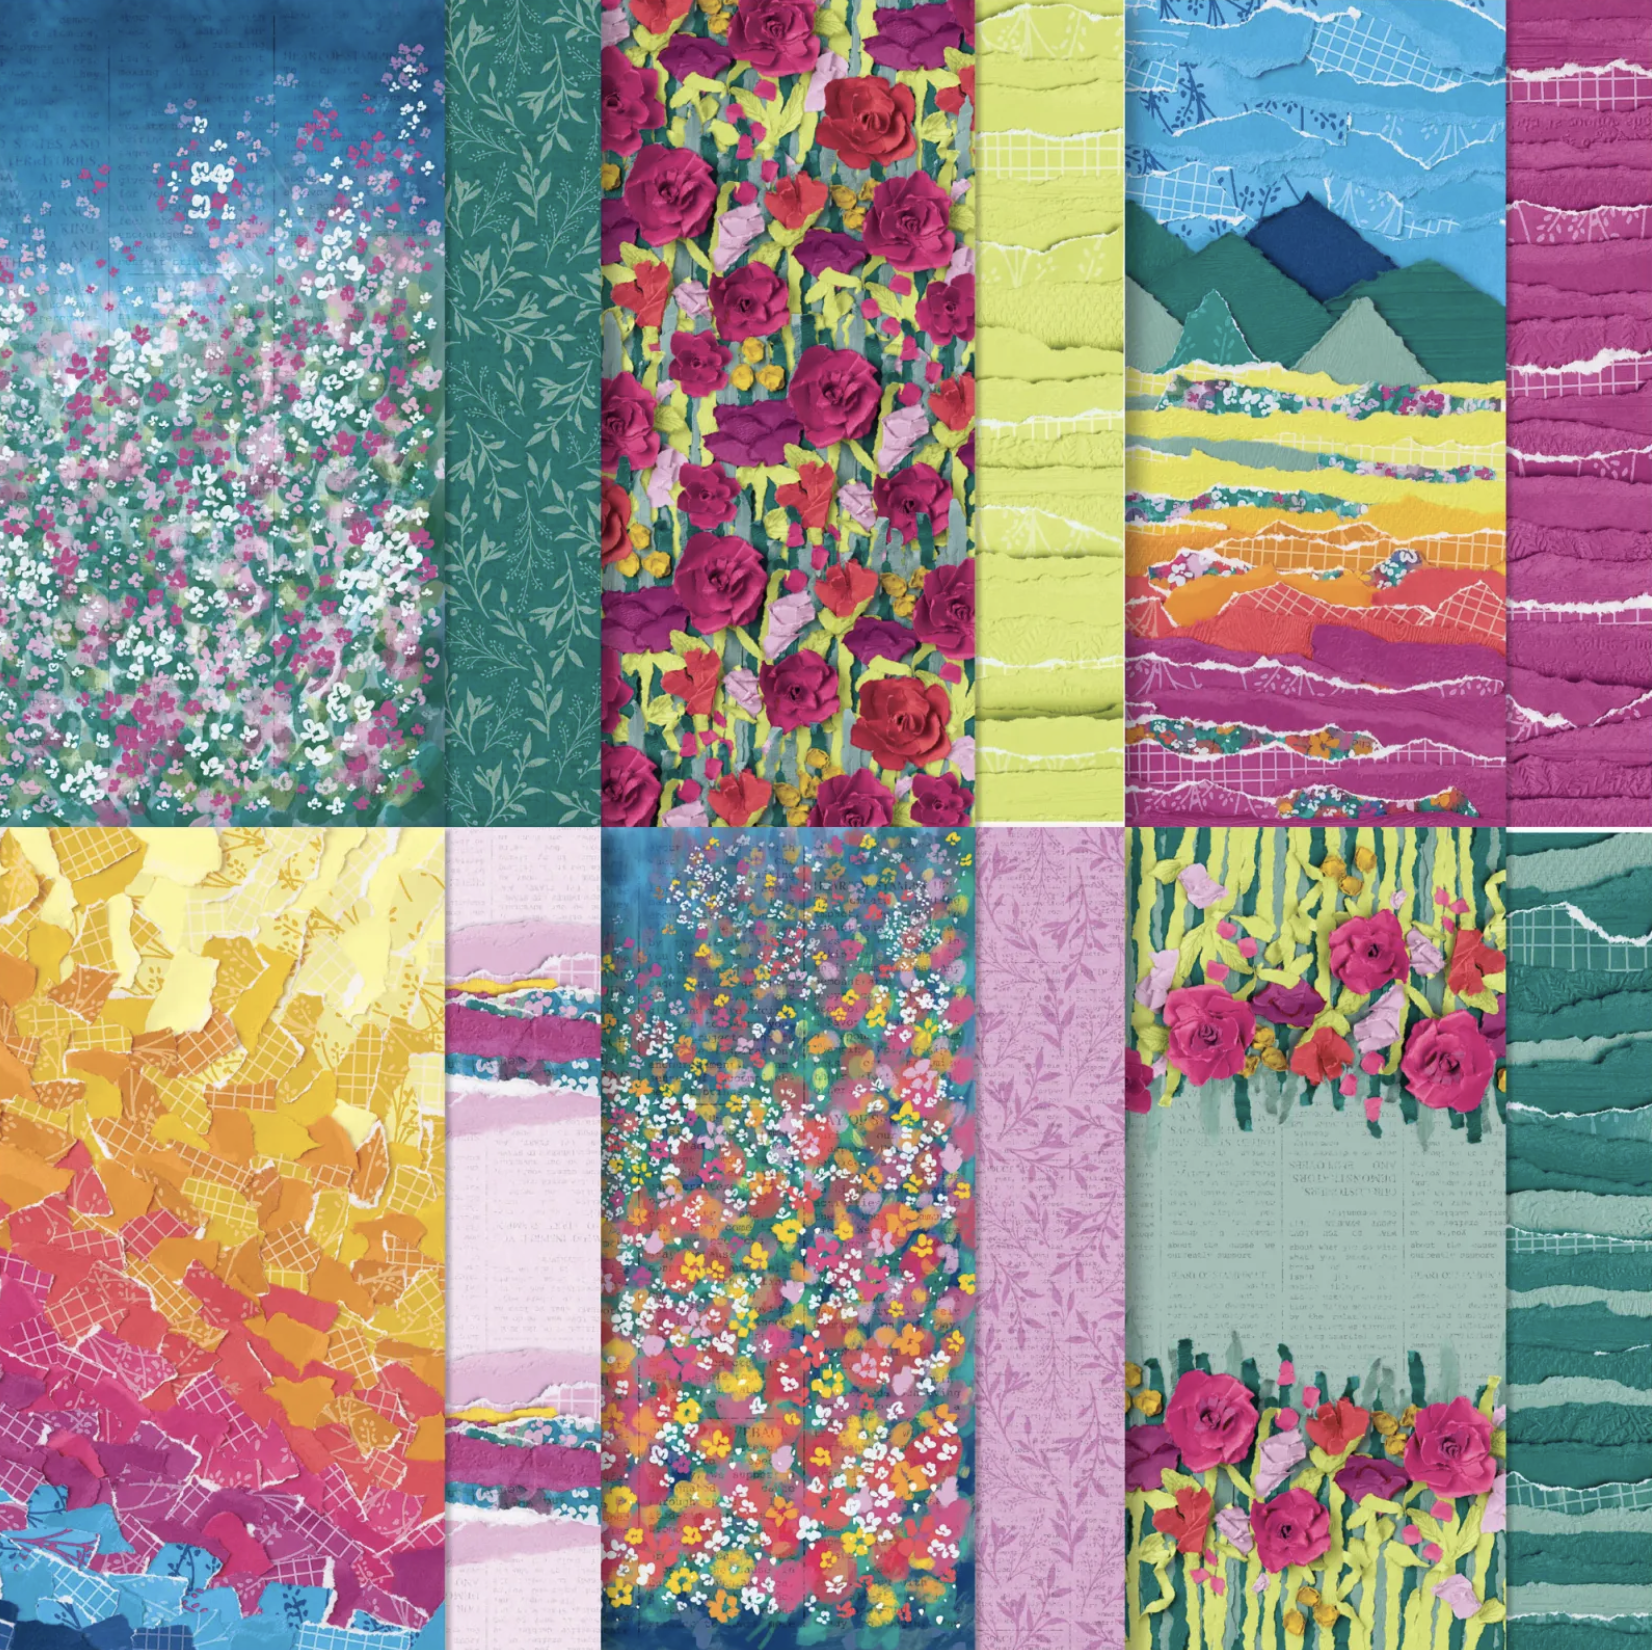
The Masterfully Made Designer Series Paper has such vibrant colors. Some of the sheets look like they they were hand painted with hand torn layers.


Tips & Instructions

  • Berry Burst Card Base - 5 1/2 x 8 1/2, score at 4 1/4

  • Basic White Layer 5 1/4 x 4, adhere to card base.

  • Masterfully Made Designer Series Paper - 5 x 3 3/4, adhere to card.

  • Cut two tags (second from largest) - one from Basic White and one from Lemon Lime Twist.

  • Stamp Scripture on white tag with Berry Burst Ink.

  • Attach the tags together, offsetting a little and feed Lemon Lime Twist Ribbon through the hole.

  • Adhere the label with Dimensionals.

  • Add some Iridescent Pearls.


On the inside layer adhere a 4 x 1 strip of Designer Series Paper.


This card was made pretty much the same way as the other card but with a different pattern of the Designer Series Paper. The tag is the largest tag in the set. Tie a bow with Night Of Navy Bordered Ribbon. Add some Brushed Brash Butterflies instead of the Iridescent Pearls.


The strip on the inside layer is 4 x 3/4.


Supply List

You can click on the item to purchase it from my Online Store.

Sketch Saturday - Darling Details

Here’s the card I made for this week’s sketch challenge using the Darling Details Bundle. I love flowers so this bundle was at the top of my list from the new catalog.


Here’s the sketch that I used from the weekly Atlantic Hearts Sketch Challenge.


The Darling Details Stamp Set has such pretty, two-step stamps where you can stamp the outline with one color and the filler with another. The dies will cut the flower images but there’s so much more with the frames and borders.


Tips & Instructions

  • Berry Burst Card Base - 5 1/2 x 8 1/2, score at 4 1/4

  • Bubble Bath Layer - 5 1/4 x 4, adhere to card base.

  • Basic White Layer - stamp sentiment at bottom corner with Berry Burst Ink.

  • Basic White - stamp 3 large flowers with Berry Burst and Bubble Bath Ink. Stamp 3 daisies with Crushed Curry and Lemon Lolly Ink. Cut with coordinating dies.

  • Cut 2 large sprigs from Old Olive and some smaller leaves from Granny Apple Green.

  • Cut largest circle from the Stylish Shapes Dies from Bubble Bath and Vellum and adhere together.

  • Adhere the 3 large flowers together and adhere to circle with Dimensionals, putting the Dimensionals in the middle.

  • Add flowers and greenery behind the flowers and adhere to the white layer. Adhere layer to card.

  • Add some Iridescent Pearls.


On the inside layer stamp the large flower with Berry Burst and Bubble Bath Inks. Stamp sentiment with Berry Burst Ink. The sentiment is from the Charming Sentiments Stamp Set.


Supply List

You can click on the item to purchase it from my Online Store.