

I love using Designer Series Paper for die cutting flowers. I cut the pretty wisteria from the Texture Chic Specialty Paper. The flowers were cut from the same piece that I used for the border. The variation in color is beautiful!

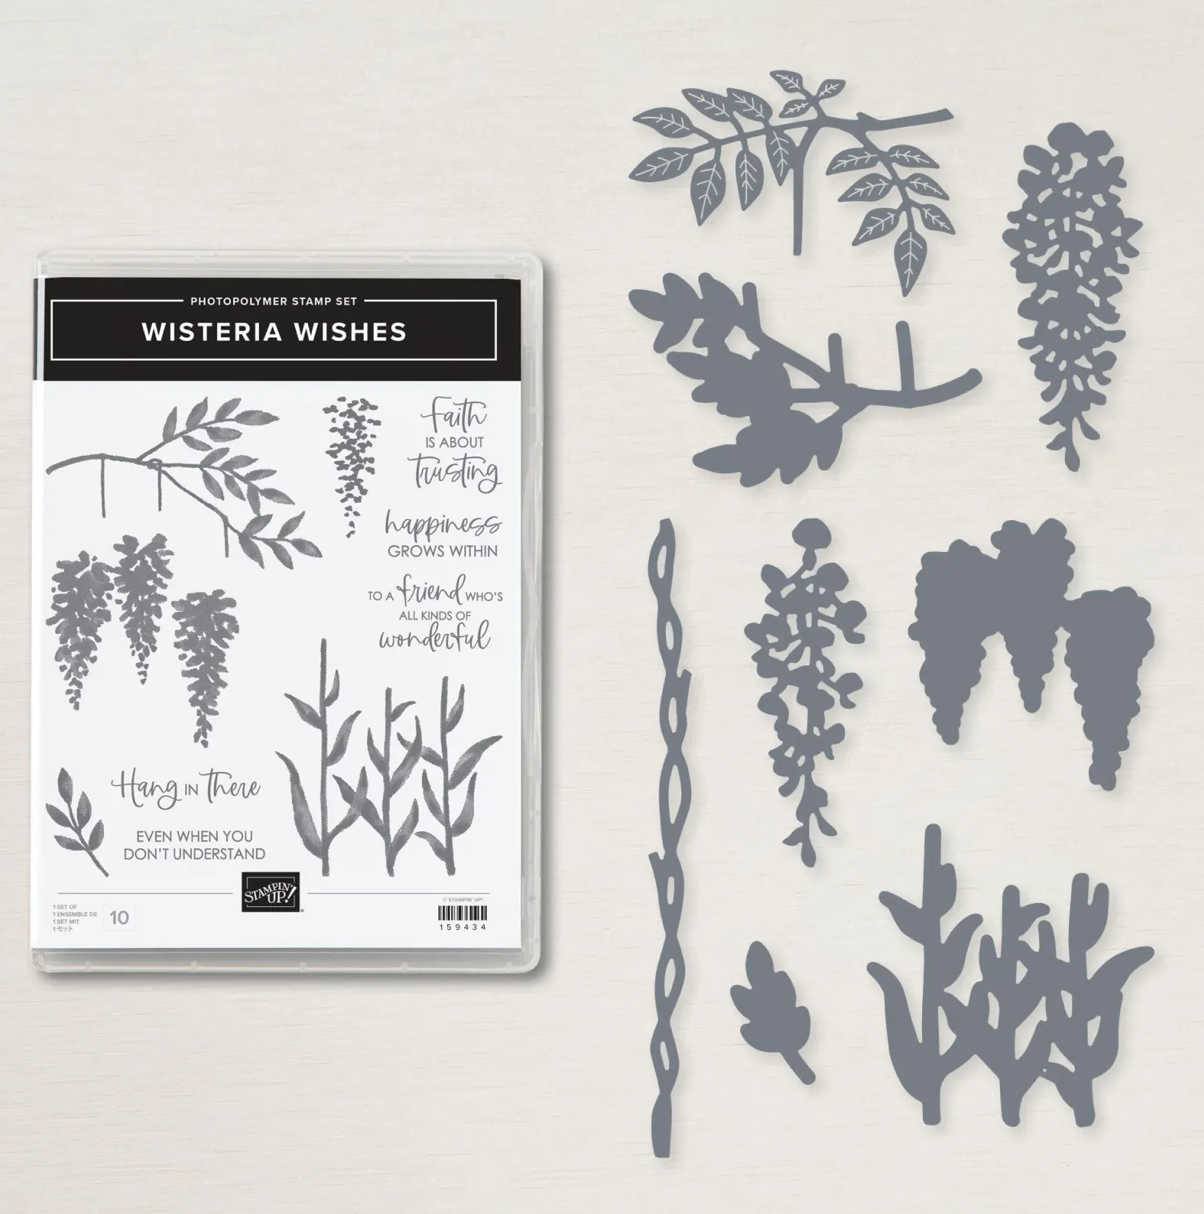
The Wisteria Wishes Stamp Set can be bundled together with the Wisteria Dies and you can save 10% when you bundle them. The images are beautiful and you can use them hanging or upright like I did for this card.
The Texture Chic Specialty Designer Series Paper has patterns that feature gold foil on one side and a distressed, aged look on the other.

Tips & Instructions
Evening Evergreen Card Base - 5 1/2 x 8 1/2, score at 4 1/4
Gold Foil Sheet - 5 1/4 x 4, adhere to card base.
(Tip - cut inside of foil sheet using a die to save for another project. It will be covered by other layers.)Basic White Layer - 5 x 3 3/4. Stamp 3 stems with leaves using Evening Evergreen Ink leaving room for the border piece on the left. Adhere to Gold Foil Sheet.
Cut 3 flowers from the Designer Series Paper. Adhere 2 flat at the top of the stems and the center one with Dimensionals.
Stamp sentiment (from the Lovely & Lasting Stamp Set) on 1/2 strip of Basic White with Evening Evergreen Ink. I inked up only the “hello” from the stamp. Punch one end with the Banners Pick A Punch.
Texture Chic Specialty Designer Series Paper - 5 1/4 x 1, adhere to left side of card front, slipping the sentiment under it and adhere to card.
Add some Brushed Brass Butterflies.

On the inside layer stamp leaves from the Wisteria Wishes Stamp Set and the sentiment from the Lovely & Lasting Stamp Set with Evening Evergreen Ink.

Supply List
You can click on the item to purchase it from my Online Store.
