Simple Suite Stampers Tutorial - Enjoy The Journey

I made this card for the April Simple Suite Stampers Tutorial. We featured the Enjoy The Journey Suite of products this month.


Each month I collaborate with 11 Demonstrators to create a Tutorial Bundle featuring a suite of products or color them. The bundle is a pdf that you can download and print and it contains pictures, measurements and instructions to make 12 projects with the featured suite.


I send these tutorials to customers who purchase from my Online Store as a thank you. You can purchase the Tutorial Bundle as well by clicking the link below.

My card this month is a camping scene in the woods. I love that the tent dies cut an outline and inside for the tent. The clouds were lightly colored with a Balmy Blue Watercolor Pencil and then Wink Of Stella was added; they look really cool in person.


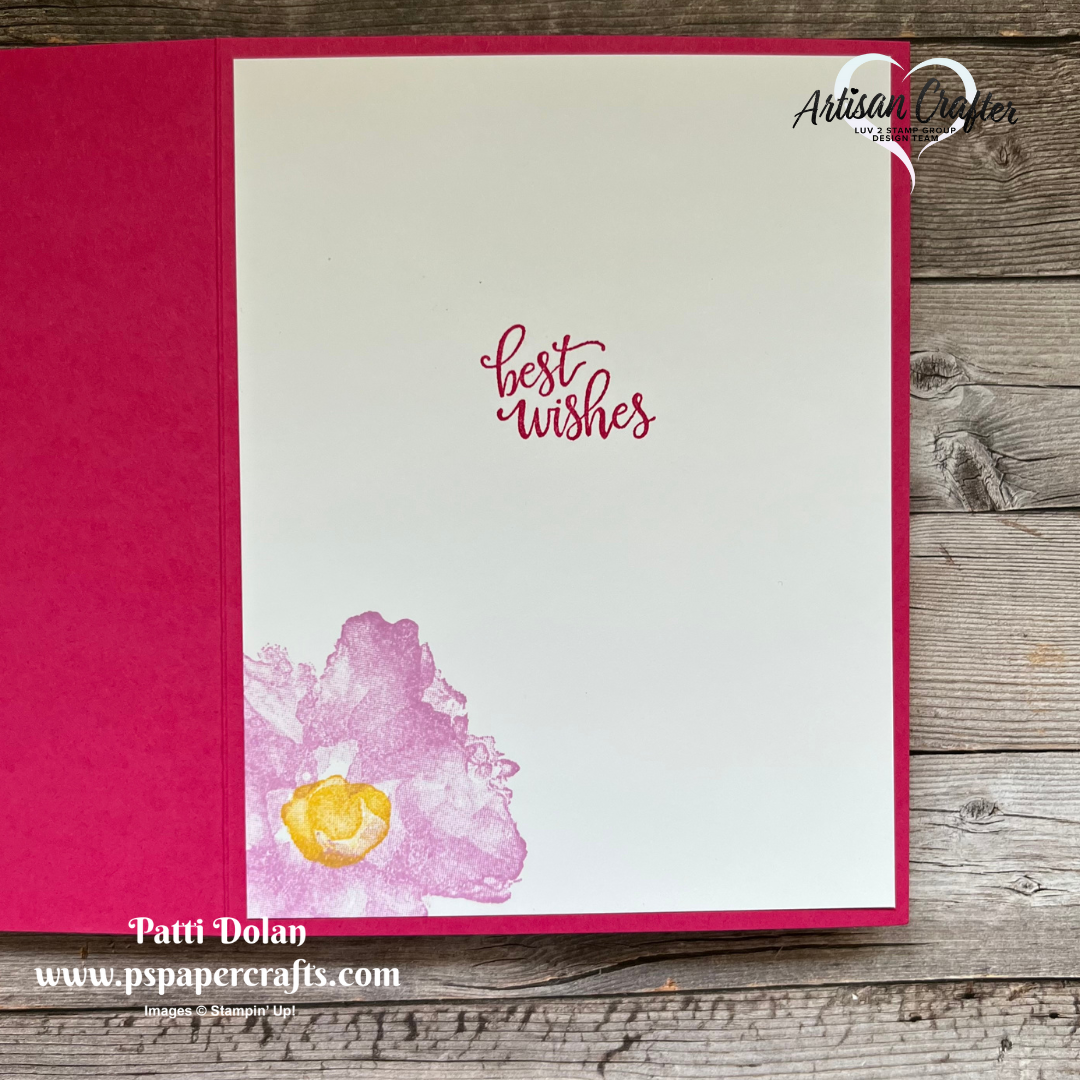
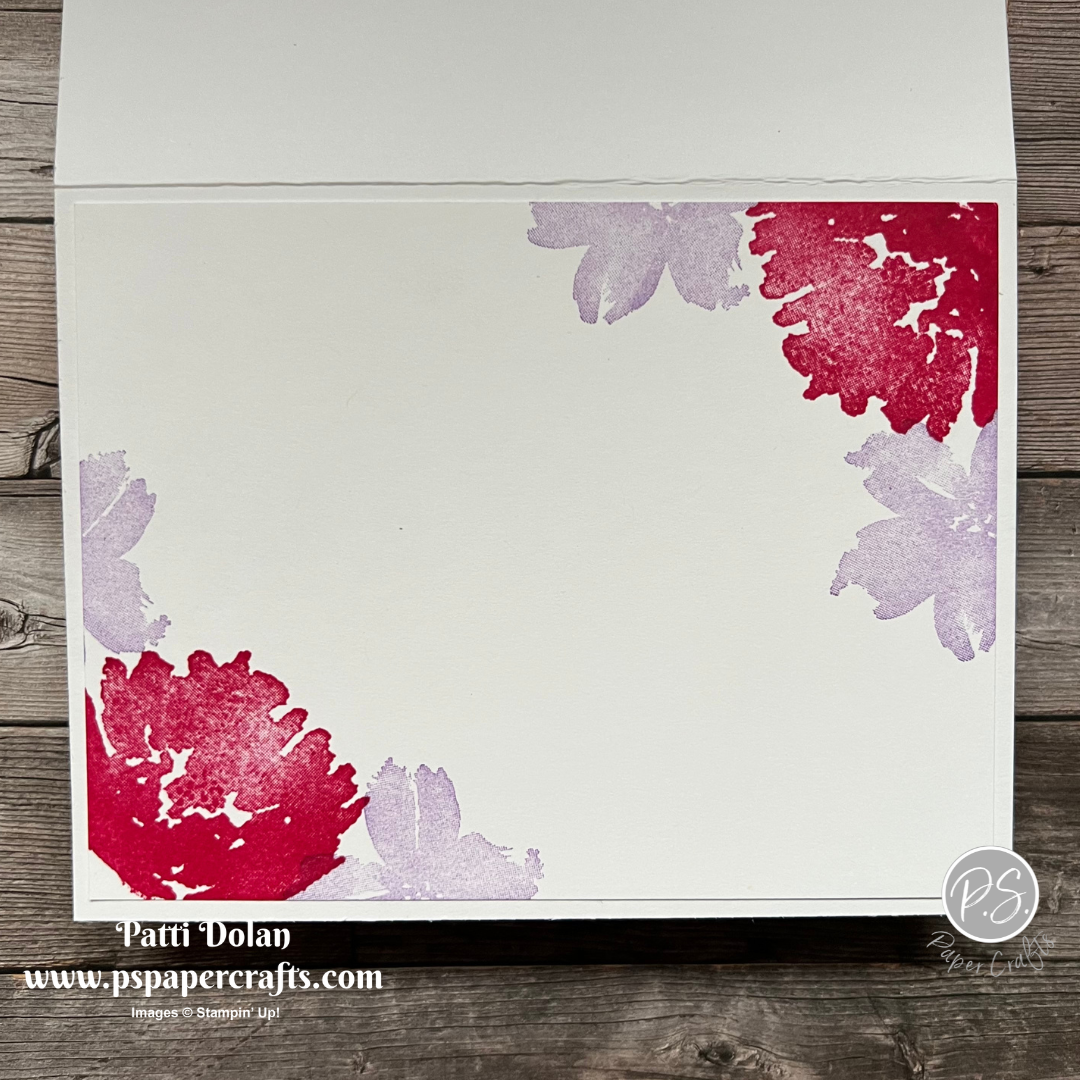
The inside layer has a great sentiment for someone who is about to start a new chapter in their life - starting college, a new career, traveling, etc.


Supply List

You can click on the item to purchase it from my Online Store.

Sketch Challenge - Artistically Inked

I made this card for this week’s Splitcoaststampers Sketch Challenge using the Artistically Inked Stamp Set. I love the watercolor look of these images.


Here’s the sketch. After I made my card, I realized that I should have rounded the corners.

Click on the sketch to see all the other cards made for this week’s challenge.


Tips & Instructions

  • Melon Mambo Card Base - 8 1/2 x 5 1/2, score at 4 1/4

  • Basic White Layer 5 1/4 x 4

  • Stamp three large flowers using Fresh Freesia Ink and stamp the center with Daffodil Delight Ink.

  • Stamp one smaller flowers with Melon Mambo Ink. Stamp some leaves with Granny Apple Green Ink.

  • Splatter some Fresh Freesia Ink on layer by flicking the end of a Light Fresh Freesia Stampin’ Blends Marker against the cap. Adhere layer to card base.

  • Stamp sentiment with Melon Mambo Ink on a 1/2” strip of Basic White and punch each end using the Banners Pick A Punch.

  • Banner each end of a 5/8” strip of Melon Mambo a little longer than the sentiment label and adhere together. Adhere label to card with Dimensionals.

  • Add some Fresh Freesia Opal Rounds.


On the inside layer stamp the sentiment with Melon Mambo and the flower with Fresh Freesia and Daffodil Delight Inks.


Supply List

You can click on the item to purchase it from my Online Store.

Sketch Saturday - Best Day

I made this cute Birthday Card for this week’s sketch challenge using the Best Day Stamp Set. I love that pudgy little kitty!


The sketch is from the weekly Atlantic Hearts Sketch Challenge. When I saw the stripes, I decided to use the Flowers & More Designer Series Paper which is so bright and fun.


Look at how sweet these images are and the sentiments are great for any birthday card!


Tips & Instructions

  • Parakeet Party Card Base - 5 1/2 x 8 1/2, score at 4 1/4

  • Basic White Layer - 5 1/4 x 4, adhere to the card base.

  • Flowers & More Designer Series Paper (striped pattern) - 5 x 3 3/4, adhere to the card.

  • Stamp the cat in the cupcake image with Black Memento Ink on Basic White. Color with Stampin’ Blends and fussy cut. I used Smokey Slate, Parakeet Parade, Polished Pink and Tahitian Tide Stampin’ Blends.

  • Adhere the image to a Basic White circle cut from the Layering Circle Dies and adhere to card.

  • Stamp sentiment with Black Memento Ink on 1/2” strip of Basic White and cut angle on each side. Adhere to the card with Dimensionals.

  • Add some Parakeet Party Matte Decorative Dots.


On the inside layer stamp the sentiment with Polished Pink and the confetti with Parakeet Party Ink. Add a 4 x 3/4 strip of the Designer Series Paper.


Supply List

You can click on the item to purchase it from my Online Store.

W-V Fun Fold Cards

This was a new Fun Fold Design for me. It’s called the W-V Fun Fold and it was very easy to make once I had the measurements.


Watch the video below to see how to make these cards. I have a Project Sheet that you can download with all the measurements and instructions by clicking the button below the video.


This is the card I made on the video using the Delicate Desert Designer Series Paper and Desert Details Stamp Set.


Here’s what it looks like opened. I used some Iridescent Pastel Gems but you can stamp the top and bottom corner if you want.


Do you wee the W and the V from the top view?


I made this card using the By The Bay Designer Series Paper and Seaside Bay Stamp Set. The sentiment was embossed with Gold Embossing Powder to coordinate with the gold accents on the patterned paper.


I love this sentiment on the inside layer. There’s a gold embossed pearl in the shell to go along with it. I added 3 Flat Adhesive-Backed Pearls.


This is the top view for this card.


Supply List

You can click on the item to purchase it from my Online Store.

Elegant Borders Sympathy Card

I made this beautiful Sympathy Card using the Elegant Borders Dies and Sun Prints Designer Series Paper.


This set of dies creates beautiful edges for your projects. It has four dies and below is what they look like when they are cut out.


Tips & Instructions

  • Thick Basic White Card Base - 5 1/2 x 8 1/2, score at 4 1/4

  • Sun Prints Designer Series Paper - 5 1/2 x 4, cut using the Elegant Borders Dies.

  • Stamp the leaves and sentiment at the bottom of the card front with Gray Granite Ink. The leaves are from the Decorative Borders Stamp Set and the sentiment is from the Something Fancy Stamp Set.

  • Adhere the Designer Series Paper to the card base.

  • Add a Rhinestone to the center of the decorative edge.


On the inside layer stamp the floral border with Gray Granite Ink. The border is from the Decorative Borders Stamp Set.


Supply List

You can click on the item to purchase it from my Online Store.

Note: The Decorative Borders Stamp Set is on the Retiring List and will be discounted by 20% starting April 4, 2023 while supplies last

Sketch Challenge - Playing In The Rain

I’m so happy with how this card turned out for this week’s Splitcoaststampers Sketch Challenge. The Playing In The Rain Bundle is so fun, I love the cute little fox walking in the rain.


When I first looked at this sketch I wasn’t sure what I was going to make but then decided to start with the Rain Or Shine Designer Series Paper and the Raindrops Embossing Folder.

Click the sketch to see what other crafters designed.


Tips & Instructions

  • Thick Basic White Card Base - 5 1/2 x 8 1/2, score at 4 1/4

  • Basic White Layer - 5 1/2 x 4 1/4, emboss using the Raindrops Embossing Folder. Adhere to the card base.

  • Rain Or Shine Designer Series Paper Layer - 5 x 3 1/2, cut each side at an angle and adhere to the card front.

  • Stamp clouds with Smoky Slate Ink on scrap of Basic White and cut using the coordinating dies.

  • Stamp fox with Black Memento Ink and cut with coordinating dies. Color using Stampin’ Blends. I used Dark Calypso Coral and Light So Saffron for the fox, Dark Parakeet Party for the coat and hat and Dark Daffodil Delight for the umbrella.

  • Stamp puddle with Balmy Blue Ink and color with a Light Balmy Blue Stampin’ Blends Marker. Cut with using the coordinating die.

  • Add Wink Of Stella to the clouds, puddle and umbrella.

  • Stamp sentiment on Black Memento Ink on a 1” strip of Basic White and punch one end using the Banners Pick A Punch.

  • Adhere the clouds to top using Dimensionals on the the top cloud. Adhere the puddle.

  • Adhere the fox with Dimensionals and sentiment with Dimensionals.


On the inside layer stamp that cute rabbit with Black Memento Ink and color with Stampin’ Blends. I used Light Balmy Blue for the puddle and Dark Parakeet Party for the jacket. Add some Light Flirty Flamingo to the rabbit’s ears, feet and cheek. I added Wink Of Stella to the puddle.


Supply List

You can click on the item to purchase it from my Online Store.

Tropical Leaf Hello Card

The leaves from the Topical Leaf Bundle are so cool. You can stamp and then punch using the coordinating punch in the bundle to make a fun card.


I love the sentiments in this stamp set; they are fun and I would get this set just for the sentiments. The coordinating punch will punch out the large leaf. You can save 10% when you purchase as a bundle.


Tips & Instructions

  • Evening Evergreen Card Base - 5 1/2 x 8 1/2, score at 4 1/4

  • Basic White Layer - 5 1/4 x 4

  • Stamp stems on white layer with Evening Evergreen Ink and adhere layer to card base.

  • On scrap of Evening Evergreen stamp the veins for 2 of the leaves with Versamark Ink, heat emboss with White Embossing Powder and punch with Tropical Leaf Punch.

  • On scrap of Soft Succulent stamp the veins for 2 of the leaves with Evening Evergreen Ink and punch with the Tropical Leaf Punch.

  • Arrange leaves on the stems and adhere. I used Dimensionals on 2 of the leaves.

  • Stamp sentiment on 1” strip of Evening Evergreen with Versamark Ink and heat emboss with White Embossing Powder. Adhere using Dimensionals.

  • Add 3 of the Soft Succulent In Color Opal Rounds.


On the inside layer stamp 3 small leaves with Soft Succulent Ink and veins with Evening Evergreen Ink across the top.


Supply List

You can click on the item to purchase it from my Online Store.

Sketch Saturday - Rejoice In Him

I made this pretty Easter Card for this week’s sketch challenge using the Rejoice In Him Stamp Set and Awash In Beauty Designer Series Paper. The white layer was embossed using the Cane Weave 3D Embossing Folder.


Here’s the sketch that I used from the weekly Atlantic Hearts Sketch Challenge.


Tips & Instructions

  • Mossy Meadow Card Base - 5 1/2 x 8 1/2, score at 4 1/4

  • Basic White Layer - 5 1/4 x 2, emboss using the Cane Weave 3D Embossing Folder.

  • Awash In Beauty Designer Series Paper Layer - 5 1/4 x 2

  • Basic White Layer - 5 1/4 x 4, adhere the embossed layer and the Designer Series Paper layer to the white layer.

  • Wrap piece of Fine Are Ribbon around the layer at the seam and adhere to the back. Adhere layers to card base.

  • Stamp sentiment with Calypso Coral Ink on Basic White and cut using the Something Fancy Dies.

  • Cut piece of Mossy Meadow using the next larger Something Fancy Dies and adhere behind the stamped label.

  • Banner one end of a 1/2” strip of Calypso Coral and a 3/8” strip of Calypso Coral using the Banners Pick A Punch (or cut banner with scissors). Adhere to card above the ribbon.

  • Adhere label using Dimensionals.

  • Add a gold Brushed Metallic Adhesive Backed Dot to label.


The Rejoice In Him Stamp Set has beautiful sentiments and images for Easter cards or can be used for other faith themed cards.


On the inside layer stamp the sentiment with Calypso Coral Ink and the palm with Mossy Meadow Ink, repeating without re-inking the stamp.


Supply List

You can click on the item to purchase it from my Online Store.

Marigold Moments Color Combos

The Marigold Moments Stamp Set has such gorgeous flower images. I love that the stamps are photopolymer and two-step stamping. I had fun playing with different color combinations for the marigolds.


Watch the video for an overview of this bundle and to see the different color combinations I used. You’ll get some tips along the way too.


These are the different combinations that I tried. Which do you like best? If you have this set, play around to see what you can come up with.


Tips & Instructions

  • Merry Merlot Card Base = 5 1/2 x 8 1/2, score at 4 1/4

  • Basic White - cut using the second from largest Deckled Rectangle Dies and emboss using the crosshatch Basics 3D Embossing Folder. Adhere layer to card base.

  • On scrap of Basic White stamp the detailed bunch of marigolds with Merry Merlot Ink. Stamp the background image with Crushed Curry, stamping off first. Cut using the coordinating die.

  • Stamp stems and leaves on scrap of Basic White with Old Olive Ink and cut using coordinating die.

  • Adhere flower and stems with leaves to white embossed layer.

  • Stamp sentiment on 1/2” strip of Basic White with Merry Merlot Ink. Cut each end at an angle and adhere to the card with Dimensionals.

  • Tie bow with 3 strands of Linen Thread and adhere with a Glue Dot.

  • Add some Brushed Brass Butterfly embellishments.


This card was made with Rich Razzleberry Cardstock. I used Rich Razzleberry and Daffodil Delight Inks for the flower and sentiment.


On the inside layer stamp the sentiment and flower using the colors that you used on the card front. The stem with leaves was stamped with Old Olive Ink.


Supply List

You can click on the item to purchase it from my Online Store.

Daffodil Daydream Easter Blessings Card

I made a bunch of these beautiful Easter Cards for the women’s group at my church to include in baskets we are giving to a local nursing home. I used the Daffodil Daydream Stamp Set along with the Scalloped Contours Dies.


This is a great stamp set for Easter or Mother’s Day. There are dies that go along with it but I didn’t used them to create this card.


Tips & Instructions

  • Thick Basic White Card Base - 5 1/2 x 8 1/2, score at 4 1/4

  • Daffodil Delight - cut using the largest dies from the Scalloped Contours Dies.

  • Basic White - cut using the 2nd largest dies from the Scalloped Contours Dies.

  • Stamp the daffodils with Black Memento Ink and color with Stampin’ Blends. I used Daffodil Delight and Dark Old Olive. Add some Wink Of Stella to the flowers.

  • Adhere layer to yellow layer and feed a piece of ribbon through, across the top and adhere to the back. (Note: the ribbon I used is retired and no longer available for purchase.) Adhere layer to card base.

  • Stamp sentiment on scrap of Basic White and punch with the Double Oval Punch.

  • Punch piece of Old Olive with the scalloped oval from the Double Oval Punch and adhere behind the stamped label. Adhere to card with Dimensionals.

  • Tie a bow with ribbon and adhere with a Glue Dot.

  • Add an Iridescent Pearl to the label.


On the inside layer stamp the sentiment with Old Olive Ink and the palm and dove with Black Memento Ink. Color the palm with a Dark Old Olive Stampin’ Blends Marker. I used the Rejoice In Him Stamp Set for the sentiment and images.


I love how this card turned out and I think the people in the Nursing Home will enjoy receiving the card and basket of goodies.


Supply List

You can click on the item to purchase it from my Online Store.

Sketch Challenge - Rhino Ready

Isn’t this just the cutest card? I made it for this week’s Splitcoaststampers Sketch Challenge using the Rhino Ready Stamp Set.


Here’s the sketch that I used. It is square but I wanted to make a standard A2 card.

Click on the sketch to see all the other cards that were made for this challenge. It’s amazing to see all the different interpretations.


The Rhino Ready Bundle is part of the Online Exclusive and has the most adorable images and fun sentiments. I only used the stamp set for this card but I’m excited to use those tree dies, the look so cool!


Tips & Instructions

  • Mint Macaron Card Base - 5 1/2 x 8 1/2, score at 4 1/4

  • Basic White Layer - 5 x 3 3/4, emboss using the Basics 3D Embossing Folder (the hobnail-glass dots folder).

  • Country Gingham Designer Series Paper Layer - 4 1/4 x 3

  • Basic White Layer - cut using the Scalloped Contours Dies.

  • Stamp the rhino, sentiment and bird with Black Memento Ink. Color the rhino with Light & Dark Smoky Slate and the birds with Daffodil Delight and Balmy Blue Stampin’ Blends. Add some Wink Of Stella to the rhino and birds if desired.

  • Adhere all the layers to card base.


On the inside layer stamp rhino, sentiment and bird with Black Memento Ink. Color rhino with Light & Dark Smoky Slate and the bird with Balmy Blue and Daffodil Delight Stampin’ Blends.


Supply List

You can click on the item to purchase it from my Online Store.

Rejoice In Him Easter Card

I can’t believe Easter is right around the corner. I made this beautiful Easter Card using the Rejoice In Him Stamp Set.


I love everything about this stamp set. The images and sentiments are perfect to share the hope and faith of Easter. They have a soft, brushstroke feel about them.


Tips & Instructions

  • Thick Basic White Card Base - 5 1/2 x 8 1/2, score at 4 1/4

  • Pretty Prints Designer Series Paper - 5 1/4 x 4, cut swirly circle using the Irresistible Blooms Dies.

  • Basic White 3 7/8 x 3 7/8, stamp the face of Jesus with Black Memento Ink and color with Stampin’ Blends. I used Light Crumb Cake for His clothing, Ivory for His face and just added a little Light Soft Suede on His hair. Adhere behind the Designer Series Paper. You can move it around to get is centered and cut the piece down if you need to.

  • Wrap Linen Thread around the layer 3 times and adhere it to the card.

  • Stamp sentiment with Black Memento Ink on Basic White and cut using the Something Fancy Dies.

  • Stamp 2 of the palms with Black Memento Ink on Basic White and fussy cut.

  • Adhere the palms behind the sentiment label and then adhere to the card with Dimensionals.

  • Tie a bow with 3 strands of Linen Thread and adhere with a Glue Dot.

  • Add a copper Brushed Metallic Adhesive Backed Dot.


On the inside layer stamp the sentiment and dove with Black Memento Ink and the palms with Shaded Spruce Ink.


Supply List

You can click on the item to purchase it from my Online Store.

Sketch Saturday - Let's Set Sail

I made this card for this week’s Atlantic Hearts Sketch Challenge. The By The Bay Designer Series Paper was perfect for the background pieces.


Here’s the sketch, isn’t it a fun one?


I haven’t used the Let’s Set Sail Bundle in a while and thought it would be perfect with the waves on the paper. You can purchase the stamp set and coordinating punch separately or bundle them together to save 10%


The By The Bay Specialty Designer Series Paper has beautiful water designs.


Tips & Instructions

  • Thick Basic White Card Base - 5-1/2 x 8-1/2, score at 4-1/4

  • By The Bay Specialty Designer Series Paper - cut 6 pieces at 1-15/16 across by 1-11/16 down.

  • Basic White Layer - 5-1/4 x 4, adhere the patterned paper to the layer leaving spaces between the pieces but going right up to the edges. Adhere layer to card base.

  • Night Of Navy Layer - 3-1/4 x 2-1/4

  • Basic White Layer - 3-1/8 x 2-1/8, adhere to blue layer.

  • Stamp sailboat on scraps of Basic White and punch with coordinating Sailboat Builder Punch. I stamped the sails with Real Red Ink and the boat with Crumb Cake Ink.

  • Lay the sailboat on the white layer to determine placement and stamp birds with Night Of Navy Ink.

  • Adhere the boat to the white layer and adhere layer to card using Dimensionals.

  • Stamp sentiment from the Best Day Stamp Set with Night Of Navy Ink on a 1/2” strip of Basic White and punch each end with the Banners Pick A Punch. Adhere to card.

  • Add a Flat Adhesive-Backed Pearl to the sentiment.


On the inside layer stamp the sentiment and birds with Night Of Navy Ink. Cut a 4” piece of the Designer Series Paper along the wave and adhere to the layer.


This is a great masculine birthday card!


Supply List

You can click on the item to purchase it from my Online Store.

One Sheet Wonder Stamping

These cards were so easy to make using the One Sheet Wonder Technique. Just stamp an 8 1/2 x 11 sheet of Basic White Cardstock with various flowers and colors and then cut them apart. They really turned out beautiful!


Watch the video to see how to create these cards and then gather some stamps and ink pads to make your own.


Tips & Instructions

  • Melon Mambo Card Base - 5 1/2 x 8 1/2, score at 4 1/4

  • Basic White Cardstock - 8 1/2 x 11, score at 5 1/2 and 4 1/4

  • Stamp flowers and leaves with different colors using the score lines as a guide. Start with the larger images and then fill in with smaller images.

  • This is what the sheet looks like before I cut it apart.


  • Cut the sheet into 4 pieces at the score lines then cut down to 5 1/4 x 4 layers.

  • Stamp sentiment with Melon Mambo Ink.

  • Adhere to Melon Mambo Card Bases.

  • Add some 2021-2023 In Color Opal Rounds

This is the card that I made on the video.


This Card is very basic. I didn’t add anything to it and I think it is so pretty - SIP - Stamp, Ink & Paper.


I stamped the sentiment on a scrap of Basic White and punched it with the Lasting Label Punch. I used Dimensionals to adhere it to the card.


I stepped up this one a little more by adding some layers. The stamped layer was cut to 5 x 3 3/4 and adhered to a piece of Melon Mambo cut to 5 1/8 x 3 7/8.

The sentiment was stamped on Basic White and cut using one of the Something Fancy Dies. I used the next larger die to cut a piece of Melon Mambo and backed the stamped label. Adhere here it to the card with Dimensionals.


Supply List

You can click on the item to purchase it from my Online Store.

Simple Stamping - Beautiful Thistle

I made these two simple cards with basic supplies. The first is just ink, paper and stamps and the second is stepped up a little bit with a punched label and butterfly embellishment.

It doesn’t take tons of supplies to make a pretty card.


This is the basic card and I colored the large flower from the Beautiful Thistle Stamp Set with Stampin’ Write Markers. These are water-based markers and can be used to color directly on the stamp.

The card base is Calypso Coral and is 5 1/2 x 8 1/2, scored at 4 1/4. The Basic White Layer is 5 x 3 3/4.


The colors I chose are Daffodil Delight, Calypso Coral and Garden Green. Just color directly on your stamp starting with the lightest color first and then breathe on the stamp to moisten before stamping on your cardstock. I also colored the sentiment with the Calypso Coral Marker.

Note: The markers can only be purchased as a full set in their color family (i.e. Brights, Regals, Subtles, etc.) but you can use any water-based marker.


I stepped this card up by stamping the sentiment on a scrap of Basic White and then punching it using the Rectangle Postage Stamp Punch. Add a Brushed Brass Butterfly to finish it off.


The Beautiful Thistle Stamp Set has the perfect image for this technique. The sentiments are so pretty!


On the inside layer I colored the smaller flower stamp with the markers and didn’t include a sentiment.


Supply List

You can click on the item to purchase it from my Online Store.

Sketch Challenge - Greatest Journey

Here’s the card I made for this week’s Splitcoaststampers Sketch Challenge. When I saw the sketch, I thought of a mountain and decided to use the The Journey Designer Series Paper as a starting point.


Here’s the sketch for SC949. You can click on the sketch to see all the projects made for this challenge. The sketch designer, Chrissy designs the sketch around horse gaits, so cool!


Tips & Instructions

  • Thick Basic White Card Base - 5 1/2 x 8 1/2, score at 4 1/4

  • Enjoy The Journey Designer Series Paper (starry sky pattern) - 5 1/4 x 4

  • Enjoy The Journey Designer Series Paper (mountain) - 5 1/4 long, cut the mountain shape and adhere to the sky pattern.

  • Cut the tent pieces using the Greatest Journey Dies from Soft Succulent and Evening Evergreen and adhere the pieces together.

  • Stamp 2 sets of trees with Evening Evergreen Ink on scraps of Soft Succulent and cut with the coordinating die. Adhere to the bottom and trim off the overhang pieces. I used these to fill in the bottom between the trees so it is behind the tent.

  • Adhere the tent with Dimensionals.

  • Stamp sentiment with Starry Sky (or Night Of Navy) Ink on scrap of Basic White and cut using the Stylish Shapes Dies. Adhere using Dimensionals.

  • Adhere the layer to the card base.

  • Add some small Rhinestones to the sky.


On the inside layer stamp the trees with Evening Evergreen and stamp stars across the top with Starry Sky (or Night Of Navy) Inks.


Supply List

You can click on the item to purchase it from my Online Store.

Cute Rain Or Shine Card from March's Tutorial Bundle

This is the card that I made for this month’s Simple Suite Stampers Tutorial Bundle. We featured the Rain Or Shine Suite. I love this cute little turtle.


You can get this tutorial bundle for free when you purchase from my Online Store in March or you can purchase the bundle directly by clicking the picture.

The Tutorial Bundle includes pictures, measurements and instructions for 12 fun projects using the Rain Or Shine products.


I cut the Rain Or Shine Designer Series Paper in strips and then placed them in order on the white layer to make a continuous scene. The turtle was stamped and colored with Stampin’ Blends.


I have a strip of the Designer Series Paper on the inside and didn’t put a sentiment on so I had plenty of room to write a note.


Did you notice the Loose Daisy Embellishments that I added?


Supply List

You can click on the item to purchase it from my Online Store.

Colorful Kaleidoscope Cards

Stampin’ Up! added a new kit to their online Kits Collection. I love this Colorful Kaleidoscope Kit. Each card has an intricate, peekaboo laser cut layer that coordinates with a fun geometric card front.


In the video I’ll show you all that’s included in the kit and how to make these cards. I made a mistake on the first card showing where to put the foam adhesive strips and I realized it when I got to the third card so listen through to see how it should be done.


The kit has everything you need to make 9 cards, 3 of each design as well as coordinating envelopes.


Here’s what’s included in the kit:

  • Colorful Kaleidoscope Photopolymer Stamp Set

  • 1 Clear Stamp Block

  • Gray Granite Stampin’ Spot

  • Predesigned projects

  • Step-by-step instructions

  • Precut pieces (No prep work! Get right to crafting)

  • Makes 9 cards: 3 each of 3 designs

  • Folded card size: 4-1/4" x 5-1/2" (10.8 x 14 cm)

  • 9 preprinted envelopes

  • Enough adhesive to complete projects

  • Gold Brushed Metallic Dots

  • 9 peek-through laser-cuts to create a kaleidoscopic effect

  • A 9-7/8" x 6-1/2" x 1-3/4" (25.1 x 16.5 x 4.4 cm) printed designer box for storage or crafting on the go

Product colors: Bermuda Bay, Calypso Coral, Gray Granite, Night of Navy, and Petal Pink


The sentiments can be used for thank you cards, birthday cards or just because, for no specific reason. You can use these for the kit and then save them for future projects.


These are the cards that I made on the video. They are so pretty!


Supply List

You can click on the item to purchase it from my Online Store.

Lighting The Way Card

I don’t know why it took me so long to use the Lighting The Way Bundle. That lantern die is amazing and I love the sentiment. This card reminds me of camping when I was a kid.


The stamp set and dies are great on their own or bundle together to save 10%. The fireflies (or what I called lightning bugs) are so fun to add to a card.


Tips & Instructions

  • Thick Basic White Card Base - 5 1/2 x 8 1/2, score at 4 1/4

  • Enjoy The Journey Designer Series Paper - 5 1/4 x 4, adhere to the card base.

  • Cut lantern from a piece of Silver Foil Specialty Paper. It looks brass or gold in this picture but it is silver. You can choose whatever color you want.

  • Cut the inside pieces for the lantern from the Enjoy The Journey Designer Series Paper. I used this sheet and I just put a scrap of the the light part of the lantern to get those small pieces. I wanted to make it look like it was glowing.


  • Adhere the lantern to the card and adhere the light pieces. I used Liquid Glue for this.

  • Stamp the sentiment with Starry Sky Ink on a 1/2” strip of Basic White and adhere to the card.

  • Cut 3 fireflies from So Saffron and adhere to the card.


On the inside layer stamp the sentiment with Starry Sky Ink and the trails of light with So Saffron Ink.


Supply List

You can click on the item to purchase it from my Online Store.

Sketch Challenge - Celebrate Sunflowers

Here’s the card I made for this week’s Splitcoaststampers Sketch Challenge. This beautiful sunflower was made using the Enjoy The Journey Designer Series Paper and Sunflower Dies.


The sketch is SC948 and you can click on it to see the other cards made for this challenge.


Tips & Instructions

  • Blackberry Bliss Card Base - 5 1/2 x 8 1/2, score at 4 1/4

  • Basic White Layer - 5 1/4 x 4, flick Mango Melody Ink from a Stampin’ Write Marker on the layer.

  • Stamp sentiment with Blackberry Bliss Ink on Basic White layer.

  • Cut the long swirly detailed strip from Blackberry Bliss using the Irresistible Blooms Die and adhere to the Basic White layer, trim off excess that hangs over the layer.

  • Cut the background for the large sunflower using the Sunflower Dies from the center of the Enjoy The Journey Designer Series Paper. I used the sheet below.


  • Cut the detailed large sunflower from Blackberry Bliss using the Sunflower Dies and adhere to the background sunflower. Adhere to bottom corner of the Basic White layer and trim off the excess that hangs over the layer.

  • Stamp small sunflower on the Designer Series Paper with Blackberry Bliss Ink and cut with coordinating die. Adhere to to corner of the layer and trim off excess that hands over the layer.

  • Adhere layer to card base.


On the inside layer stamp two small sunflowers with Blackberry Bliss Ink.


Supply List

You can click on the item to purchase it from my Online Store.