Sketch Saturday - Tidings All Around

I found today’s sketch on Pinterest by searching Card Sketches. It’s a simple card but I think the Night Before Christmas Designer Series Paper makes it beautiful.

 
Sketch Saturday - Tidings All Around.jpg
 

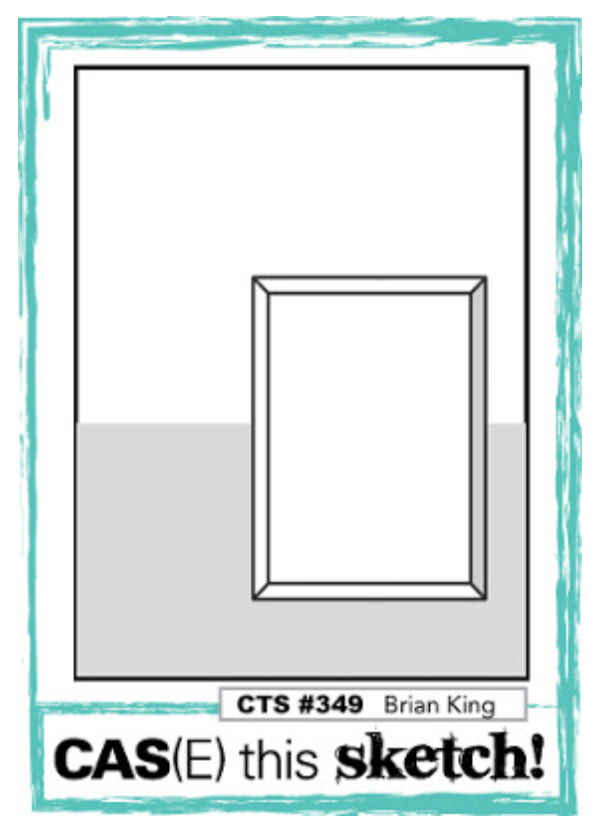
Here’s the sketch. It’s from Viva La Verve. They post lots of sketches on Pinterest.

 
Screen Shot 2019-11-29 at 10.41.04 PM.png
 

Tips & Instructions

  • Real Red Card Base - 5 1/2 x 8 1/2, score at 4 1/4

  • Night Before Christmas Designer Series Paper - 5 3/8 x 4 1/8 and adhere to card base

  • Stamp sentiment from Tidings All Around with Real Red Ink on scrap of Whisper White and punch with Story Label Punch

  • Cut 3 strips of Real Red at 1/2 and punch end with Banner Triple Punch

  • Lay out the strips on card to get placement and then trim so they varying lengths (mine are 2 7/8, 2 3/8, 2 — I just eyeballed it)

  • Adhere banner strips to card and then adhere sentiment label using Dimensionals

  • Add some Red Rhinestones and Pearls

 
Sketch Saturday - Tidings All Around2.jpg
 

On the Inside, I stamped the floral image with Mossy Meadow Ink and the sentiment with Real Red Ink.

 
Sketch Saturday - Tidings All Around Inside.jpg
 

If you want any of the products I used on this project, just click on the item below or the Shop Now button and it will bring you to my Online Store. Please use the current Host Code when you go to checkout your order. You can also click directly on an item to order. 

Fun Pop-Up Gift Card Holders

These Gift Card Holders are just perfect for Christmas or any occasion. I saw these on various YouTube Videos and had to try it. I’m not sure who the original designer is, but Thank You, I love them.

 
Pop-Up Gift Card Holder Both.jpg
 

I’ll show you how to make the Navy card with the beautiful silver embossing on the video and scroll down for the instructions and products for the plaid one.


Tips & Instructions

  • Night Of Navy card base - 4 1/4 x 11, score 4 1/2, 5 1/2 and 6 1/2

  • Whisper White Strip - 1 x 11 for belly band

  • Scraps for outside star and inside star

  • Fold card base on score lines and adhere as shown on video and punch corners with the Detailed Trio Punch

  • Cut along mountain top fold so the card can fit in

  • Stamp stars using Versamark on the outside and top flap of the inside

  • Cut Star and stamp JOY sentiment with Versamark and emboss in Silver and adhere to inside

  • Wrap belly band around and determine placement for sentiment

  • Stamp sentiment Love and Peace on belly band with Versamark and emboss with Silver

  • Adhere ends of belly band to secure it and make sure it can slide easily

  • Stamp star with Versamark and emboss with Silver, cut out with coordinating star die and adhere to belly band, add a Rhinestone to center of the star

 
Pop-Up Gift Card Holder Blue.jpg
 

This is what the inside looks like with the card popped up.

 
Pop-Up Gift Card Holder Blue Inside.jpg
 

If you want any of the products I used on this project, just click on the item below or the Shop Now button and it will bring you to my Online Store. Please use the current Host Code when you go to checkout your order. You can also click directly on an item to order. 
Scroll down for the instructions and products for the plaid version.


The Plaid gift card holder’s base is made with Shaded Spruce. The Wrapped In Plaid Specialty Designer Series Paper was cut at 4x4 but I think I would make them 4 1/4 x 4 to make it fit better. Cut 4 of those for both panels on the outside and inside.

 
Pop-Up Gift Card Holder Plaid.jpg
 

The belly band Cherry Cobbler and cut at 1 x 11. Stamp the sentiment with Versamark and heat emboss with White Embossing Powder. Punch the tree with Gold Foil Paper. I also punched the place for the gift card with the Story Label Punch and then cut ends to fit the card.

Cut sentiment label with the square from the Frosted Frames Dies (or just cut a square to fit) Stamp sentiment with Cherry Cobbler Ink and tree with Shaded Spruce Ink.

 
Pop-Up Gift Card Holder Plaid Inside.jpg
 

If you want any of the products I used on this project, just click on the item below or the Shop Now button and it will bring you to my Online Store. 

Flap Over Fun Fold Christmas Card

Here’s a Fun Fold Card that was inspired by Dawn Griffith. I watched her video and changed it up a little bit.

 
Flap Over Fun Fold Christmas Card Both.jpg
 

Don’t you just love this snowman. He makes me smile. It’s from the Snowman Season Stamp Set and I used the Let It Snow Designer Series Paper to coordinate with it. Watch the video to see all the steps to make this Fun Fold card.


Flap Over Fun Fold Christmas Card2.jpg
 

Tips & Instructions

  • Real Red Card Base - 5 1/2 x 4 1/4

  • Coastal Cabana Layer - 5 1/2 x 4

  • Whisper White Layer 5 1/2 x 3 1/4

  • Let It Snow Specialty Designer Series Paper - 6 x 3 1/2, score at 5 9/16

  • Scrap of Real Red - Cut scalloped ring using scalloped Layering Circle Die and plain Layering Circle Die that nest together

  • Scrap of Coastal Cabana - Cut ring using Layering Circle Dies that nest together (use the one plain one from the scalloped ring and the next smallest)

  • Using the smaller plain circle die from the Coastal Cabana ring, cut circle out of the Designer Series Paper where you want the snowman to peek out

  • Line up the Whisper White Layer behind the Designer Series Layer and mark circle cut out with a pencil for placement of snowman and stamp snowman with Black Memento Ink, then stamp sentiment with Real Red Ink

  • Add small dots of Liquid Glue on snowman image - on snowflakes and ground and then pour Glitter over

  • Adhere Coastal Cabana ring around circle and then adhere Real Red scalloped ring

  • Line up layers and adhere folded Designer Series Paper to back of Coastal Cabana Layer

  • Adhere Whisper White layer to Coastal Cabana Layer making sure snowman is centered in circle

  • Adhere to Real Red card base

  • Make bow and adhere with Mini Glue Dots

 
Flap Over Fun Fold Christmas Card1.jpg
 

If you want any of the products I used on this project, just click on the item below or the Shop Now button and it will bring you to my Online Store. Please use the current Host Code when you go to checkout your order. You can also click directly on an item to order. 

Elegant Christmas Card - Sending you a little Yuletide Cheer

I love all the copper on this card: the sentiment, the floral background and the Brightly Gleaming Specialty Designer Series Paper! Gorgeous!!!

 
Yuletide Cheer2.jpg
 

Tips & Instructions

  • Pretty Peacock Card Base - 5 1/2 x 8 1/2, score at 4 1/4

  • Brightly Gleaming Specialty Designer Series Paper - 5 1/2 x 2 1/2, adhere to card base

  • Gold Foil - cut with Frosted Frames Dies

  • Whisper White Cardstock - cut with Frosted Frames Dies

  • Stamp sentiment with Versamark and heat emboss Copper Embossing Powder and adhere to Gold Foil floral frame

  • Adhere frame to card using Dimensionals

 
Yuletide Cheer .jpg
 

On inside, heat emboss sentiment with Copper Embossing Powder. Adhere 3/4 x 5 1/4 strip of Designer Series Paper to bottom.

 
Yuletide Cheer inside.jpg
 

If you want any of the products I used on this project, just click on the item below or the Shop Now button and it will bring you to my Online Store. Please use the current Host Code when you go to checkout your order. You can also click directly on an item to order. 

Sketch Saturday - Snow Front

Today’s sketch is another CAS(E) This Sketch challenge from Splitcoaststampers and I really like it.

 
Sketch Saturday Snow Front Tree.jpg
 

Here’s the sketch. You can play along at this link CAS(E) this Sketch #349

 
Screen Shot 2019-11-22 at 10.27.01 PM.png
 

Tips & Instructions

  • Coastal Cabana Card Base - 5 1/2 x 8 1/2, score at 4 1/4

  • Let It Snow Designer Series Paper Layer - 4 x 3

  • Real Red Cardstock Layer - 4 x 2 1/4

  • Adhere layers to card base and then adhere red/white striped strip from Let It Snow Designer Series Paper across seam

  • Whisper White Stitched Rectangle (5th largest)

  • Velum Layer - 3 7/16 x 2 1/8 (cut so it fits inside the stitching for the rectangle

  • Stamp tree with Early Espresso, birds with Real Red, snow with Smoky Slate and sentiment (from Itty Bitty Christmas) with Real Red. (Note, leave to dry or dry with heat tool. I like to just let it sit so it doesn’t warp at all.)

  • Adhere Vellum layer to Stitched Rectangle and adhere to card with Dimensionals

 
Sketch Saturday Snow Front Tree2.jpg
 

On the inside stamp tree with Early Espresso Ink and sentiment and bird with Real Red Ink.

 
Sketch Saturday Snow Front Tree inside.jpg
 

If you want any of the products I used on this project, just click on the item below or the Shop Now button and it will bring you to my Online Store. Please use the current Host Code when you go to checkout your order. You can also click directly on an item to order. 

Embossed Christmas Pizza Boxes

Transform a plain gold pizza box into a gorgeous treat box!

 
Embossed Christmas Pizza Boxes.jpg
 

Watch the video below to see how to emboss the pizza box and then make a pretty belly band to wrap around it.


Tips & Instructions

  • Emboss Gold Mini Pizza Box using the Tin Tile 3D Embossing Folder (use Embossing Plate with 3D Embossing Folders) and make the box

  • Cut belly band with either 2 x 8 1/2 piece of Shaded Spruce or Cherry Cobble Cardstock

  • Cut oval with Whisper White Cardstock and scalloped oval with Wrapped In Plaid Designer Series Paper and adhere them together

  • Stamp sentiment from Itty Bitty Christmas with either Cherry Cobbler or Shaded Spruce Ink

  • Punch 2 trees from Shaded Spruce Cardstock and 1 tree from Wrapped In Plaid Designer Series Paper and adhere to oval, using Dimensionals to pop up the plaid tree

  • Wrap belly band around pizza box leaving the opening at the top and adhere oval to top

  • Tie Jingle Bell with Linen Thread and adhere to tree with Mini Glue Dot

This box has the Cherry Cobbler belly band.


I used Shaded Spruce for the Belly Band on this box.

 
Embossed Christmas Pizza Box2.jpg
 

This is one of my go to stamp sets for Christmas. It has such great sentiments.

 
Itty Bitty Christmas Stamp Set.jpg
 

If you want any of the products I used on this project, just click on the item below or the Shop Now button and it will bring you to my Online Store. Please use the current Host Code when you go to checkout your order. You can also click directly on an item to order. 

Cup Of Christmas - Cup Of Cheer!

Here’s another card I made using the Cup Of Christmas Bundle. I love how you can change the colors and get a different look. Look at yesterday’s Blog post for a video using different papers/colors.

 
Cup Of Christmas Cup of Cheer2.jpg
 

This Bundle has some great images and dies. If you purchase a bundle, you save 10%.

 
Cup Of Christmas Bundle.jpg
 

Tips & Instructions

  • Merry Merlot Card Base - 5 1/2 x 8 1/2, score at 4 1/4

  • Rococo Rose Layer - 5 1/4 x 4

  • Whisper White Layer - 5 x 3 3/4, emboss with Subtle Embossing Folder and adhere layers to card base.

  • Cut cups with Rococo Rose and Merry Merlot Cardstock

  • Cut poinsettia with Whisper White Cardstock and adhere to one of the cups

  • Heat emboss sentiment on one cup with white embossing powder

  • Cut candy canes from Rococo Rose and Merry Merlot Cardstock. Adhere striped over solid candy cane. Make sure you flip one of them so it faces the opposite way.

  • Adhere candy canes behind cup and adhere cups using Dimensionals

  • Add 3 Faceted dots

 
Cup Of Christmas Cup of Cheer (1).jpg
 

On the inside, stamp sentiment with Merry Merlot Ink and floral image with Rococo Rose Ink.

 
Cup Of Christmas Cup of Cheer Inside.jpg
 

If you want any of the products I used on this project, just click on the item below or the Shop Now button and it will bring you to my Online Store. Please use the current Host Code when you go to checkout your order. You can also click directly on an item to order. 

Sweet Christmas Wishes with Cup Of Christmas!

The Cup Of Christmas Bundle is really fun and you can make some cute cards with it. The stamp for the cup is unique; you can stamp either side so you can get the handle to be on the left or the right….how cool!

 
Cup Of Christmas both.jpg
 

Watch the video to see how to use the Snowfall Accents Puff Paint to create the foam on the rim of the cup. It is amazing!


Tips & Instructions

  • Real Red Card Base - 5 1/2 x 8 1/2, score at 4 1/4

  • Coastal Cabana Layer - cut with 2nd largest Stitched Rectangle

  • Whisper White Layer - cut with 3rd largest Stitched Rectangle

  • Scraps of Let It Snow and Real Red for cup, candy canes and bow

  • Stamp sentiment on white layer using Real Red Ink

  • Add line of Snowfall Accents Puff Paint to rim of cup and heat with Heat Tool until it puffs up

  • Adhere layers to card base and candy canes (criss crossing them)

  • Adhere bow to cup and then adhere cup over candy canes using Dimensionals

 
Cup Of Christmas Card.jpg
 

If you want any of the products I used on this project, just click on the item below or the Shop Now button and it will bring you to my Online Store. Please use the current Host Code when you go to checkout your order. You can also click directly on an item to order.

3 Day Sale!!!

Are you ready for a sale??? Stampin’ Up! is having its Online Extravaganza Sale November 20-22, 2019.

 
10.01.19_SHARABLE_ONLINEX_NA.jpg
 

Get ready for three days of savings with the Stampin’ Up! Online Extravaganza! For three days only, you can get these deals:

15% OFF INKPADS AND CARDSTOCK IN
Neutrals Collection
Regals Collection
2018–2020 In Colors
2019–2021 In Colors (except Purple Posy) 


TAKE ADDITIONAL 5% OFF THE ORIGINAL 10% DISCOUNT: 
8 bundles
Neutrals Classic Stampin’ Pads Assortment
Regals Classic Stampin’ Pads Assortment
2018–2020 In Colors Classic Stampin’ Pads Assortment

Joy To The World!

The Feels Like Frost Specialty Designer Series Paper is so beautiful. I cut a piece for the focal point of this card using the Frosted Frames Dies.

 
Feels Like Frost - Joy To The World Card2.jpg
 

One side of the paper has beautiful winter images and the other is silver foil and white. So gorgeous!!!

 
Screen Shot 2019-11-18 at 10.13.15 PM.png
 

Tips & Instructions

  • Night of Navy Card Base - 4 1/4 x 11, score at 5 1/2 (side folding, horizontal card)

  • Seaside Spray Layer - 4 x 5 1/4

  • Wrap piece of Seaside Spray Metallic Ribbon around Seaside Spray layer adhering in the back and attach layer to card base

  • Cut Feels Like Frost Specialty Designer Series Paper using the Frosted Frames Dies. Prior to cutting move the die around so you can choose the area you want to show. Cut some extra foliage from paper.

  • Using Embossing Buddy, wipe focal. Stamp sentiment (from Itty Bitty Christmas) using Versamark and then heat emboss with White Embossing Powder

  • Adhere the extra foliage behind focal piece and then adhere focal piece using Dimensionals

  • Adhere Rhinestones randomly

 
Feels Like Frost - Joy To The World card.jpg
 

On the inside, stamp sentiment with Night Of Navy Ink. Cut snowflakes from the leftover Feels Like Frost Specialty Designer Series Paper and adhere on the inside.

 
Feels Like Frost - Joy To The World Inside.jpg
 

If you want any of the products I used on this project, just click on the item below or the Shop Now button and it will bring you to my Online Store. Please use the current Host Code when you go to checkout your order. You can also click directly on an item to order. 

O, Holy Night, The Stars Are Brightly Shining!

So Many Stars is the perfect name for this bundle. There are tons of stars in the stamp set and the dies!

 
Screen Shot 2019-11-12 at 9.38.15 PM.png
 

Here’s the card I made using this bundle. I used Night Of Navy, Seaside Spray and Gold Foil on this card and I think it turned out beautiful.

 
So Many Stars Card2.jpg
 

I’ll walk you through the steps to make this card on the video below.


Tips & Instructions

  • Night Of Navy Card Base - 5 1/2 x 8 1/2, score at 4 1/4

  • Seaside Spray Layer - 5 1/4 x 4

  • Stamp sentiment on bottom corner of card with Versamark and emboss with Silver Embossing Powder

  • Stamp star image with Versamark on Whisper White Scrap and emboss with Silver Embossing Powder

  • Cut star and swoosh of stars with Silver Foil Sheet using Stitched Star Dies

  • Adhere swoosh to Seaside Spray Layer

  • Adhere embossed star to silver star and then adhere over swoosh using Dimensionals

  • Adhere smaller stars around

  • Adhere layer to card base

 
So Many Stars Card.jpg
 

If you want any of the products I used on this project, just click on the item below or the Shop Now button and it will bring you to my Online Store. Please use the current Host Code when you go to checkout your order. You can also click directly on an item to order. 

Peaceful Christmas Scene

Isn’t this a beautiful winter scene for a Christmas card?

 
Snow Front Merry Christmas card2.jpg
 

I used the Snow Front Stamp Set to create this card. There are so many stamps in this set that you can use to make all kinds of beautiful scenes.

 
Snow Front Merry Christmas .jpg
 

Tips & Instructions

  • Crumb Cake Card Base - 5 1/2 x 8 1/2, score at 4 1/4

  • Mossy Meadow Layer - 5 1/4 x 4

  • Whisper White Layer 5 x 3 3/4

  • Stamp scene on Whisper White Layer - Stamp large tree with Early Espresso Ink and then stamp birds with Real Red Ink. Stamp the ground with Smoky Slate Ink. Stamp the mountains with Smoky Slate Ink, stamping off first to give you a lighter shade. Stamp some pine trees with Mossy Meadow stamping direct and then stamp again without re-inking. Stamp snowman with Early Espresso Ink. Stamp sentiment (From Seasonal Snowman) with Mossy Meadow Ink.

  • Add Real Red Glimmer Dots to card

 
Snow Front Merry Christmas card.jpg
 

On the inside stamp sentiment (from Seasonal Snowman) with Early Espresso Ink. Create another scene on the inside as shown or create your own.

 
Snow Front Merry Christmas card inside.jpg
 

Sketch Saturday - Snow Front

Today’s card was made using the Snow Front Stamp Set for a team challenge that I’m participating in.

 
Sketch Saturday - Snow Front Card.jpg
 

Here’s the sketch that I used. There’s a lot of pieces and I had to really look for that scalloped edge along the sentiment. I went through my dies and found one from the Stitched Be Mine Dies. You can use whatever you have on hand.

 
Screen Shot 2019-11-06 at 10.20.34 AM.png
 

Tips & Instructions

  • Night Of Navy Cardstock - 4 1/4 x 11, score at 5 1/2 (side folding horizontal card)

  • Sahara Sand Layer - 3 1/2 x 4 3/4 and adhere to card base

  • Wrapped In Plaid Strip - 1 1/4 x 4 1/2, punch banner at each end (should be 4” point to point)

  • Whisper White scrap - cut with 4th largest Layering Oval Die

  • Whisper White strip - 5/8 x 5 1/2, stamp sentiment from Itty Bitty Christmas with Night Of Navy Ink

  • Gold Foil strip - 1/2 x 4, cut with scalloped edge from Stitched Be Mine Die

  • Stamp scene on Oval - cabin with Merry Merlot, trees with Shaded Spruce, stamping multiple times and ground with Smoky Slate, stamping off first to get lighter shade

  • Adhere gold scalloped edge behind sentiment strip and then adhere strip to card

  • Adhere oval to plaid strip and then adhere to card using Dimensionals

 
Sketch Saturday - Snow Front Card2.jpg
 

On the inside stamp sentiment with Night Of Navy, trees with Shaded Spruce and snowman with Smoky Slate Inks.

 
Sketch Saturday - Snow Front Inside.jpg
 

If you want any of the products I used on this project, just click on the item below or the Shop Now button and it will bring you to my Online Store. Please use the current Host Code when you go to checkout your order. You can also click directly on an item to order. 

Joy Of Giving Tag Kit

The Joy Of Giving Tag Kit has everything you need to make 30 beautiful gift tags.

 
Screen Shot 2019-11-06 at 10.29.11 PM.png
 

The kit includes a Stamp Set, Poppy Parade Ink Spot, Clear Block, Shaded Spruce Bakers Twine, Tag Bases and all the pieces needed to create these 30 tags, three designs. You even get a pretty box to store them in.

 
Screen Shot 2019-11-06 at 10.26.18 PM.png
 

I’ll walk you through making 1 of each of the 3 designs in the video below. Stay until the very end where I will show how best use the gold foil pieces and then show the finished tags.


Joy Of Christmas Tags All.jpg
 

Here’s a peak inside the box!

 
Joy Of Christmas Tags in box.jpg
 

If you want to purchase this project kit, just click on the item below or the Shop Now button and it will bring you to my Online Store. Please use the current Host Code when you go to checkout your order. You can also click directly on an item to order. 

Simple But Elegant Rose Christmas Card

Here’s another card using this gorgeous Christmastime Is Here Specialty Designer Series Paper.

 
Christmastime Is Here - Merry Christmas2.jpg
 

This would be an easy card to mass produce for Christmas! The Designer Series Paper makes it beautiful but the steps are pretty simple.

Tips & Instructions

  • Cherry Cobbler Card Base - 5 1/2 x 8 1/2, score at 4 1/4

  • Christmastime Is Here Designer Series Paper (Floral) - 5 1/4 x 2 3/4

  • Christmastime Is Here Designer Series Paper (Pattern) 5 1/4 x 1 3/4

  • Lay both pieces of the Designer Series Paper on card base and line up so there is a border all round. Using a little adhesive at the top edge of the patterned paper, adhere floral paper over it, being sure to keep the border of the base even. Do not adhere to card base.

  • Wrap ribbon around the seam of the papers and adhere in the back, then adhere layer to card base.

  • Stamp Sentiment on Whisper White Cardstock with Versamark, and heat emboss with Gold Embossing Powder. Cut with Layering Oval Die

  • Cut Gold Foil Paper with scalloped Layering Oval Die and adhere behind sentiment oval

  • Adhere Ovals over ribbon with Dimensionals

  • Tie bow with Gold Ribbon and adhere with Mini Glue Dot

  • Add Gold Glimmer Dots

 
Christmastime Is Here - Merry Christmas.jpg
 

On the inside, stamp and emboss sentiment with Gold Embossing Powder. Stamp greenery with Old Olive Ink.

 
Christmastime Is Here - Merry Christmas Inside.jpg
 

If you want any of the products I used on this project, just click on the item below or the Shop Now button and it will bring you to my Online Store. Please use the current Host Code when you go to checkout your order. You can also click directly on an item to order. 

Beautiful Christmas Rose Card

You’re going to love this Christmastime Is Here Suite. The Designer Series Paper has lots of gold accents and is just beautiful!

 
Christmastime Is Here Card2 2.jpg
 

The floral image was embossed with gold and then colored with Stampin’ Blends Markers. I’ll walk you through the products in this suite as well as show you how I created this card on the video below.


For any purchases from my Online Store during the month of November, I’ll send you a FREE pdf with 8 projects using the Christmastime Is Here Suite!!!

Tips & Instructions

  • Cherry Cobbler Card Base - 5 1/2 x 8 1/2, score at 4 1/4

  • Christmastime Is Here Specialty Designer Series Paper - 5 1/2 x 4 1/4, adhere to card base

  • Whisper White Layer - 3 3/4 x 5

  • Use Embossing Buddy to wipe Whisper White Layer

  • Stamp large floral image with VersaMark, pour Gold Embossing Powder over and heat with Heat Tool

  • Color image with Stampin’ Blends Markers (Poppy Parade Combo, Dark Old Olive, Dark Cherry Cobbler, Light Crumb Cake)

  • Stamp sentiment (from Itty Bitty Christmas) with Golden Glitz Metallic Ink (let dry or dry with Heat Tool)

  • Adhere to card with Dimensionals

  • Adhere 3 Gold Glitter Dots

 
Christmastime Is Here Card 2.jpg
 

If you want any of the products I used on this project, just click on the item below or the Shop Now button and it will bring you to my Online Store. Please use the current Host Code when you go to checkout your order. You can also click directly on an item to order. 

Very Versailles Thank You Card

The Very Versailles Stamp Set is just so elegant. I love all the images in it.

 
Very Versailles Thank You Card2.jpg
 

I used Terracotta Tile and Pretty Peacock Inks along with that pretty Terracotta Ribbon to make this card.

 
Very Versailles Thank You Supplies.jpg
 

Tips & Instructions

  • Terracotta Card Base - 5 1/2 x 8 1/2, score at 4 1/4

  • Whisper White Layer - 5 1/4 x 4

  • Stamp script image with Terracotta Tile Ink on top right and bottom left area, stamping off twice first (note stamping off is stamping on scrap paper to remove a layer of ink, I did this twice before stamping on the layer)

  • Stamp leaf image with Pretty Peacock Ink on top left and bottom right area and adhere layer to card base

  • 3/4 x 4 strip of Whisper White Ink, stamp sentiment with Terracotta Tile Ink in center of strip and then stamp the image on both sides of the sentiment as shown

  • Adhere strip to 7/8 x 4 strip of Terracotta Tile Cardstock

  • Adhere Terracotta Tile Scalloped Ribbon along back of strips leaving the bottom scallop showing

  • Adhere strip with Dimensionals

 
Very Versailles Thank You Card.jpg
 

Stamp the leaf images on the inside with Pretty Peacock Ink.

 
Very Versailles Thank You inside.jpg
 

If you want any of the products I used on this project, just click on the item below or the Shop Now button and it will bring you to my Online Store. Please use the current Host Code when you go to checkout your order. You can also click directly on an item to order. 

Sketch Saturday - Wrapped In Plaid

Today’s card is once again from the CAS(E) This Sketch Challenge from Splitcoasterstampers.

 
Sketch Saturday - Wrapped In Plaid3.jpg
 

Here’s the sketch. I really enjoy doing these challenges and seeing what other crafters do with the sketch. You can look at the other cards at this link. CAS(E) this Sketch #346

 
Screen Shot 2019-11-02 at 11.06.52 AM.png
 

Tips & Instructions

  • Cherry Cobbler Card Base - 5 1/2 x 8 1/2, score at 4 1/4

  • Wrapped In Plaid Designer Series Paper (DSP) Layer (holly leaves) - 2 x 5 1/2, adhere to card base.

  • Whisper White Layer - 3 x 3 1/2, stamp sentiment (from Itty Bitty Christmas) with Golden Glitz Metallic Ink (my new favorite). I like to dry with the Heat Tool to speed up drying.

  • Wrapped In Plaid DSP (polka dots) - 2 3/4 x 2 3/4, adhere to Whisper White Layer

  • Punch 3 trees from Wrapped In Plaid DSP with the Pine Tree Punch, adhere 2 and then adhere 3rd with Dimensionals

  • Add 3 Gold Glitter Enamel Dots

  • Adhere layer to card with Dimensionals

 
Sketch Saturday - Wrapped In Plaid2.jpg
 

On the inside stamp sentiment with the Golden Glitz Metallic Ink and a tree (from Perfectly Plaid) with Shaded Spruce Ink. An alternative is to punch another tree and adhere on the inside.

 
Sketch Saturday - Wrapped In Plaid Inside.jpg
 

If you want any of the products I used on this project, just click on the item below or the Shop Now button and it will bring you to my Online Store. Please use the current Host Code when you go to checkout your order. You can also click directly on an item to order. 

November Happenings from Stampin' Up!

Can you believe it's November already?  Christmas is right around the corner and Stampin' Up! has a new suite called Christmastime Is Here.

 
10.01.19_SHAREABLE_Q4_OOP_NA.jpg
 

There are so many beautiful products in this suite but I think my favorite is the Specialty Designer Series Paper.  Here's a video from Stampin' Up! which shows all the components.  You can order the entire suite or pick and choose what you want. 


You can click on the items below to purchase the products individually or the stamp and die bundle or the entire suite!

Did you hear that Stampin' Up! has a new Trimmer.  I was able to pre-order it and have been using it for a while and I love it.  They are now available for customer order so head on over to my Online Store and get your order in.  

 
10.22.19_SHAREABLE_PAPER_TRIMMER_NA.jpg
 

Click on the picture below to order the new Paper Trimmer.

One more thing...if you didn't get the October Paper Pumpkin, that's ok, you still have time for the November Paper Pumpkin Kit. The November Kit makes 24 holiday-themed gift tags of 4 various sizes and designs. 

Hurry, you need subscribe by November 10 to get yours.

 
11.01.19_SHAREABLE_NEW_PP_WINTERWONDERSP2.jpg
 

Christmastime Is Here!!!

The new Christmastime Is Here Suite is going to be available for purchase starting November 1!

 
Christmastime Is Here Card2.jpg
 

The Designer Series Paper in this suite is just gorgeous! There is gold edging on these beautiful roses. I fussy cut this bouquet out but there is a die that cuts another one for you. I used the Golden Glitz Metallic Ink for my sentiment and it’s so pretty!

Tips & Instructions

  • Cherry Cobbler Card Base - 5 1/2 x 8 1/2, score at 4 1/4

  • Christmastime Is Here Specialty Designer Series Paper (DSP) - 5 1/4 x 4

  • Fussy cut rose bouquet from Christmastime DSP

  • Stamp sentiment with Golden Glitz Metallic Ink on Whisper White and cut with die from Christmastime Is Here Bundle. I used my Heat Tool to help speed up the drying of the ink.

  • Wrap ribbon around DSP layer and adhere in the back (I use Scotch Tape) and adhere layer to card base.

  • Adhere sentiment label to card

  • Adhere rose bouquet to card over ribbon with Dimensionals

  • Make bow and adhere with Mini Glue Dot

 
Christmastime Is Here Card.jpg
 

On the inside I stamped the Merry Christmas sentiment with the Golden Glitz Metallic Ink.

 
Christmastime Is Here Card Inside.jpg
 

If you want any of the products I used on this project, just click on the item below or the Shop Now button and it will bring you to my Online Store. Please use the current Host Code when you go to checkout your order. You can also click directly on an item to order. 
Note: this suite is available starting November 1, 2019 while supplies last.