Stampin' Up! Retiring List Announced

04.18_SHAREABLE_RETIRING_LIST_US.png

Stampin' Up! has released its retiring list to make room for all the goodness in the new catalog. These products will be available from April 9 - May 31, 2018 or while supplies last.

  • Due to high demand for retiring stamps, we'll keep producing retiring stamps until May 25

  • Retiring Accessories are available while supplies last

  • Some bundles are no longer available at the discount but you can purchase the items separately so if you want to save 10% on a bundle, order before they retire (check the *** on the list)

If your planning on spending $100 on retiring items, you should consider purchasing the starter kit.  You spend $99 and get $125 worth of products plus free shipping.  Then you get a 20% discount on future orders.  Its really the best deal.  Let me know if you are interested.

I just returned from the Stampin' Up! OnStage Convention in Atlanta. I had so much fun spending the day with 600 paper crafters and seeing all the new products.  These are some of the lovely ladies I'm on team with.  We had a great time together. 

30123918_10213724267574023_8390984328095465472_o.jpg

We all received the new catalog and it is awesome!!!  There are new tools, stamp sets, thinlits, a color revamp, updated stamp pad cases and so much more. As a demonstrator, I get to pre-order and I'll be sharing with you as I get my order.  I also received some freebies at the convention that I will be sharing on my blog so be on the look-out.   

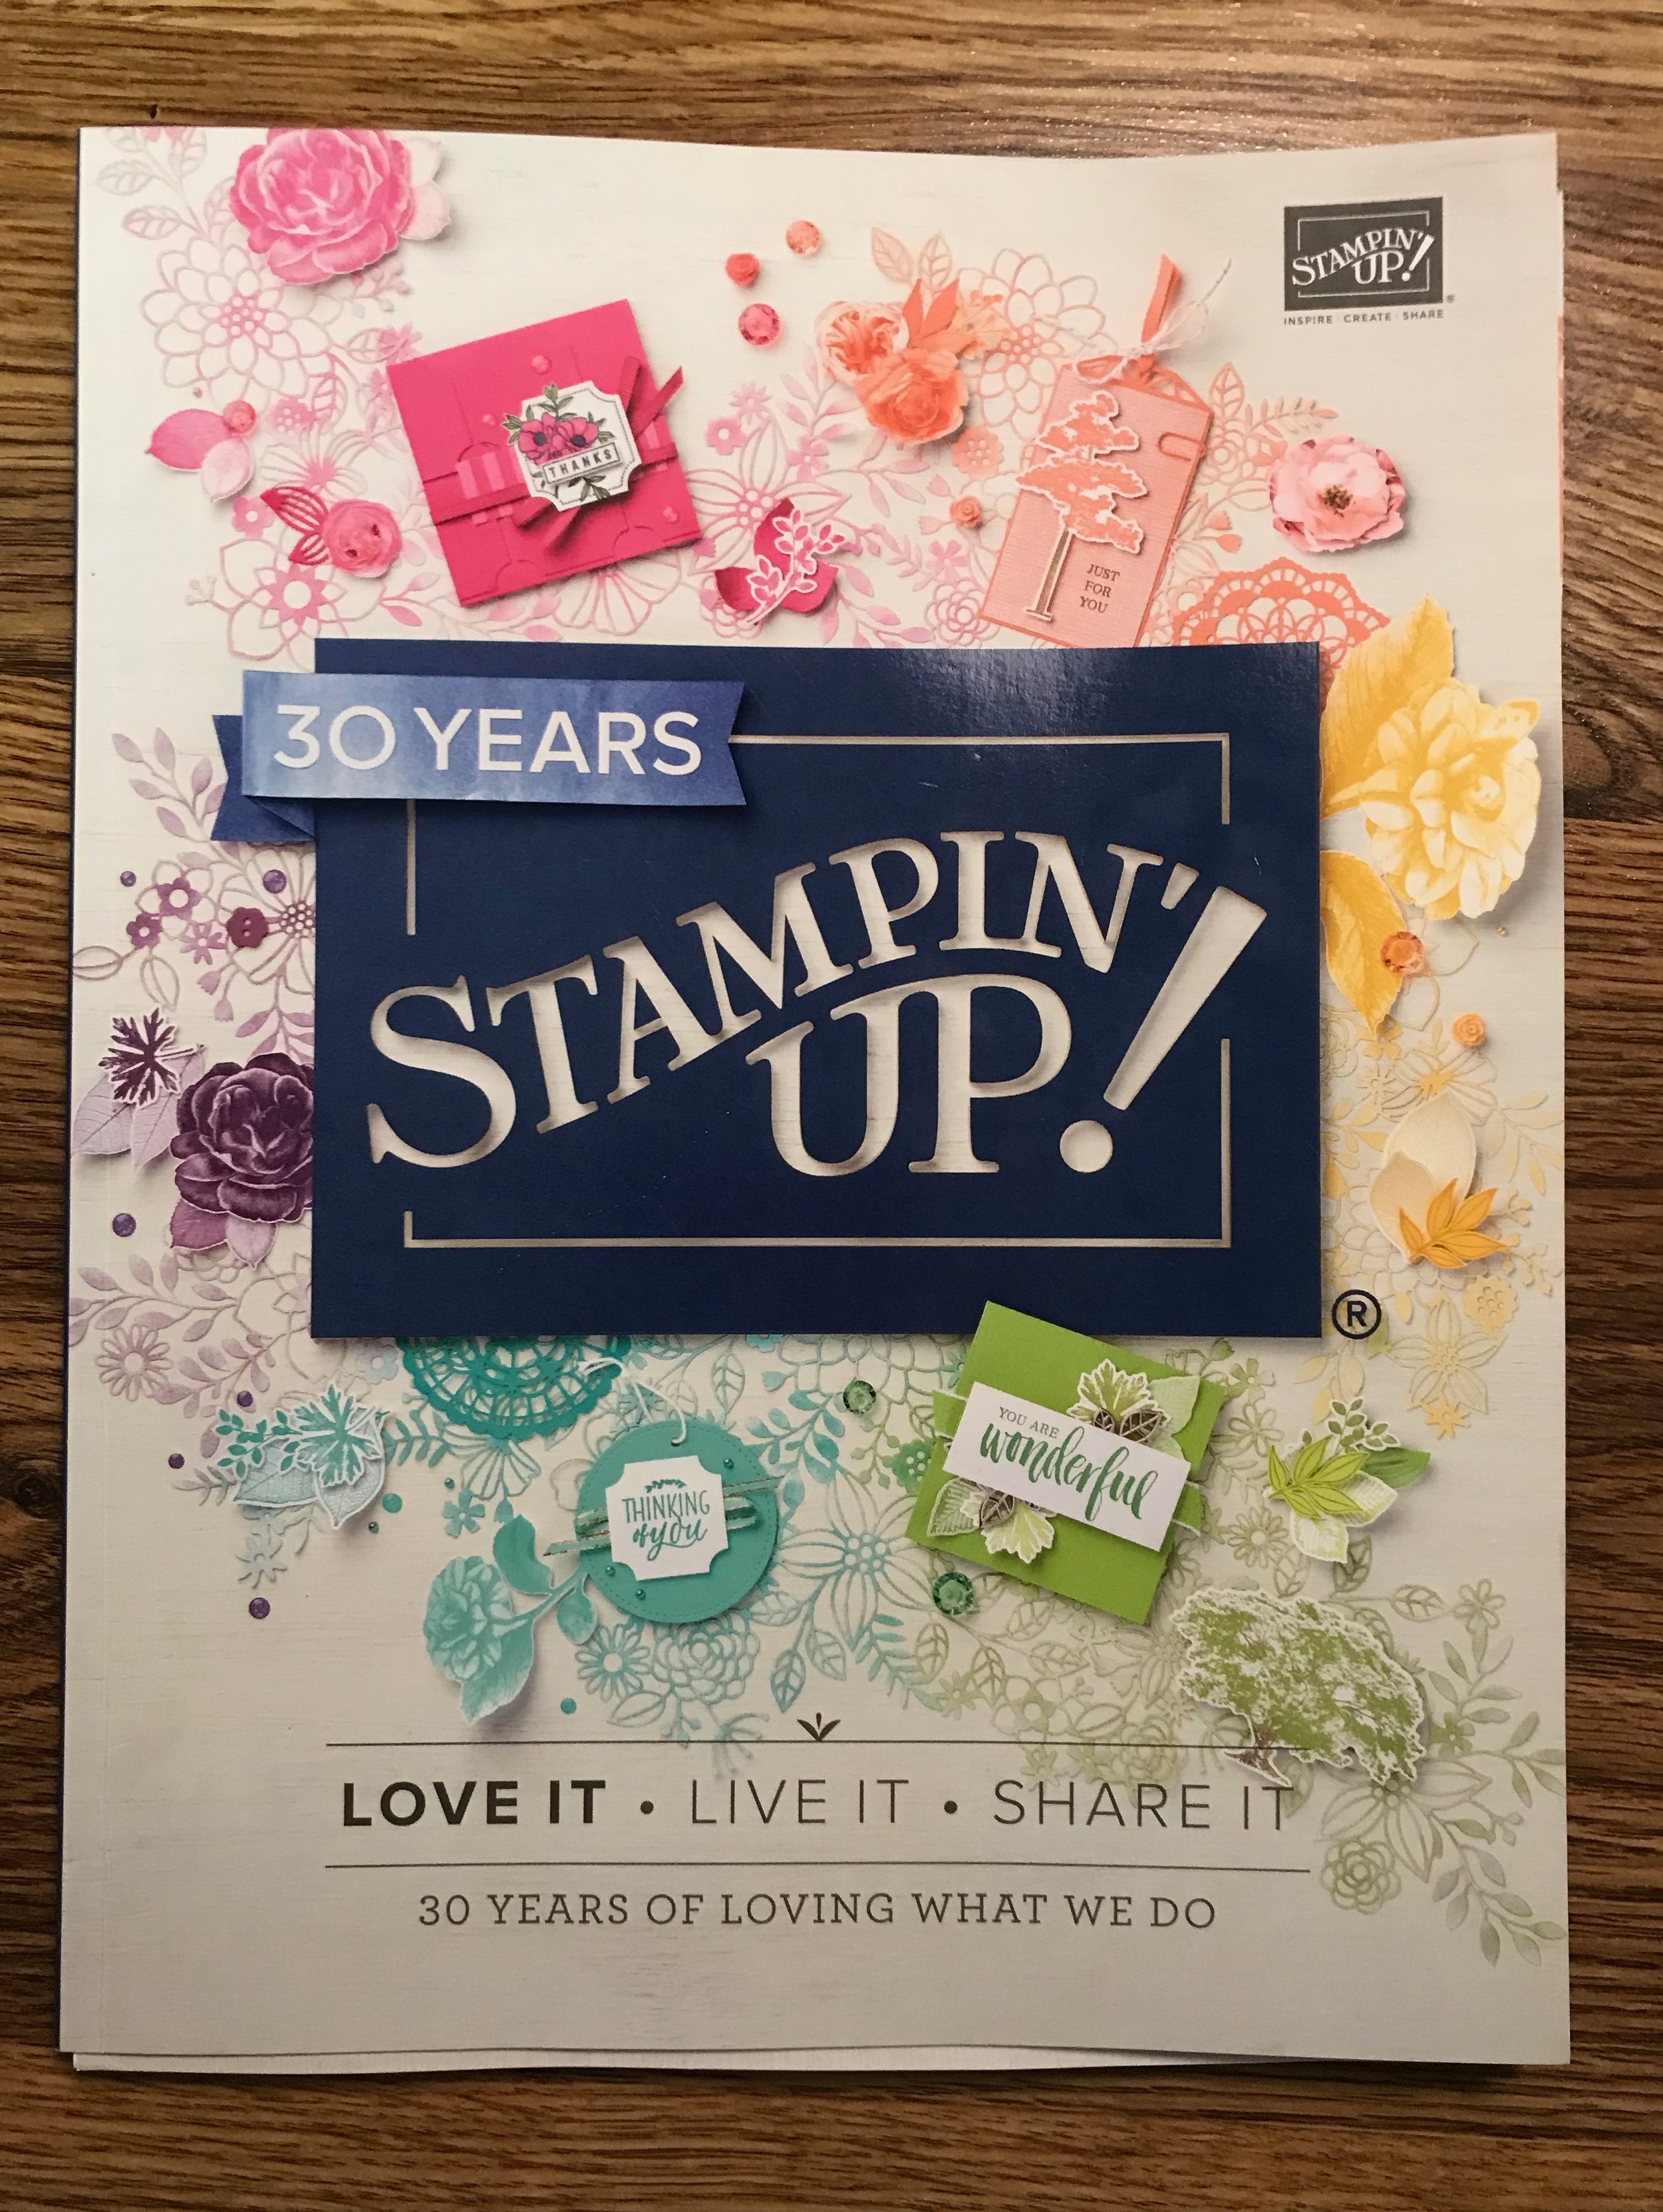
Here's a sneak peak of the catalog cover! 

IMG_2729.jpeg

Let me know if you need a catalog.  I'll be putting my order in and sending them out in May for ordering in June.

Beautiful You - Faux Tile Technique

I'm on my way to the Stampin' Up! OnStage convention in Atlanta.  The day before, I'm attending an event with a top demonstrator and we're doing a shoebox swap.  I've never done this, or even heard of it but I'm excited.   I'll be making 10 kits with all you need to make this card. 

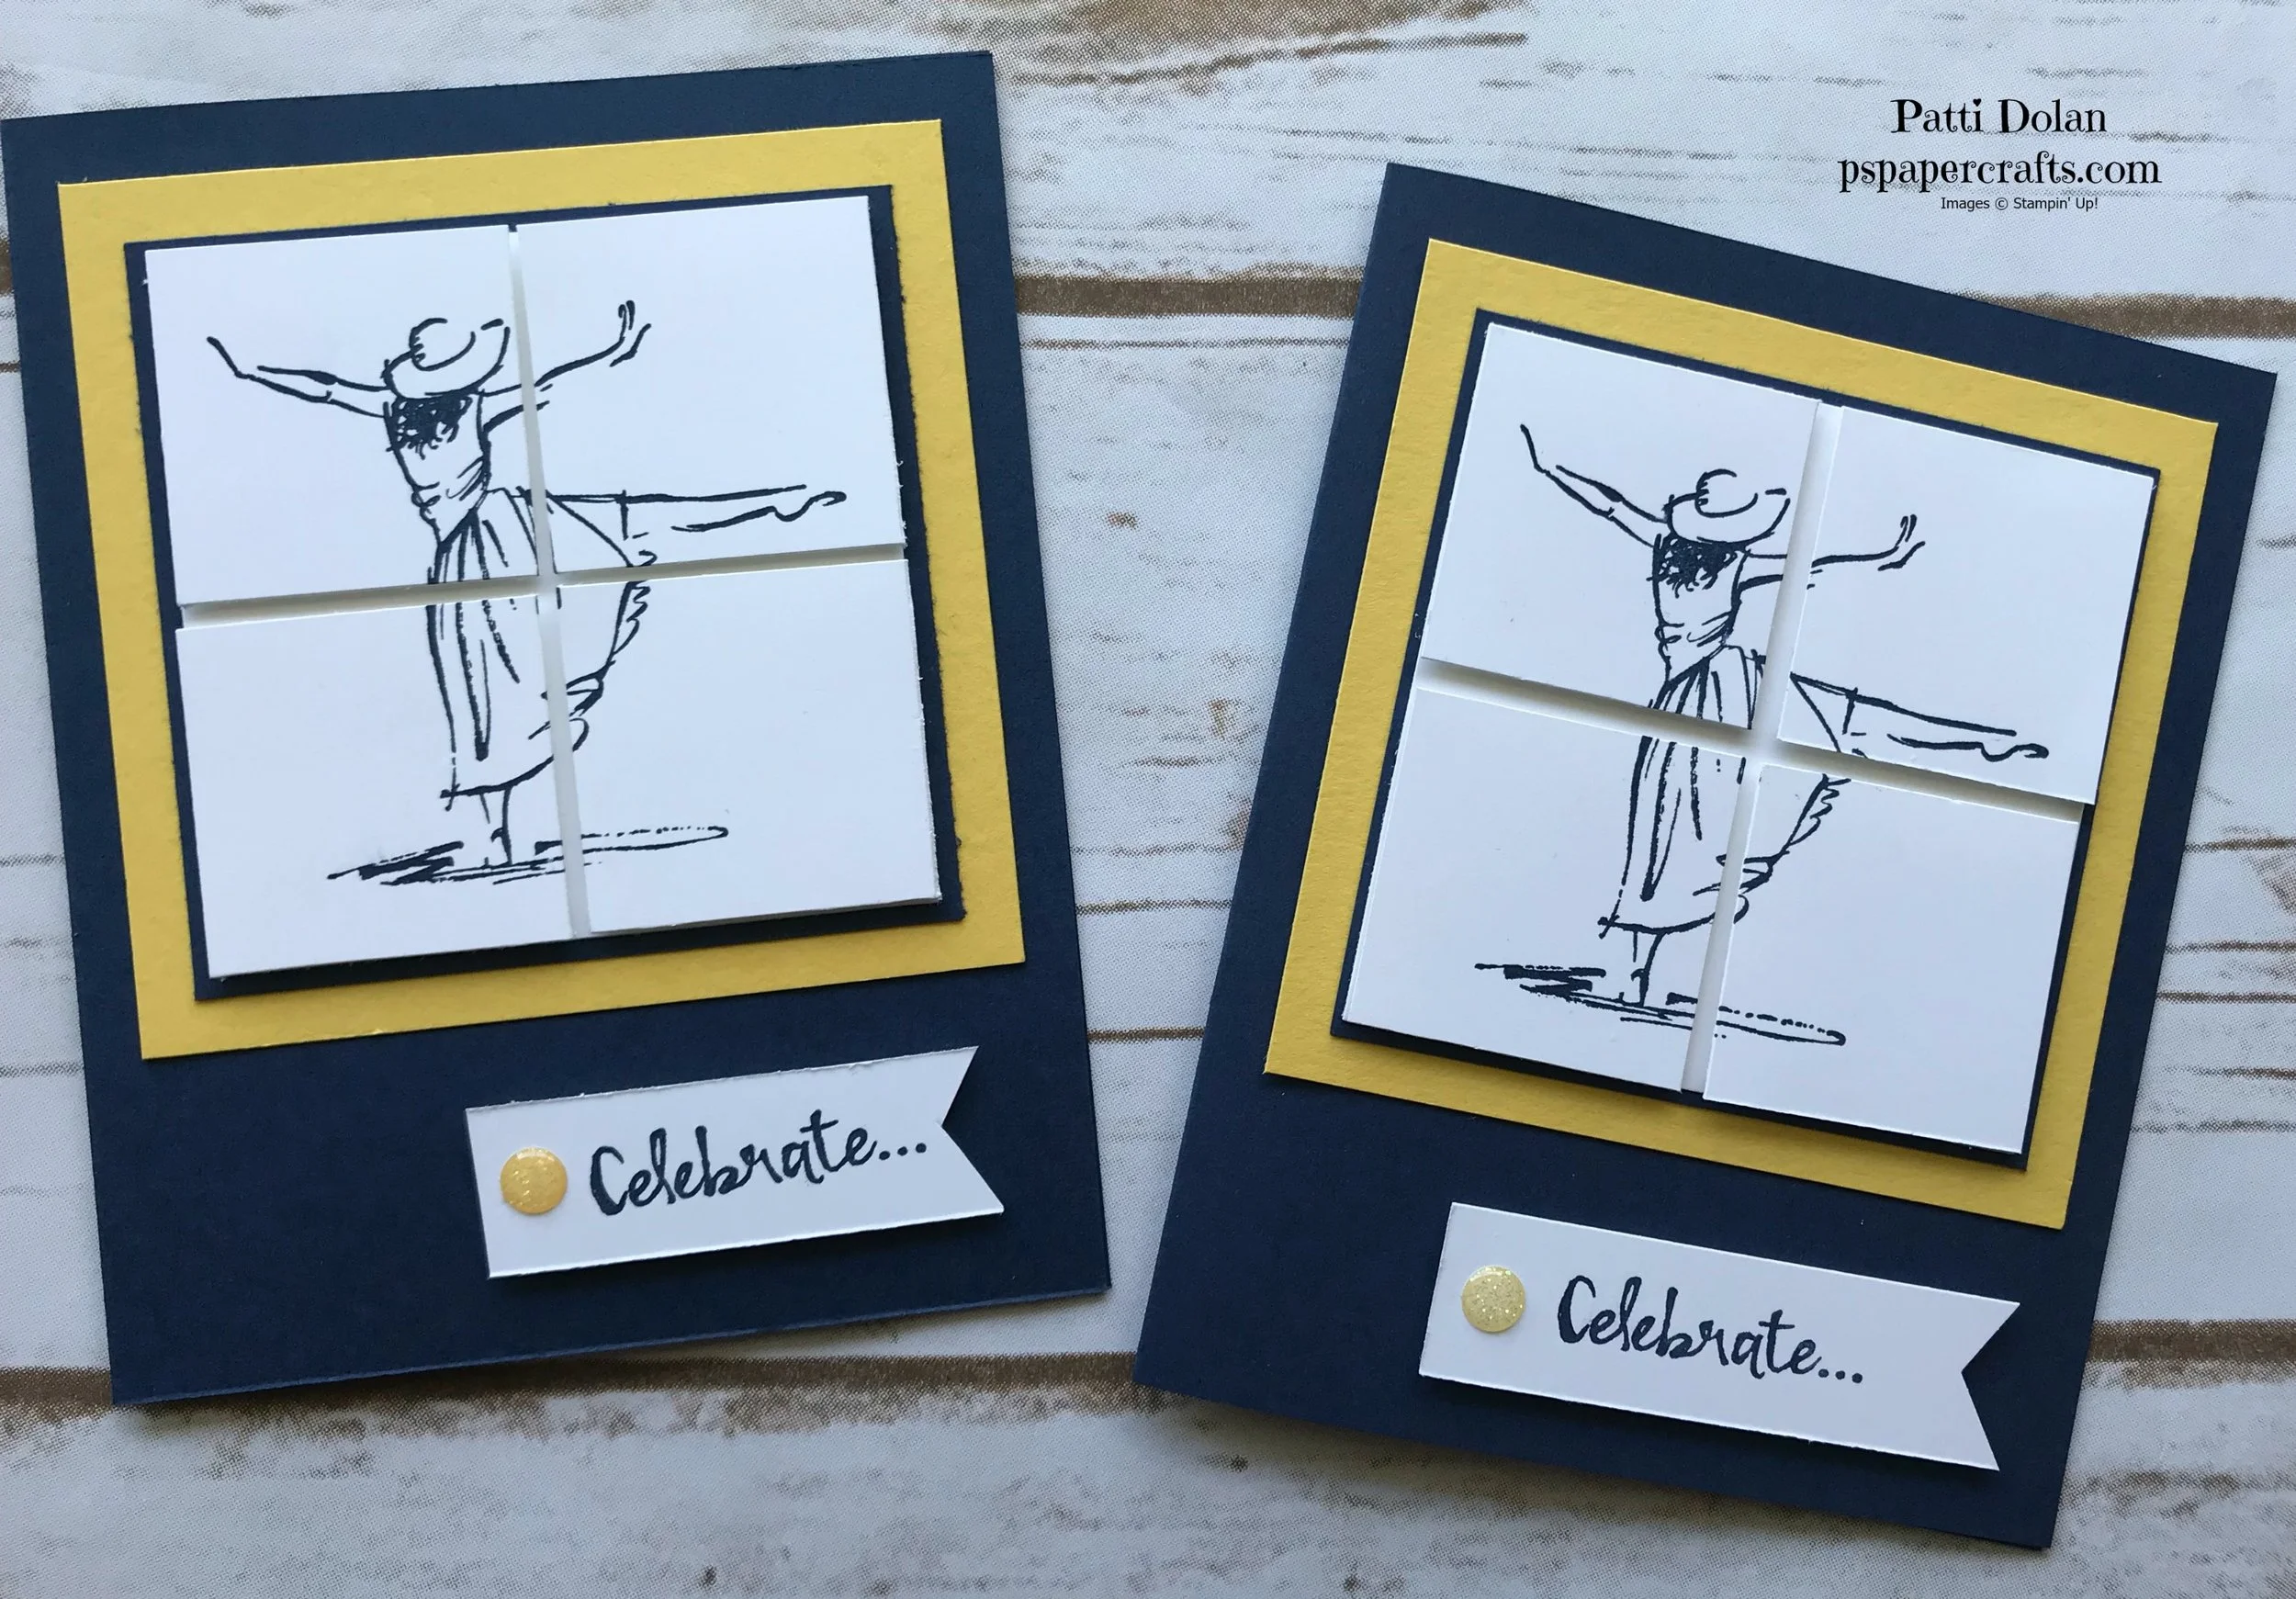
Beautiful You Faux Tile Both.jpg

This card features the Beautiful You Stamp Set which has some gorgeous images and great sentiments.  I'm calling this a faux tile technique, not sure if that's a real thing or not!!!  You basically stamp the image and then cut it into squares and adhere it with dimensionals.

Beautiful You Faux Tile.jpg

The colors are Night of Navy and Daffodil Delight which is a great combination.  This was an easy card to make.  You can create it with any image or group of images.  Give it a try.

Dimensions:

  • Night of Navy Card Base - 5 1/2 x 11 score at 4 1/4
  • Daffodil Delight - 3 3/4 x 3 3/4
  • Night of Navy 3 1/4 x 3 1/4
  • Whisper White backing - 3 1/16 x 3 1/16
  • Whisper White for Stamped Image 3 x 3
  • Whisper White for banner - 3/4 x approx 3

Check out the video to see how I made it.

If you want any of the products I've demonstrated today, just click on the item below or the Shop Now button and it will bring you to my Online Store. Please use the current Host Code when you go to checkout your order.  You can also click directly on an item to order.

Beautiful Sympathy Card using the Gorgeous Springtime Foils DSP

There's only a few more days left of Stampin' Up!'s Sale-A-Bration Event.  One of my favorite products you get for free with a $50 order is the Springtime Foils Specialty Designer Series paper.  

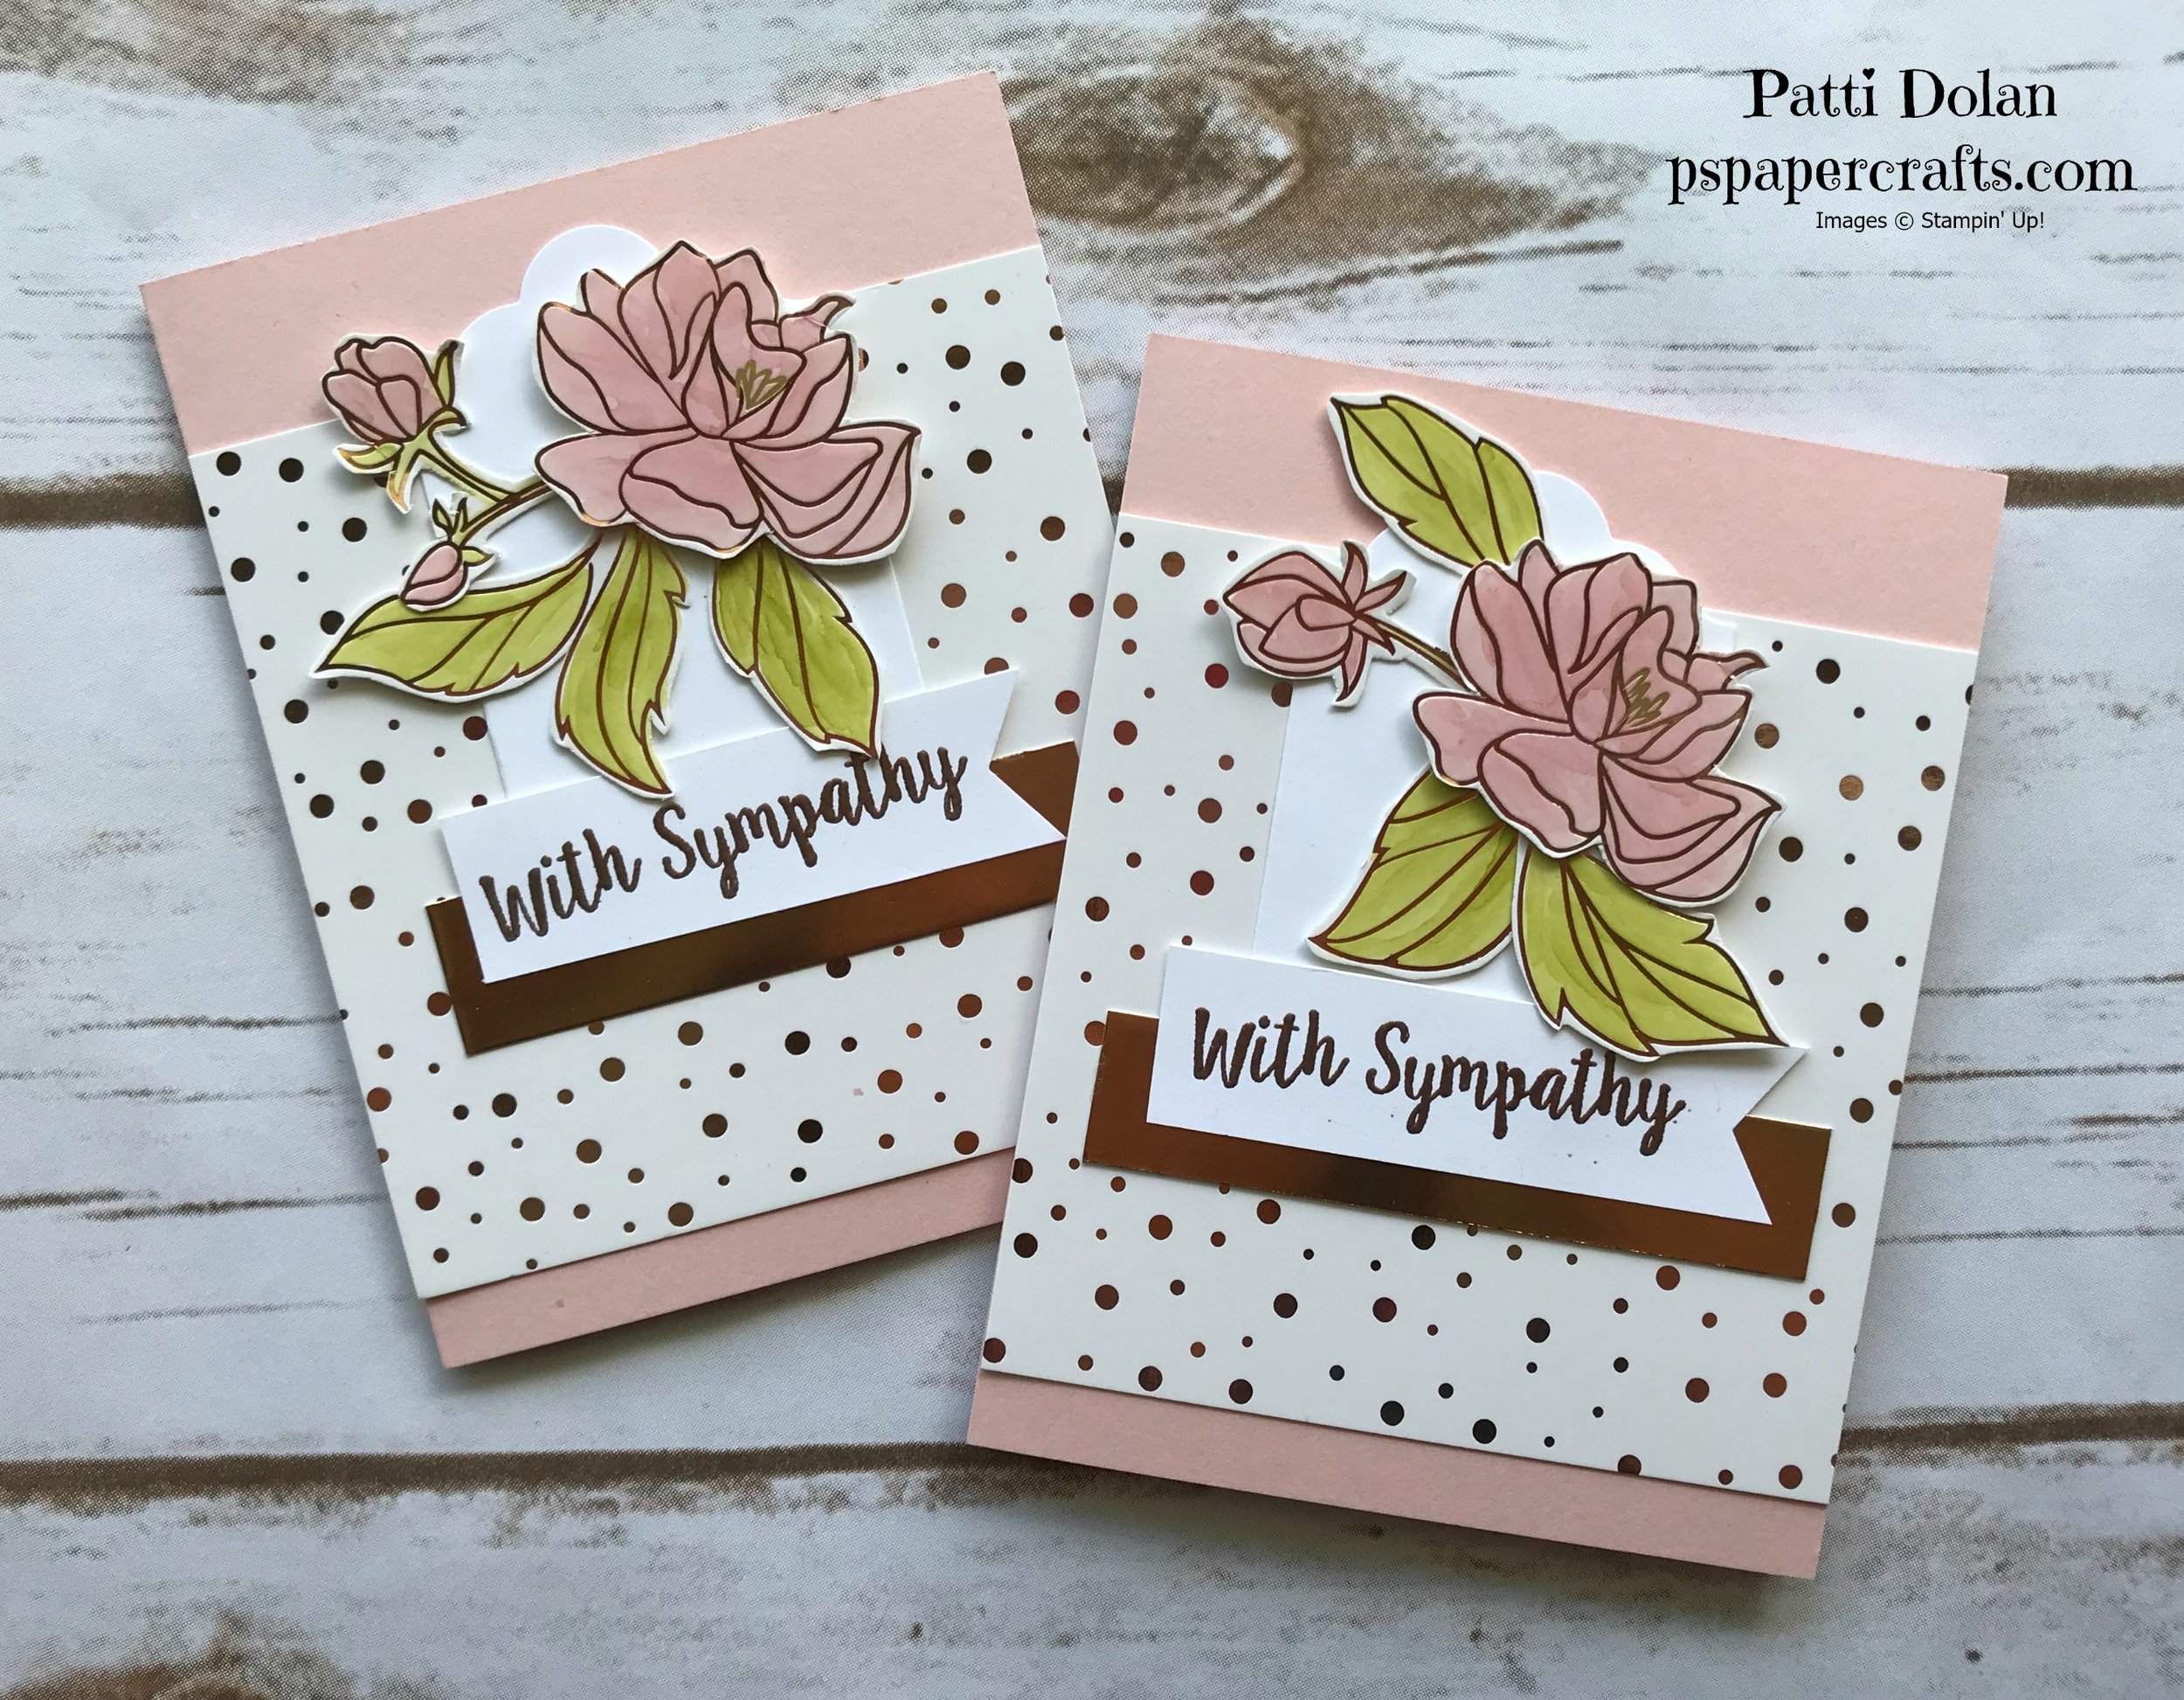
Springtime Foils DSP Both.jpg

I cut out the flowers from the DSP and then colored them with the Dark Pink Pirouette and Light Old Olive Stampin' Blends Markers. The background layer of DSP has beautiful foil dots that just sparkle.  

Springtime Foils DSP Single.jpg

The sentiment was embossed with Copper Embossing Powder and then layered on a strip of Copper Foil Paper.  This card is very elegant and sweet.

Check out the video below:

The dimensions for this card are:

  • Card base - Pink Pirouette 5 1/2 x 8 1/2 (scored at 4 1/4)
  • Layer of dotted DSP - 4 1/4 x 4 1/4
  • Strip of Copper foil - 3/4 x approximately 3 3/4, then cut to size
  • Strip of Whisper White - 7/8 x approximately 3 1/4, then cut to size
  • Whisper White for Label Layer
  • Cut out of flowers and leaves from DSP

If you want any of the products I've demonstrated today, just click on the item below or the Shop Now button and it will bring you to my Online Store. Please use the current Host Code when you go to checkout your order.  You can also click directly on an item to order.  

Don't forget its Sale-A-Bration ends March 31, 2018. Be sure you don't miss out on earning free products for every $50 you spend.  Let me know if you need a catalog and I'd be happy to send you one.

Sweet Blossoming Basket Card

There is a new bundle that you can get for free with a $100 order until the end of March, 2018....its a Sale-A-Bration product. The stamp set is beautiful and the embossing folder is a great addition to my collection. Its always nice to have choices for embossing a layer on your project. 

Blossoming Basket Both.jpg

The card base is Crumb Cake Cardstock and I embossed the front with the Basketweave Embossing Folder. The layer of Rich Razzleberry behind the Whisper White really makes it pop.  

I made one card using the sentiment from this Blossoming Basket set. 

Blossoming Basket.jpg

I used the sentiment for this one from the Perennial Birthday Stamp Set from the Occasions Catalog.  I'm going to use this for a birthday.  I think the sentiment goes well with the basketful of flowers.

Blossoming Basket Birthday.jpg

You can see how I made these by watching the video below.

If you want any of the products I've demonstrated today, just click on the item below or the Shop Now button and it will bring you to my Online Store. Please use the current Host Code when you go to checkout your order.  You can also click directly on an item to order.  

Don't forget its Sale-A-Bration ends March 31, 2018. Be sure you don't miss out on earning free products for every $50 you spend.  Let me know if you need a catalog and I'd be happy to send you one.

God Is Love Easter Card

Today I'm using the Hold on to Hope Bundle that Brandi Cox designed for her Million Dollar Sales Achievement.  I actually met Brandi in Utah, what a beautiful person she is. 

Hold on to Hope Both.jpg

The cross was cut out in Silver Foil paper and and backed with Basic Gray Cardstock.  I love the Powder Pink and Basic Gray color combination and then to add the silver cross really pulls it all together.  

I pulled out an old retire stamp set to get the Happy Easter sentiment on the inside.

Hold on to Hope Inside.jpg

Here's an alternative inside using the scripture stamp from the set.  It really is beautiful.  I love the sentiments in this set. 

Hold on to Hope Inside2.jpg

This was an easy card to make.  Take a look at the video.

If you want any of the products I've demonstrated today, just click on the item below or the Shop Now button and it will bring you to my Online Store. Please use the current Host Code when you go to checkout your order.  You can also click directly on an item to order.  

Don't forget its Sale-A-Bration ends March 31, 2018. Be sure you don't miss out on earning free products for every $50 you spend.  Let me know if you need a catalog and I'd be happy to send you one.

Sale-A-Bration Ends March 31!

Just a reminder that Sale-A-Bration ends March 31, 2018. During Sale-A-Bration you can earn free product for every $50 or $100 you spend.  This is a great deal!  If you're not sure what to purchase, let me suggest that you stock up on cardstock and envelopes or purchase some of the Stampin' Blends or items that are in the Occasions Catalog.

Another way to earn Sale-A-Bration items is to purchase -pre-paid Paper Pumpkin subscriptions by March 31.

PP_SAB__SHARE_THUMB_0118.jpg

This is also a fantastic time to join my team as an Independent Demonstrator. 

Screen Shot 2018-03-09 at 11.46.12 PM.png

If you've ever even considered joining as a demonstrator, why not try it now.  What do you have to lose?  Many demonstrators are considered Hobby Demonstrators where they enjoy the discount and don't really run it as a business.  If you want to take it the the next level, you can get share your craft at classes, workshops and/or online to build your customer following.  Either way, you become part of a wonderful community of papercrafters.  We have a FaceBook group that shares and encourages and have become like family to me.  Here's some of the team I'm on from the Stampin' Up! OnStage Convention in Utah last November. 

23380184_10210460847497309_7573873870118375811_n.jpg

Fun Watercoloring With Brusho

Today I had fun playing with the Brusho Watercolor Powders and I really like how my cards turned out. It was very easy to use these powders, even if you're not an artist!

Beautiful Day Brusho Both2.jpg

I created the background by sprinkling some of the blue Brusho powder on Watercolor Paper and then spritzed it with water.  Isn't it cool!

Beautiful Day Brusho Single.jpg

The butterfly is from the Beautiful Day Stamp Set.  I stamped it with Versamark and Black Archival Ink and then Heat Embossed it with Clear Embossing Powder.  Putting a drop of water on a clear bloc and sprinkling some Brusho Powder for each color gave me my palette to paint with. Using an Aqua Painter, I painted the wings of the butterfly.  

Beautiful Day Brusho Single2.jpg

Painting and mixing colors brought me back to art class in elementary school.  I used the blue and yellow to make green.  Using the watercolor paper really allows for mixing of colors and blending. 

Take a look at the video below to see how I created these cards.

If you want any of the products I've demonstrated today, just click on the item below or the Shop Now button and it will bring you to my Online Store. Please use the current Host Code when you go to checkout your order.  You can also click directly on an item to order.  

Don't forget its Sale-A-Bration ends March 31, 2018. Be sure you don't miss out on earning free products for every $50 you spend.  Let me know if you need a catalog and I'd be happy to send you one.

Super Simple Epic Birthday Card!

Today's card very easy to make, its just ink and cardstock. This would be great for a guy or a teenager. The best part is this is a free set you can earn this month during Sale-A-Bration.

Epic Celebrations Both.jpg

The background was created by stamping the guitar in Early Espresso randomly on a piece of Crumb Cake Cardstock.  I sponged the edges of the Whisper White Cardstock and added a piece of the Night of Navy Corduroy ribbon.  

Epic Celebrations Single.jpg

The guitar makes a nice platform for the sentiment inside the card.

Epic Celebration Inside.jpg

Take a look at the video below to see how I made it.

If you want any of the products I've demonstrated today, just click on the item below or the Shop Now button and it will bring you to my Online Store. Please use the current Host Code when you go to checkout your order.  You can also click directly on an item to order.  

Don't forget its Sale-A-Bration ends March 31, 2018. Be sure you don't miss out on earning free products for every $50 you spend.  Let me know if you need a catalog and I'd be happy to send you one.

Barn Door Birthday Card!

I made this card for my daughter's birthday.  She absolutely loves the barn door look.  As soon as I saw this bundle I knew I would use it to make her card and I know she will LOVE it.

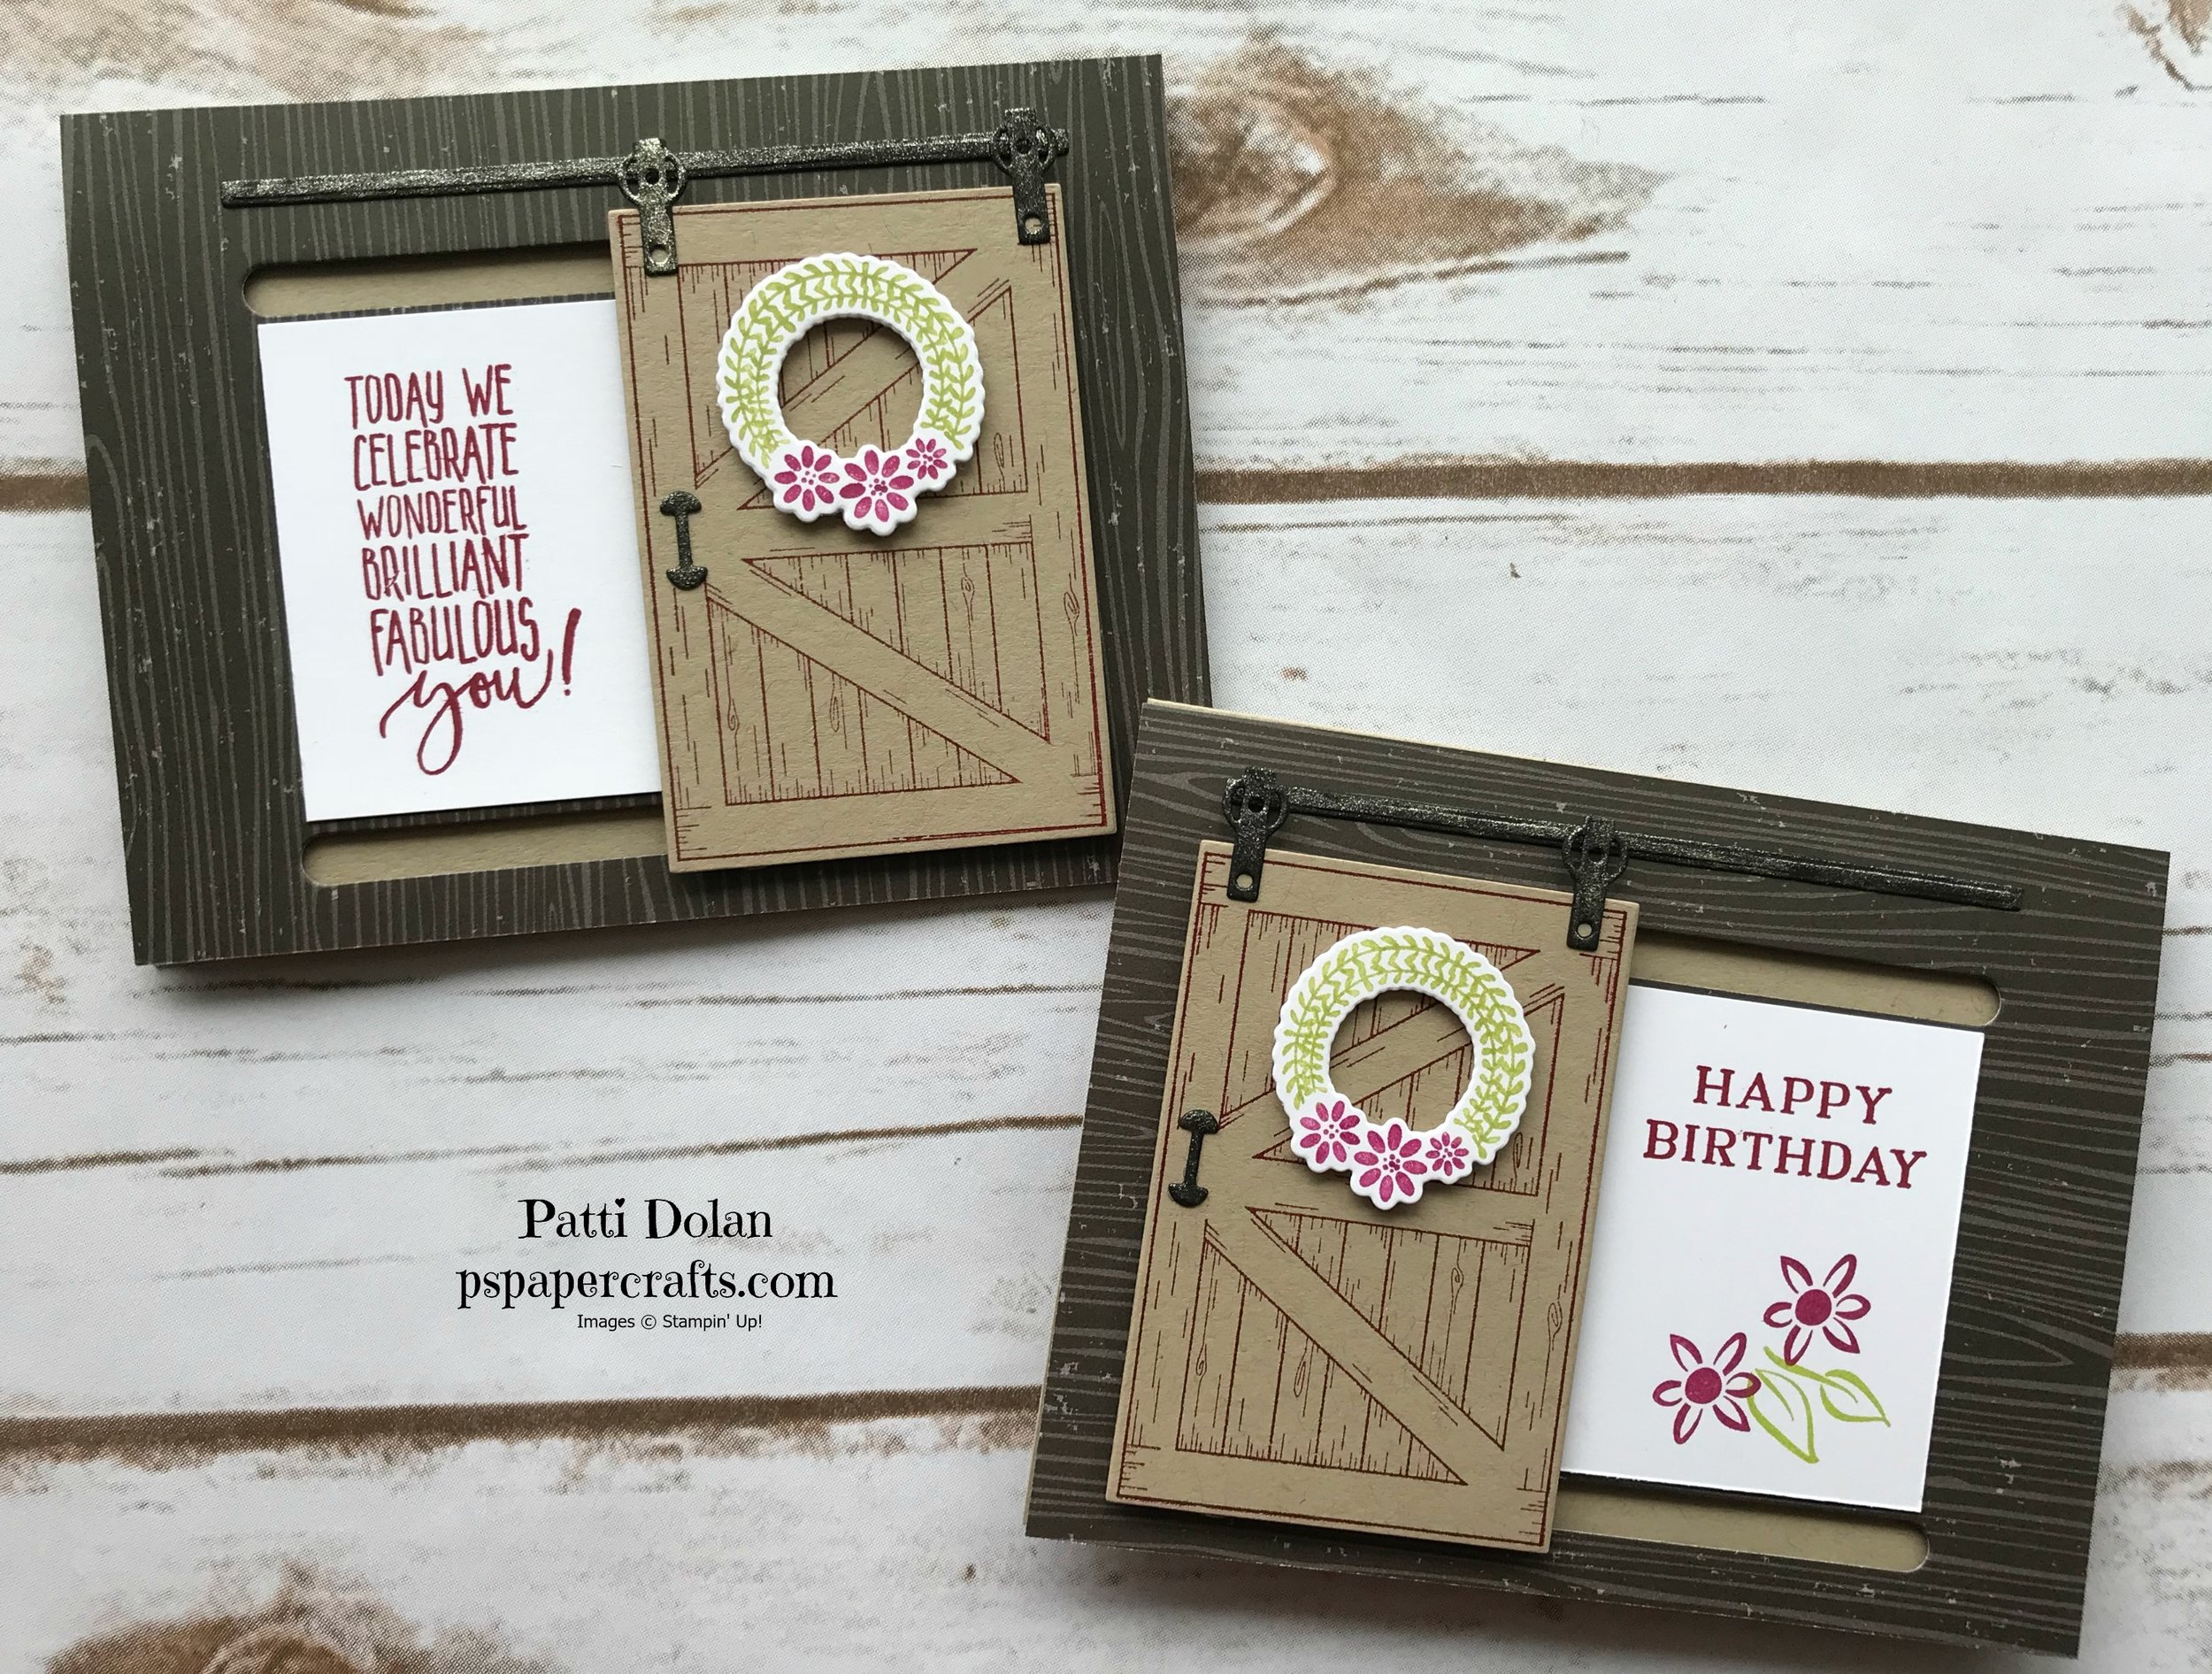
Barn Door Birthday Both.jpg

It's so cool how the door slides back and forth.  You can put a sentiment or image on both sides and then slide the door to see each one.  

Barn Door Birthday Both2.jpg

Here's a closer look at the hardware.  I cut out the pieces in Basic Black and then coated them with Wink of Stella.  Doesn't it look like its metal?

Barn Door Birthday Hardware.jpg

It looks like this would be difficult to make but it wasn't.  The card opens up like a regular card so you can write in it and add a little something (i.e. cash, check). 

Slide to the right and you get this sentiment!

Slide to the right and you get this sentiment!

Slide to the left and you see the other sentiment!

Slide to the left and you see the other sentiment!

Take a look at the video to see all the steps to make this type of card.  Give it a try!!!

If you want any of the products I've demonstrated today, just click on the item below or the Shop Now button and it will bring you to my Online Store. Please use the current Host Code when you go to checkout your order.  You can also click directly on an item to order.  

Don't forget its Sale-A-Bration time where you can earn free products for every $50 you spend.  Let me know if you need a catalog and I'd be happy to send you one.

Beautiful Peacock, What More Can I Say!!!

Today's card features the Beautiful Peacock Stamp Set. This is a free item during Sale-A-Bration when you spend $50.  

Beautiful Peacock Both.jpg

The images included in this stamp set are so delicate and beautiful. They can be used as flourishes, without the peacock. I added a strip of the Eastern Palace Designer Series Paper. This DSP reminds me of peacocks!

Beautiful Peacock Single.jpg

I added some Rhinestones for a little sparkle. This is such a simple card but turned out to be so elegant.  

Here's what I did in the inside.

Beautiful Peacock Inside.jpg

Watch the video below to see how I made this card.

If you want any of the products I've demonstrated today, just click on the item below or the Shop Now button and it will bring you to my Online Store. Please use the current Host Code when you go to checkout your order.  You can also click directly on an item to order.  

Don't forget its Sale-A-Bration time where you can earn free products for every $50 you spend.  Let me know if you need a catalog and I'd be happy to send you one.

Waterfront - Beautiful, Peaceful Island

Today is the last of the 3-day series featuring the Waterfront Stamp Set from the Stampin' Up! Occasions Catalog.  This looks like a pretty, little island with the cool water and the sun shining down. Can't you just feel the warm tropical breeze?

Waterfront - Island Both.jpg

The Pool Party water image and strip of card stock gives the cards an inviting look. I used a piece of Burlap Ribbon just to add a little texture.

One is a birthday card using the sentiments from the Picture Perfect Birthday Stamp Set. 

Waterfront - Island Happy Birthday.jpg

This card has a sweet sentiment from the Lovely Wishes Stamp Set. You can send a card like this to a special person in your life.

Waterfront - Island One of a Kind.jpg

Take a look at today's video below.

If you want any of the products I've demonstrated today, just click on the item below or the Shop Now button and it will bring you to my Online Store. Please use the current Host Code when you go to checkout your order.  You can also click directly on an item to order.  

Don't forget its Sale-A-Bration time where you can earn free products for every $50 you spend.  Let me know if you need a catalog and I'd be happy to send you one.

Waterfront - Peaceful Mountain Scene

We're on day 2 of my 3-day series featuring the Waterfront Stamp Set. We went from the beach to the mountains. Doesn't this look like a watercolor painting. This set has all the pieces to pull off a beautiful scene like this.  

Waterfront Mountain Scene Small.jpg

I used a sponge brayer to give a slight background color to the scene.  I used Marina Mist on the top 2/3rds and Pool Party on the bottom 3rd. The Brayers are so easy to use. Just a light touch and you can create a soft background.  The rest was just stamping. I layered the scene on an Early Espresso card base.  

Take a look at the video to see how to do the background and create this peaceful scene.  This card is great for a guy!

If you want any of the products I've demonstrated today, just click on the item below or the Shop Now button and it will bring you to my Online Store. Please use the current Host Code when you go to checkout your order.  You can also click directly on an item to order.  

Don't forget its Sale-A-Bration time where you can earn free products for every $50 you spend.  Let me know if you need a catalog and I'd be happy to send you one.

Waterfront - Life at the Beach

I'm featuring the Waterfront Stamp Set this week. This set is so versatile, I just love it. You can make beach or mountain or forest scenes so easily. Stay tuned the next few days to see more cards with this stamp set.

Waterfront Ocean Scene Both Small.jpg

I really like how these came out, the colors make them so beachy....is that even a word :)  I used the Seaside Embossing folder with a strip of Pool Party to get the waves.  The scene was stamped on Whisper White Cardstock with a scalloped layer of Marina Mist behind it.  

This card uses a sentiment from the Waterfront Stamp Set.   I have the embossed side showing on the Pool Party strip.

This card uses a sentiment from the Waterfront Stamp Set.   I have the embossed side showing on the Pool Party strip.

The sentiment for this card is from the Perennial Birthday Stamp Set in the Occasions Catalog. I used the de-bossed side of the Pool Party strip to give it a different look.

The sentiment for this card is from the Perennial Birthday Stamp Set in the Occasions Catalog. I used the de-bossed side of the Pool Party strip to give it a different look.

Take a look at the video to see the steps to make these cards. 

If you want any of the products I've demonstrated today, just click on the Shop Now button and it will bring you to my Online Store. Please use the current Host Code when you go to checkout your order.  You can also click directly on an item to order.  Need a catalog?  Leave me a comment and I'll get one to you.

Lots of Lavender Thank You Card!

The Lots of Lavender Stamp Set is so pretty and has all the stamps needed to give a watercolored look. And you can get this set FREE during Sale-A-Bration. That's right, if you spend $50, you can get this stamp set for free. 

Lots of Lavender Both Small.jpg

The nice thing about this stamp set is that there are stamps for each part of the image so you can easily add different colors, like the leaves and the bow.   

Lots of Lavender Small2.jpg

I used the Burlap Stamp for the background.  I inked it with Crumbcake and then stamped off and then stamped on Crumbcake Cardstock.  This gave it a subtle rustic look.  The sentiments are from my "go-to" set, Beautiful Bouquet.  You can change it up to a Happy Birthday or Thinking of You sentiment.

Here's the video....

If you want any of the products I've demonstrated today, just click on the Shop Now button and it will bring you to my Online Store. Please use the current Host Code when you go to checkout your order.  You can also click directly on an item to order.  Need a catalog?  Leave me a comment and I'll get one to you.

Easy Peasy, Pretty Birthday Card!

Today I'll show you how to make this beautiful Birthday card.  It's quick and easy, but very pretty.

Perennial Birthday Small.jpg

The Perennial Birthday Stamp Set has some really nice sentiments and some pretty flower images.  I used Powder Pink Cardstock and layered a strip of Marina Mist and then a pop of color from a strip of Sweet Soiree Designer Series Paper.  If you stamp using the same color ink as the cardstock, you get a watermark look.  That's what I did for the background. 

Perennial Birthday Label.jpg

Did you notice the label.  I used the Pretty Label punch and punched one label with the sentiment on Whisper White Cardstock and then punched a second with Marina Mist Cardstock.  I cut the Marina Mist in half and then glued it to the Whisper White label to give it a border.

You can see how I did this in the video below:

If you want any of the products I've demonstrated today, just click on the Shop Now button and it will bring you to my Online Store. Please use the current Host Code when you go to checkout your order.  You can also click directly on an item to order.  

Pretty Valentine Treat Box

Today I have a treat for you, well a treat box project that you can make for any occasion.  I made these for my Stampin' Up! teammates for the last OnStage Convention that I attended.  Today I'm making them for Valentine's Day.  Aren't they cute?

Valentine Treat Box Both small.jpg

I cut one of the Acetate Card Boxes in half and then added some beautiful Painted with Love Specialty Designer Series Paper.  I added a band around them to keep them closed.

I made this one using one side of the DSP.  Four pieces of Ghirardelli chocolates fit perfect inside....Mmmmm!

Valentine Treat Box 1 small.jpg

This is the exact same paper, just the other side is showing. Isn't it pretty with the gold foil.  I just love this paper.  I fit eight pieces of Dove chocolate in this one. 

Valentine Treat Box 2.jpg

Here's the video to walk you through the steps.

The Dimensions are as follows:

  • Cut Acetate Card Box in half (at the 4" mark)
  • Cut DSP approx 5 1/2 by 4 7/16.  Cut off edge of one side using die, border punch, etc.
  • Score using the straight side (not the side you just cut with die) at 2 7/8 and 3 1/2
  • Cut DSP for band at 1" by 9" 
  • Score band at 2 5/8 and 3 1/4 and 6 1/4 and 7
  • Punch Berry Burst with 1 3/8 Scallop Circle Punch
  • Punch Gold with 1 1/4 Circle Punch
  • Punch Whisper White with 1 1/8 Scallop Circle Punch

This is the one that I made for my teammates. I used the Fresh Florals DSP and Powder Pink Cardstock and I cut the edge with the Swirly Snowflakes Thinlits Dies. I used self-adhesive, super slim and seriously strong magnets that I purchased at a local craft store.

Valentine Treat Box 3 small.jpg

Below are the supplies I used for the Valentine Boxes that I made in the video.  You don't need all these exact items, you can use other DSP and other sentiment and heart stamps.  Check out your stash or order what you need by clicking on the item or clicking on the SHOP NOW button.

Fun Eclipse Birthday Cards!

Have you tried making an Eclipse Card yet? Its so easy and so much fun. I've seen a lot of them lately on Pinterest and decided to give it a try.  

Eclipse Birthday Cards All.jpg

I made a few of them for birthdays and I think I'll try one with LOVE for Valentine's Day. I'll post it here when I do. Today's video will show how I made the Birthday Girl and I'll have details on the other two as well.

I used the Picture Perfect Designer Series Paper (DSP) for this card. Its from the 2018 Occasions Catalog. The Large Letters Framelits made it so easy to cut out the letters.  This was the first time I tried it on DSP and I think it came out great. The Sentiments are from the Picture Perfect Birthday set. Check out this suite on pages 4 & 5 of the Occasions Catalog.

Eclipse Birthday Cards Single3.jpg

Here's the video

This is a cute boy's birthday card. I used the FREE Party Panda stamp set.  Its a Sale-A-Bration item. During Sale-A-Bration, you get free product for every $50 you spend.  I think this is such a fun set.

Eclipse Birthday Cards Single2.jpg

My final card is a beautiful Birthday card using the Petal Palette Stamp Set and the new Stampin' Blends in Old Olive, Pink Pirouette and Daffodil Delight. Since I used 5 letters in this one for HAPPY, I wasn't able to fit it on an A2 card. I made it to fit into a legal size envelope.  

The dimensions are:  
Old Olive Card base - 9 1/4 x 8 and scored at 4
Basic Black layer - 8 3/4 x 3 1/4
Whisper White Layer - 8 1/2 x 3

Eclipse Birthday Cards Single1.jpg

Here are the products I used for all 3 of the cards. You can click on an item and it will bring me to my online store or you can click the Shop Now button on the top or right side to shop.

Give it a try and send me a picture and I'll post it on my blog for everyone to see!!!

Here's one more I made for Valentine's Day.  I used the Heart Happiness Stamp Set and colored the flowers with the Stampin' Blends.  The card base is Fresh Fig. 

Eclipse Love Card.jpg

Fun Birthday Card Using The Bird Banter Stamp Set

Wouldn't receiving this card put a smile on your face? The birds from the Bird Banter Stamp Set in the new Occasions Catalog are just so cute! 

I stamped the images using Memento Ink and then colored them with the new Stampin' Blends Markers. These are alcohol based markers so they blend beautifully. You can purchase a single marker, a combo pack (light and dark) or the entire collection. Of course, I had to have them all :)

Bird Banter Both.jpg

I fussy cut the bottom bird and then attached him to a strip of Tutti-Frutti 6x6 Designer Series Paper.  The adhesive backed Tutti-Fruttie Sequins add just the right finishing touch. The card base is Lemon Lime Twist so the colors all coordinate. This is what I love about Stampin' Up! everything coordinates!

Bird Banter Single small.jpg

Here's a peek at the inside.  Aren't those birdies cute?

Bird Banter Inside small.jpg

Take a look at my video to see how I made them and for tips on use the new Stampin' Up! Blends Markers.

Most of the products I used are from the 2018 Occasions Catalog.  You can start ordering from it on January 3 so start making your wish list.  Its also Sale-A-Bration time so for every $50 you spend, you get free product from the Sale-A-Bration brochure. Let me know if you need a catalog and I'll send one out to you.

Elegant Thank You Card using the Petal Passion Suite

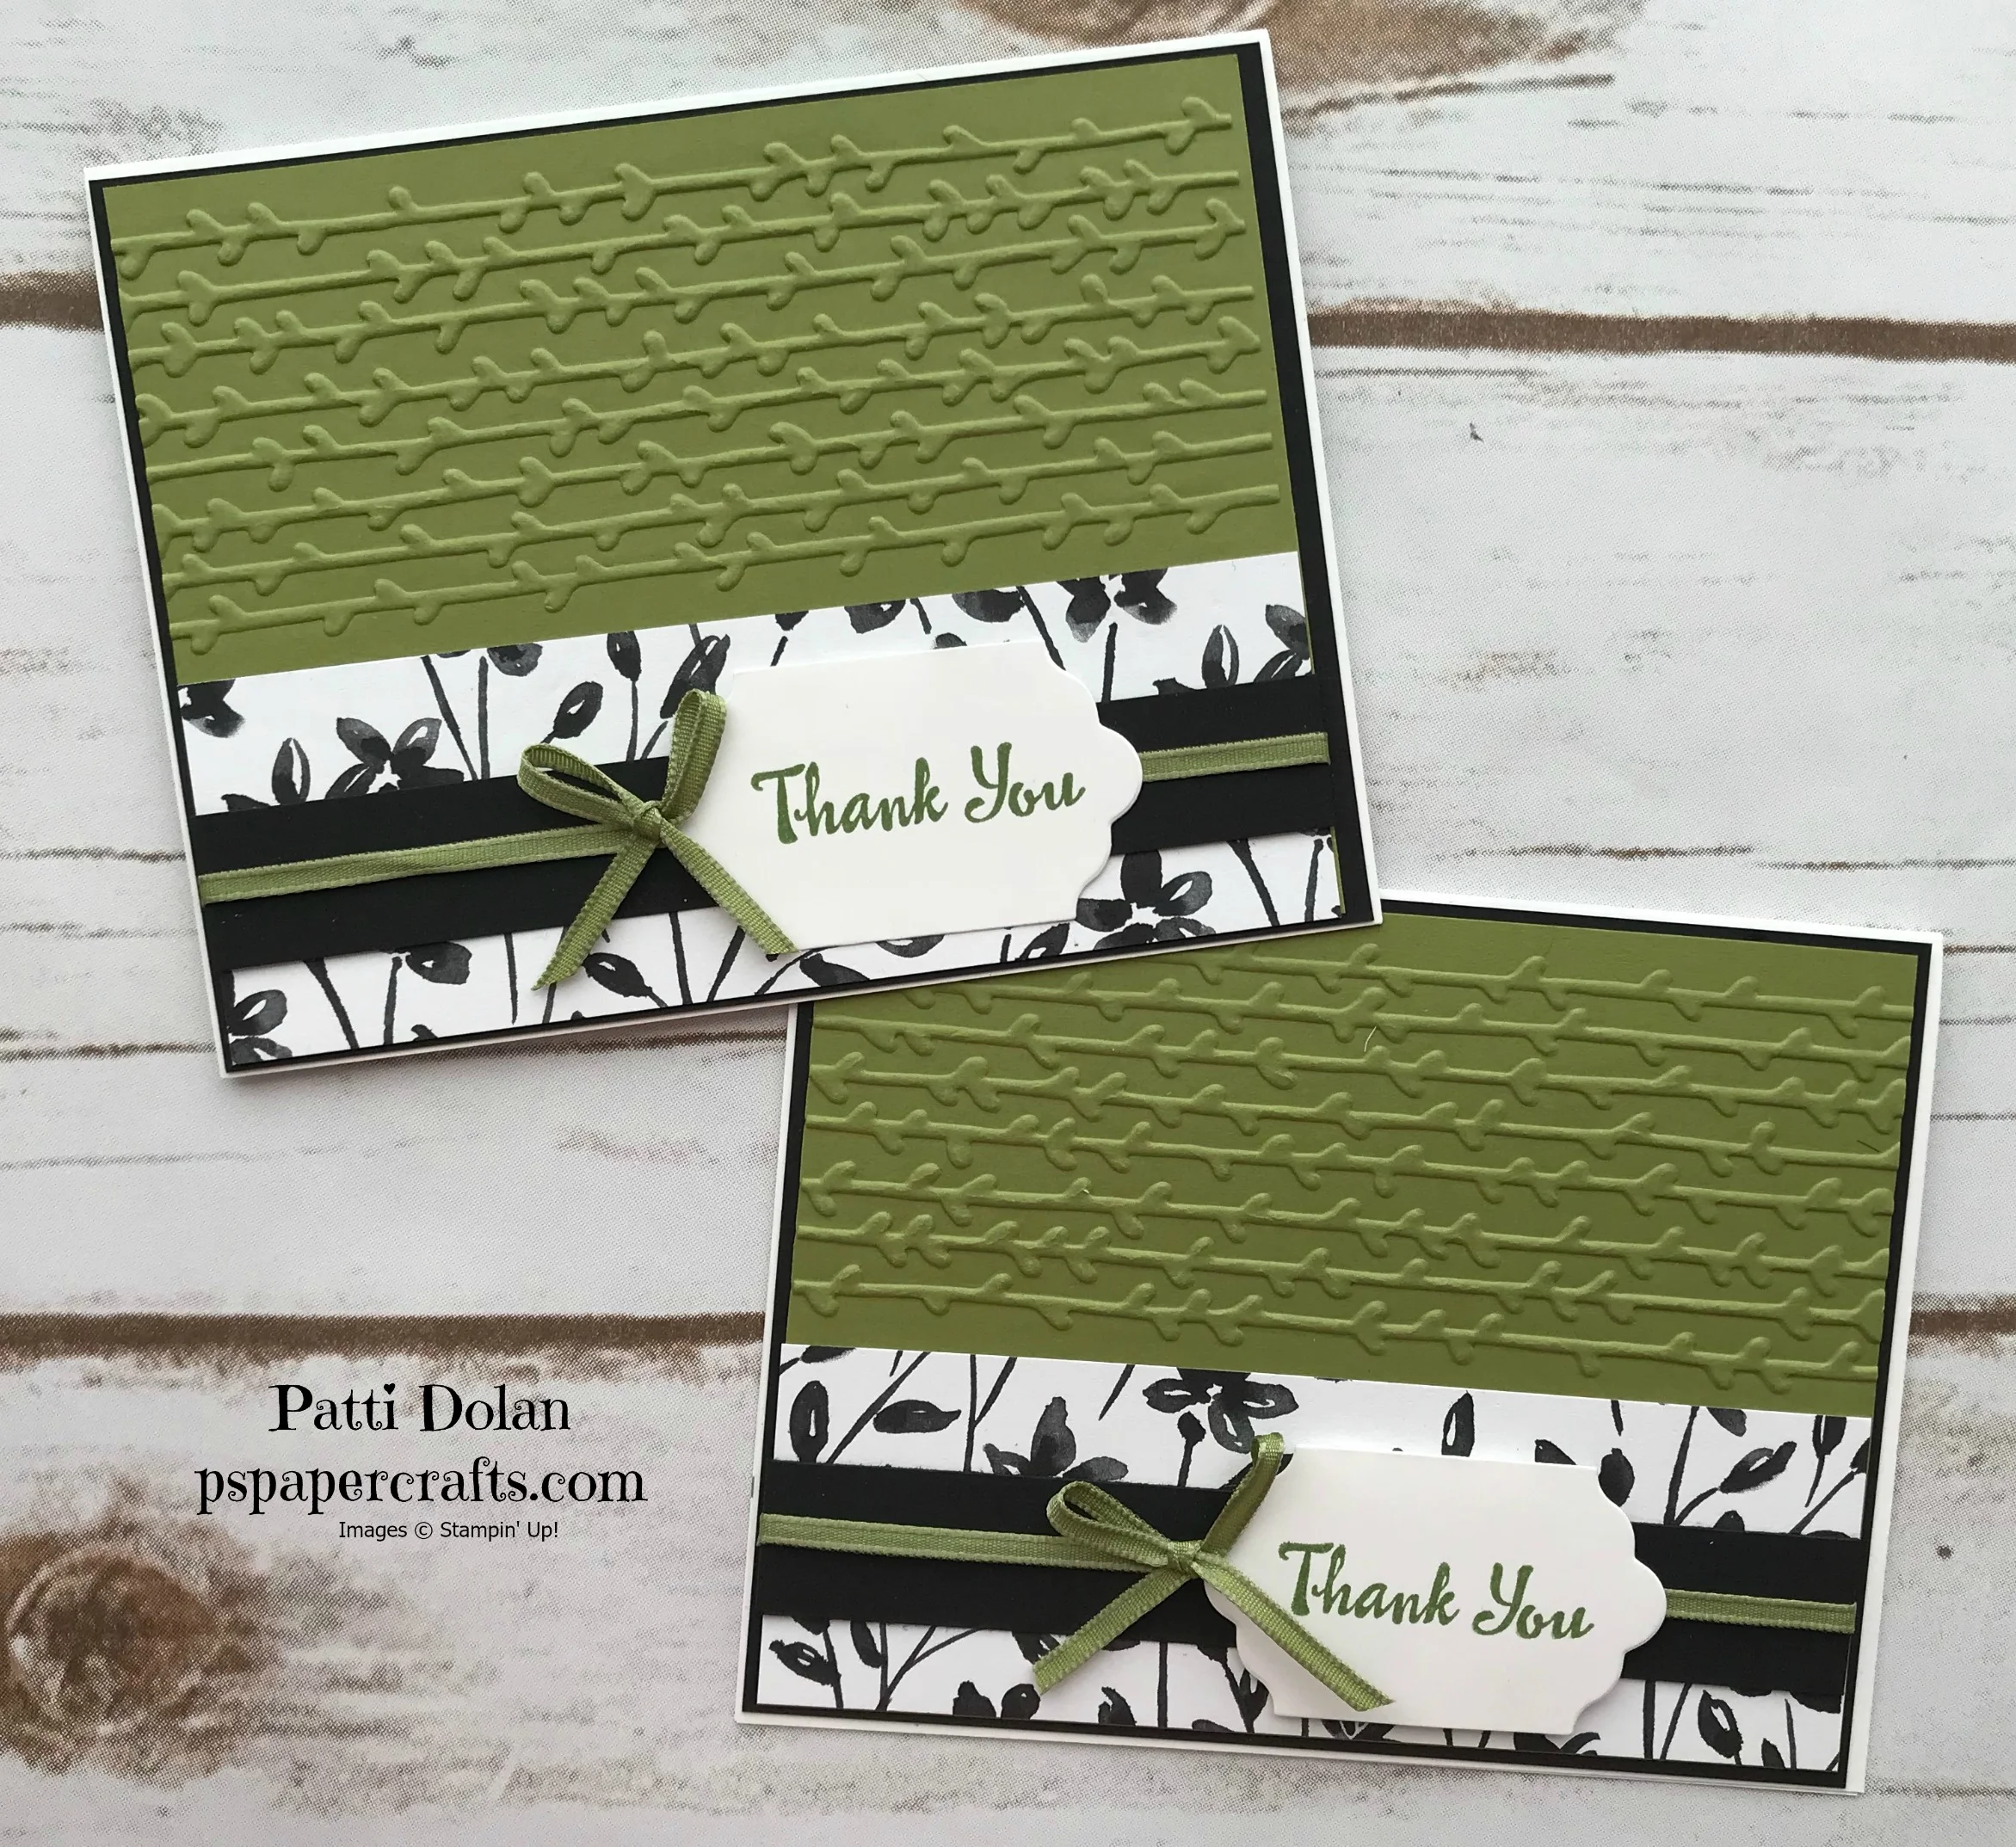
After finishing with my Christmas cards and packaging, I was able to finally start playing with some of the new products from the Occasions Catalog. I absolutely love the Petal Passion Suite. I think the Designer Series Paper is just gorgeous!!! I hope you agree.

Petal Palette Thank You Both.jpg

This suite has coordinating Stamps and Thinlits, Designer Series Paper, a set of 2 Embossing Folders and some pretty Embellishments.  Did I tell you how much I love the black and white Designer Series Paper???

Petal Palette Thank You Single.jpg

I used one of the embossing folders in the set with Old Olive Cardstock to create the top of the card and the Petal Passion Designer Series Paper for the bottom portion.  The sentiment was stamped and cut out with the Lots of Labels Framelits and I added some Old Olive Sheer Ribbon to pull it all together. 

Watch the video below to see how to make this card and see an overview of some of the products I used.

Most of the products I used are from the 2018 Occasions Catalog.  You can start ordering from it on January 3 so start making your wish list.  Its also Sale-A-Bration time so for every $50 you spend, you get free product from the Sale-A-Bration brochure. Let me know if you need a catalog and I'll send one out to you

Christmas Gift Bags - Week 12 of 12 Weeks of Christmas!

We are finally here, our 12th week of Christmas!!! I'm thinking that you've completed all your cards so I wanted to give you some ideas for Christmas packaging. I used the Gift Bag Punch Board to make these and it was really easy to do.  Aren't they cute? You can make different sizes and change up the paper for different occasions. 

Christmas Gift Bags.jpg

In the video I'll show you how to make the middle one using the Merry Little Christmas Designer Series Paper. The other two bags were made with the Year of Cheer Designer Series Paper.

Here are some other gift packaging ideas. You can put small items like jewelry, chocolate or gift cards in these. 

Christmas packaging.jpg

You can look at my blog post for the dimensions and steps to make these gift card holders. They are in Real Red and Garden Green Cardstock and were embossed with the Quilt Top Textured Impressions Embossing Folder and then the Stitched Felt embellishments were added to finish them off.  

Christmas Gift Card Holders.jpg

I used the mini pizza boxes, Be Merry Designer Series Paper and Pretty Pines to create these cute gift boxes.

Pretty Pines Pizza Boxes both.jpg

If you want any of the products I've demonstrated today, just click on the Order Now or Shop Now button and it will bring you to my Online Store. Please use the current Host Code when you go to checkout your order.  You can also click directly on an item to order.